Hey hey! So this post has taken on a mind of its own. I’ve been getting a lot of questions about the tile (isn’t it great!) and the whole process of tiling a bathroom with marble tile so I figured I needed to get all of my thoughts out to the world before they escaped my little brain. Who knew I had so many thoughts on tiling. 🙂
The finishing details of the bathroom are still coming together. We bribed some friends with promises of beer to help us bring the tub into the bathroom and we still need to run the water and drain lines to the tub and toilet. So, not the most exciting details on the planet, but I have already taken my first shower in the new shower (AHHHH!!!) even though the glass surround hasn’t arrived yet. #PatienceOfA3YearOld
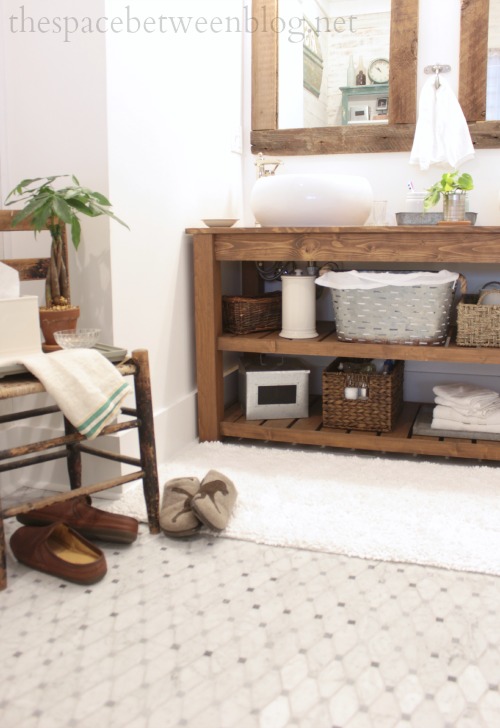
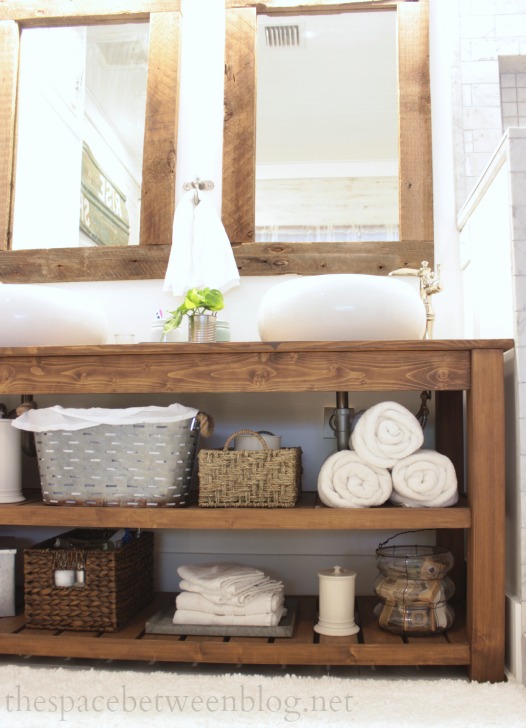
Joel hurt his back doing something totally not home improvement related (Seriously, he was on a boat!) so the crawl space plumbing projects have halted to pretty much a complete stop. On the upside that has opened me up to try out way too many arrangements of baskets and bins on the open shelves of the vanity. I seriously love that kind of stuff and feel like it could easily turn into the ever revolving arrangement with Joel constantly asking me where stuff is.
All the more reason to get his, er, I mean the hall bathroom done next. 🙂
So let’s talk about tiling. We covered the details about the exact tile we used, how we decided that marble was the right choice for us and how to decide which way to lay an irregular shaped tile like the long octagon. But let’s get into some details about the actual tiling experience for those of you getting ready to tackle something like this yourself. And this is a long one, I’ve actually separated the floor tiling, tile cutting tips, tips that are specific to marble tile and thoughts on grout into another post. You may just want to pin this for easy reference when you’re getting ready for your own tiling project!


First, I think tile is a great DIY project. Be it a backsplash or a whole bathroom, it is not a hard project, just something you have to be prepared to take a lot of time with. You won’t want to rush through and set unreasonable deadlines because inevitably, like most DIY, it will take longer than you think. Areas like the bench and the shampoo nook took more time than expected. With all of those little corners comes more tiles that need to be cut … which always equals more time. So, here are a few things I’ve learned along the way that you’ll hopefully find helpful.
1 – Preparation – We’ve covered a lot of the preparation steps so far including:
- floor plan and framing
- adding a bench in your shower
- creating a preslope under your shower pan
- installing a PVC shower liner
- DIYing a shower pan
- creating a niche for shampoo and bath products
- installing cement board and waterproofing before tile
2 – Getting started is always the hardest part. Here are a few things to consider before you lay your first tile:
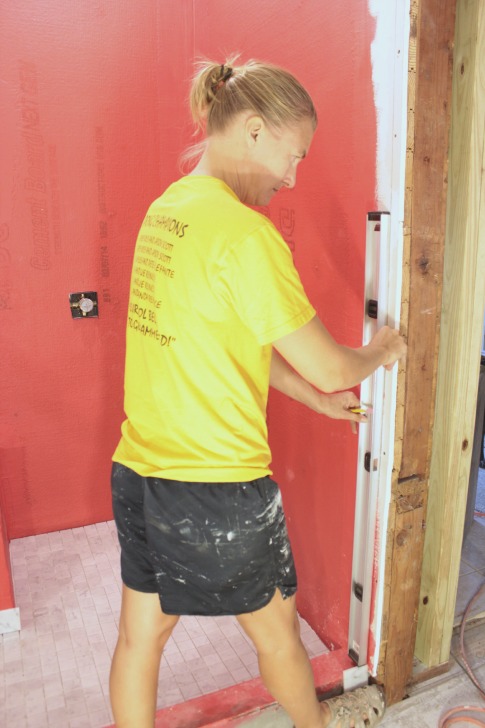
- How are you going to handle transition areas? Like where tile ends and either meets up with a wall, trim or something else. You could either order tile trim pieces (often referred as bullnose or pencil tiles) or tile right up to wood trim. Since our shower butts right up to the entrance trim I used a 4 foot level to mark a line straight up the wall where to stop the tile where it would line up with the tile on the outside of the shower curb (that I am holding up with my foot) and then we installed the doorway trim up to that same line after we tiled. I ended up shimming out the door frame a bit so I could use a full trim piece. If your measurements aren’t so tight it would probably be easier to install the doorway trim first if it’s not installed already.
For the other side of the shower I used a piece of the bullnose trim to gauge where the shower tile should end (I lined the outside of the trim tile up with the outside of the half wall) and then used the level to draw a plumb line up the wall.

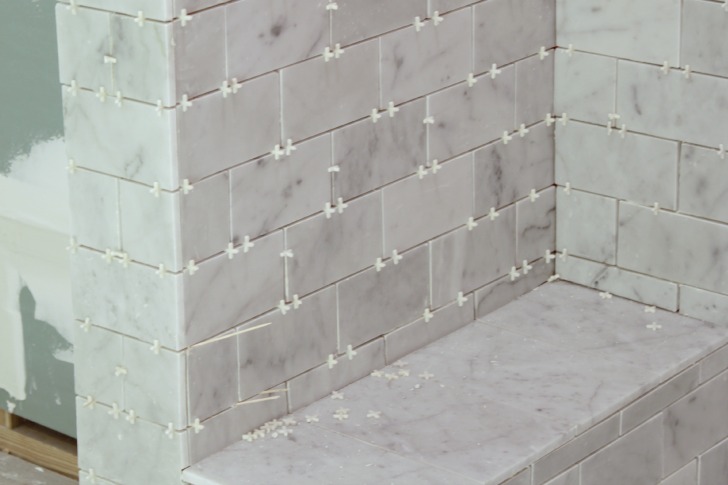
Another area that needed thought was the wall that goes up the side of the bench. I started by measuring the center of that wall (including the thickness of the tile that would be installed on the bench side of that wall and the trim tile that would be installed on the vanity side of the wall and then installed the tile so the rows alternated with a full tile and then the grout line between two tiles running exactly up the center of that wall.
Honestly, this is one of the spots that I am most proud of, if I hadn’t thought to do this first it would have looked really wonky with slivers of tile and off centered grout lines. For all the times I mess things up, I’m patting myself on the back for this one. So I think the score is something like 3 billion mess ups to this one smart move. I’ll take it. 🙂
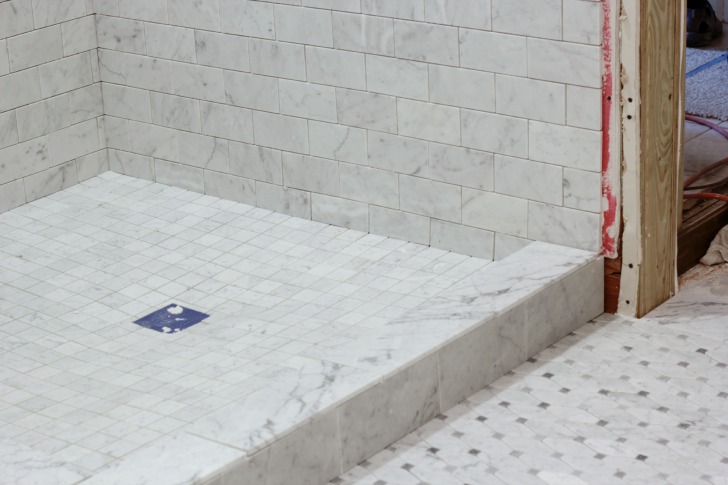
- Are you going to use the same tile for curb surround or use a larger tile for less grout lines, which is what I did. I used a 6″ x 12″ tile cut to size for the top and both sides of the curb.
- Make sure the first row of tile you lay on the wall is level. Whether you plan to start in the middle of the wall, which some suggest, or just make sure that bottom row is level (which is what I did) you want to ensure your wall tiles run level, even if your room’s ceiling and floor are not level.
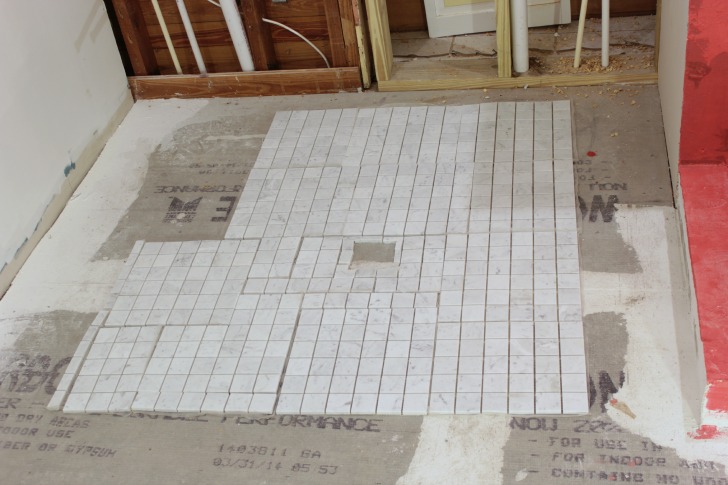
- Plan to tile all floor surface areas before any wall areas that are tiled and overlap the floor tile. I tiled the shower pan first then the shower walls (doing the bench seat before the back of the bench) then the bathroom floor and then the shower curb because it overlapped with the shower floor.
3 – Here are some affiliate links to the supplies and tools I used:
- thinset mortar
- mixing paddle or large trowel to mix
- 1/4″ notched trowel
- level – I used a tiny little plumber’s level, a 2 foot level and a 4 foot level for different parts of the project
- knee pads
- tape measure
- straight edge (a small level works well)
- wet tile saw
- safety glasses
- tile spacers
- toothpicks (just trust me!)
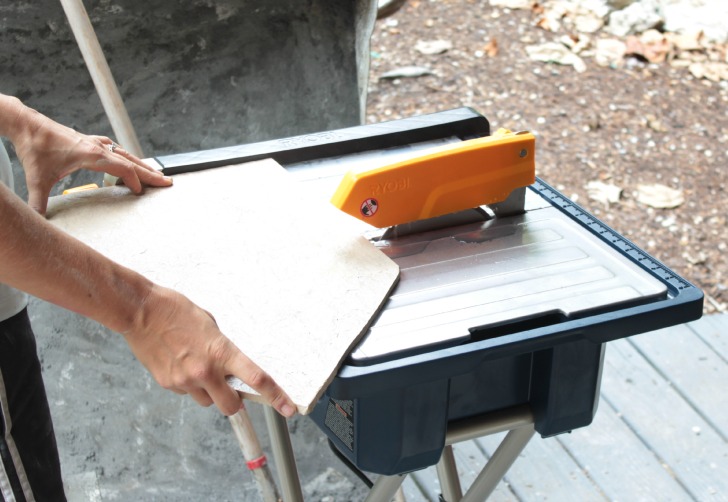
4 – Practice with the wet saw. I got a scrap tile from a local work site and just made cuts with our wet saw because it was the first time I was using it. Ryobi sent me their 7″ wet saw with a stand and it was easy to assemble and worked great for this whole project.
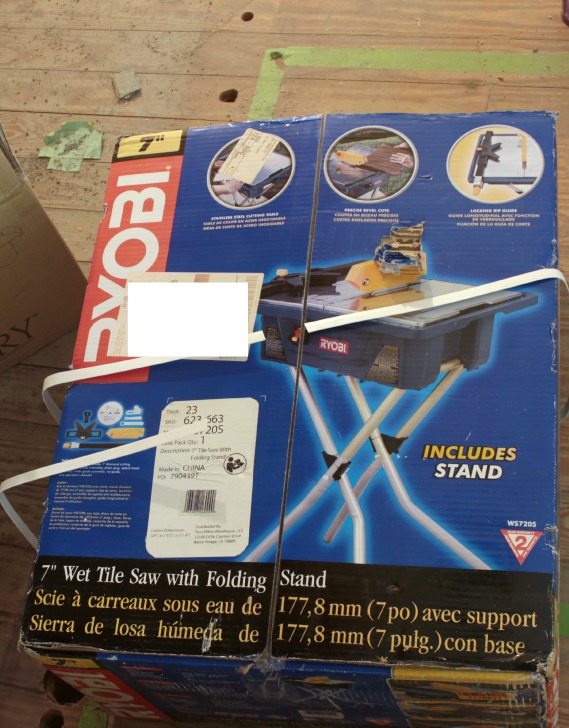 Practicing helped me get a feel for how slow to go to prevent chipping the tile and how handling the tile and the saw felt and I didn’t have the pressure of potentially ruining the beautiful marble tile.
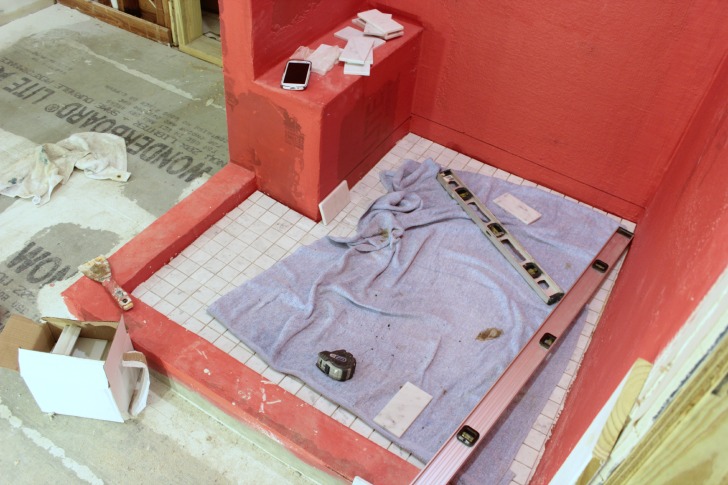
5 – Consider making as many cuts as you can before you even mix your thinset mortar. The first part of the bathroom I tiled was the shower pan and I actually dry fit every single piece of tile before I mixed any thinset. I played around with where it made sense to start laying the tile to hopefully minimize the amount of cuts I needed and I was able to piece it all together and cut each tile to fit so when I was ready to tile it really only took me a few minutes … and I was confident that it was right because I had already seen it in the shower pan.
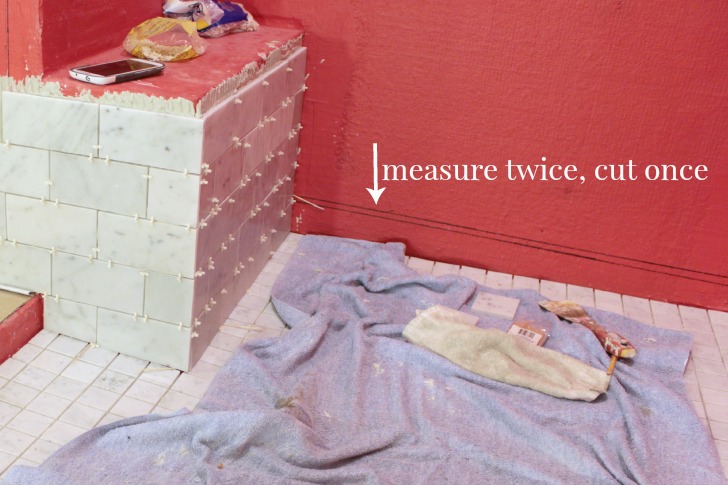
6 – Make sure your wall tile is level where ever you start. I started right with the bottom row on the wall and like with the shower pan, I actually cut every tile in the first row of wall tile before I mixed any thinset. Start by finding the lowest point where your shower pan meets the wall, place one full-sized tile (mine are 3″ high by 6″ wide) and then mark a level line around the entire shower at the top of the tile and then mark and cut each tile so it will hit that line. For accurate cuts you need to hold your tile up to the spot where it will be installed with the front of the tile facing the wall and make your marks on the sides of the tile, but you always want to cut the tile with the front facing up so you need to transfer your mark to the front of your tile with a straight edge.

That corner of the bench where the wall tile is leaning is the lowest spot on the shower pan. The reason why you have to find this spot to get started is to avoid needing to add little slivers of tile in the lower areas (or leaving an extra-large grout line). Not the end of the world but nice to avoid all the same. And yes, it took me a few level lines around the shower to figure this gem out. 🙂
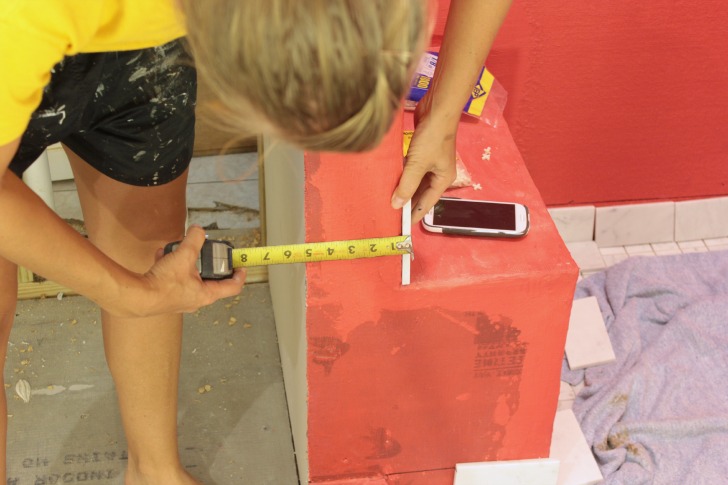
Also just do a quick check with the tape measure to see how many tiles fit along each wall and do what you can to avoid just having a tiny sliver of tile at any point.
General Tiling Tips:
- Toothpicks work awesome as spacers in areas where for some reason you want a slightly smaller or larger grout line than the full spacer. I used them when installing the bullnose tile and in random spots on the wall where I needed to tweak the grout line a bit to keep everything level. I read this when Brittany posted about her kitchen tile and it is a great tip.
- Working in small sections is not only easier but takes the stress off, just mix a little bit of thinset because it goes a long way. I would put about 2 inches of water in the bottom of a 5 gallon bucket and was always ready to be done tiling when I got to the end of the mixed thinset. I tiled the shower over the course of a week first tiling the shower pan, then the bottom of the walls up to the seat of the bench, then the seat of the bench and walls up to the shampoo niche and then the top of the walls.
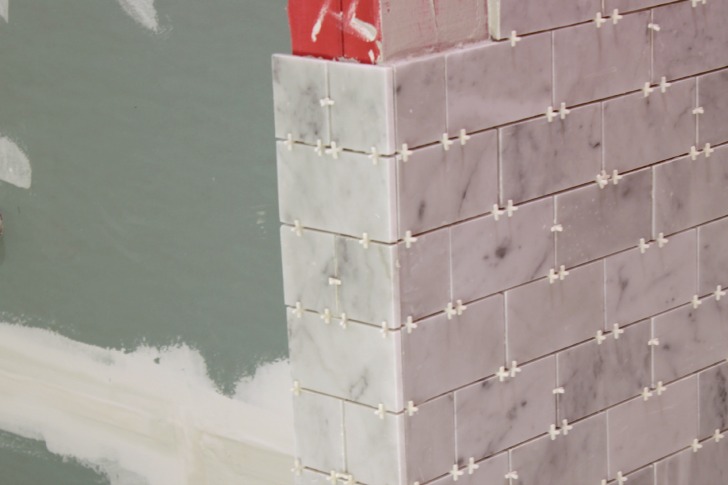
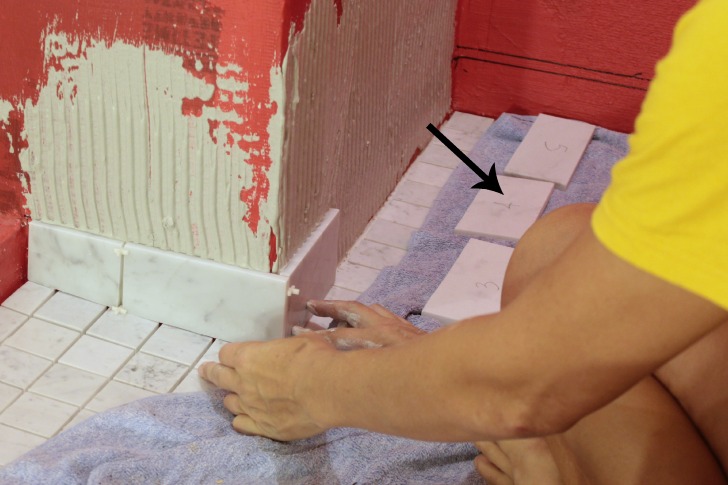
- When tiling outside corners I found it worked best to work on the rows on both sides of the corners at the same time and making sure they lined up as we went. You can also see in this picture that I numbered each cut tile for the first row after I cut them so I wouldn’t mix myself up. That’s another good tip right there. 🙂
- When tiling any horizontal surface (like your curb, a bench and the bottom of the shampoo niche) make sure to lay the tile on a slight slant so any water that gets on it won’t just sit on it and instead it will drip down into the shower pan and toward the drain. If you think you’re going to forget this one I invite you to solicit my husband’s help, for some reason his one main goal during the whole process was to
annoy meremind me to do this more than a normal amount. (Joel: “Can I remind you of something?” Me: “Is it just going to annoy the crap out of me?” Joel: “Probably, but don’t forget to slant those tiles.” Me while rolling my eyes and pulling out the level and adjusting the tiles to sit on a slant: “Thanks for the reminder.”) - For any row that has a full-width tile at one end always start tiling at that end of the row. If you start at the other end there is a chance you could get to the full tile and for some reason you’re a little off and need an extra sliver. That would not be good.
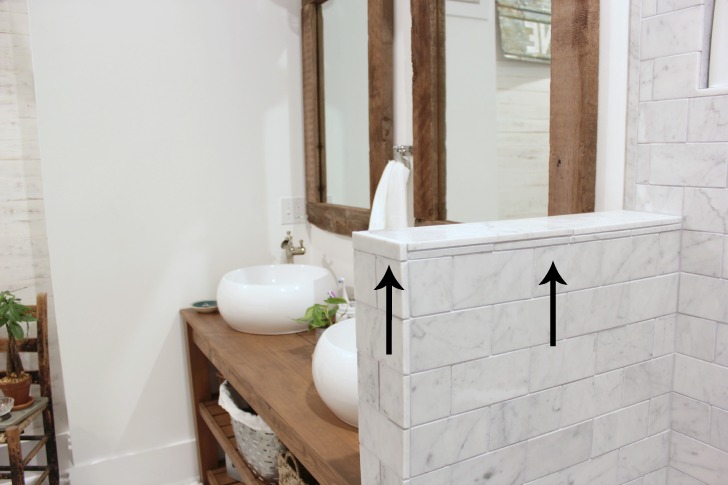
- For areas where a vertical surface meet a horizontal one (like the top of the half wall behind the bench and the shampoo niche) you have to decide which tiles you want to overlap. One day I want to try miter cuts in tile, but for this project we just went with an overlap. Having the wall tiles overlap the others looks better I think, but also leaves extra grout lines on that horizontal surface for water to sit. We did a bit of a combination of strategies.

- Always do a final double-check of all tiles when you’re done to make sure none of the spacers have fallen out of place and none of the tiles have slipped around. I would also check back after about 30 minutes just to be sure and at that point the thinset hasn’t cured so last-minute adjustments can be made. It can get dizzying staring at all the tile for so long, stepping away sometimes helped clear the brain.
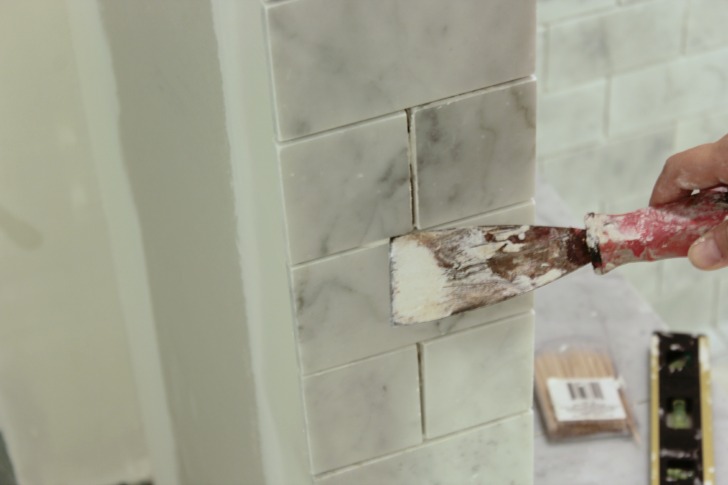
- Look for thinset on the front of your tiles and gently scrape it off, if any thinset accumulates between your tiles a spackle knife works great to scrape it out.
- And here’s a big ol’ maybe idea – use the same color thinset as you plan to use for grout. I used white thinset and gray grout but if I had used gray thinset it wouldn’t have been that big of a deal if thinset got between the tiles because it would have just looked like grout when it was done. Just a thought. 🙂
- Like any DIY, doing this with a friend is always more fun, and quicker. Tiling is a great two person job, when Joel was around he would handle all of the cuts and I could just stay in the bathroom and mark and measure and lay tile.
Woah, tile tip overload, but hopefully a few hints in there that will help you with your next tiling project. And now for the best part …
Where I got my fabulous tile:
- shower pan tile
- shower wall tile
- shower bench seat and shower curb tile
- bullnose trim tile
- bathroom floor tile
A huge thank you to The Builder Depot for supplying me the tile for this master bathroom renovation!