the space between

upcycle, repurpose and reinvent your space

  • about
  • aruba
  • key west
  • curacao
  • projects
  • house tours
  • privacy policy

master renovation – demolition and disappointing discoveries {and a couple fun ones, too}

June 19, 2014

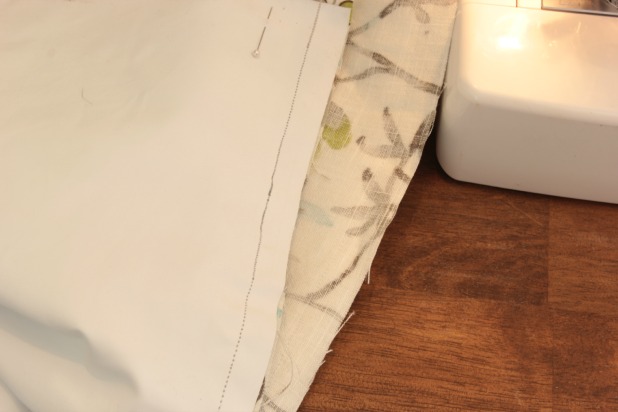
Happy day to you! I hope you are having a banner week, it has been one around here so far for sure. First, the BHG Outdoor Decor win (Thanks in large part to YOU!), then the USA men’s soccer team beat Ghana (the team that has knocked us out of the last two World Cups) in the World Cup and we have officially started a new major renovation project. Which gets us excited in so many different ways. 🙂

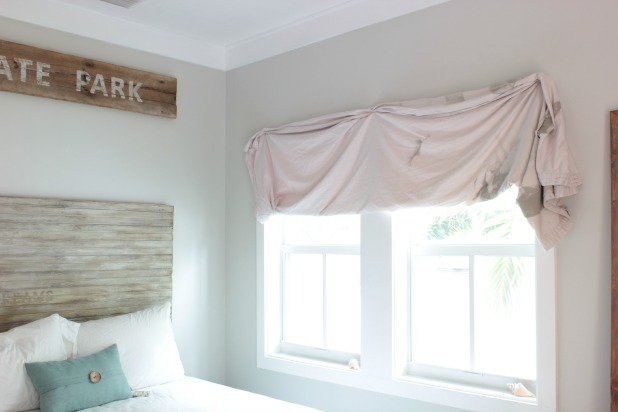
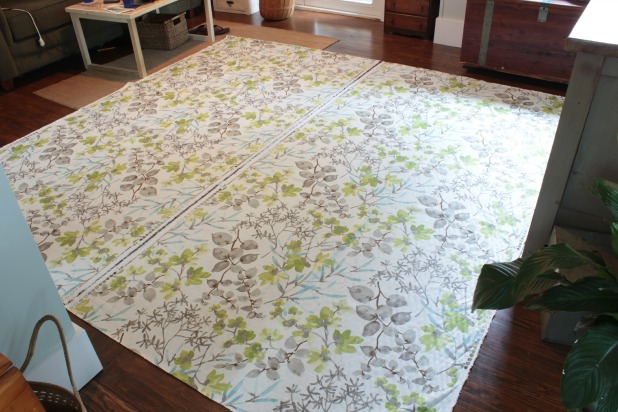
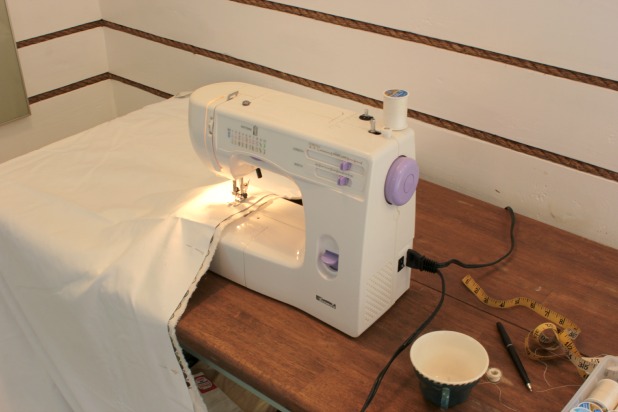
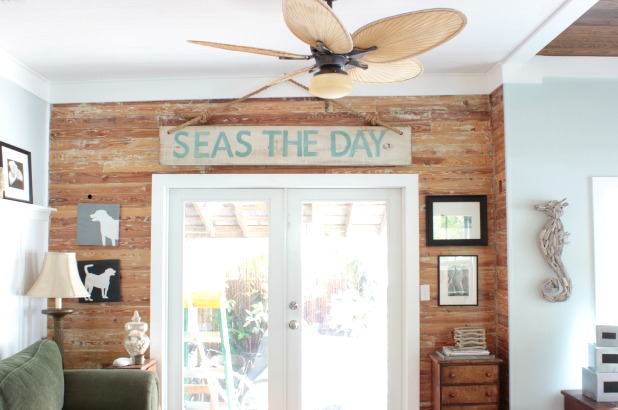
So here’s how I really want you to think we live.

making curtains

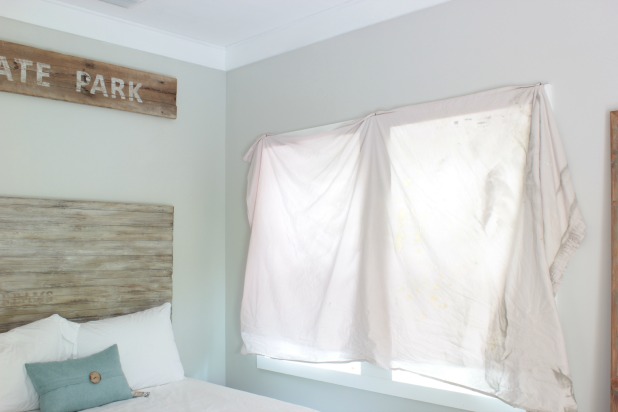
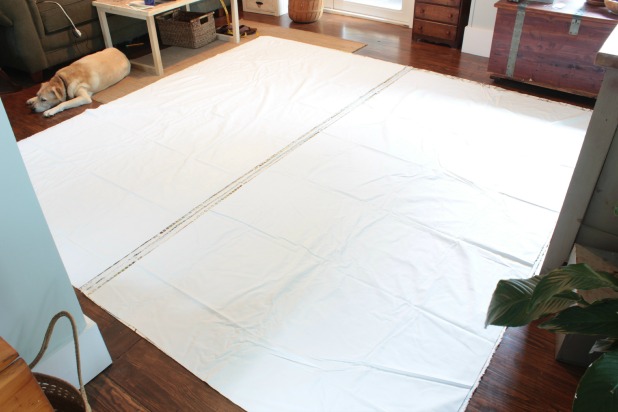
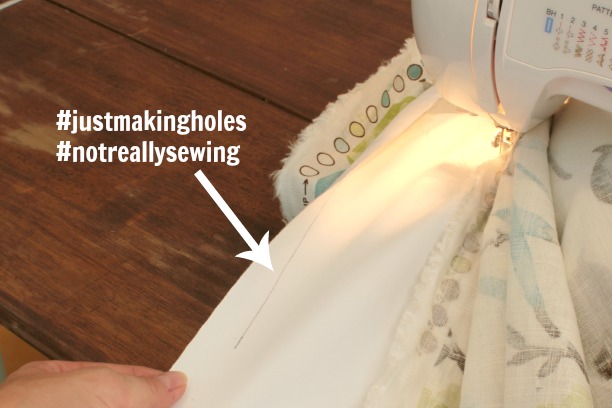
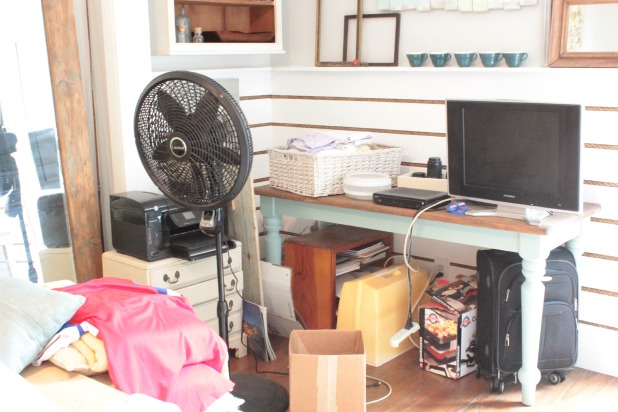
And here is how we actually live.

guest-bedroom-messy

What I want you to think.

living room side wall May 2014

And what really is.

living-room-messy

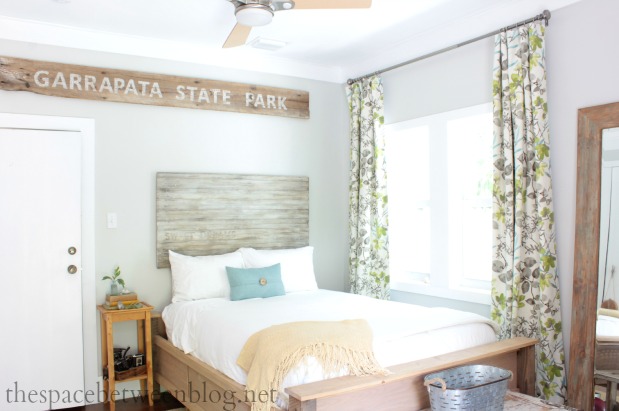
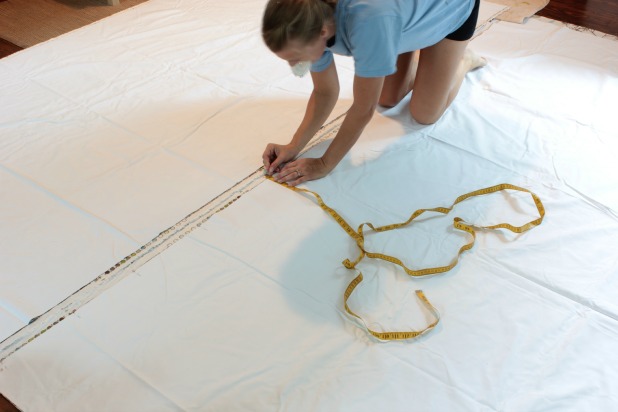
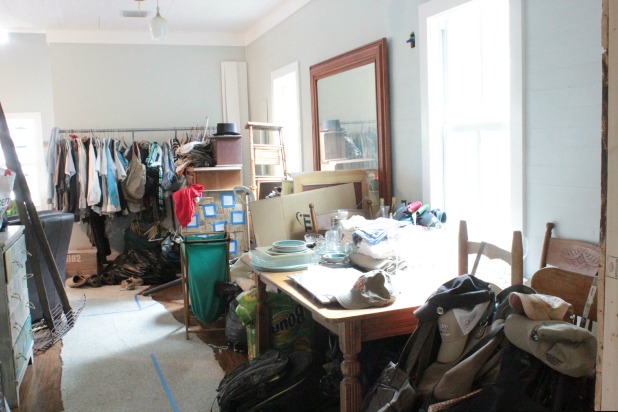
And then there’s this.

dining-room-messy

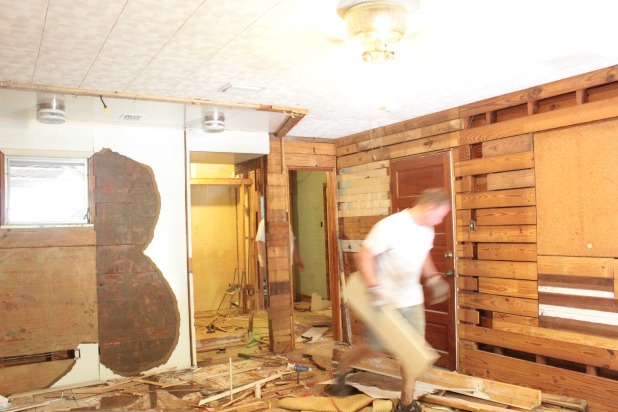
And that’s all because we have completely emptied out the master bedroom, bathroom and closet in preparation for a complete master renovation.

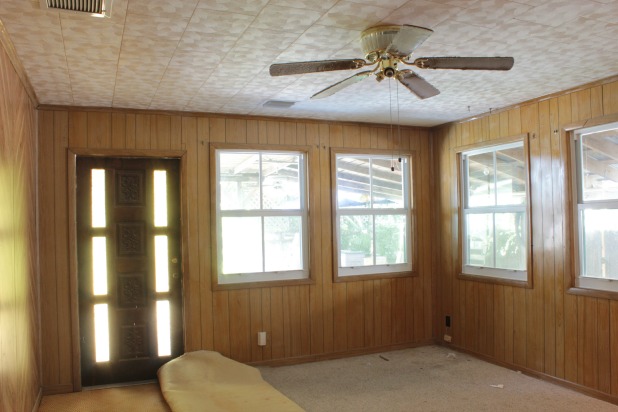
So let’s take a look at what we’re dealing with, starting with the master bedroom.

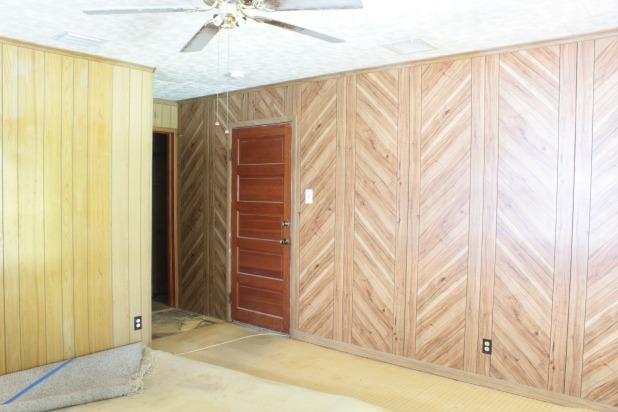
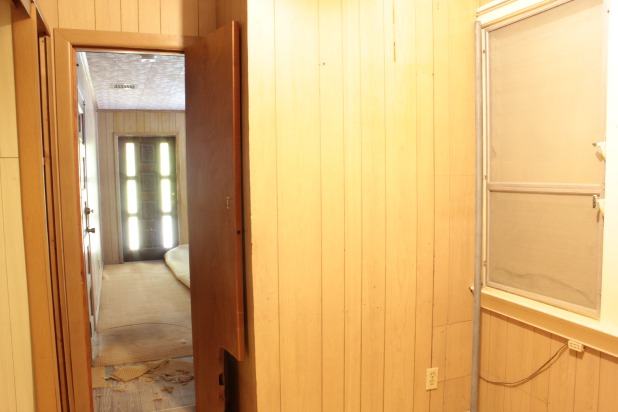
Here’s the view to the left as you stand in the entry way to the room (which is in the back of the kitchen right by the current location of the washer and dryer). I think the direction I want to go with the room has me leaning toward painting the inside of the door white. The style of this door is very similar to our front door.

master bedroom before

The view from standing in front of the door that leads to the back yard. The old window with the AC unit in it is going to go away because the new wall for the master closet will come out of the back wall pretty much in the middle of where that window is now, where the blue tape is run along the floor.

master bedroom before

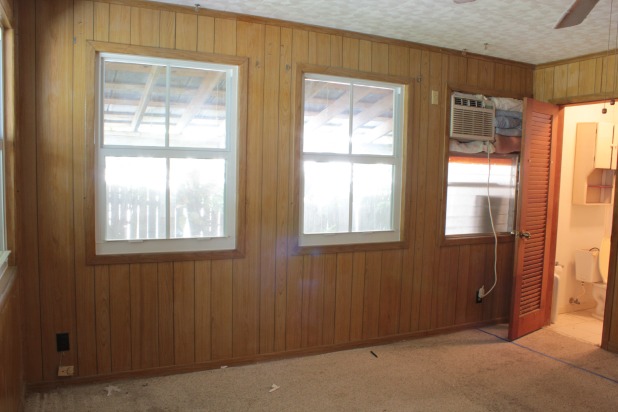
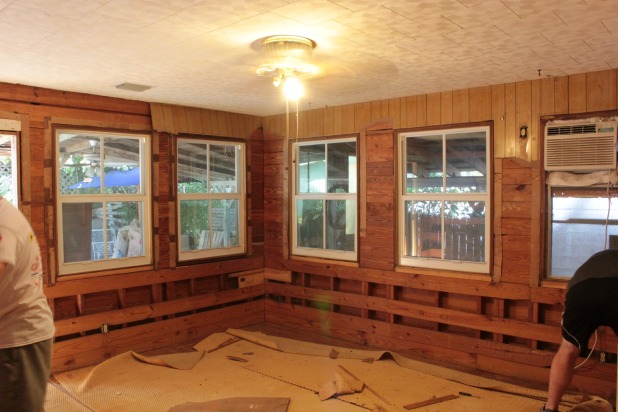
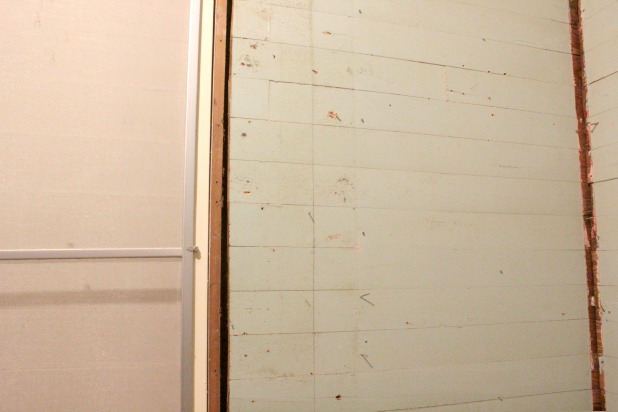
View from the back corner windows. Not only do we have multiple shades of paneling, we have multiple patterns. 🙂

master bedroom before

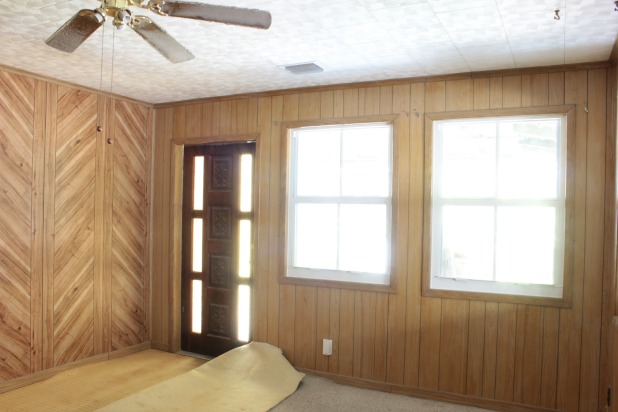
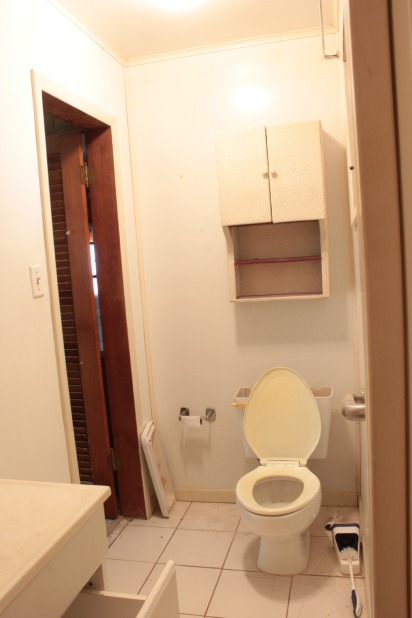
View from the old master bathroom door.

master bedroom before

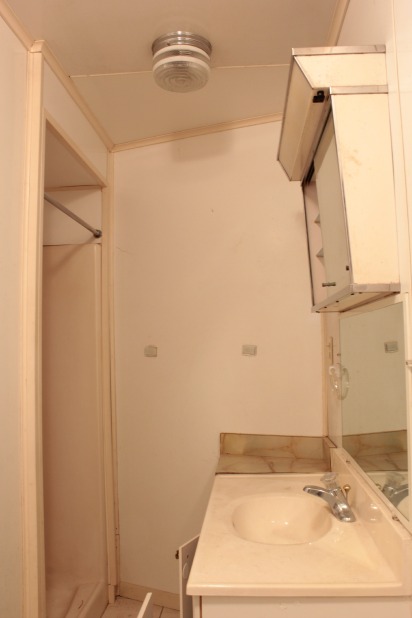
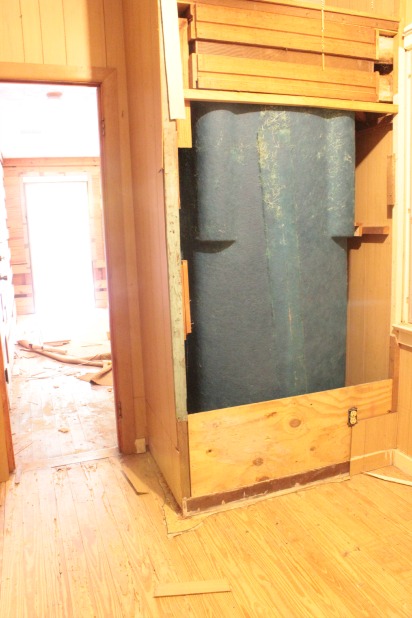
And to make everyone in the history of ever feel good about your own bathroom, here is the awkward little nook that was turned into a master bathroom by a previous owner.

The view from the door into the room, the shower is off to the left at the end.

original master bathroom

And from standing in the shower looking back toward the door. You’re welcome. 😉

original master bathroom

I shared a bunch of pictures of the space that will become the master bathroom when we discussed getting started and the floor plan. Everything that is now in our dining room came straight out of that room so here is the weird space emptied out. Remember that time our refrigerator water line leaked?

old master closet

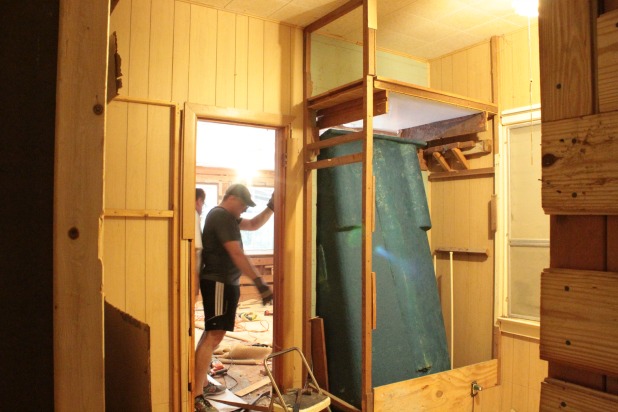
And here’s the back side of the shower with the master bedroom in the distance.

old master closet

And once things were cleared out we didn’t waste any time getting to some demolition. And for the first time we invited a couple of friends over and I am so thankful for the extra sets of hands. It was amazing to see the demolition unfold so quickly.

Joel and I got started about 7:30 am and got organized with a few essentials before diving into demolition:

  • be aware of where all electrical lines are running and which breakers in your circuit breaker box shut them off
  • make a note of where all plumbing lines are running and find the appropriate shut offs – the individual shut offs under the sink weren’t working and there weren’t any under the shower so we actually had to shut the water off to the whole house for a bit
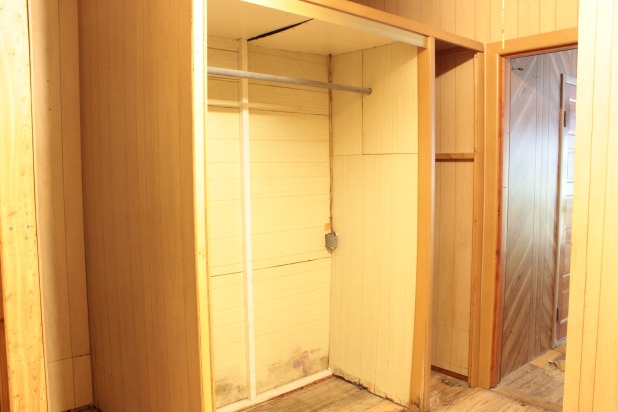
  • take out anything that you’ll want to save, especially if you have help coming, who might be ready to just tear everything apart – I wanted to salvage the bathroom door and the rods in the closet area, no idea what I’ll do with them … but that’s never stopped me from holding onto something before  🙂
  • compile the appropriate tools for easy access throughout the day – some essentials include safety goggles, leather gloves, electrical testers, hammers, pry bars, sledgehammers, regular and Phillips screwdrivers (for removing outlet and switch covers), pliers (to turn valves and loosen nuts for toilet removal) and the reciprocating saw

Things were looking like this about an hour later when our first victim friend arrived. Paneling comes down pretty easy with a hammer and pry bar, start with all of the trim around the windows, baseboards and along the ceiling and then the small nails holding the sheets up are no match for anyone eager for some demo.

master bedroom demolition

About an hour later, and with our crew of four in full motion we had the reciprocating saw out and were taking down the wall enclosing the bathroom. Since it was a weird little add-on we knew it wasn’t load bearing, definitely check with a professional before removing any walls in your house. 🙂

master bedroom demolition

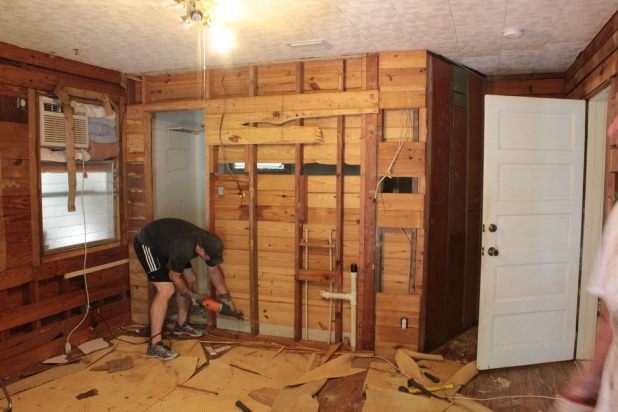
Joel worked pretty steady all day dragging everything out to the dumpster. Our friends, Adam and Wayne, manned the sawzall and handled the wall removal, manhandled the shower out of its little nook and rid us of all of the weird closet add ons while I tackled everything from paneling removal to toilet, sink and vanity removal and all of the little things that needed an extra set of hands.

There’s the shower.

master demolition

And there goes the shower!

master demolition

All-in-all it took the 4 of us about 4 hours to get to this point.

master demolition

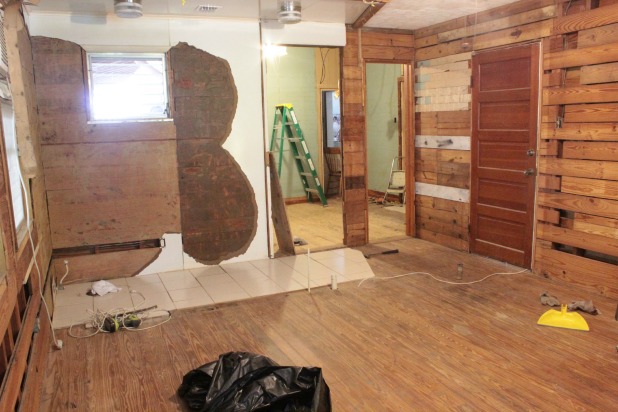
And if we’ve learned one thing in our years of DIY it is that a clean work area “feels” so much better that the mess above.

Maybe it’s mind over matter, or true what they say about clean space helping to clear the mind. Either way, it is just so much better to wake up the next day to this.

master demolition

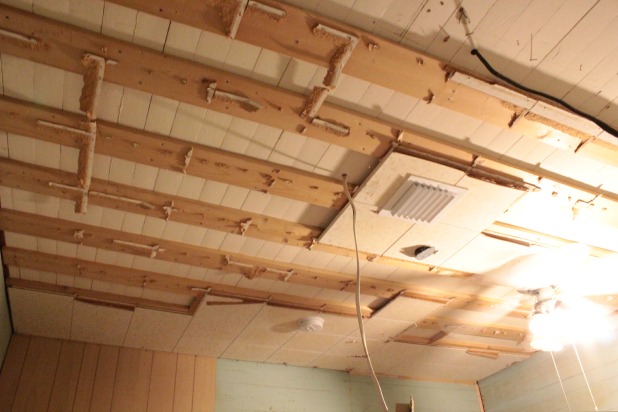
We were thrilled to find the wood floors in the bedroom in beautiful condition. We’ll definitely be able to refinish those down the road, but I was disappointed to find that when the drop ceiling was installed they added 1 x 6 wood strapping, even though the ceiling was already wood. This isn’t terrible, just extra work, above my head. My shoulders were not thrilled by the discovery.

master demolition

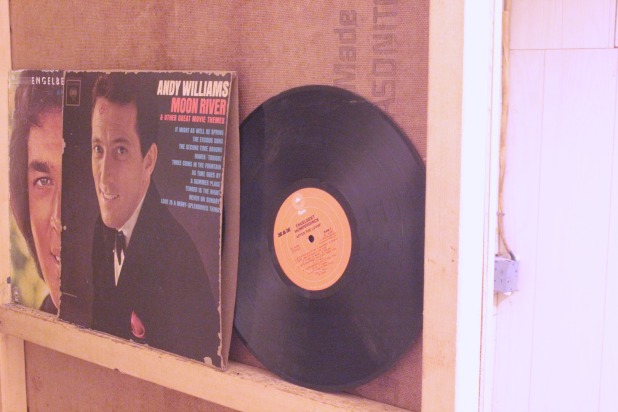
But on the fun discovery side were these records that had been hidden in the walls.

master demolition

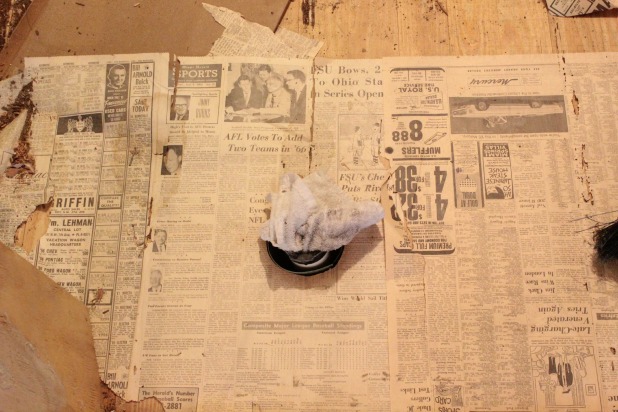
It was also fun to find this newspaper from 1963 under the shower and read the headlines like “AFL votes to add two teams in ’66”. And the date on the paper is Joel’s birthday. The DIY birthday gifts just keep on coming. 🙂

master demolition

Each day this week I’m just make a little bit more progress. There are a lot of little nails to be pulled, all the drop ceilings need to come down, all of the staples removed and there are so many different wood surfaces (some in better condition than others) that we still need to make final decisions on what will stay and what will go now. As sung by The Clash.

But I was thrilled to find Dade County Pine walls in what will be the bathroom so we’re going to try to work as much of that into the final design as possible. Something about extinct wood just makes me want to protect every last bit of it that I reasonably can.

master demolition

You can find out more about Dade County Pine and get a reminder about what things looked like before demolition and where we think we’re headed with the layout. (Although, once a space really reveals itself its funny how minds seem to change around here.)  I’ve also shared all kinds of details about my love of the pry bar and how invaluable it is during demolition.

So that’s what’s happening around here. What’s happening around your space? Any renovation projects getting started? Or is it beach time?

the lies people tell you about making curtains

June 17, 2014

Note:  First of all, seriously, we WON! The whole BHG Outdoor Decor thing. You and I. We won. I am verklempt, for everyone who voted, I love you for ever and ever, amen. 🙂

Now, I have to admit it, sometimes it is the most selfish of reasons that inspires a project around here. But whatever it is that lights the fire you just have to run with it. I guess. 🙂

We’ve moved into the guest bedroom in preparation for the full renovation of the master bedroom, bathroom and closet in one fell swoop. If the term “one fell swoop” means to tear out everything existing in each of those three spaces to then, over the course of time, one little project at a time, build it back up that is. So this is happening.

master demolition

Much more to come on that hot mess very soon. But it only took me about .3 seconds to find myself completely dissatisfied with the curtain situation in the guest bedroom … which looked a bit like this for about six months.

drop-cloth-curtains

And this.

drop-cloth-curtains-2

Sad, I know. My standing joke when we show everyone the house is to proclaim them “custom curtains”. I would venture to guess they are one of a kind, but if you have something similar send me a picture. It will make me feel better.

And one of the main differences in our guest bedroom and our master bedroom (other than the fact that one room has been renovated and one room needs to be renovated) is light.

As one of the people who takes up residence in this abode, normally in the master bedroom, I can admire all of the light in the guest bedroom from afar. I often think I forgot to shut the light off in there since the natural stream of light is so bright and beautiful.

What is not beautiful, however, is the neighbor’s light that he often leaves on all night. And the crack of dawn light that creeps in every single morning.

making curtains for the guest bedroom

I kind of knew the light issue was there, but as the self-serving host I am, I never really cared too much, knowing that curtains would happen … eventually.

And then we started sleeping in there. And curtains become el project numero uno on the ol’ to-do list. Because no real progress is going to happen on the master if this girl can’t get a good night’s sleep.

So, I set about making curtains, and I was determined to have them end up beautiful, and not be long, drawn out process. Seriously, you can so do this.

I know there are a ton of different tutorials out there with proclamations of the what you’ll need to make professional looking lined curtains. And I can attest that you really don’t need any of the skills or knowledge even I thought were necessary.

Lie #1 – The ability to sew a straight line on command. My curtains are proof that is not 100% required.

making curtains for the guest bedroom

Lie #2 – You have to know exactly how tall you want your curtain panels to end up before you start. Nope. Not true.

Lie #3 – You have to know exactly what size needle to use and what tension and stitch size to set your sewing machine on. I have no doubt this would be helpful, but I have no idea, so I snapped this pic for anyone interested. Maybe these settings mean something to you?

making curtains - sewing machine settings

Lie #4 – You can’t just wing it as you go. Whatev! I did, so you totally can, too.

So let’s get started winging it. 🙂

Step One – Clean your floor. Maybe you’re someone that does this on a regular basis without a prompt. Or maybe you’re me. 🙂  You’re going to need a lot of room to lay out your fabric so pick an area with a large, flat surface that you can maneuver around to reach your fabric from all angles. Dog supervision is entirely optional.

dogs-on-fabric

Step Two – Measure about how tall you want your finished curtains to be. Remember, if you want to fake larger windows plan to make your curtains so you can hang your curtain rod high on the wall and not right at your window trim.

Tip!!!  Use the entire height of your wall as a guide. If you use this measurement you will always have enough fabric, and have leeway for a curtain that puddles more at the floor if you want.

See, no need to know the exact measurement at this point.

I measured from the bottom of our crown molding to the floor and used that 104″ measurement as a guide. If you don’t have crown molding just measure from the ceiling to the floor.

Step Three – Depending on how much of a hem line you want, add some inches to the final curtain height. I knew I didn’t need a hem at the top so I just picked a number out of thin air and decided I wanted at least a 5″ hem at the bottom, nice and chunky. So add a bit more than that to the total height of the finished curtain, I added 8″. This will give you some wiggle room, unless you are perfect, then go with a more exact measurement. 🙂  Lay out your fabric and cut to size. I just doubled over the fabric right off the bolt and made my cuts. This beautiful fabric is the Braemore Gazebo Cloud from Online Fabric Store.

making curtains for the guest bedroom

Good quality fabric sheers are key, I have these. And that first cut was the hardest for me. What if it’s not right? Too short? I render this beautiful fabric useless?

making curtains for the guest bedroom - cutting

That’s how I decided to go with the measuring tip above. It took all of the questions out of it, no matter what, my fabric would be more than big enough for my room.

And I found comfort in making both panels at the same time, you know, just for the visual reassurance that they were basically the same size.

making curtain panels

Tip!!!  If you’re working with a patterned fabric make sure you have the pattern running in the same direction on both panels here before you start pinning anything!

Step Four – If you’re making lined curtains lay out your lining fabric, the side that will face toward your window facing down, right on top of my designer fabric and cut to size. I used this blackout lining fabric from Online Fabric Store.

making blackout lined curtains

Truth be told, no measuring devices were used during this step. Basically your lining fabric doesn’t need to be quite as long as your designer fabric, so I just cut it an inch or so shorter than the curtain fabric. Easy peasy.

For fabric buying purposes I will tell you that 6 yards of both the curtain fabric and the liner would be perfect for this size panel.

Step Five – Pin around the top and both sides of the fabric. I lined the top of the lining fabric and curtain fabric together and pinned 1″ in from the edge and to make sure that the color index along each side of the fabric didn’t end up showing I pinned 1 1/2″ in from the edge of the designer fabric.

making curtains - pinning

Step Six – Sew! I first sewed along the top and then along each side.

Here are a few sewing tips for near novice DIYers like myself:

    • slow and steady works better than fast and out of control, trust me
    • always start and end a line of sewing with a little forward, backward, forward action to prevent the thread from easily unraveling
    • find a spot on your sewing machine to line up the fabric, or mark one right on there to help keep your lines straight, I used the edge of the metal plate on my machine as a guide

making curtains - sewing machine settings

    • whenever you need to stop in the middle of sewing a line make sure the needing is depressed into the fabric, this will prevent it from slipping out from under the foot
    • have something close to toss the pins in as you take them out of the fabric, my great grandmother’s antique tea cup worked perfect

making curtains

  • definitely take the pins out before they go under the sewing machine needle, I have learned this the hard time … multiple times before it actually stuck #becauseIamverybright
  • every once in a while make sure you’re actually sewing, sometimes the bobbin thread or even the thread in the needle just doesn’t cooperate and the needle holes make you feel like you’re sewing but you’re not #totalsewingbummer

making curtains

Step Seven – Turn your fabric right side out.

Tip!!!  Cut the inside corners of fabric off before turning them inside out to make it easier to create a nice, sharp corner point. A pencil or other pointy object helps maneuver the fabric into place as well.

making curtains

Step Eight – Iron. No exclamation point here, because I don’t find ironing one bit exclamation point worthy.

Tip!!!  Iron from the lining side of the panel, this makes it easier to have the fabric side overlap the lining just a bit on each edge.

making curtains

Step Nine – Hang! Yep, we only have 3 sides sewn, but this is my way of avoiding having to take exact measurements. With my rod hung and using clips for easy hanging, and a more casual feel (you could add back tabs or leave an opening to run the rod through your panels if you prefer that look) it’s easy to hang the curtains and see exactly where I want to hem the panels at the bottom. Just pin along the bottom of the curtain at the final length.

You don’t need to hang both panels here, but I’ll admit, I was tempted to call this project done-for-now since the bottom is hidden by the bed. And I couldn’t help but stop to admire the sheer beauty of the fabric. Again, it is the Braemore Gazebo Cloud from Online Fabric Store.

making curtains

Step Ten – Hem the bottom to the final panel length. I just unclipped each panel and measured from the top of the panel to where I had pinned the bottom. Measure that same distance along the width of both panels and pin along the bottom.

making curtains

To create the bottom hem just measure your desired hem size, remember mine was 5″ (about) and iron the fabric over again with that much of a “cuff” of fabric showing.

making curtains

Then, just to hide any evidence of an unfinished edge, I folded the fabric over an additional inch or so and ironed again.

making curtains

I first sewed that smaller hem to hide the unfinished edge, making sure it didn’t peek out either end. You can definitely call the curtains done here if you want more of the curtain fabric puddling on the floor.

making curtains

And then just one more line of sewing to bring the final panel size to your desired length.

making curtains

And for someone who went into this thinking “I’m not really sure what I’m doing” I could not be more thrilled with the result.

making curtains

When Joel got home I proclaimed “you have to check out the curtains, and you have to touch them, they feel like real real curtains”. And they do. They are weighty and bring such a focal point to the room.

I am definitely in love.

making curtains

Here’s a shot of what they look like on the floor behind the bed. aka, proof I did actually finish sewing the bottom. 🙂

making curtains - simple sewing tips included from thespacebetweenblog.net

Needless to say the whole sleeping experience in the guest bedroom has just gotten a bit more luxurious!!

making curtains with blackout lining - great sewing tips included as well from thespacebetweenblog.net


What about you … make any curtains this weekend? Do any demolition? Have you ever spent a night in your own guest bedroom? It’s … weird. 🙂

Update: A real life professional has added some invaluable tips in the comments. Definitely take a minute to check them out if you’re getting ready to make your own lined curtains.

Need a vacation? Don’t forget to enter the chance to win a 4 night stay in Anna Maria Island here.

And a larger than large thank you to Online Fabric Store for supplying me with this beautiful fabric and blackout lining, and even more for your incredible patience. I have had this fabric since October and then instead of proceeding with the curtain making process I decided to write a book. Your grace in this situation warmed my heart.

  • « Previous Page
  • 1
  • …
  • 29
  • 30
  • 31
  • 32
  • 33
  • …
  • 169
  • Next Page »

Copyright © 2025 · custom theme design by this bold girl · Built on the Genesis Framework 

  • pinterest
  • facebook
  • instagram
  • rss