the space between

upcycle, repurpose and reinvent your space

  • about
  • aruba
  • key west
  • curacao
  • projects
  • house tours
  • privacy policy

10 beginner plumbing tips everyone should know

August 19, 2014

Hey guys! We actually just got back from 10 days away, up to Maine visiting family and completely unwinding without cell or internet for a few of those days. Sorry for the crickets in the comments and on social media. Speaking of crickets, we didn’t really see much wildlife on our vacation (that transition works, right?), which is a bummer because I was really hoping to see a moose because I haven’t for many years and everyone has been talking about seeing a bunch of them this year.

We didn’t even catch any fish on our fishing trips. Well, Joel did catch something that my brother declared “the largest minnow I’ve ever seen”. But I don’t think that really counts. But check out how beautiful it was, the entire lake was like glass … maybe the fish could see us coming. 🙂

joel-fishing

Now that we’re back I’m geared up to jump right back into things because our tile is coming, the bathroom window is ready and I’m supposed to be making a vanity. I want to kick things in high gear to get this room in working order already. We’ll see how the project and blog balance goes. And we’ll be patient with each other along the way. K? 🙂

So in addition to the DIY shower pan I’ve been working on we’re pretending to be plumbers around here. And by “we” I totally mean “Joel”. Determined to not let the lack of responsiveness from an actual plumber derail our progress, Joel jumped right in and took over. I am an hesitant active assistant … when he needs one … but I have plenty to keep me busy when he’s maneuvering around the crawl space, and when I don’t, I do my best to look busy so I don’t get roped into any of that mess. 😉

how to cap a water pipe in the crawl space

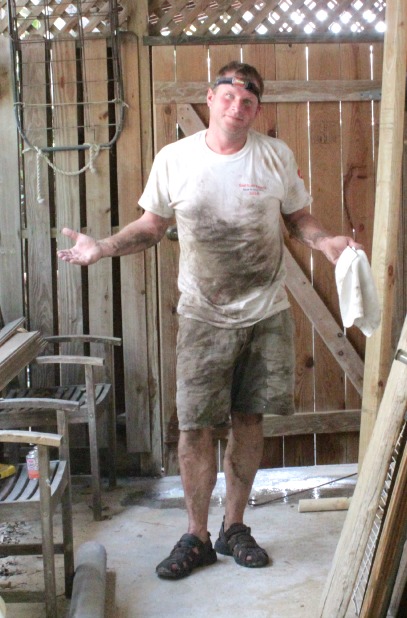
As an added bonus he often forgets he has the headlamp on so I am quick to make fun. I know. I’m awesome.

But seriously, I am so impressed. He is calculated, he takes the time to research and has spent more time in the plumbing aisle in HD than is normal for any one lifetime. So much so that every time we go back the workers are all “Hey, you’re back!” and we’re all “You know it!”. It doesn’t hurt that one of the managers in our local store is a plumber with 20+ years of experience. We’ve picked his brain on every aspect of this project. And have gotten a crash course in some key beginner plumbing tips that everyone should seriously know.

As an aside, just to prove that we tend to just hang out at HD, I even fit in a little workout on a recent trip.

push-ups

Ha, I was doing a little push up challenge with a few workout buddies where we have to do 10 push ups whenever we get a text … it was only a matter of time before I was caught in that plumbing aisle. 🙂

And now for the tips, in no particular order, because they will all seriously change your world if you ever want to tackle a little plumbing project.

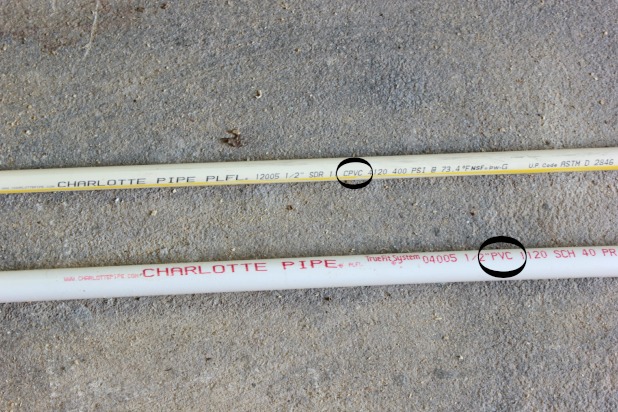
1 – PVC and CPVC are two different materials entirely. Find out what you have and be sure! More tips on that here.

plumbing tips everyone should know
2 – CPVC is better for hot water. Something to keep in mind if you’re ever working with your water lines. It does create a little extra thinking but running CPVC for hot water and PVC for cold water is how the professionals do it. #JustAskJoel  😉

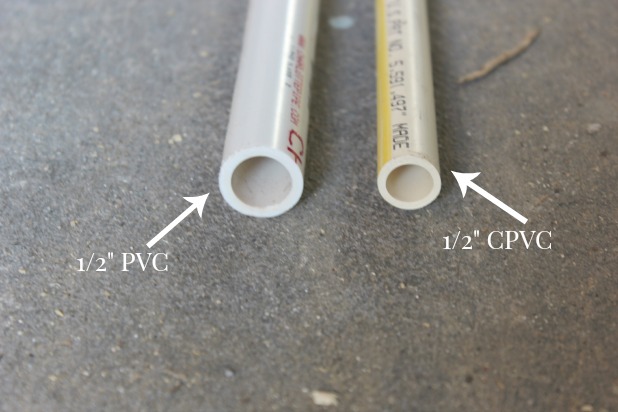
3- PVC measures diameter from the inside of the pipe and CPVC measures from the outside of the pipe. This tripped us up a bit before we got this tip. Because 1/2″ PVC pipes look like 3/4″ pipes, but it’s because the 1/2″ measurement is taken from the actual opening of the pipe.

plumbing tips everyone should know

4 – These cutters exist, they work on both PVC and CPVC, get them. In Joel’s words “game changer”. Let’s just say trying to cut that stuff with a hack saw in the confines of the crawl space is not fun or easy, at all.

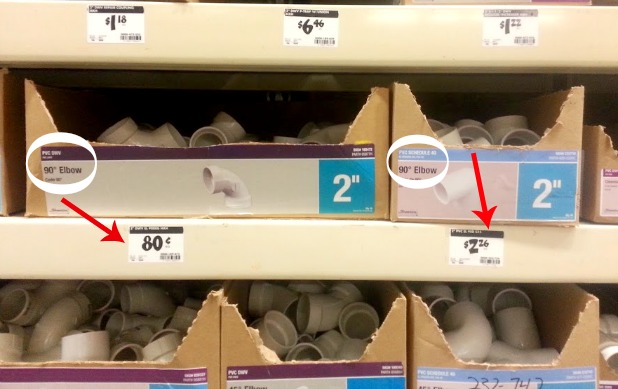
5 – So not only do you have to select between PVC and CPVC, but when you get into all of the PVC you’ll notice there seem to be two of everything. Good. Ness. Why are there two of the exact same thing? Ah ha. They are not the exact same thing. On the packaging you’ll see it’s either DWV or Schedule 40. Super clear now right?! Um, no. This is huge. DWV PVC can only be used for drains, waste or vents! They are not meant for the pressurized running water lines … that is what Schedule 40 is for. And I’m pretty sure that was our demise in that old bathroom in Maryland, trying to use (the cheaper option) DWV PVC for the water lines.

plumbing tips everyone should know
6 – Now, not only do you have to be clear on what kind of pipe you are using, you have to use the right glue for that kind of pipe. The glue labels are very clear what they will work for, but if you don’t know to look you might just grab the wrong one. Don’t make that mistake. That would be insanely frustrating … I would imagine. More on that in this post about how to cap a water pipe.

plumbing tips everyone should know
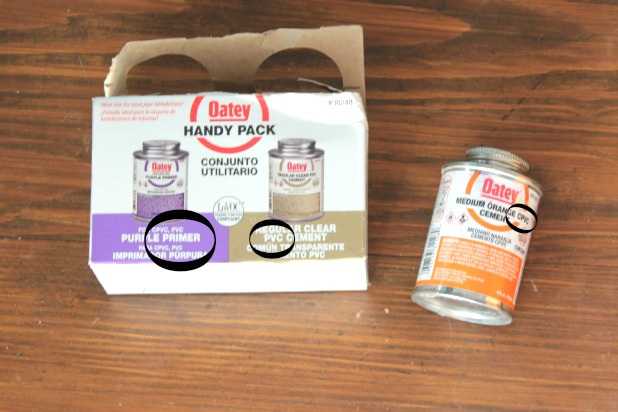
7 – Always use a primer (or acetone) before gluing, inspectors may actually look for the purple color of the primer during an inspection so don’t skip this step, even though it seems weird to have to prime plastic.

8 – When in doubt, add a shut off valve. We’ve had to shut off the water to our entire house multiple times in this process because we either didn’t have a shut off valve close to where we needed to work or they were non-functional. I may be on record saying “Too bad the water is shut off, I really wanted to wash the dishes … said me never.”  But after a grimy DIY day sometimes all you can really think about is a shower … and then you have to wait an hour for your newly glued pipes to dry. Shut off valves seem very luxurious to us right now. Add them. We like these.

9- Definitely check your local codes but here are some guidelines we got from a professional plumber.

  • Shower drains have to be 2″ diameter all the way to main line
  • Toilet drains can be 3″ or 4″, but why take your chances, we’re going 4″
  • Tub and sink drains can be 1 1/2″ under them but should be 2″ back to the main
  • For sinks, basically run the 2″ line to the wall and when you transition the pipe to run up the wall convert it to 1 1/2″.
  • All toilets need something called a clean out (picture worst case scenario and that will explain that) as well as a vent pipe run up the exterior of your house. If you have two toilets near each other they can have the same clean out and vent.

10 – I know it may seem that we are underestimating the work of trained plumbing professionals, but we’re really not. Have the number of a reliable plumber (one who will show up on nights, weekends, even Christmas morning) handy. We didn’t have any luck here in Key West so I actually called a plumber we’ve used regularly in Maryland. He answers all of our questions and even let us send him a sketch of our new layout so he could itemize exactly what we need to do. It’s actually one of my biggest tips when it comes to becoming a DIYer, rely on the professionals whenever necessary. Their inside knowledge is invaluable … I always ask “Is there anything I should know that I’m probably not thinking of?” Because there’s always something.

10+ beginner plumbing tips everyone should know from thespacebetweenblog.net

Have you ever tackled your own plumbing? Or learned a new DIY skill out of necessity? Or just think we’re crazy? That’s ok, too. 🙂

how to DIY a shower pan preslope {and do you even need one?}

August 11, 2014

This post is part of a complete series explaining how to diy a shower pan from start to finish. Including the framing and prep work, installing the shower liner, building the pan, preslope, installing the drain and tile.

If you missed all of the preparation and planning steps, stop on over here first to get started.

Today we are specifically talking about how to DIY a shower pan preslope and whether or not you need one.

Now, in prep for this I may have watched every You Tube video and read every tutorial known to man on the topic of how to DIY a shower pan preslope. I even asked some questions on the Sakrete blog, spent an entire afternoon in Home Depot getting some tips and gathering my supplies … and I still messed it up twice.

Here are a couple of disclaimers

    • For every person who said the preslope is the #1 most important step of a DIY shower pan someone told me I should start my placing my PVC liner right over my subfloor and skip the preslope step.
    • For every person that said I needed to lay felt underlayment over my subfloor someone else looked at me like I was crazy when I asked if they used a felt underlayment.
    • And in everything I found online the exact products they used were not listed (which was the cause of my initial demise) and when you go to the home improvement store and ask for “deck mud” or “shower pan mortar” you will be amazed at the number of differing suggestions you will receive.
    • All-in-all, this is just what worked for me and the specific products I used. I know there are a bajillion ways to do this that could work. Don’t judge, but I DIYed a tile shower about 6 years ago without a preslope and with regular grout sealing we have had no issue. #KnockOnWood
  • MOST IMPORTANTLY:  If you visit that Sakrete blog and read that the Sand Mix is made especially for shower pans and choose to not mix it with real mortar and have the same issues I had I reserve the right to say “I told you so”. I’m just sayin’. And I know it says it right on the package.

how to DIY a shower pan preslope

Save yourself the heartache, and the time, and the heavy drinking. And seriously, if you choose to skip the preslope all together I will not judge. I mean, the DIY Network instructions don’t even include a preslope … and they are a whole TV network … about DIY. Here’s a little diagram care of Oatey (the company who makes the PVC liner) that helps illustrate where we are going to end up.

how to DIY a shower pan 
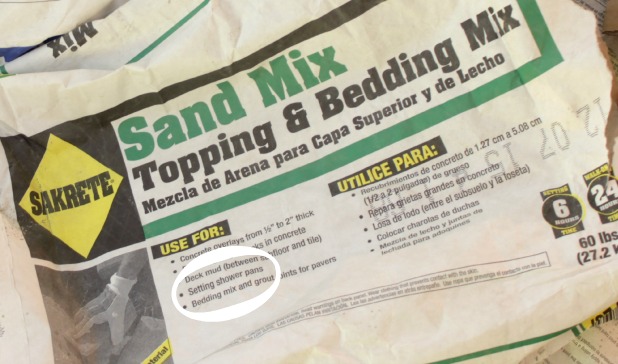
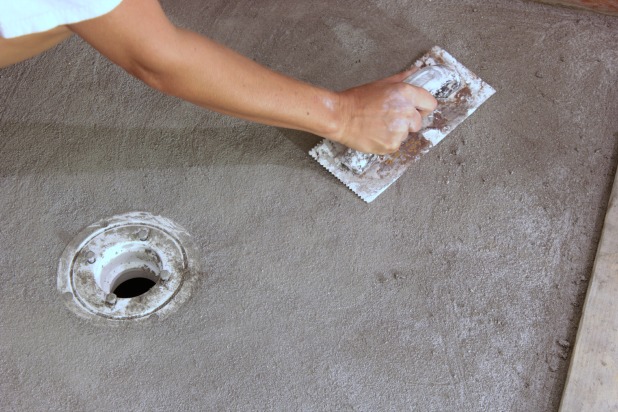
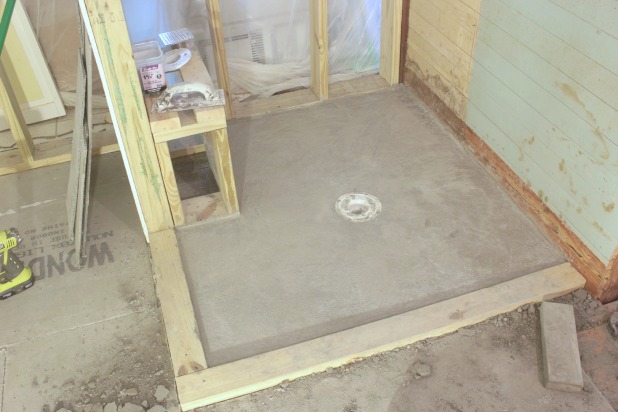
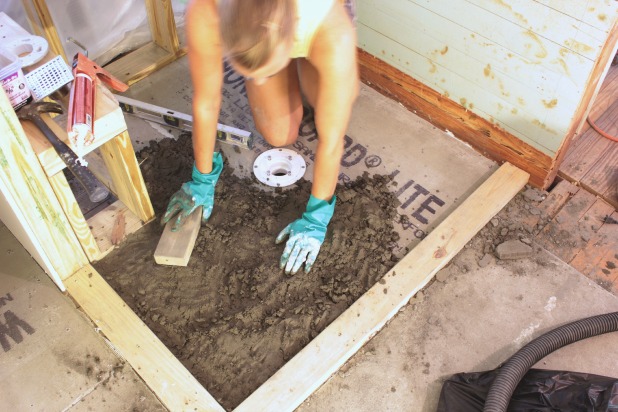
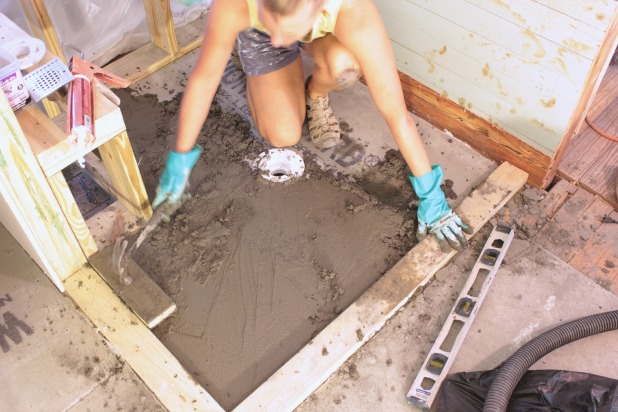
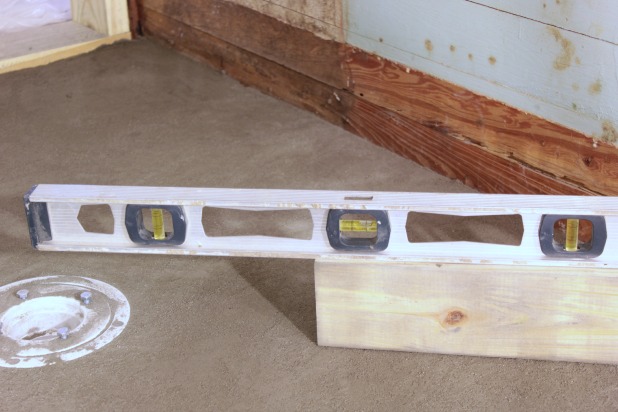
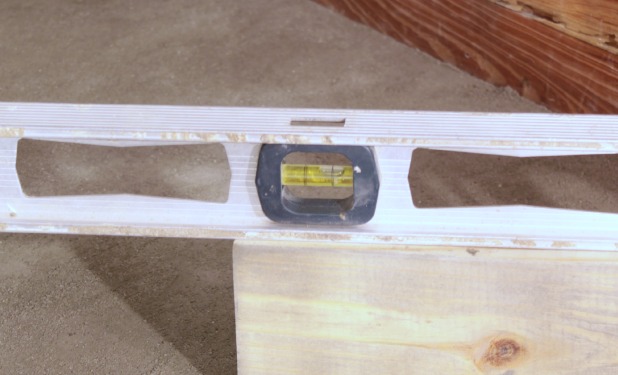
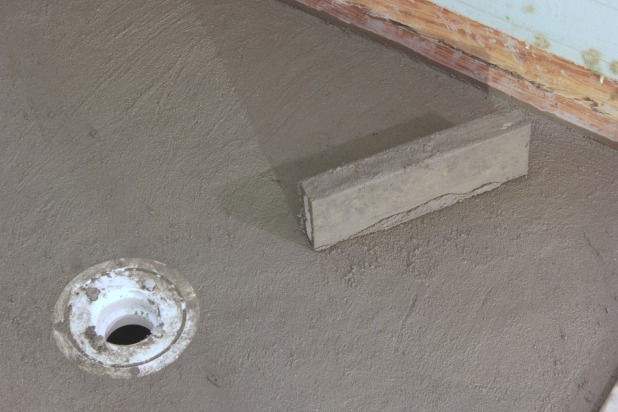
The purpose of the slope in a shower pan is to encourage all water toward the drain. Under the tile and thin set is a sloped mortar base that creates the slope for you to lay your tile. Under that slope is the PVC liner which is on top of your preslope. Seriously, if you’ve got water getting under all that tile and cement and PVC lining you’ve got bigger issues than a little preslope. 🙂

If you are going to start with a preslope, here is the how-to.

1.  Start with a solid, clean and properly supported shower floor. And be sure to tackle all of the prep steps first.

2. Gather your supplies.

how to DIY a shower pan supplies

      • 2 foot level
      • two pieces of 2 x 4, one about 12″ long and one about 18″ long
      • knee pads, we bought a cheap volleyball pair at Walmart a number of years ago and they still work great
      • rubber gloves (not shown, but totally needed)
    • an empty bucket (not shown, this will make sense in a minute)
    • trowel with at least one flat edge
    • everything else is just for show  🙂 … but this does show all three parts of the adjustable drain we used and the cement board screws

3. Mix 1 part Mortar to about 3 parts Sand Mix. This is where I failed miserably the first two attempts. Sand Mix alone did not work for me. I know the packaging says it will, and their blog says it does, and maybe I just mixed it too dry (which is why I tried it twice, to mix it wetter the second time) but it didn’t work. It didn’t work so much that it literally only took me about 5 minutes with my hammer to break it all up to get back to my subfloor. That photo is here.

how to DIY a shower pan 
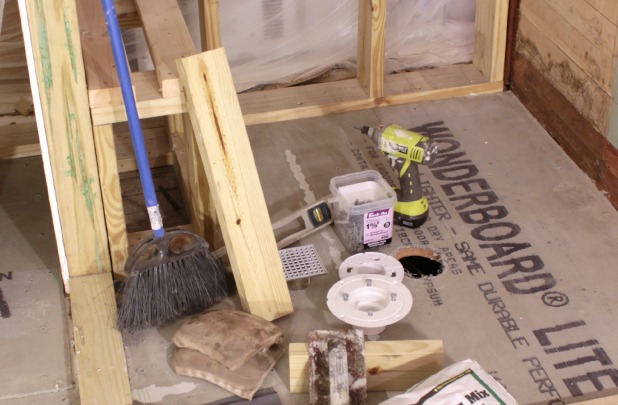
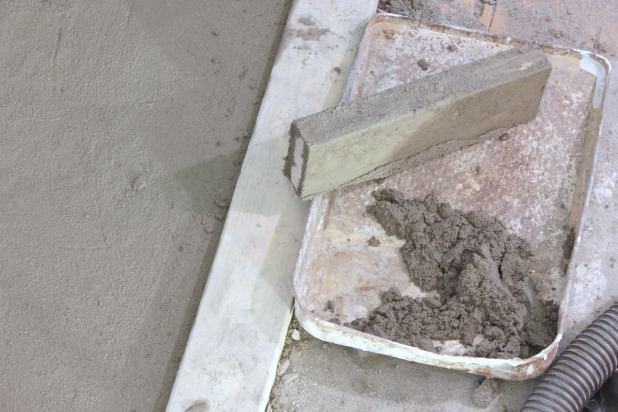
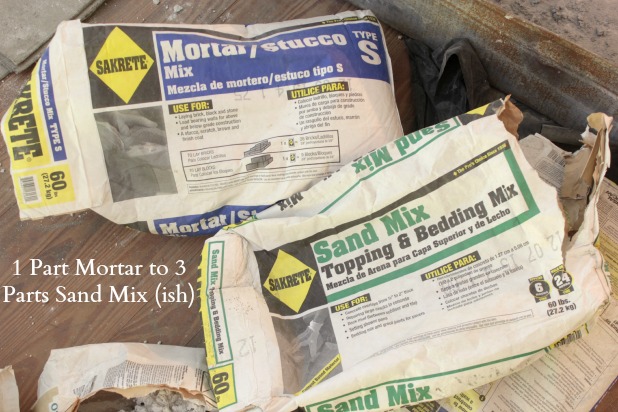
The plumber I consulted with over 20 years experience said it’s like mixing cake ingredients without a recipe. Knowing my skilz in the kitchen I knew I was doomed. But, it worked out. I liked using this rake thing to mix, so much easier than a shovel because it didn’t try to move all of the heavy mixture, but I would make sure to scoop up any dry mix from the bottom of the mix with a regular spade shovel, too.

how to DIY a shower pan

The packaging says to use about 5 1/2 quarts per bag, but knowing that I wanted my mixture to form a ball without crumbling in my hand I just winged the water thing. So many tutorials say to not add too much water and make it soupy, and that is right but the plumber said a more detrimental problem is not enough water because it won’t bind. It kind of looks like wet beach sand when it’s ready.

how to DIY a shower pan

4.  Shovel a few scoops of the mixture into the shower area and get to work. I used the shorter 2 x 4 and my hands most of the time to get the mixture into the right position and pack it tight.

how to DIY a shower pan preslope

From this starting corner I just worked my way clockwise around the shower. I found it easiest to pack the outside edges (which will be the thickest because of the slope) by placing the 2 x 4 right up against the curb and hitting it a few times with a hammer.

how to DIY a shower pan preslope

It took me a minute to remember to put those knee pads on, but I suggest just doing it first. 🙂

If you get to any areas that, when packed down tight, are dips in the preslope …

how to DIY a shower pan preslope

Just crumble some more mixture right over it and tap it in tight with the 2 x 4.

how to DIY a shower pan preslope

And you can see there that the idea is to bring the preslope down to match the height of the drain flange that you’ve installed.

Tip!!! Be sure to clear those bolts on that drain flange of any mortar mixture when you are done, screw and unscrew them a bit so you are sure they are still functioning properly and don’t get covered in mortar.

5. Check your slope as you go. If you have a corner where your 2 x 4 won’t fit, set it on your short 2 x 4 piece to check the slope.

how to DIY a shower pan preslope

You’re goal is about a quarter bubble out of the center line … feel free to attempt perfection, I was happy with a varying scale really. 🙂

how to DIY a shower pan preslope

6.  For areas that need to be shaved down a bit the 2 x 4 works surprisingly well. You don’t really want any peaks or valleys in this layer, as straight of a surface from point A to point B. And here is where the empty bucket comes in. If your large mixture bin is not within reach, as mine wasn’t, it was handy to have an empty bucket (I actually used an old rusty paint tray) to just dump excess mix.

Imagine I’m sitting on the bottom right of this picture and pulling the 2 x 4 toward me.how to DIY a shower pan preslope
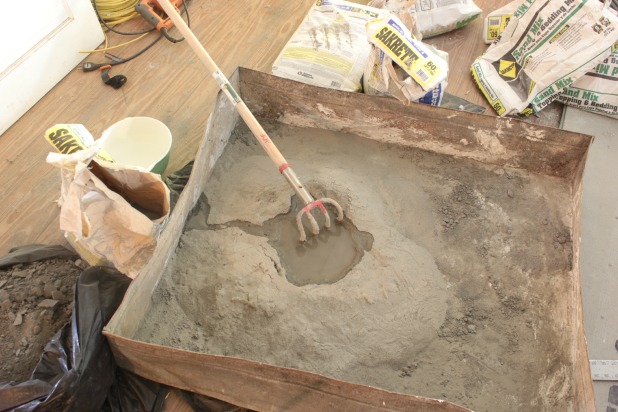
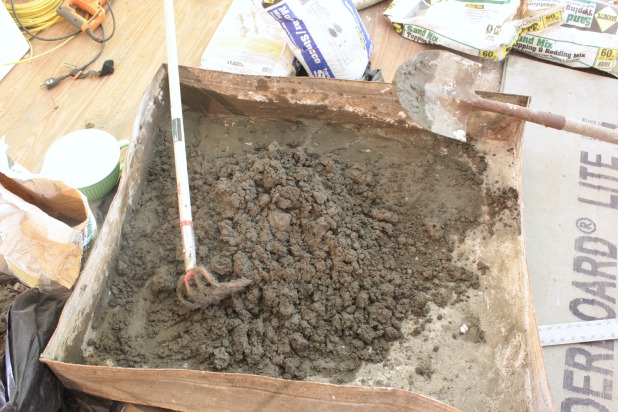
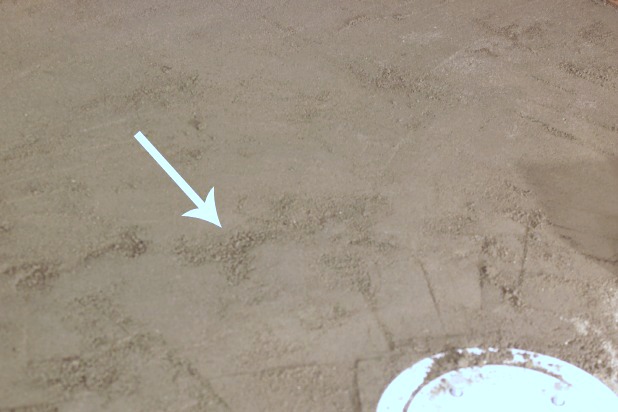
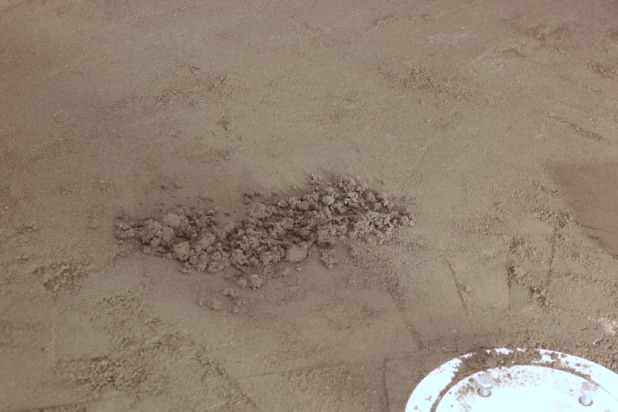
And then dumping the extra bits here.

how to DIY a shower pan preslope

This whole process, from mixing the mortar and sand mix to the final tap of it in place in my shower took about an hour and half for our 16 square foot shower. And I used 1 1/2 bags of sand mix and 1/2 bag of mortar.

7.  Let dry overnight.

8.  This is totally an ad lib step. When I went to check on it about 17 hours after I completed it, so not fully cured but good and hard, I noticed the little specs of mix that had dried around some parts of the shower pan. So I took the flat edge of a metal trowel and just scraped it across the entire thing. Since it wasn’t cured I could even scrape out a few areas that weren’t exactly flat. Definitely not any major changes, but it felt nice to be able to smooth it out even more.

In this picture I’m scraping the trowel away from me.

how to DIY a shower pan preslope

And then I used our shop vac to clean it up and I was thrilled to be officially done with this step a full week later than I had expected.

how to DIY a shower pan preslope

Next up comes the PVC liner and then the mortar base and we’ll be ready for the tile. Which is on schedule to arrive next week!

Update:  The shower pan series is complete. Here are the other posts that might come in handy if you’re making your own shower pan.

  • installing a PVC shower pan liner
  • the final steps of the shower pan
  • how to prepare your shower for tile

And we’re installing Carrera Marble Subway Tile in the shower with a matching long octagon tile (that I had never seen before and am totally in love with) on the floor, just click here to check it out.

I am soooo excited for that step. But we still need to:

  • tape and mud the cement board seams on the floor
  • install cement board around the shower walls
  • rough in the plumbing (shower, tub, toilet and sinks)
  • finish the greenboard and drywall on the rest of the walls
  • finish framing in the new pocket door to the master bedroom, which needs to be done before we
  • frame in the walls to the closet so we can
  • lay cement board in there (and tape and mud that) because we are laying the same tile throughout the two spaces

Update – That bathroom is complete, check the rolling door (with windows!) we installed here, the DIY wood vanity and the reclaimed wood framed mirrors.

I know that’s just a partial list, but it’s all the brain can put together right now. 🙂  It’s hard to believe this all started about 2 month ago! We feel like progress is steady but things just take time. And we try hard to fit in a fair share of fun and not pressure ourselves to work on this old house project every second of down time we have. Lately that has meant me getting out of the house sometimes, just to get out … it’s hard to really relax when you’re sitting amid the madness.

Here’s the supplies list again so you can get started!

      • 2 foot level
      • two pieces of 2 x 4, one about 12″ long and one about 18″ long
      • knee pads, we bought a cheap volleyball pair at Walmart a number of years ago and they still work great
      • rubber gloves
      • an empty bucket
    • trowel with at least one flat edge

this post contains affiliate links

  • « Previous Page
  • 1
  • …
  • 23
  • 24
  • 25
  • 26
  • 27
  • …
  • 169
  • Next Page »

Copyright © 2025 · custom theme design by this bold girl · Built on the Genesis Framework 

  • pinterest
  • facebook
  • instagram
  • rss