the space between

upcycle, repurpose and reinvent your space

  • about
  • aruba
  • key west
  • curacao
  • projects
  • house tours
  • privacy policy

those two other times I mismeasured

October 15, 2014

I’m beginning to feel like Roger Clemens in front of the grand jury talking about his history with performance enhancing drugs … and his tendency to misremember.

I have the same tendency to mismeasure. It’s incurable. I don’t really get it. It just happens. Luckily it is one of those things that doesn’t really matter in DIY. πŸ˜‰

As an aside, apparently mismeasure is not a word, but don’t worry, I won’t let that stop me from using it over and over again in this post. πŸ™‚

Remember what happened with the new vanity? It’s the fatal inch. That last little bit of space that sneaks up on me.

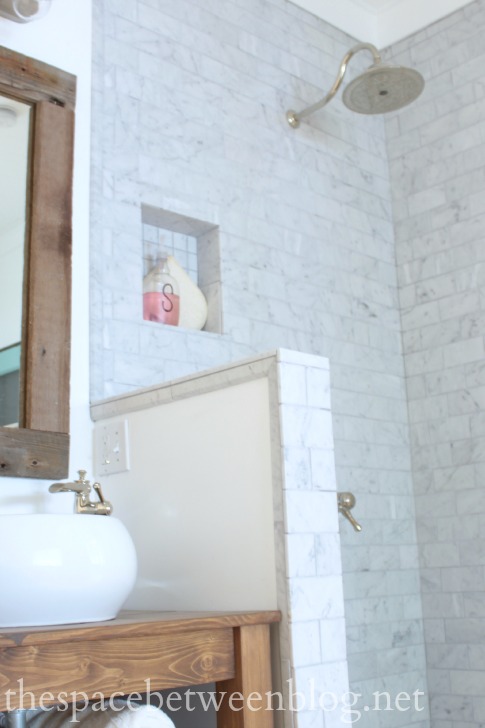
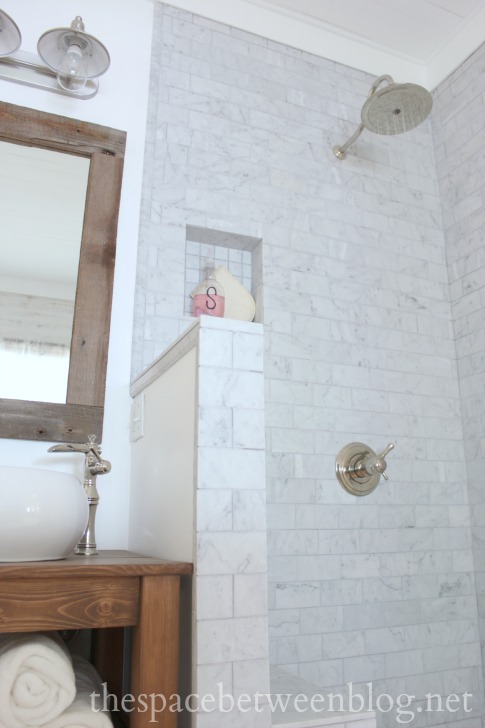
So I really couldn’t help but laugh when the tile in the shower was done and the large shampoo bottles I built the cut-outs for didn’t really fit.

master bathroom

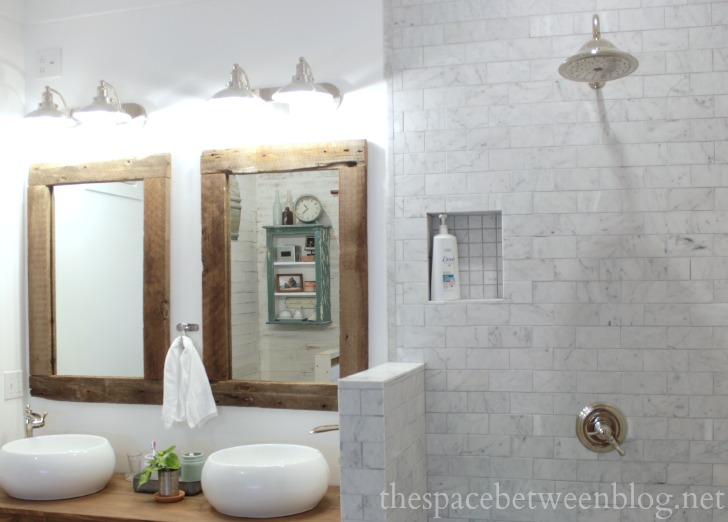
I mean, they fit. But you can’t exactly pump the product out of it since they touch the top. Joel just shook his head and said “Shocking” when I told him. Sarcasm gets us through the day. Neither one of us were really that surprised. πŸ™‚

I mean, I used the actual bottles to gauge how big to make the little nook.

master bathroom renovation

Just goes to show that I need to go back and read my own advice sometimes.

Luckily this little mismeasure was something that could be solved by the dollar store. I just found a bottle I liked and since it didn’t have a pump I also bought another bottle with a pump. If I had been thinking I would have just used the pump from my shampoo bottle and cut the straw to fit the shorter bottle. But this post is evidence I am not always a thinker. πŸ™‚

master bathroom

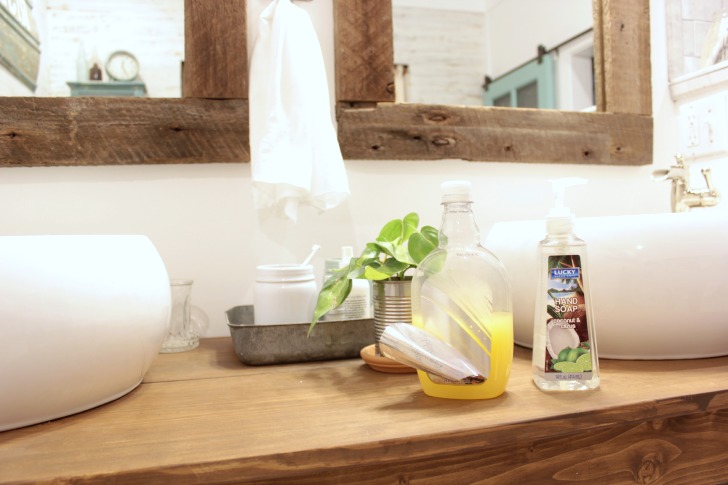
I peeled off the label from what was a bubble bath product (And you know I’m using the bubble bath, I just poured it into a glass jar.) and used this trick to get rid of all of the gooey sticker residue.

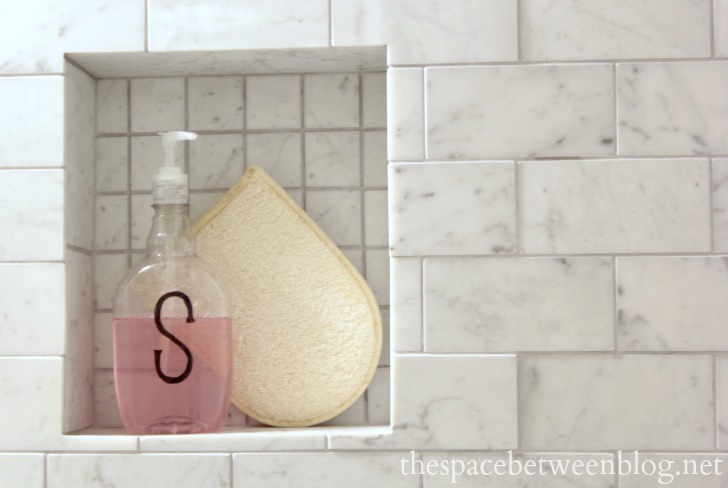
A simple hand-drawn S to indicate it is shampoo, because I’m going to have to make another one for the conditioner, and we’ve got a decent looking $2 monogrammed shampoo bottle that fits in our new niche.

monogrammed shampoo bottle in the master bathroom

Now this other little mismeasure might be considered less of a mismeasure and more of a misinformed situation.

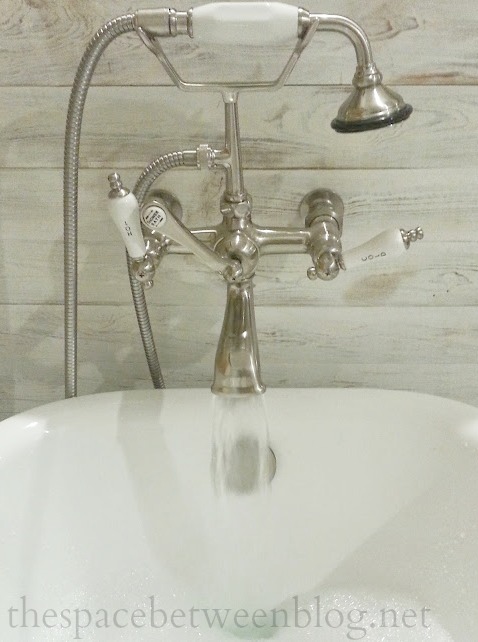
So I bought this tub.

And I ordered it at the last-minute possible so we weren’t the neighbors with a tub in their yard for too long.

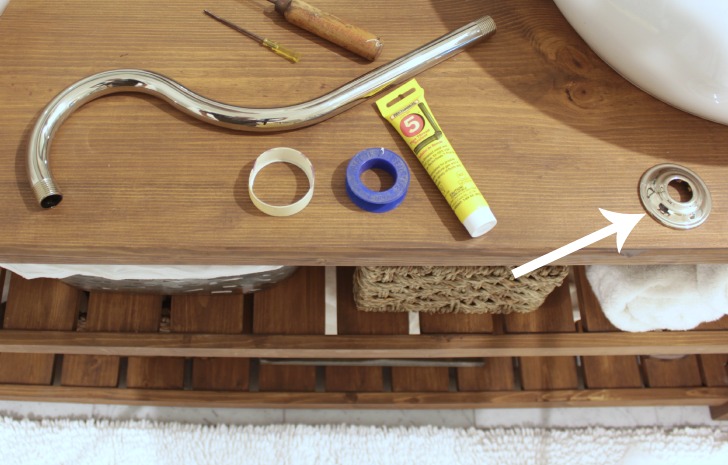
So I pulled the spec sheet off the internet to determine where to drill the drain hole in the floor and tile around it.

tub-drain-hole

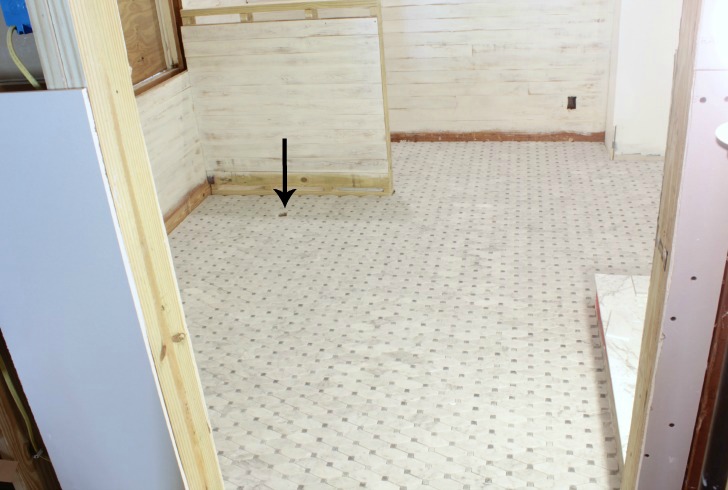
And low and behold that was not the right spot for the hole. Huge bummer.

But luckily it turned out to be a fairly easy fix since my wrong hole will forever be hidden under the new tub.

Since I had ordered the tub with an overflow drain the drain hole wasn’t supposed to be directly under the tub drain location but in front of the actual tub where the overflow drain came down. Something you should definitely verify before making any drain hole decisions. Says Captain Obvious.

Now with the tub and drain on hand I just used the drain to determine where the hole should go.

monogrammed shampoo bottle in the master bathroom

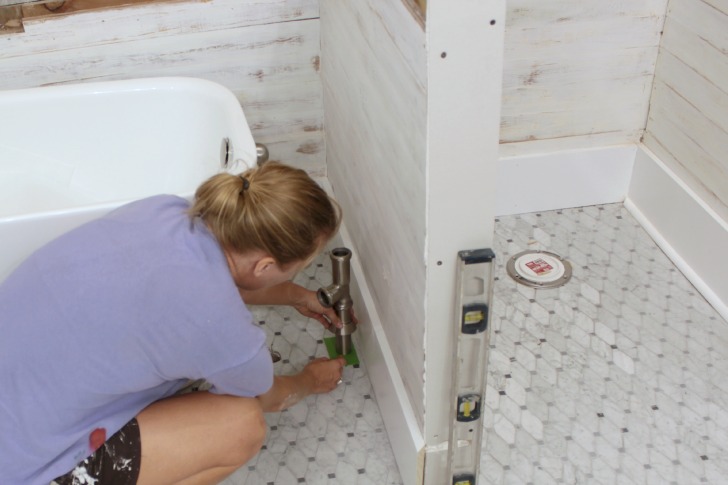
Then I used a chisel and a hammer to break away the tiles over where the new hole needed to go. I actually first tried to put tape over the tiles and wet them and use a hole saw, but the hole saw I have didn’t work on the tile and I didn’t want to buy a new one, so I went the chisel and break route. But there are hole saws made to cut tile, here’s an affiliate link to a bunch of good options.

tub drain hole in the master bathroom

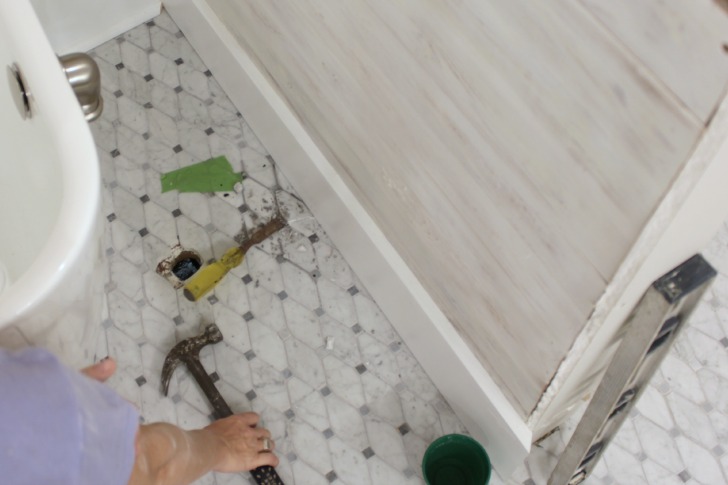
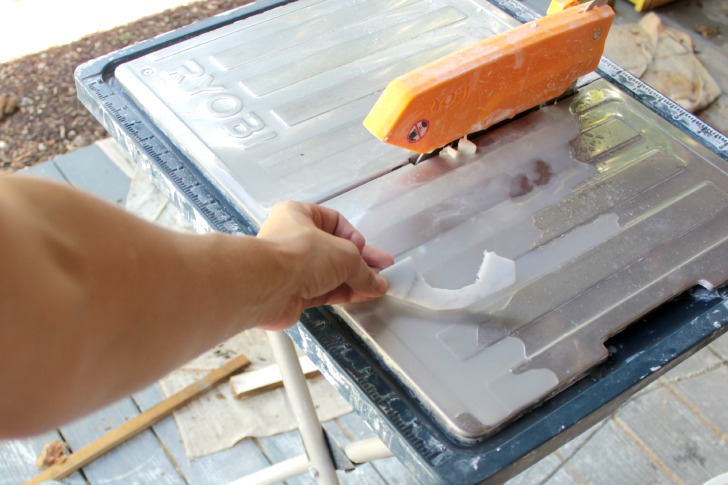
Once I broke through the tile the hole saw did work to drill through the 1/4″ cement board and the subfloor and then it was just a matter of cutting and placing a few new tiles around the new hole and grouting them. Remember, these cuts don’t have to be perfect because they will end up hidden under the flange around the drain pipe.

tub drain hole in the master bathroom

I wish I had more beautiful pictures for you but sometimes I like to share the little mishaps that happen along the way, too. Thankfully these did nothing more than slow down the progress of the bathroom renovation. I actually have yet to complete a project without at least one thing going wrong or not as planned.

Speaking of things not going as planned, our shower glass is still missing in action and even though our new window has been installed in what was the gaping hole in the bathroom (YAY!) the installers want to come back to seal around it so I can’t trim it out yet. Hence the lack of more pretty pictures.

But we’re down to the final details on this whole redo, and I’ve already started working on the bedroom and closet. Can’t wait to see what I mess up in there. πŸ˜‰

How about you, is there anything you tend to mess up over and over when you’re doing a project?

trough style sink faucets and a rain shower head and valve, you know, the bathroom bling

October 9, 2014

There were many aspects of this master bathroom renovation that were really up in the air until they actually happened. I’m not really the type to create a mood board and search for things that fit the design. I tend to roll with the punches and make decisions as it all unfolds.

But I just knew from the get go that we wanted a rain shower head and “fancy” vessel sink faucets.

trough style vessel sink faucets

We installed a rain shower in a previous bathroom and loved it. Many people like double shower heads or all kinds of fancy controls and water spray options but for some reason we don’t. I’ll be over here chillin’ in my tub with a glass of wine and lots of bubbles while you’re messing around with your fancy showers. πŸ™‚

vintage style tub faucet

More on the tub soon, it’s all installed y’all and it is awesome.

And one thing that I can’t stress enough is that a faucet install is seriously one of the easiest DIY upgrades you can make. We had to install all of our new plumbing, so that doesn’t really count, but if you’re working with an outdated bathroom and just want to bring in a little spark of new, a faucet is a great way to do it.

make a spa like diy wood vanity

Like all of the other aspects of this bathroom, I did all kinds of research locally and online (Remember how I decided to narrow down all of the choices in 3 simple steps?). Knowing the styles we were looking for helped narrow things down pretty quickly and I soon found and feel in love with a specific trough style faucet that had a matching cousin in the rain shower head on National Builder Supply.

So, I did what I do and reached out to them and said “Hey, hey, I totally have a crush on your faucets and I’m wondering if you’ll let me take them home with me?”

National Builder Supply is a great online resource for, wait for it, all kinds of great supplies you’ll need for a variety of building projects.

What I really loved about getting a matching set of sink and shower faucets is that the finish matches perfectly. Even though many items will have a “polished nickel” or “brushed nickel” finish they do vary slightly from brand to brand and although I didn’t think it was a big deal when it came to our lights or the tub (which is on the other side of the room) I really wanted these fixtures to match perfectly.

trough style vessel sink faucets

The faucet installation was a simple matter of doing what the easy to follow instructions told us to do. The hardest part was deciding exactly where I wanted it so I could do the nerve-racking task of drilling a hole in the top of our new vanity.

sink faucet installation

The water lines and a threaded rod poke through the hole under your vanity and with a wrench you just attach the plate that secures the faucet to your counter and attach your water supply lines to your new faucet.

sink faucet installation

It really is as simple as that. One big tip we learned along the way, especially since we had installed all new water lines, is to run water into a bucket through your new water lines for at least a minute before hooking them up to your new faucet. This gets rid of any sediment that may have settled in the lines and prevents that sediment from getting lodged into your new faucet.

The rain shower head and valve seemed a little bit more daunting to us because I chose a valve that could separately control the water pressure and the temperature. #WeBeFancy

Which basically just meant there were a lot more parts to work with. In other words, there just seemed like a lot more opportunity for error.

rain shower head and valve installation

Joel and I did this install together, for these kinds of tasks that seem a little over our heads at first I guess we just like to have the moral support of a partner in crime. Or it might be someone to blame if things go wrong. I’m not entirely sure.

And luckily the instructions given were clear and thorough and got us through each little step without fail.

One other big plumbing tip we’ve learned along the way is to use pipe thread sealantΒ for any threaded plumbing connection. We always just used to use teflon tape, over-tightened the connections and crossed our fingers. Sometimes it worked, and then other times, well, you know.

Then we met this guy in the plumbing aisle.

plumbing-aisle-helper

Apparently if you stand in the plumbing aisle looking confused at all of the options while holding a shower valve long enough a nice plumber will decide to solve all of your problems. Seriously, this guy was great. More than great. And we didn’t even get his name. But our exchange lasted long enough that I thought, I totally need photo evidence or this little experience is just going to die in my memory.

So far this year the plumbing aisle has proven useful for working out and making friends. πŸ™‚

And his insistence that we use this pipe thread sealant hasn’t failed us as. I just dab a bit of it on right over the teflon tape for any threaded connections like the ones we had on the new shower valve.

installing a shower valve

Wrap the teflon tape as tight as possible around the threads in the same direction that you will then thread on the connection. Righty tighty, lefty loosy. πŸ™‚

installing a shower valve

And I just use my finger to spread the sealant evenly.

installing a shower valve

One half turn with a wrench after you’ve hand-tightened the threads as much as possible should do it.

installing a shower valve

With the new valve hooked up to our water supply lines we followed the instruction to let the water run for a minute to get any sediment out of the lines before installing the new valve controls.

installing a shower valve

And then it was just a matter of closely following the easy to follow instructions. Slowly. And one at a time. πŸ™‚

installing a shower valve

installing a shower valve

At this point I was so excited for that first shower I pretty much fell off the taking picture bandwagon. But we used the same teflon tape then sealant technique to attach the shower head arm to our water supply and the rain shower head to the arm. Don’t forget to slip on the flange before you screw everything together.

installing a shower valve

And if you need me, I have not left the new bathroom since this little project has been completed. Even though the shower glass hasn’t arrived, there apparently is a little missing glass incident so if you live in the Miami area and see any 1/2″ pieces of glass that look lost please send them my way. πŸ™‚

trough style vessel sink faucets

The fact that the shape of the rain shower head mimics the shape of the vanity lights I chose and that we installed it at about the exact same height as the lights is the kind of thing I would like to tell you I planned. So I am going to tell you that. Just know that is a lie. πŸ™‚

rain shower head

The exact fixtures that National Builder Supply sent me for the renovation (Huge thanks NBS!) are the Delta Cassidy Single Hole Bathroom Faucet and the Delta Cassidy Shower Faucet and valve. I think they are the frosting to the cake, or the peanut butter to the jelly or whatever food related combo you like best. The perfect amount of bling to compliment the more rustic elements in the room.

Now tell me, are you a rain shower head person or the fancy-multi-control-body-spraying-shower type?

And, just because its funny and I’m from Maine, you should check out the Flannel City Faceoff that Duluth has put together. Are you from an area famous for flannel, I am I think you should all vote for Portland, ME to win it all here!

And today I’m sharing 20+ Fall Decorating Ideas over at Remodelaholic.com, I found some great ideas to get us in the spirit of the season!

  • « Previous Page
  • 1
  • …
  • 14
  • 15
  • 16
  • 17
  • 18
  • …
  • 169
  • Next Page »

Copyright © 2025 · custom theme design by this bold girl · Built on the Genesis Framework 

  • pinterest
  • facebook
  • instagram
  • rss