This post may contain affiliate links which won’t change your price but will share some commission.
This post is part of a complete series explaining how to diy a shower pan from start to finish. Including the framing and prep work, installing the shower liner, building the pan, preslope, installing the drain and tile.
If you missed all of the preparation and planning steps, stop on over here first to get started.
Today we are specifically talking about how to DIY a shower pan preslope and whether or not you need one.
Now, in prep for this I may have watched every You Tube video and read every tutorial known to man on the topic of how to DIY a shower pan preslope. I even asked some questions on the Sakrete blog, spent an entire afternoon in Home Depot getting some tips and gathering my supplies … and I still messed it up twice.
Here are a couple of disclaimers
-
- For every person who said the preslope is the #1 most important step of a DIY shower pan someone told me I should start my placing my PVC liner right over my subfloor and skip the preslope step.
-
- For every person that said I needed to lay felt underlayment over my subfloor someone else looked at me like I was crazy when I asked if they used a felt underlayment.
-
- And in everything I found online the exact products they used were not listed (which was the cause of my initial demise) and when you go to the home improvement store and ask for “deck mud” or “shower pan mortar” you will be amazed at the number of differing suggestions you will receive.
-
- All-in-all, this is just what worked for me and the specific products I used. I know there are a bajillion ways to do this that could work. Don’t judge, but I DIYed a tile shower about 6 years ago without a preslope and with regular grout sealing we have had no issue. #KnockOnWood
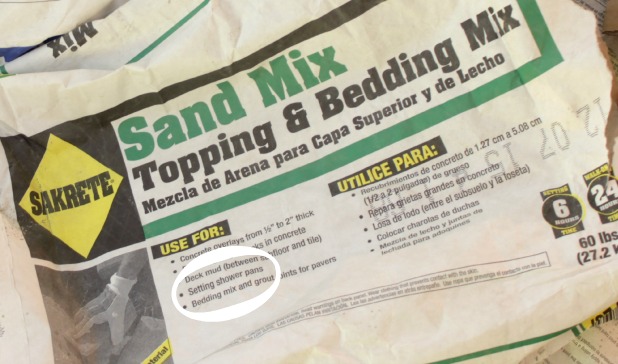
- MOST IMPORTANTLY: If you visit that Sakrete blog and read that the Sand Mix is made especially for shower pans and choose to not mix it with real mortar and have the same issues I had I reserve the right to say “I told you so”. I’m just sayin’. And I know it says it right on the package.
Save yourself the heartache, and the time, and the heavy drinking. And seriously, if you choose to skip the preslope all together I will not judge. I mean, the DIY Network instructions don’t even include a preslope … and they are a whole TV network … about DIY. Here’s a little diagram care of Oatey (the company who makes the PVC liner) that helps illustrate where we are going to end up.
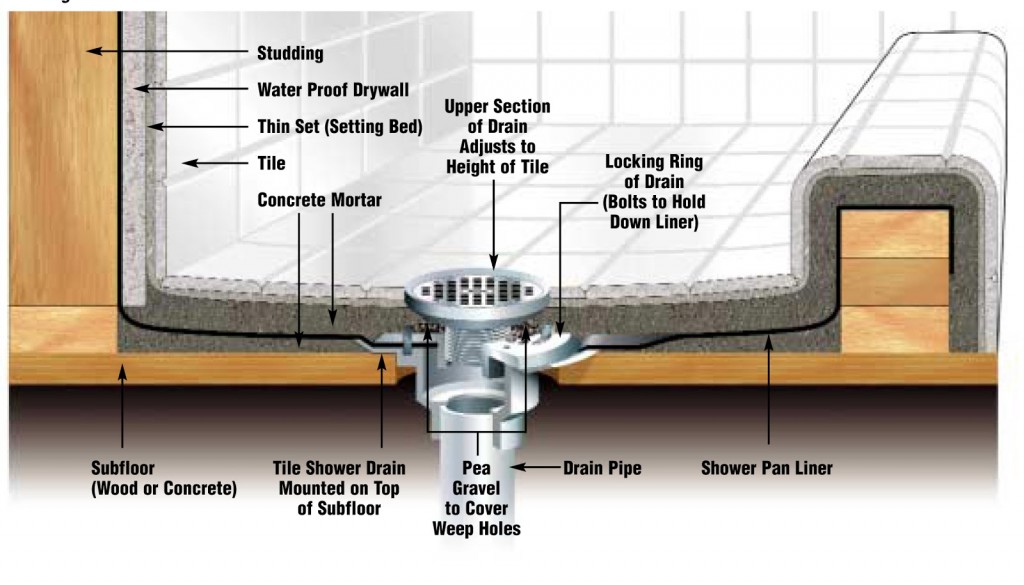 The purpose of the slope in a shower pan is to encourage all water toward the drain. Under the tile and thin set is a sloped mortar base that creates the slope for you to lay your tile. Under that slope is the PVC liner which is on top of your preslope. Seriously, if you’ve got water getting under all that tile and cement and PVC lining you’ve got bigger issues than a little preslope. 🙂
If you are going to start with a preslope, here is the how-to.
1. Start with a solid, clean and properly supported shower floor. And be sure to tackle all of the prep steps first.
2. Gather your supplies.
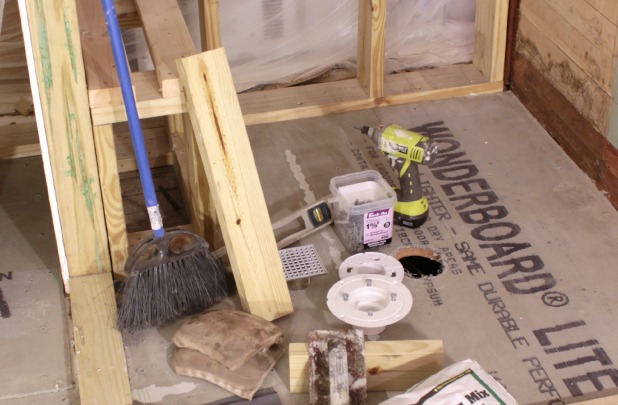
-
-
- two pieces of 2 x 4, one about 12″ long and one about 18″ long
-
- knee pads, we bought a cheap volleyball pair at Walmart a number of years ago and they still work great
-
- rubber gloves (not shown, but totally needed)
- an empty bucket (not shown, this will make sense in a minute)
- trowel with at least one flat edge
- everything else is just for show 🙂 … but this does show all three parts of the adjustable drain we used and the cement board screws
-
3. Mix 1 part Mortar to about 3 parts Sand Mix. This is where I failed miserably the first two attempts. Sand Mix alone did not work for me. I know the packaging says it will, and their blog says it does, and maybe I just mixed it too dry (which is why I tried it twice, to mix it wetter the second time) but it didn’t work. It didn’t work so much that it literally only took me about 5 minutes with my hammer to break it all up to get back to my subfloor. That photo is here.
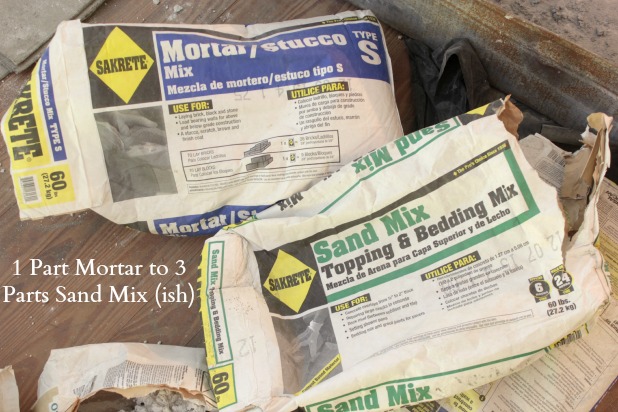 The plumber I consulted with over 20 years experience said it’s like mixing cake ingredients without a recipe. Knowing my skilz in the kitchen I knew I was doomed. But, it worked out. I liked using this rake thing to mix, so much easier than a shovel because it didn’t try to move all of the heavy mixture, but I would make sure to scoop up any dry mix from the bottom of the mix with a regular spade shovel, too.
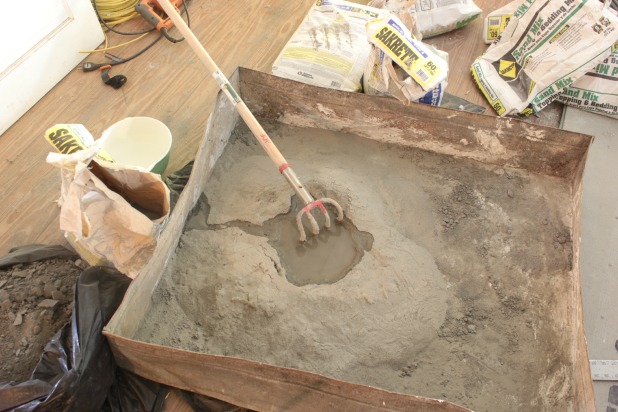
The packaging says to use about 5 1/2 quarts per bag, but knowing that I wanted my mixture to form a ball without crumbling in my hand I just winged the water thing. So many tutorials say to not add too much water and make it soupy, and that is right but the plumber said a more detrimental problem is not enough water because it won’t bind. It kind of looks like wet beach sand when it’s ready.
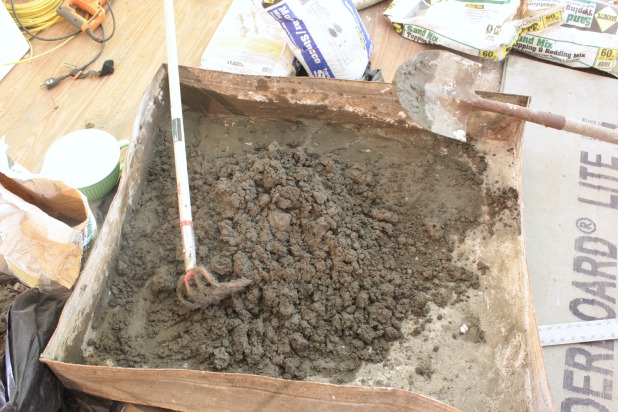
4. Shovel a few scoops of the mixture into the shower area and get to work. I used the shorter 2 x 4 and my hands most of the time to get the mixture into the right position and pack it tight.
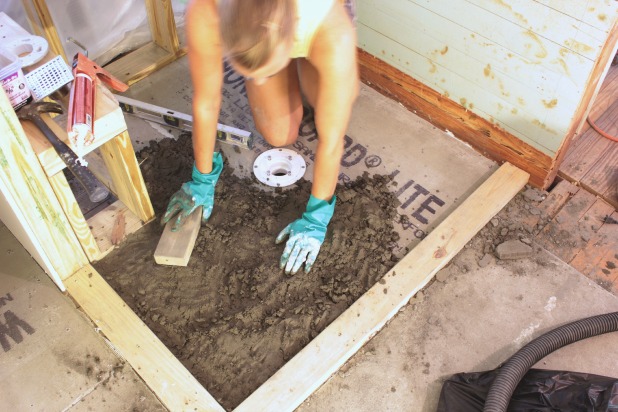
From this starting corner I just worked my way clockwise around the shower. I found it easiest to pack the outside edges (which will be the thickest because of the slope) by placing the 2 x 4 right up against the curb and hitting it a few times with a hammer.
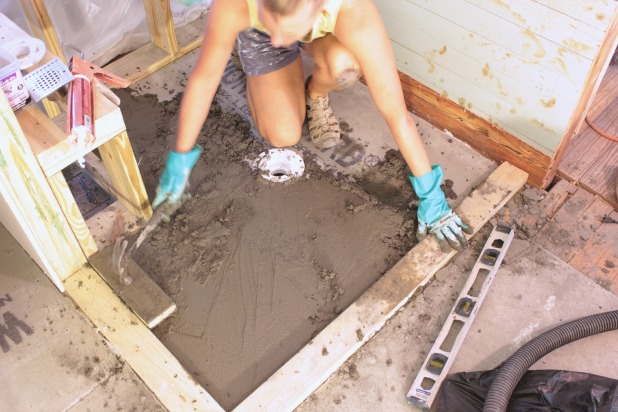
It took me a minute to remember to put those knee pads on, but I suggest just doing it first. 🙂
If you get to any areas that, when packed down tight, are dips in the preslope …
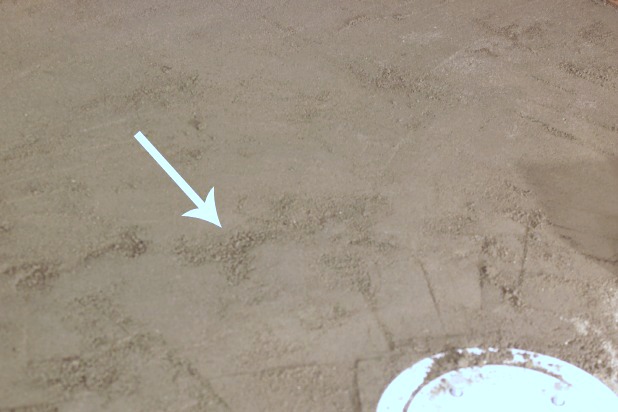
Just crumble some more mixture right over it and tap it in tight with the 2 x 4.
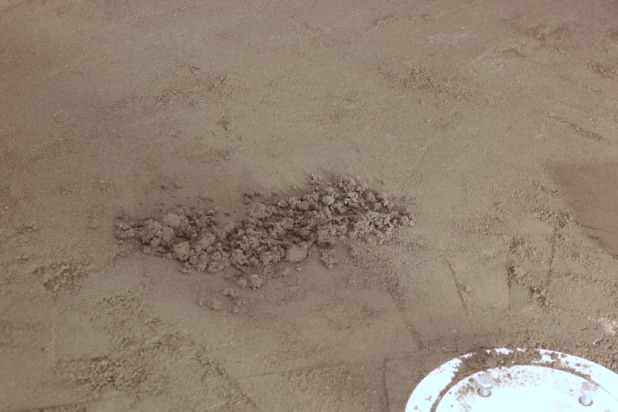
And you can see there that the idea is to bring the preslope down to match the height of the drain flange that you’ve installed.
Tip!!! Be sure to clear those bolts on that drain flange of any mortar mixture when you are done, screw and unscrew them a bit so you are sure they are still functioning properly and don’t get covered in mortar.
5. Check your slope as you go. If you have a corner where your 2 x 4 won’t fit, set it on your short 2 x 4 piece to check the slope.
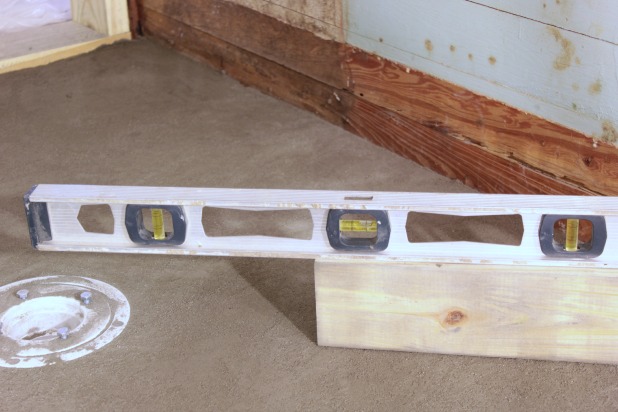
You’re goal is about a quarter bubble out of the center line … feel free to attempt perfection, I was happy with a varying scale really. 🙂
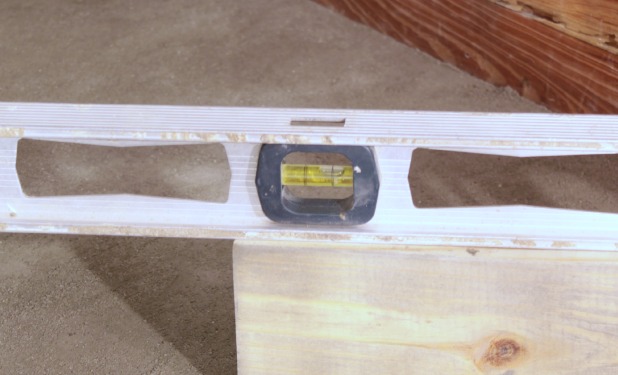
6. For areas that need to be shaved down a bit the 2 x 4 works surprisingly well. You don’t really want any peaks or valleys in this layer, as straight of a surface from point A to point B. And here is where the empty bucket comes in. If your large mixture bin is not within reach, as mine wasn’t, it was handy to have an empty bucket (I actually used an old rusty paint tray) to just dump excess mix.
Imagine I’m sitting on the bottom right of this picture and pulling the 2 x 4 toward me.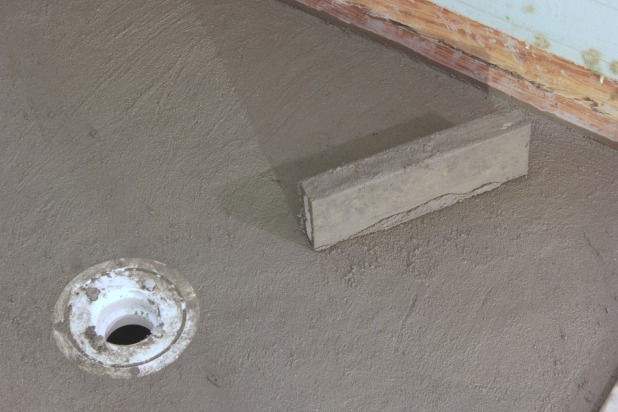 And then dumping the extra bits here.
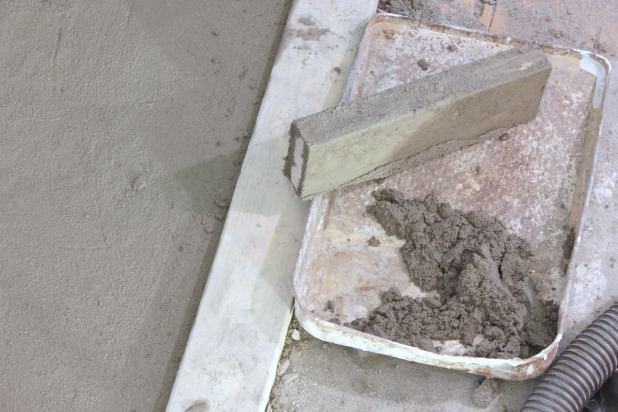
This whole process, from mixing the mortar and sand mix to the final tap of it in place in my shower took about an hour and half for our 16 square foot shower. And I used 1 1/2 bags of sand mix and 1/2 bag of mortar.
7. Let dry overnight.
8. This is totally an ad lib step. When I went to check on it about 17 hours after I completed it, so not fully cured but good and hard, I noticed the little specs of mix that had dried around some parts of the shower pan. So I took the flat edge of a metal trowel and just scraped it across the entire thing. Since it wasn’t cured I could even scrape out a few areas that weren’t exactly flat. Definitely not any major changes, but it felt nice to be able to smooth it out even more.
In this picture I’m scraping the trowel away from me.
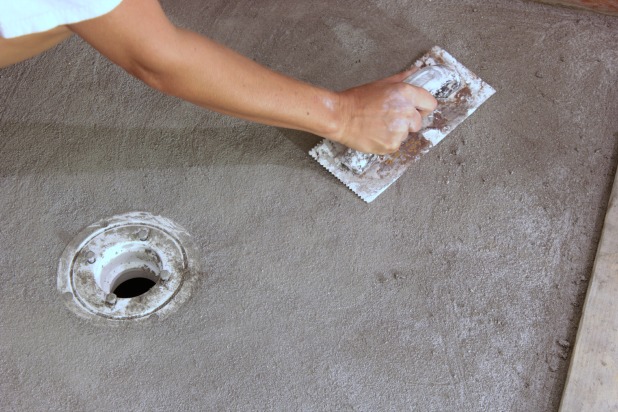
And then I used our shop vac to clean it up and I was thrilled to be officially done with this step a full week later than I had expected.
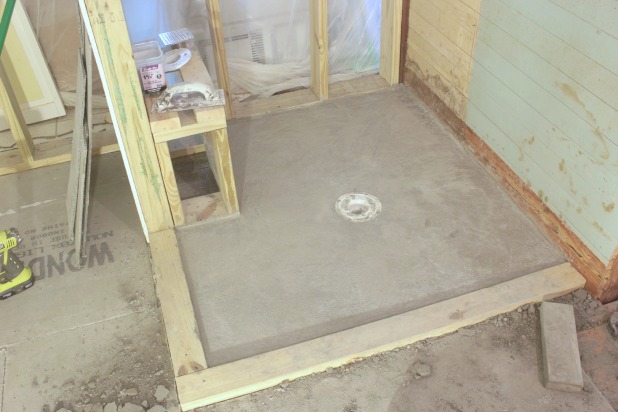
Next up comes the PVC liner and then the mortar base and we’ll be ready for the tile. Which is on schedule to arrive next week!
Update: The shower pan series is complete. Here are the other posts that might come in handy if you’re making your own shower pan.
- installing a PVC shower pan liner
- the final steps of the shower pan
- how to prepare your shower for tile
And we’re installing Carrera Marble Subway Tile in the shower with a matching long octagon tile (that I had never seen before and am totally in love with) on the floor, just click here to check it out.
I am soooo excited for that step. But we still need to:
- tape and mud the cement board seams on the floor
- install cement board around the shower walls
- rough in the plumbing (shower, tub, toilet and sinks)
- finish the greenboard and drywall on the rest of the walls
- finish framing in the new pocket door to the master bedroom, which needs to be done before we
- frame in the walls to the closet so we can
- lay cement board in there (and tape and mud that) because we are laying the same tile throughout the two spaces
Update – That bathroom is complete, check the rolling door (with windows!) we installed here, the DIY wood vanity and the reclaimed wood framed mirrors.
I know that’s just a partial list, but it’s all the brain can put together right now. 🙂 It’s hard to believe this all started about 2 month ago! We feel like progress is steady but things just take time. And we try hard to fit in a fair share of fun and not pressure ourselves to work on this old house project every second of down time we have. Lately that has meant me getting out of the house sometimes, just to get out … it’s hard to really relax when you’re sitting amid the madness.
Here’s the supplies list again so you can get started!
-
-
- two pieces of 2 x 4, one about 12″ long and one about 18″ long
-
- knee pads, we bought a cheap volleyball pair at Walmart a number of years ago and they still work great
-
- an empty bucket
-
this post contains affiliate links

Claire says
i am so excited to see this! I spent this weekend on a crash (and burn) course in tiling, just to fill in the little area under a built in vanity for a new freestanding one, and it took 4 trips to the hardware store! I totally relate. Also i remember reading on here that the mini crowbar was your best demolition tool, and i insisted on buying one in the face of much mockery from my husband. “No, Karah says its awesome, You’ll see” He bought it just to humor me, but then it turned out to be the best, most useful thing we had. Ha! Every time he said, “Can you pass me the mini crow bar?” I got to gloat little. Looking forward to seeing your renovation results.
Karah says
Hahahaha. Two cheers for the crow bar, sounds like you guys have a few projects on your hands and it always amazes me how often that is just the right tool. And there’s nothing wrong with a little gloating, either. 😉
Susan @ Uniquely Yours or Mine says
I’m always so impressed by what you tackle! I have a question though… did you ever consider a trough drain at one end of the shoer vs. A center drain? We will be updating our shower in the next year and I was in the trough drain train but wondered if there is a reason not to…
Karah says
Hi Susan! Thank you so much!! I am in love with trough drains but didn’t really consider it for our bath, not for any real reason other than I saw the square adjustable drain and liked it enough to get it. Unfortunately I can’t give any words of wisdom on installing one … other than I bet you could do it. 🙂
Eric Gaden says
Awesome stuff. I will be doing my own bathroom project soon and your information is very helpful. You broke it down better than most places I’ve seen. Thanks for the excellent writeup.
Karah says
Awesome! Best of luck with your project and don’t hesitate to reach out with any questions!! Thank you so much for the nice comment!
Ryan says
Karah,
Nice persistence on your shower pan. I’m about to tackle this and had one question. Like, I’m LITERALLY about to tackle this so if you don’t happen to read in the next hour….you can save your brain cells the workout…
I noted when you finally were successful with the pan, you actually went against conventional wisdom. You did that by increasing your cement to sand ratio rather than decreasing it. Normally one adds sand to a topping mix, not mortar.
Yet, you were successful (Congrats by the way!).
All I can think of as the source of your earlier problem was using cement board as flooring. Cement board is designed to wick away moisture, or rather provide the means for that moisture to escape. So when you packed your ‘regular mud’ mix, it was wicking out the moisture and preventing a good cure. When you added the mortar, you probably increased the water ratio, less wicking occured and you ended up with a successful result.
Did you place a water barrier between the cement board and your pre-slope? Plastic, tar paper.
I’d done a ton of masonry work, foundation work, footings etc. Never a shower pan, but I base this long winded exposition on my years of masonry. Let me know your thoughts when convenient. I do agree with you that there is an opinion for every perspective on this.
It is a bit maddening. Thanks for the site. Very well done. Ryan
Karah says
Hope your pan worked out well!!
Lauren Jones says
My husband and I have been using the shower downstairs for years because of a leak in our bathroom. We are now ready to install a new shower system in our bathroom and are in need of some help. It is good to know that one should start with a solid, clean, and properly supported shower floor. I understand that preparation would be very important with a project like this. We will be sure to keep this in mind as we start the shower installation process.
Kevin says
Did you leave the tobyfor I see in the picture on the floor or did you take them out. If you didn’t what is to stop them from rotting?
Karah says
Tobyfor?
Mike says
tobyfor = 2X4 (to by for)
I liked your tutorial, but am bewildered as to why the sand mix alone wouldn’t work??? I’m about to do mine with it.
Jeremy says
LOL…..It took me 3 times of reading that too. I believe he means 2 x 4 or two by four. I have to tell you, I’ve spent the same exhaustive amount of time researching and querying about methods and materials that you mentioned in the beginning, and your tutorial with clear explanation and pictures has got to be maybe one of thee best aides I’m personally referring back to.
Karah says
Ahhh, yes, you are probably right, Jeremy. And I’m so glad you found the tutorial helpful, hope your project worked out well!!
Karah says
So sorry for my delayed replied, how did you project turn out? We are glad we went with the preslope.