the space between

upcycle, repurpose and reinvent your space

  • about
  • aruba
  • key west
  • curacao
  • projects
  • house tours
  • privacy policy

creating curb appeal or “you’re decorating with exactly how many street side finds?”

April 17, 2014

Update:  Just a huge thanks to Better Homes and Garden for entering my porch in the Outdoor Decor category of their Summer Bash and an even huger (totally a word!) thanks to everyone who voted for us. We won!! Thank you all!

BHG Outdoor Decor winner

Consider yourself forewarned, I might just declare each newly finished, or even nearly finished, room “my new favorite space”. I think when you’re facing a full house renovation you have to celebrate the little successes. 🙂

creating curb appeal with some front porch decorating

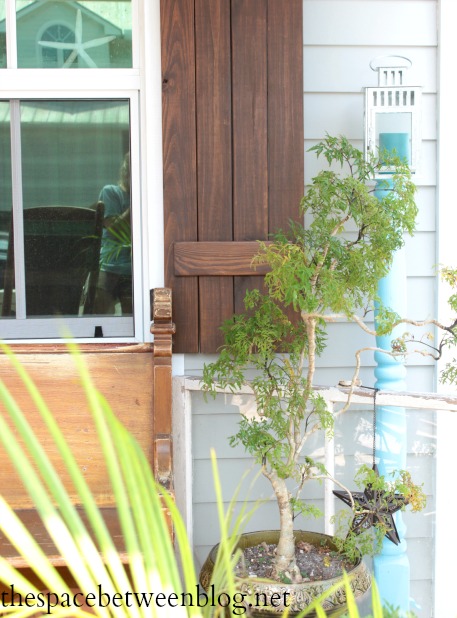
And clearly it doesn’t even have to be a room inside my house for it to qualify. To get the street side finds countdown started, I found that old window a few blocks away on an evening dog walk one day. It’s perfectly chippy and a nice filler for that bare corner without blocking the view to our newly painted hardiboard siding.

Even though there are still a few little things to tick off the front porch to-do list like patching the cracks and painting the new posts (they’re only primed right now), covering the concrete floor with wood decking (maybe eventually) and making some sort of house number (maybe with sea glass?) I decided to skip ahead to the decorating anyway to polish off the process of creating curb appeal.

creating curb appeal with some front porch decorating

The timing worked out perfectly for a little front porch piddling (as my mom would call it) since my mom was actually on her way for a visit. And you know you can’t visit us without being put to work. But rest assured I try hard to assign you projects I think you’ll like. So my mom and I arranged and rearranged furniture and shopped for accessories and plants. But that stump was picked up along the street shortly after we moved in, Joel texted me a picture of it one day after he saw it on his way to work saying “I saw this and thought you might want it”. Now that’s love. 🙂

And when Joel’s mom was here she picked the right pots and placement for the plants, the perfect little project for an avid gardener. You’re welcome moms!!

creating curb appeal with some front porch decorating

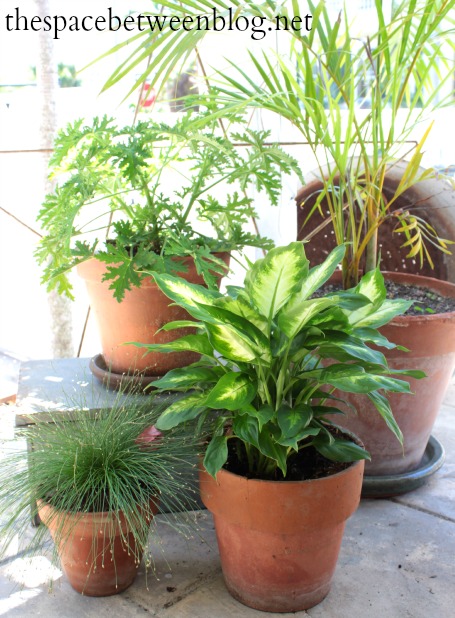
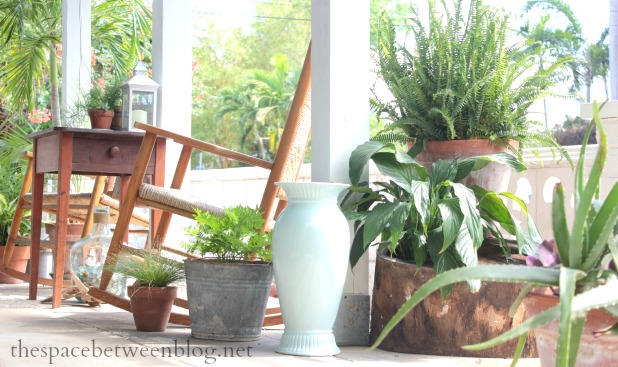
I found that metal star behind the plants a while back along a road in down town Key West and snagged that rusty old galvanized bucket in the background from my neighbor. She had drug it out of her crawl space so of course it was meant for my front porch decor. 🙂

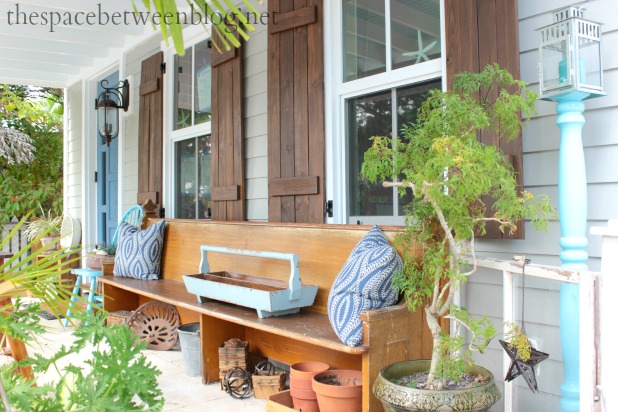
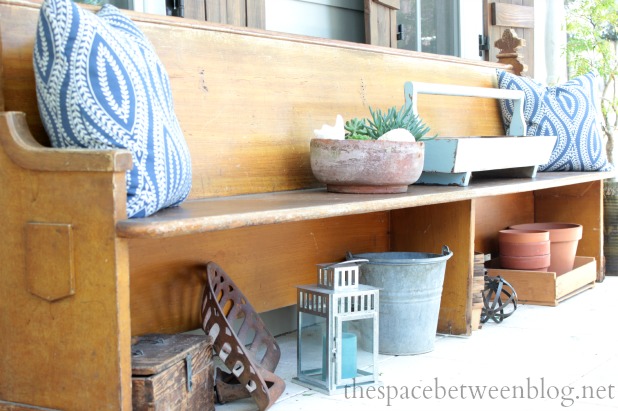
It was perfect to get a new set of eyes on the front porch because I seriously would have never thought to keep the church pew and the rocking chairs all on the porch together.

beadboard on the ceiling

My mom arranged the chairs to face the house and the church pew and it creates the perfect little sitting area. Seriously … I would have never thought.

The space doesn’t actually photograph well from far off since the bright sunny daylight and the shade of the porch is a hard contrast. But the wall that runs across the front of our property also serves to block a bit of the view from the street. Which I can’t say I mind at all. 🙂

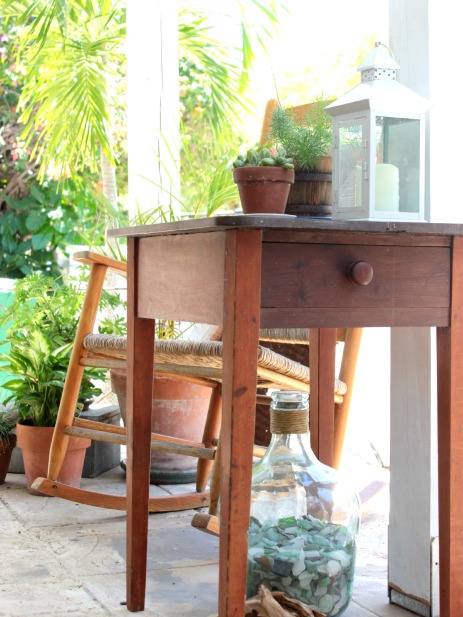
The rocking chairs also serve to add just a bit of separation from the street. And that large glass bottle that now holds our sea glass was a random Ross find, it was perfect since the tall glass vessel we had the sea glass in broke on the move here from Curacao.

creating curb appeal with some front porch decorating

Note to self: add some trim around the new, chunky patio posts to hide the brackets.

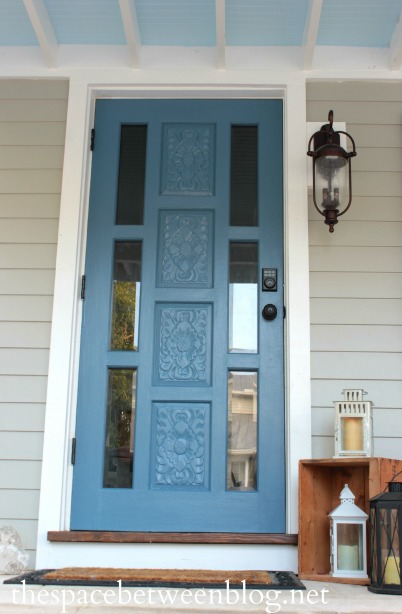
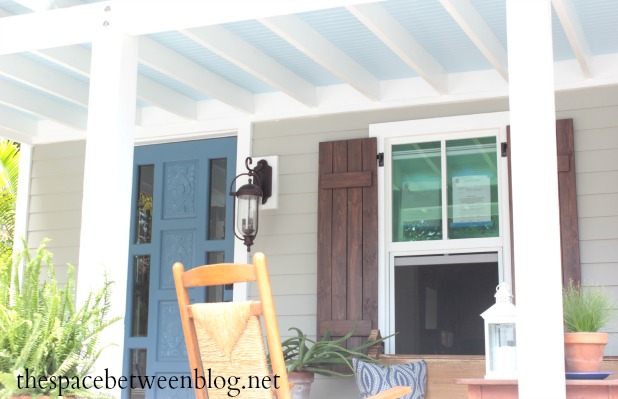
Even though I didn’t end up going with aqua for the front door color I wasn’t willing to give it up entirely.

creating curb appeal with some front porch decorating

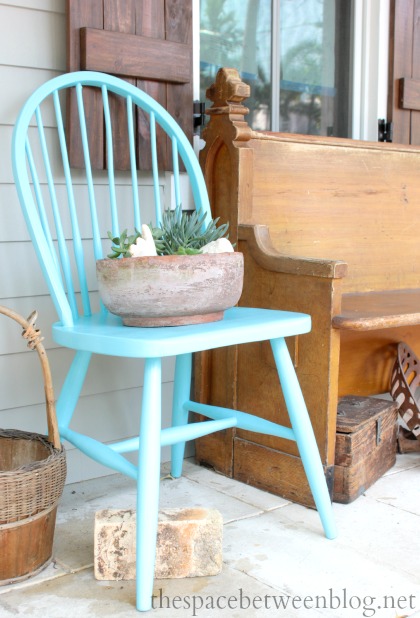
A few coats of spray paint on an old chair makes the perfect seat for my new little succulent garden with a few pieces of white coral mixed in. And that basket to the left of the chair, yep, street find … and that brick was washed up on a beach in Curacao.

I also spray painted part of one of the old patio posts the same aqua color, I used this one (affiliate link), and it makes the perfect pedestal for a new lantern I found on clearance at IKEA when we were in Tampa. It was marked down to $6 because the box it was in was damaged. Reason #289 to never skip a quick walk through the clearance section in any store, you just never know.

creating curb appeal

Under the church pew was the perfect spot for Joel’s grandfather’s old tool box and a rusty tractor seat that came from my grandfather’s farm. I found the blue pillows on the church pew at Ross and they almost perfectly match the new front door color. My mom and I also picked out some fabric so as soon as the pillow making fairy gets here they’ll be added to the mix.

Who can sew and wants to visit? There are a few days available. 😉

front porch decorating April 2014

And for no other reason than I wanted to put this enamel bowl that was left in this house when we bought it somewhere a few more plants and an old crate found a home to the left of the front door.

creating curb appeal

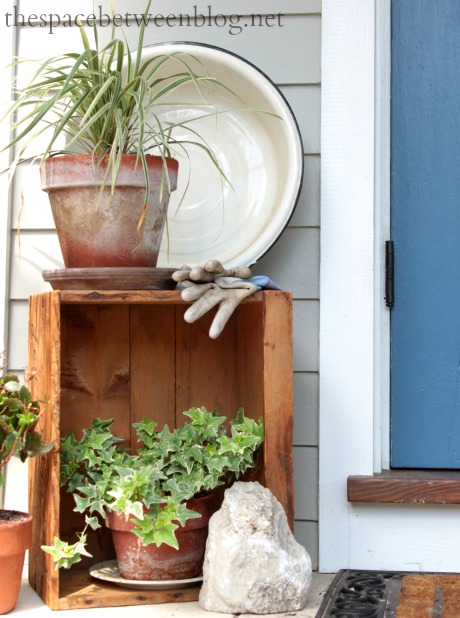
Those gardening gloves are my mother-in-law’s, she accidentally left them there, but they make for pretty pictures so we’ll just keep them there ready for use on your next visit, Carole. 🙂

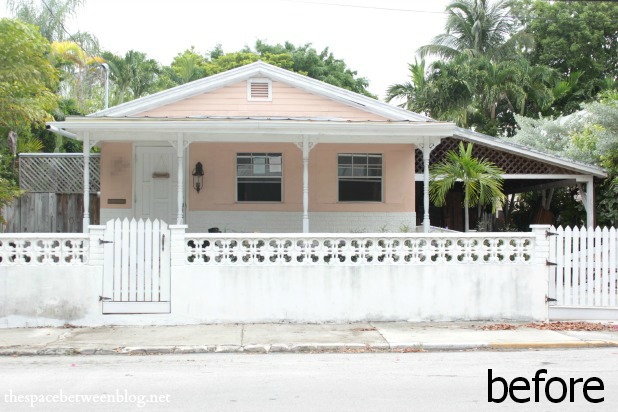
Overall I can’t even believe where we started.

creating curb appeal

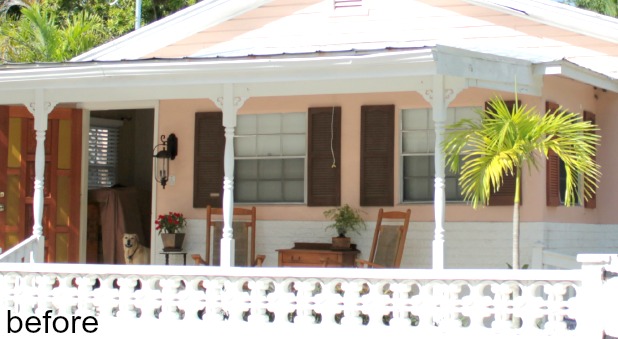
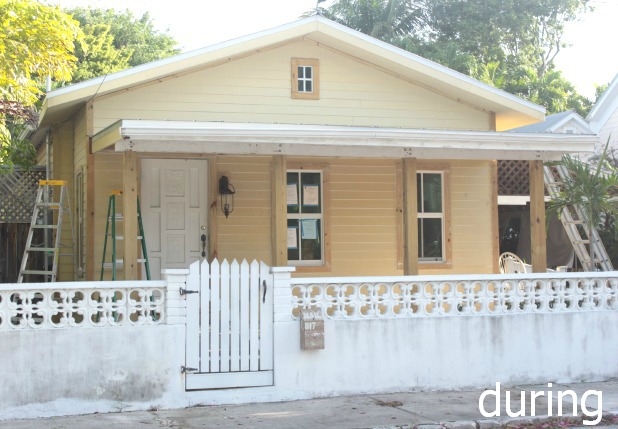
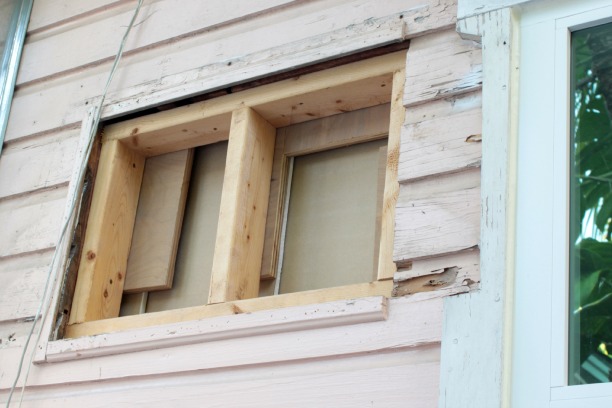
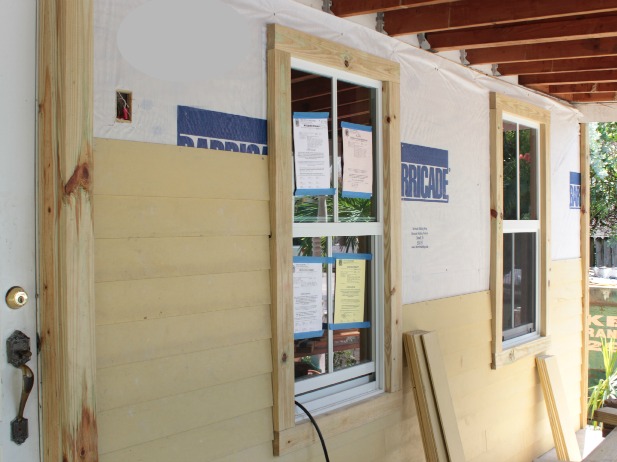
The new window sizes alone makes such a huge difference. Or maybe it’s that we had to get rid of the old faux brick to enlarge the windows. Hmmmm …

front-porch-feb-2014-during

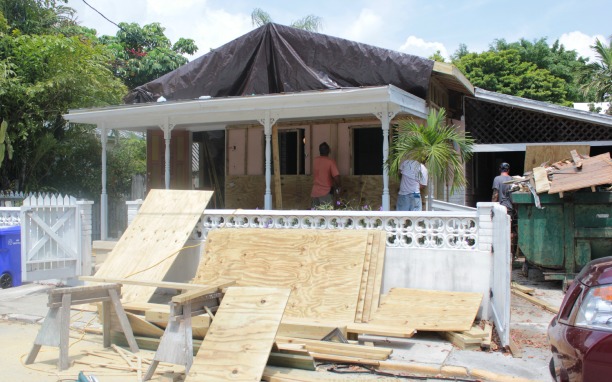
With a few random rain storms that have been coming through my progress on finishing up the caulk all around the new siding and trim has been slow, but we’re getting there. All of our family and visitors are gone so that actually freed me up to work on a fun little project for the back part of the guest bedroom. I posted all about it on Instagram.

creating curb appeal

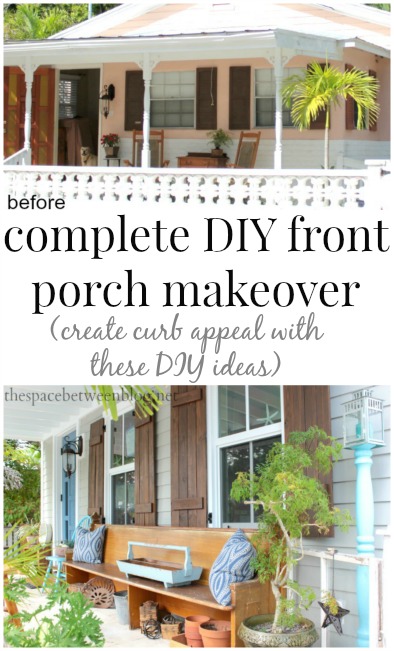
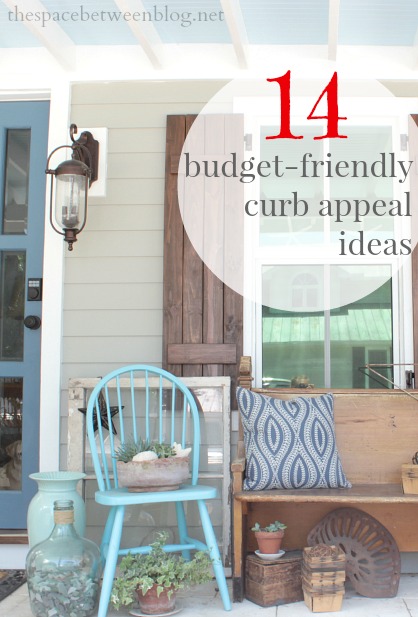
See how many updates we’ve tackled and what a difference in the whole look of the front of our house it has made by checking out the 14 curb appeal ideas I first posted about right when we moved in.

14 curb appeal ideas

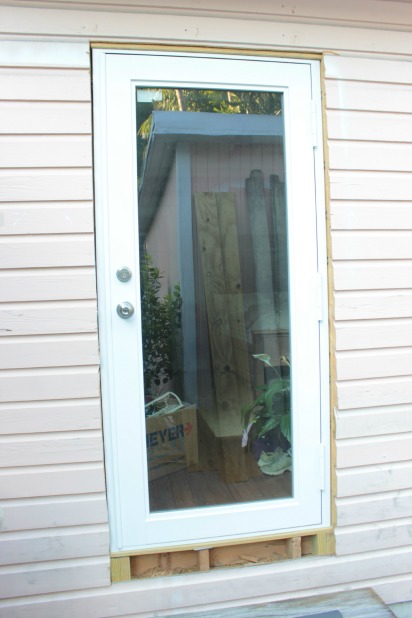
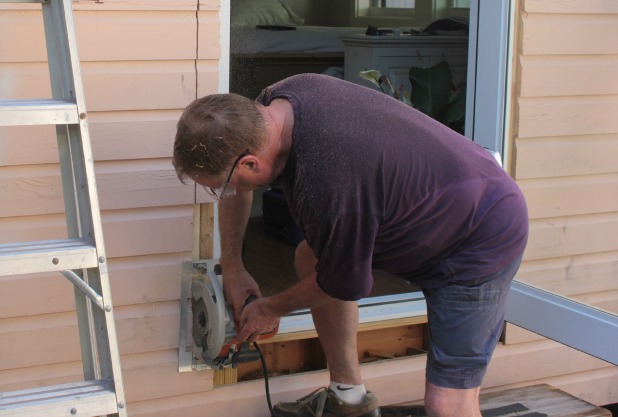
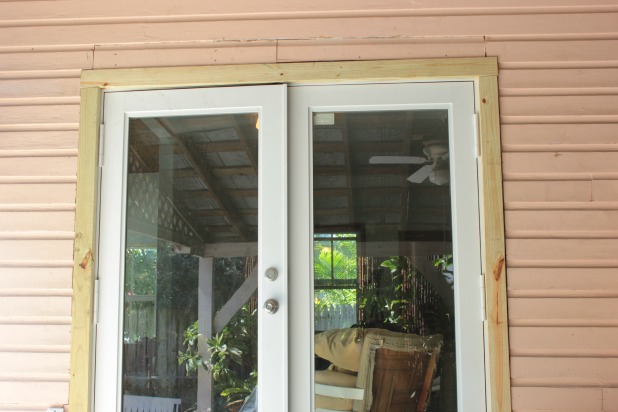
If you’re looking for more of the how-tos you can check out how we got rid of the faux brick, about the hardiboard siding installation, how the new windows went in (and more here), about the new exterior trim installation, the day we discovered the porch roof wasn’t attached to the house, replacing the old posts with chunky patio posts, caulking, painting, learning how to use a paint sprayer, adding glass door panels to the front door, picking a front door color with some Key West inspiration, installing beadboard on the ceiling and why I am in love with our new keyless entry system.

********************************************

book-button-sidebar

preparing to repaint the house with many little exterior updates courtesy of my dad

April 8, 2014

With a whole house that pretty much has something screaming at me to update it in every single room sometimes I find it really hard to stay focused on just one project at a time. Especially when that one project involves day after day of me and tubes of caulk. I am slowly (very, very slowly) making my way through all of the new siding.

For now we’ve decided to focus our efforts on any project that helps us get closer to closing out the building permit we opened when we had our little roof raising Labor Day party weekend.

roof project progress

We have two full years until we have to close it out, but it’s giving us nice focus right now to just forge ahead and tick things off the list. In between family visits and playing tour guide that is. We’re in the middle of a “we have company visiting 21 of 27 days” stint right now so progress is on the slower side. But fun with the family is full speed ahead. 🙂

So, during my dad’s recent visit I tasked him with a number of nagging little things that I knew would be right up his alley and move us ever so slightly closer to a new exterior paint color. Otherwise known as the prep work that needs to happen before we’re even prepped and ready to prep and get ready for paint.

First, trim around the outside of the two new french doors.

exterior siding repair

Remember the two new doors we had installed when we upgraded all of the windows? They’ve been sitting trim-less (inside and out) ever since. The interior trim is prominently on the to-do list, we’ll get there, but the exterior trim was going to be a bit more complicated since the exterior siding needed to be cut to fit the trim. And the doors were installed flush with the interior walls, not necessarily flush with the exterior trim. You’re welcome, dad.

exterior siding repair

So my dad measured and cut and used handmade templates to fit the same pressure treated 2 x 4 trim we installed around the windows around each of the new doors. He had to rip out old window trim that was above where we installed the new double french door off of the living room and measured and cut to fit a couple of new pieces of siding. They were actually old pieces of siding that were cut out when the doors were installed.

exterior siding repair

The whole process was quite a puzzle and it was impressive to watch him work through it all. Something that would have taken me weeks (with probably a lot of wood leftover from cuts that didn’t work out) took him barely a day.

exterior siding repair

And of course the exterior siding isn’t level, which is pretty evident with our newly installed (level) double french door.

And let’s not worry about that not-fully-upholstered chair inside, we’re going on 10 or 11 years with that chair. Sigh.

Second, patch the siding where the AC used to be in the guest bedroom wall.

exterior siding repair

For some reason a previous owner decided to put a window AC unit right into the wall. Which could be equated to the fact the current home owners for some reason decided to fill said hole with a dog bed and a blanket.

guest bedroom before

Just keeping it classy around here. 😉  If you haven’t seen the full guest bedroom before, don’t miss out, see both drop ceilings, the orange shag carpet and all of the paneling here.

Thankfully the dog beds are long gone and I framed out the hole to patch it with drywall when we were updating the interior months ago.

drywalling the ceiling in the guest bedroom

But the exterior was left untouched until dad came to save the day. He used siding that had been cut out when we installed the doors and even custom cut a trim board piece to fit the weird cut out that is just another one of those quirky things we find around here everyday.

preparing to paint the house exterior

It doesn’t exactly look pretty now, but add it to the list of things that need scraping and cleaning and caulking to continue the prep process as we approach the delightful day when we finally get to repaint the exterior.

And third, fix my poorly executed new porch light placement.

I get quite a few comments in real life and on the blog about our new porch light.

beadboard on the ceiling

This was one of those little updates I kind of snuck in without a second thought. The light was among the things we moved down here and was one I bought on clearance at Lowe’s a number of years ago. I knew I loved it and just didn’t have a spot for it at the time, but knowing that we’re always in transition it was too good of a deal to pass up.

And here’s photo evidence I updated the light long ago, without a word.

key-west-house-exterior-old-roof-before

And when we started the exterior updates it was easy to decide where the light needed to be once we had the siding installed up close to the wiring.

window-trim-install-2
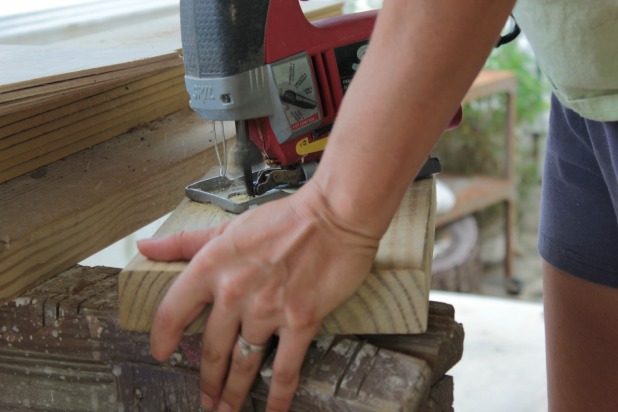
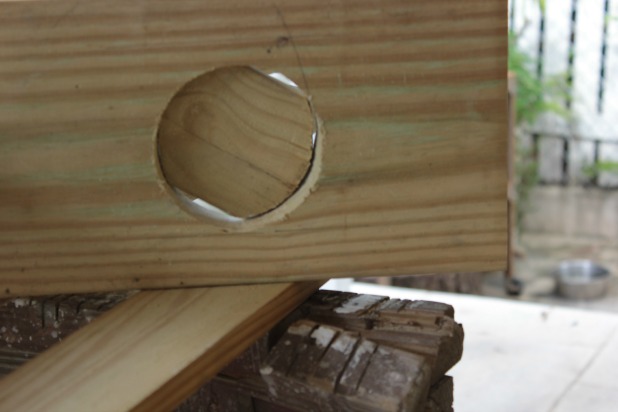
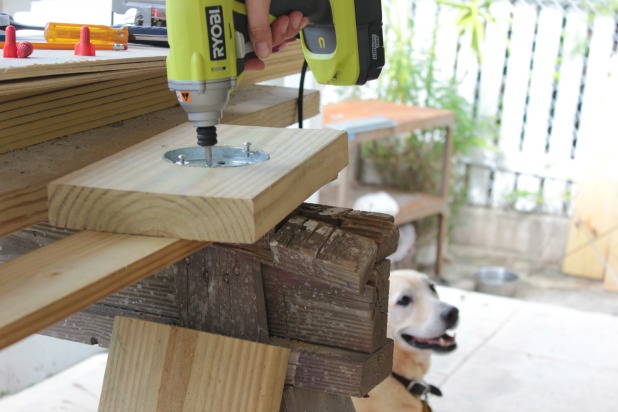
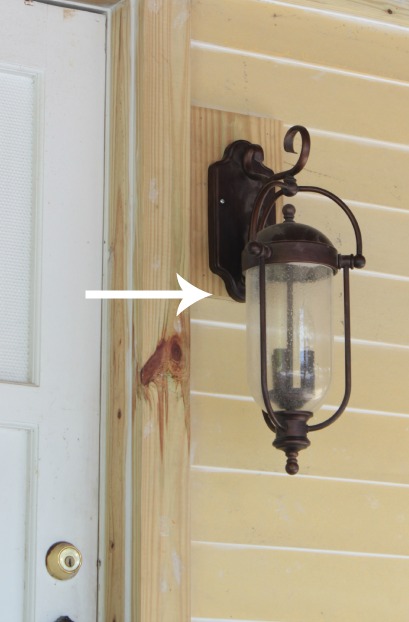
I just took a scrap piece of 2 x 8, so it is the same depth as the window and door trim and wide enough for a bit of it to peek out around the light fixture and bought a narrow electric box, that the contractor referred to as a pancake box, traced the pancake box in the center of the 2 x 8 and cut out the opening with our jig saw.

preparing to repaint the house

I cut a little 1 x 4 to wedge in the hole so the small pancake box could screw right into the 1 x 4 wedge and still sit flush with the front of the 2 x 8.

preparing to repaint the house

I even thought to cut off part of that 1 x 4 piece (you could just drill a hole but I had the jig saw right there so just cut off a section) so the wires for the light could be pulled through it and then through the opening in the back of the pancake box to connect to the light. I was feeling pretty good about myself at this point in the process from what I remember.

front-porch-light-update-3

I pulled the wires through and everything fit snug right above the last row of siding we had installed.

front-porch-light-update-4

We actually lived with just wire nutted wires for quite a while until the day we decided not having light on the porch was silly since we had the fixture just lying around.

And this happened.

front-porch-light-update-5

At this point I was not feeling like a master DIYer. Turns out you don’t just center the opening for the light fixture box in the center of the trim board, you have to see where the light fixture box lines up with the light fixture itself and cut the opening there.

See how the screws are higher than halfway up the light fixture?

front-porch-light-update-6

That, my friends, meant that the pancake box needed to be higher than half way up the trim board. But somehow, while I was on a trip to the Home Depot, my dad took the fixture down and recut the opening and reattached everything with the light in the perfect spot without even removing the trim board.

installing glass door panels from thespacebetweenblog.net

I tell ya, my dad’s got mad skills and was able to make these projects that were looming over my head seem like they were nothing.

So be forewarned, everyone is welcome to visit, but you never know what little to-do items you’re going to be tasked with while you’re here. 🙂

***********************************************

DIY Wood Pallet Projects Book Pre-order

  • « Previous Page
  • 1
  • …
  • 37
  • 38
  • 39
  • 40
  • 41
  • …
  • 169
  • Next Page »

Copyright © 2025 · custom theme design by this bold girl · Built on the Genesis Framework 

  • pinterest
  • facebook
  • instagram
  • rss