the space between

upcycle, repurpose and reinvent your space

  • about
  • aruba
  • key west
  • curacao
  • projects
  • house tours
  • privacy policy

upcycling idea – one of a kind picture frame {and for some reason some thoughts on religion}

August 25, 2014

It’s been a while since we’ve talked about a little upcycling idea around here so today we’re going to pause with the hard-core home improvement and I’m going to start with my first ever thought published on this blog about religion and that is that I don’t really know what I believe. (How’s that for covering a lot of topics in one opening sentence?)  🙂

If that religion confession makes you uncomfortable I don’t think there’s anything that I can really do about that.

upcycling idea - picture frame

I grew up going to Sunday School and church and I am confirmed in the Protestant church. But I don’t go to church as an adult, not to say that I never would. I guess I follow some sort of inner spiritualism that is just within me, and it has seemed to work for me through the years.

With that said, I’m also not offended by religion or talk of God or when others make proclamations of their own beliefs. To each her own.

And when I first heard the Dodge commercial narrated by Paul Harvey during the 2013 Super Bowl I pretty much stopped in my tracks and then had to watch the video on constant repeat for a few days.

[youtube=https://www.youtube.com/watch?v=sillEgUHGC4]

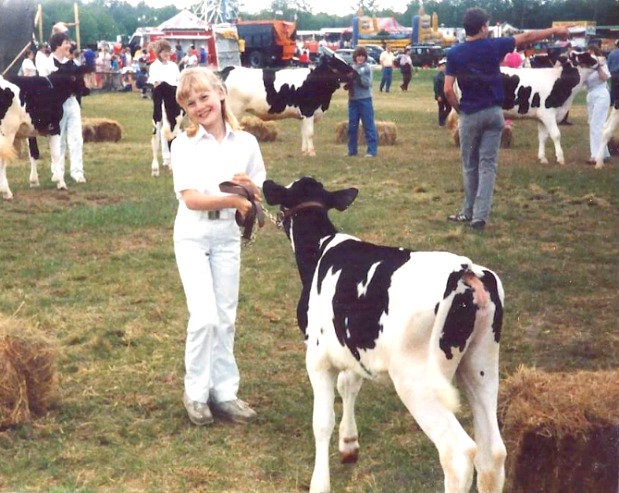
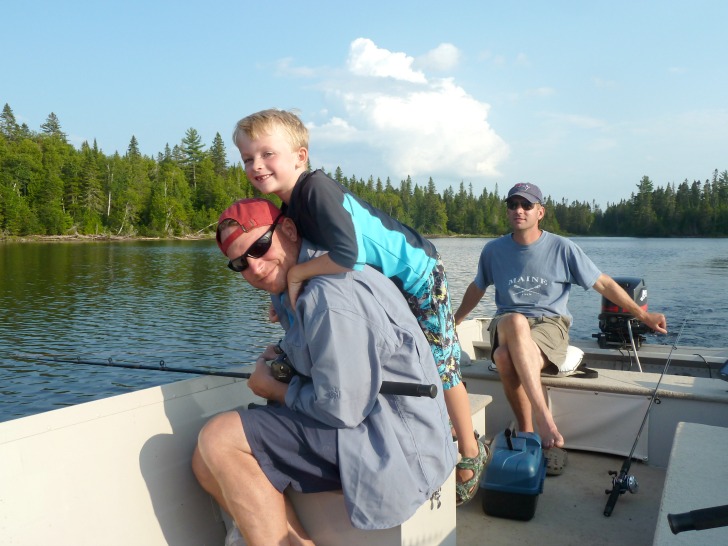
I grew up on a farm. We are a family of farmers. It was normal to have to feed the heifers after Christmas dinner. One year on my birthday we had to corral a bunch of cows that had somehow gotten out of the fenced field. My summer vacations were spent showing cows at our state and county fairs.

gorham-250th

And I know in my core the truth that the commercial speaks.

And still my brother chose to grow up to be a farmer. To study the business of it at Penn State and excel at it.

And during our vacation to Maine Joel and I became our nephew’s God parents. Which you might think is odd given my beliefs, or lack there of. But one thing I do know for sure is that we will always do right by my nephew. There is no sacrifice too great. There is no greater purpose than to aid in the upbringing of a kind, generous, contributing member of society. And gosh darn it we are fun. 🙂

upcycling idea - use old lattice and beadboard to make a one of a kind frame

And somehow my brother and sister-in-law believe in us to do this the best way we know how. So I wanted to kick it off on the right foot with a little baptism gift for the family. And what says “spiritual advisor” more than a picture frame made out of ratty old lattice straps and leftover beadboard?!?!

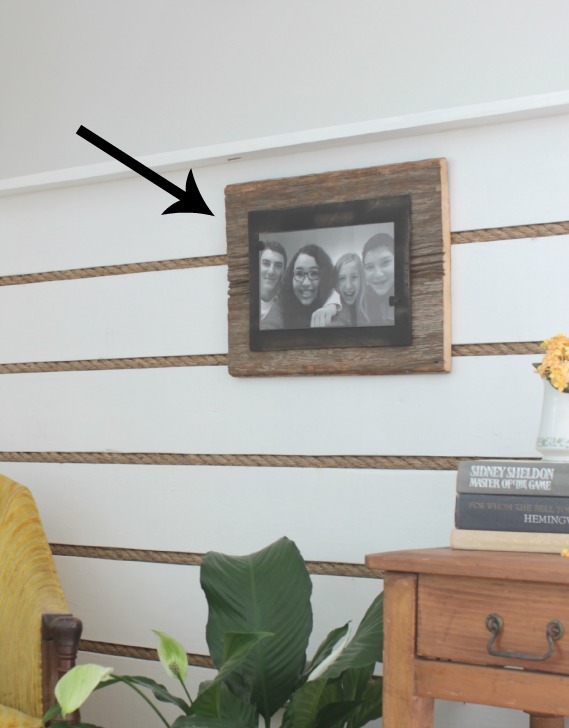
I was inspired by a frame we got for Christmas from one of Joel’s sisters, it’s made from old barn wood out of her in-laws farm, with a 1/4″ piece of plywood attached to the front as the “backing” for the picture and a piece of plexiglass held on by clips holding in the photo.

barnwood picture frame

But I didn’t have any barn wood on hand so here’s what I came up with.

upcycling idea - picture frame

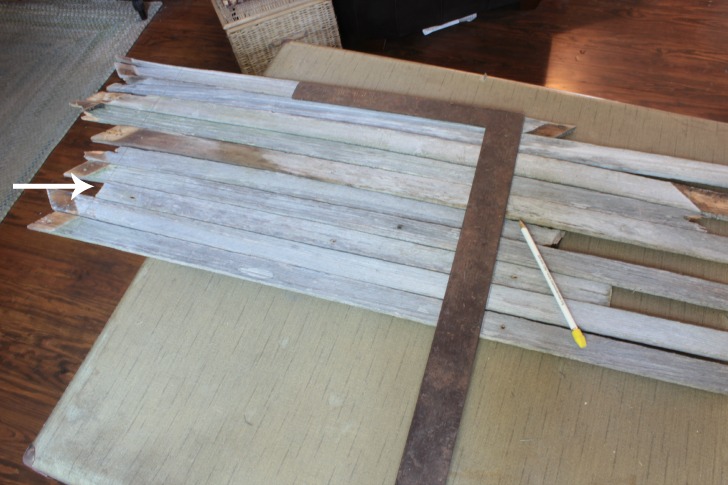
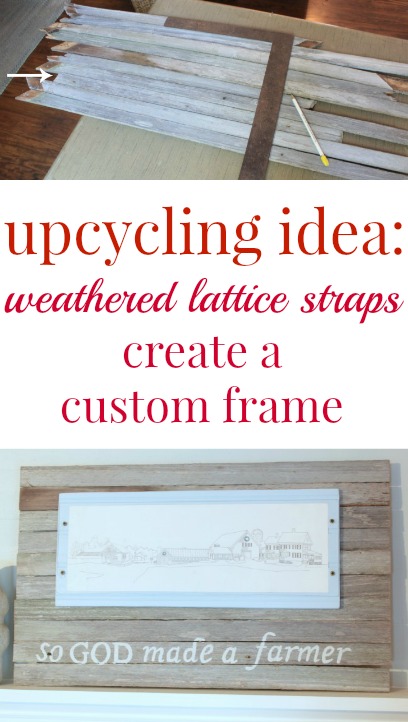
A few months ago, kind of on a whim, I used our sawzall to cut down some old lattice. And, in one of those moves that makes Joel shake his head I saved all of the pieces. Come on, it was the perfect shade of weathered wood. What’s a girl to do?

lattice-above-gate

So I picked the straighter pieces and just laid them out and used a square to mark where to cut them at each end to create a rectangle.

upcycling idea - use old lattice and beadboard to make a one of a kind frame

Measure the height of the slats as they lay beside each other and cut two 1 x 2s (or whatever scrap wood you have on hand) just shorter than the measurement, I used my miter box to make all of the cuts. I also painted mine with leftover paint from our front door paint project. Totally optional.

upcycling idea - picture frame

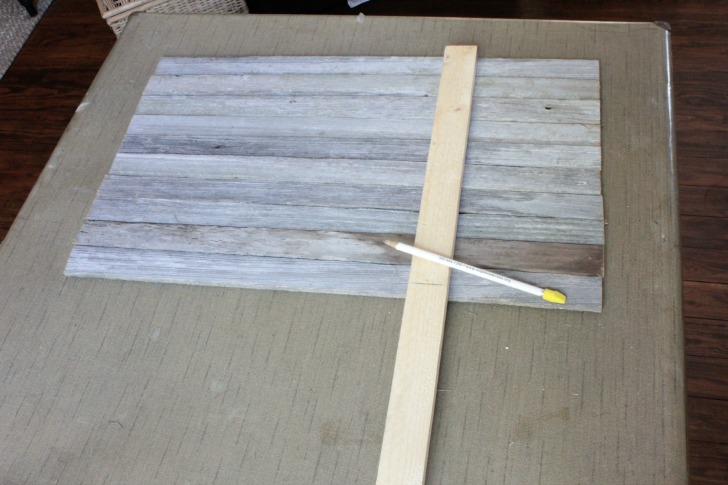
Lay the 1 x 2s vertically along the back of the lattice slats, run a bead of glue on the flat side of each 1 x 2 and apply pressure to it all until the glue cures. These old cinder blocks have come in quite handy since we moved in (remember this?). You could also nail it together with 5/8″ nails or staples if you wanted to, I didn’t.

upcycling idea - picture frame

Now you can really create anything. Trace any silhouette image on and cut it out with a jig saw, an anchor for a nautical theme room? Or paint a silhouette, or use this image transfer technique to create some word art.

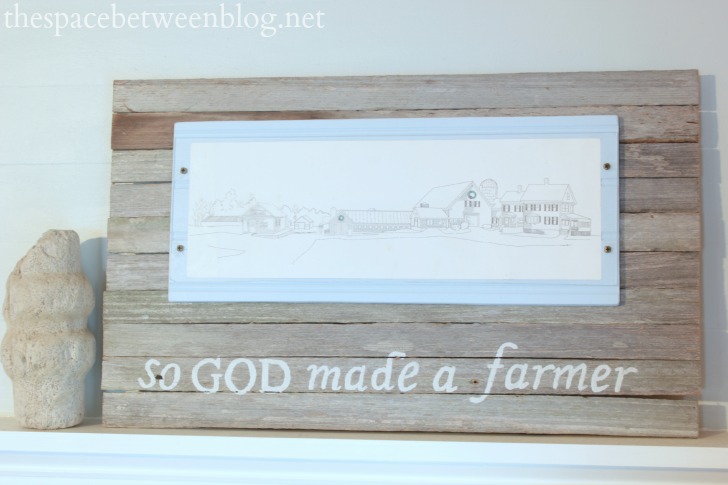
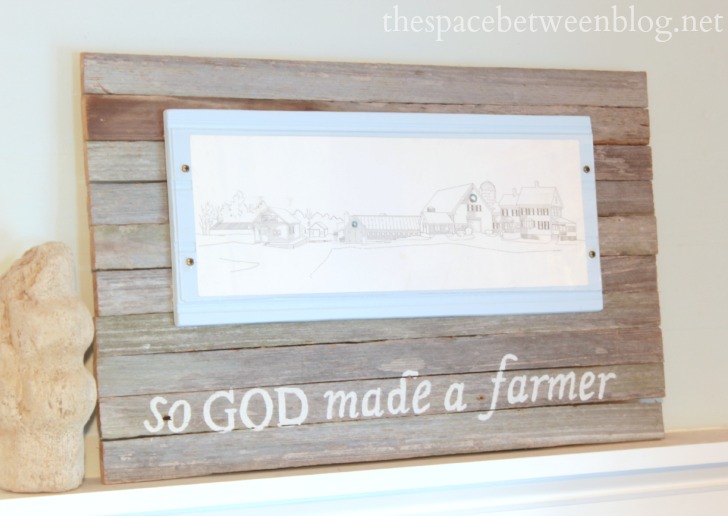
This time around I wanted a frame that would work for an old drawing of the farm where we grew up. So I used a leftover piece of the blue beadboard we installed on the underside of our porch ceiling and glued and clamped that onto the lattice.

upcycling idea - picture frame

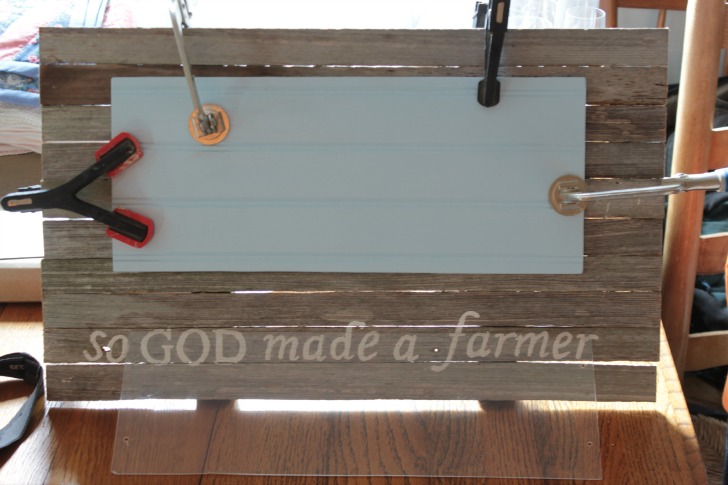
I used the same painting technique I used to make the reclaimed wood sign in our guest room for the lettering and cut a piece of plexiglass I found in our closet with all of our frames with a little circular saw with a blade with lots of tiny teeth. Technical terms here people, please try to keep up. 😉

Actually, this is the exact saw I used and this looks like the blade. (affiliate links)

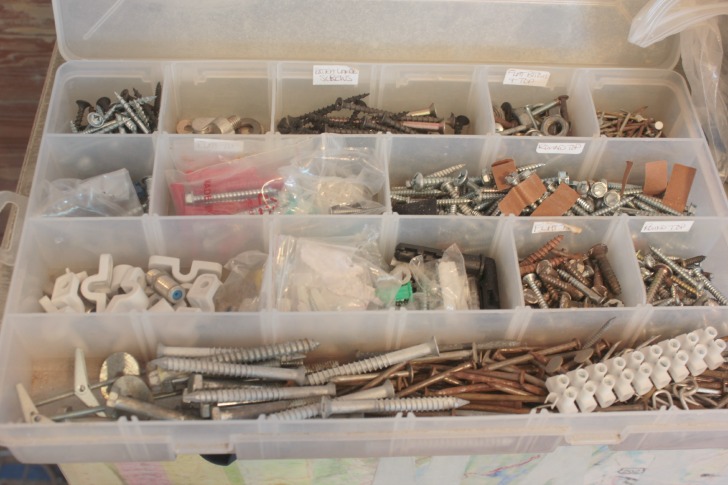
And a regular drill bit worked to drill 4 holes where I could then use some random old screws to attach it all together. Please tell me you have something that looks like this because you cannot throw away perfectly good screws.

old-screws

I think they liked it. Well, they said they did, but they do have a tendency to be polite … and they hung it above the fireplace so maybe they’re just thinking quick access when they need firewood this winter.


upcycling idea - picture frame

What about you, been upcycling anything these days?

installing a pvc shower liner

August 21, 2014

This post is part of a complete series explaining how to diy a shower pan from start to finish. Including the framing and prep work, installing the shower liner, building the pan, preslope, installing the drain and tile. You can also start with the preparation and planning post or with creating a preslope.

Alrighty, we’re back on track with the shower pan project. Which is a good thing because the tile is officially on the way. Which is exciting and nerve racking all at the same time. I don’t know why. The tile just seems like such a huge part of the final room it just feels like such a big step. We are so ready for it, but having it actually on the way reminds me of everything still on the to do list. So let’s get cracking.

Installing a pvc shower liner.

Now, you guys. I thought this step was going to be a breeze. I mean it’s a rectangle piece of plastic and I have a mostly square shower. Lay, wrap, nail, done. Right?

Not so fast.

how to install a pvc shower liner

This whole liner deal took me about 3 hours from start to finish, including time taken to snap extra photos and an afternoon snack break. Apparently this task also makes one hungry. 🙂  If you’re looking to learn how to DIY your entire shower pan you might want to start with the preparation and planning steps and then how to create a preslope (and if you even need one) if you haven’t already. With those steps under our belt its time to tackle the learning curve for how to install a pvc shower liner.

Determine how much liner you need.

Which proved a little tricky for me. #GoFigure  If you don’t have a bench, this is pretty straight forward. Just add about 1 foot to both the length and width of your shower pan. So if your shower pan is 3′ x 3′ buy a liner that is 4′ x 4′. If you have a bench you will want the liner to go up and over the bench and then up the wall again about 6 inches … so you do the math. 🙂  Our shower pan is about 4′ x 4′ with an 18″ high bench and I bought a liner that was 5′ x 7′, and it worked out.

Gather your supplies.

how to install a pvc shower liner

Some say to use an adhesive under your liner, some don’t. I took out a tub and bath adhesive that we had on hand, but didn’t end up using it. I figure a plastic liner sandwiched under tile, mortar, the cement shower pan and over another layer of cement might just stay in place. 🙂  Other than that here are some affiliate links to what you’ll need:

  • pvc liner
  • utility knife
  • hammer
  • roofing nails or another galvanized nail with a large head, you could probably use a stapler as well
  • pvc liner adhesive if you are going to need to make cuts, or these corner clips

Tip!!!  Don’t wear shoes while you do this step. Then you won’t unexpectedly step on anything and track it onto your new liner and inadvertently puncture it. (And I’ll apologize now for all the bare feet action visible in this post.)

Finish off your curb.

If you haven’t already, make sure your curb is at least two 2x4s high and add blocks in between your wall studs. I used a combination of 1 x 4s and 2 x 6s (just scraps we had on hand) to block in between the wall studs.

how to install a pvc shower pan liner

You may remember I had just installed one layer of 2 x 4’s for a curb, so I just nailed in 2 more right on top. How high you need your curb will depend on how large your shower is and how much a slope you’re going to be adding. Adding 4 1/2″ of curb for our 4′ x 4′ shower should leave us with about 1″ of curb when all is said and done because of the unevenness of our old floor. The depth of the shower pan adds up quick so I say err on the high side when it comes to the curb.

Lay out your liner.

Lay it over your preslope to see what you’re working with.

how to install a pvc shower pan liner

The rule of thumb is that you want the liner to come up each wall about 6″ and wrap all the way around your curb. Our local Home Depot only sold a 5′ wide liner so for our 4′ deep shower the liner comes up about 5″ at one and doesn’t wrap to the bottom of the outside of the curb.

I figure, if we’ve got water issues on the “outside” of our shower curb, those problems are bigger than the liner anyway. 🙂

Decide which corner to tackle first.

Can I just tell you, I read my fair share of useless tutorials on this topic. With tips ranging anywhere from “don’t ever cut the liner”, “just fold it like you’re wrapping a present” and  my favorite “tuck it in between the wall studs at the corner”.

Well, I challenge anyone who has exposed wall studs to check them out and see exactly how many of you have a perfect little gap in the corner to just tuck your pvc liner.

Oh well, this corner was my first victim and in an effort to poke and prod the thicker-than-it-seems liner into the teeny gap I did have I ended up with this.

how to install a pvc shower liner

Far from perfect, but remember you will be installing 1/2″ cement board on top so there’s a little added leeway in the corner for you. And I didn’t cut the liner, so there’s that little success.

Tip!!! Nail into the liner as high as possible, just to prevent puncture holes near the base.

Work your way around each corner.

I had to do something different for each corner. For a little play-by-play … this corner came out the worst I think, it was the “fold it like you’re wrapping a present” idea that I tried. Honestly, the folds create such a bulky look in hind sight I wish I’d just cut it and used the adhesive. But that’s just me.

how to install a pvc shower liner

I did use the utility knife to cut the corner so it would lay flat on and over the curb.

how to install a pvc shower liner

And here’s how far it comes over the curb. You can kind of see how bulky it is at the fold in this picture, too.

how to install a pvc shower liner

Tip!!!  Use those bare feet to hold the liner tight down on the preslope while you pull it taught up the wall and in the corners and nail it in.

how to install a pvc shower liner

The corner that just went up around the curb was my first use of the glue. I tried a different little “fold it like wrapping paper” technique and just didn’t like the bulkiness of it so I made the minimal amount of cuts I could to get it to lay flat.

installing a pvc shower liner

installing a pvc shower liner

And the glue turned out super easy to use. It comes with the applicator so I just followed the instructions on the can. Apply to both sides, let dry for one minute before adhering the two pieces together and then hold them tight for about 30 seconds. My fancy time keeping apparatus was my phone. 🙂

installing a pvc shower liner

installing a pvc shower liner

Tips for installing the pvc liner around a shower bench.

The other tricky area where I needed to use the glue was on the side of the bench. The thought I kept in mind was to always overlap the pvc liner so the piece on the top was facing away from the source of the water. So I didn’t have the side panel of the liner come up over the piece on the top of the bench, I tucked it underneath. Going with the theory that if water somehow gets under the tile on the bench and trickles down the side it will go all the way to the slope of the pan and to the drain and not somehow sneak into the glued seam.

I started but cutting a weird shaped piece of the pvc liner so it would bend around the edges of the bench. The two hanging top flaps (marked with an x) got cut off after I took the picture, I was thinking they didn’t need to be cut off entirely. I was wrong.

installing a pvc shower liner

Then, just one edge at a time, I glued. The top was pretty easy to tuck under but the side inside the shower was the toughest. You can see the top is already done here as I’m gluing the side piece.

installing a pvc shower liner

Cut out the hole for the drain.

Just feel for the drain and with your utility knife cut an X over each bolt head and in the drain.

installing a pvc shower liner
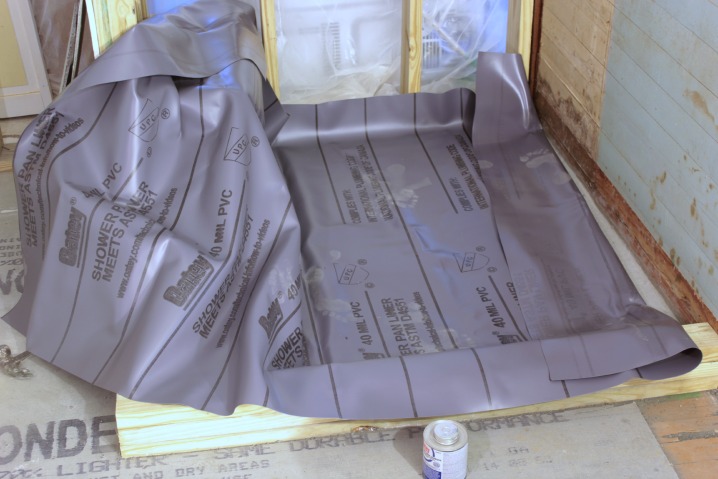
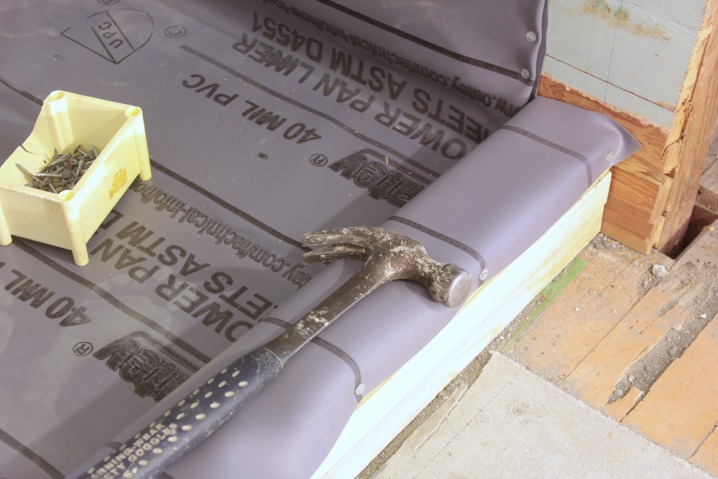
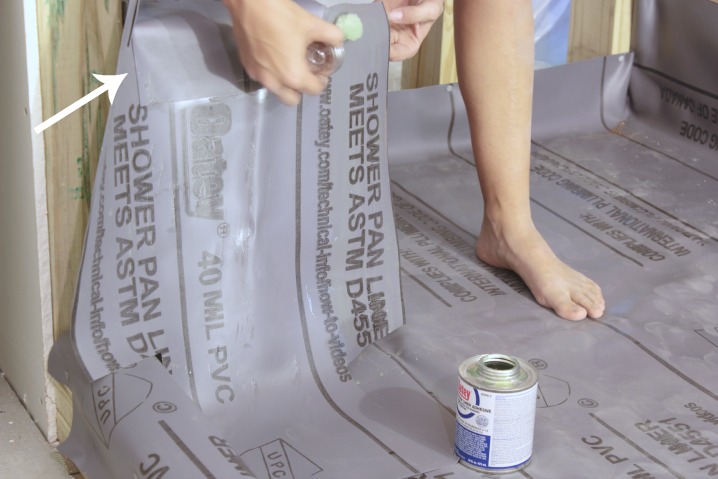
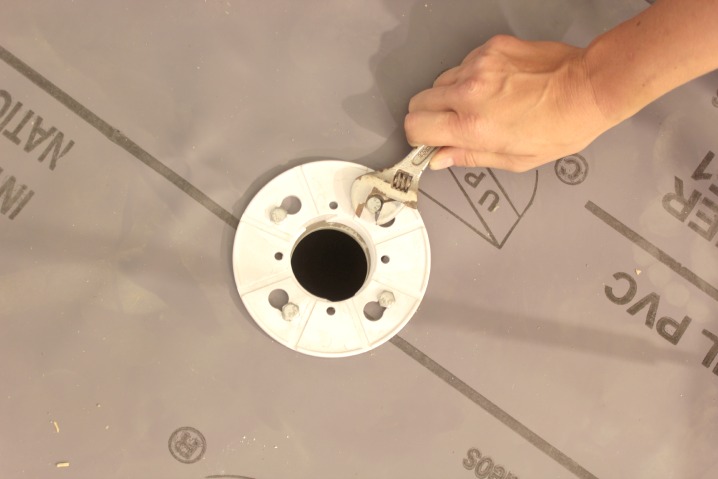
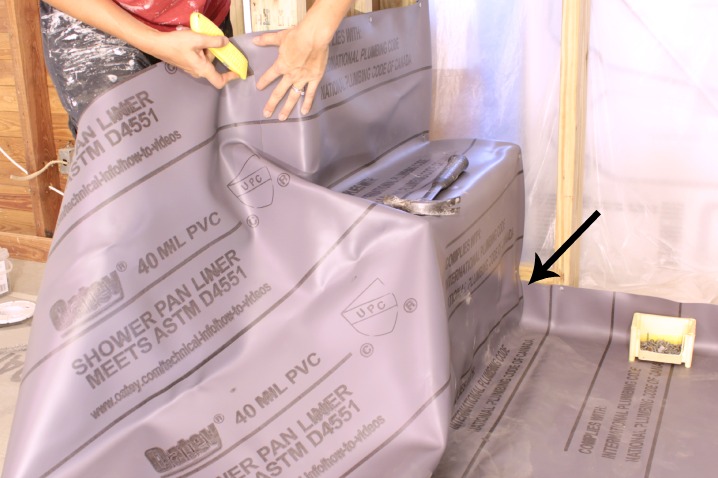
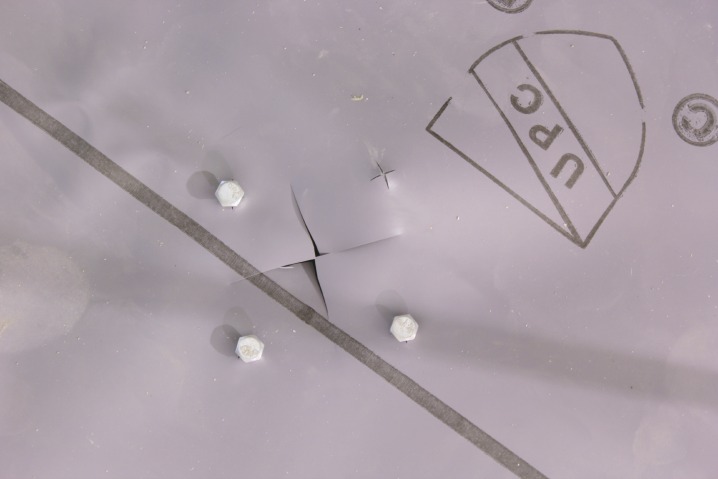
Then you can push the pvc shower liner right over the bolts and tighten them once you have added the second part of your adjustable drain. And then just finish cutting out the drain.

installing a pvc shower liner

Getting this step complete feels like such a success. If you have your drain pipes hooked up you could even check for water tightness now by filling your shower pan with water and letting it sit overnight. We don’t have our drain lines hooked up so we’re going with the theory that we trust the glue to work and I didn’t puncture the liner. 🙂

how to install a pvc shower liner

There’s only one more step in this shower pan ordeal and then we’ll be ready for some cement board and finishing up the drywall in the room.

Many of you have said you’ll be tackling your own shower pan project eventually. If you have any more specific questions just let me know. Some of the details are easy to overlook when typing it up. Like that back corner where the bench meets the back wall … I actually did that corner twice. I noticed after I took this picture that it was doing the bulky thing …

installing a pvc shower liner

So I removed that 2 x 6 I had added that is kind of hidden behind the arrow in the picture and tucked the liner in there and then added the 2 x 6 back. And this picture reminds me that it was quite a decision process to figure out where to cut around the bench and not totally ruin the liner. So yeah, just shout if you’re doing this, sometimes it helps just to talk it through.

Update:  The shower pan series is complete. Here are the other posts that might come in handy if you’re making your own shower pan.

  • the final steps of the shower pan
  • how to prepare your shower for tile

And to see what direction we’re headed with the tile just click here.

Here’s the supplies list again to get you started:

  • pvc liner
  • utility knife
  • hammer
  • roofing nails or another galvanized nail with a large head, you could probably use a stapler as well
  • pvc liner adhesive if you are going to need to make cuts, or these corner clips
  • « Previous Page
  • 1
  • …
  • 22
  • 23
  • 24
  • 25
  • 26
  • …
  • 169
  • Next Page »

Copyright © 2025 · custom theme design by this bold girl · Built on the Genesis Framework 

  • pinterest
  • facebook
  • instagram
  • rss