the space between

upcycle, repurpose and reinvent your space

  • about
  • aruba
  • key west
  • curacao
  • projects
  • house tours
  • privacy policy

Carrara Bianco Honed Long Octagon Bardiglio Gray Dot Mosaic Marble Tile

September 10, 2014

That’s it. The full name of the master bathroom floor tile in all its glory. And you guys are crushing on it as much as I am. I’ve discussed the tile decision here and little more here. And it wasn’t until I saw this tile that I finally decided to succumb to my marble tile desire. I had never seen anything like it before and honestly I’m not the biggest fan of the octagon shaped tiles with the black dots that I see around a lot. So my instant attraction to this shape, the long octagon, with the gray dot instead of the black dot, came as a bit of a surprise.

And you know we’ve laid the floor tile, right? So which way did we end up going? Many of you weighed in on the discussion both here, on Facebook (And did you happen to see all of the Dolphins paraphernalia that was left for us as a prank here?) and on Instagram. And the winner is …

long octagon gray dot marble tile

We just couldn’t talk ourselves out of it. I read every opinion and really considered every option … even trying the diagonal. Ummmm, no. 🙂

long octagon gray dot marble tile

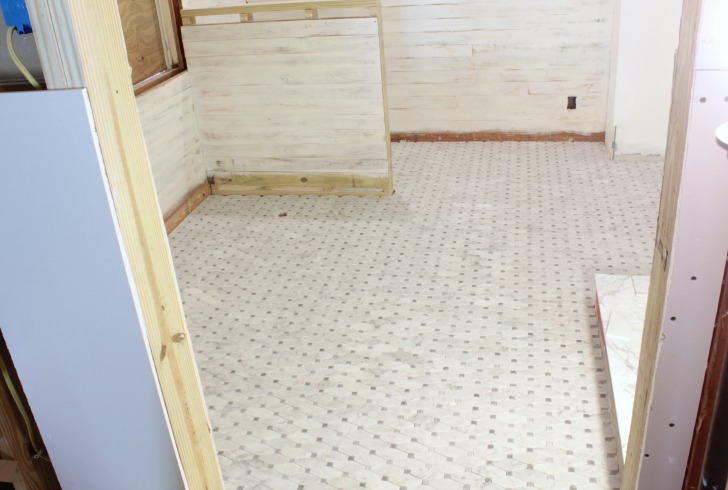
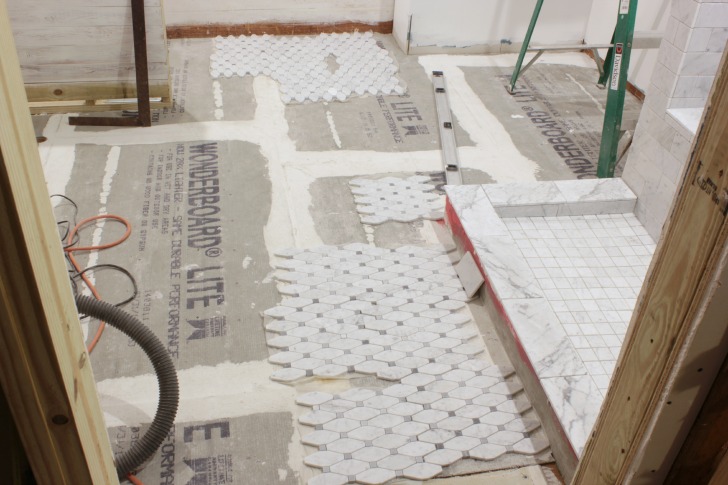
We ended up laying out a lot more tile and tried it in two different areas of the bathroom, not only along the shower curb but also along the back wall. Because where the tile is laid perpendicular to the shower it runs parallel to the back wall and vice versa. So here’s what we stared at for a while.

long octagon gray dot marble tile

long octagon gray dot marble tile

Some of you commented that you had received professional advice that a tile should run so that leads you into a room. And then there was also the comment that the professionals say that a tile should run right to left as you enter the room.

long octagon gray dot marble tile

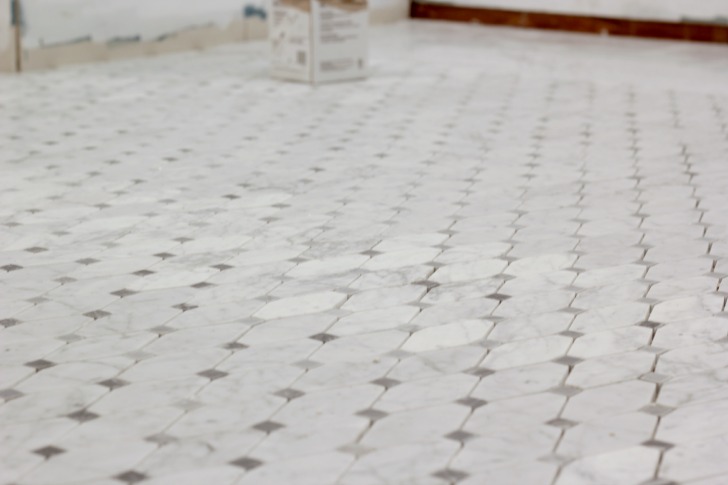
And we considered back and forth until we just decided to go with our gut, which was also suggested by a number of you. For some reason we feel you can really see the tile better run this way.

long octagon gray dot marble tile

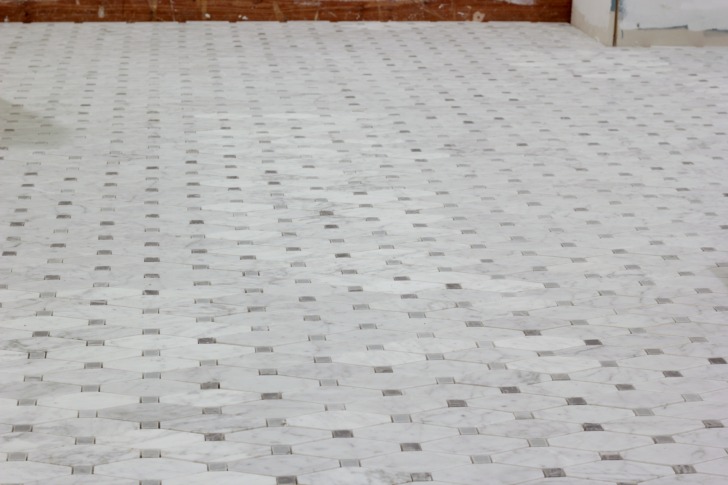
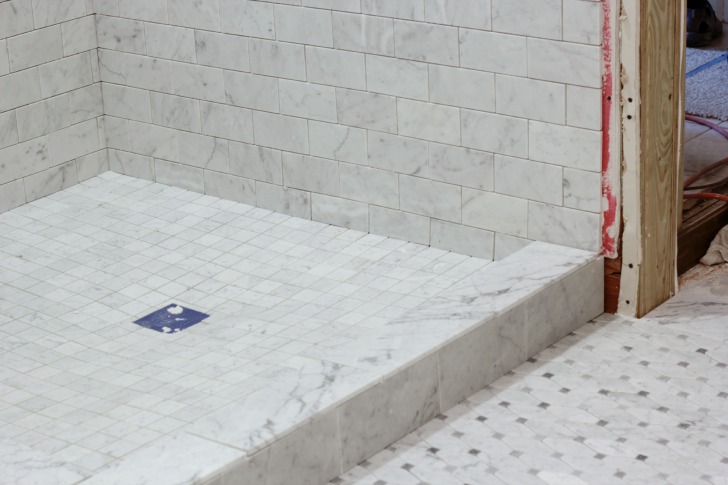
And now that its down, we love it even more! I love that it’s not all white and that the mosaic nature of it really breaks up the white-ness of Carrara marble. I’ve been compiling my tiling tips and will get together a post for you of what we’ve learned along the way, and in the mean time I can be found standing in the bathroom doorway gazing at my new tile and dreaming of the day when it is all grouted and sealed. I am waiting a few days to seal everything before I grout it and seal it again because, as you can kind of see in the photos, some of the tiles are still gray from the moisture in the mortar. Since we broke up the tiling of the shower we learned that it takes 3-4 days for the tiles to get back to their original color … all the more time for me to stare and admire. 🙂

long octagon gray dot marble tile

Although, the day after all of the grouting is done will be a glorious one. And on that note I would like to apologize in advance to my lower back, knees, shoulders and every other body part that is about to explain to me (in both sharp and aching ways) exactly why people get paid big bucks to do this stuff for a living.

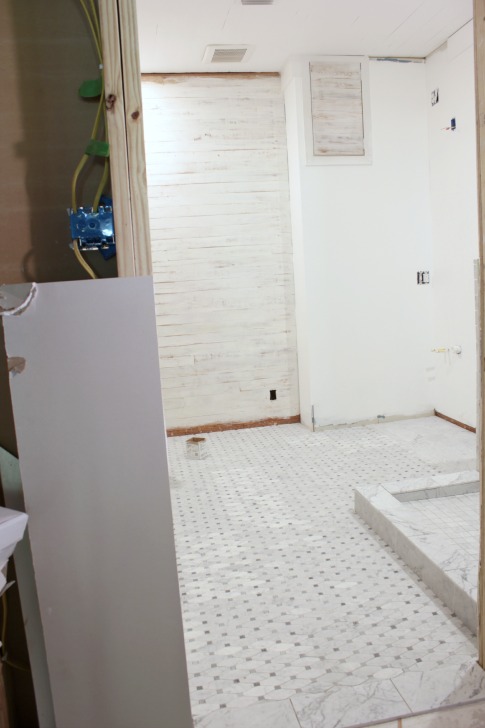
And one parting shot of what the bathroom looks like from the entrance to the closet. Need a reminder of the full floor plan?

long octagon gray dot marble tile

I’m stoked that The Builder Depot provided all of the tile for this master bathroom renovation, and this exact tile can be found here. Right now it is on sale for $12.75 sq ft.

and in other news, more exterior painting progress

September 8, 2014

Hey guys! Tiling is going strong around here. And by that I mean Joel and I knocked out the floor in about 7 hours on Saturday before we drove to Miami. (Might not be my recommended strategy for everyone … just ask my lower back, and knees and every other aching body part.)  Thank you so much for the input on laying the floor tile. There are just a few trim pieces that need to find a home around the shower curb and it’ll be time for some grout.

I don’t know if I really emphasized here enough how much I actually hemmed and hawed about marble. I love the look and just wasn’t sure it was what I wanted for the bathroom, I was worried it would feel uppity or too ritzy and you know I like me some rustic, reclaimed, used up goodness. But geesh, if I could take these gray dot long octagon floor tiles to dinner and a movie I totally would. I am in love.

But since that whole deal isn’t done, and the longer it takes the more I am dreading all of the grouting, and just pretending in my mind that it is going to be one of those surprising quick and easy tasks (don’t ruin it for me!) I wanted to show you some fun progress around here that was quick and easy. Ta Da!

exterior painting progress

Not exactly the most glamorous of shots, I know, an it’s still not the whole house … but over the course of two days a crew of 4-5 guys came and scraped, caulked, primed and painted about 1/3 of the exterior of the house, leaving only about 1/3 left to do. It was great to continue making progress on the bathroom and have a crew working on something I really didn’t want to do myself. It always amazes me to see the progress of 4-5 people working together versus my lonesome self. It seems miraculous.

Joel and I had taken a day and thoroughly cleaned the side of the house they were going to paint. It was amazing how much chipping paint came right off.

exterior painting progress

We also removed all kinds of random unnecessary wires that were run along the exterior. Here is Joel contemplating what to keep and what to yank. And the plan is to paint that shelf unit the same color as the siding and hang it out there and create some sort of weather resistant cover (out of canvas or maybe boat upholstery material or something) to store paint and other supplies. I know it sounds weird, but storing things outside is pretty typical around here, and that side of the house is somewhat sheltered from the normal direction of rain, and there’s a nice, wide overhang from the roof. But you can still judge, it seems hillbilly, I know. #EmbracingOurRedneck

exterior painting progress

And here was our arsenal of tools … it was amazing how many random screws and brackets we were able to remove along with all of the old wire. We kept the telephone box and the cord coming in from the street but we removed pretty much everything else.

exterior painting progress

And after a through cleaning and removal of the chipping paint we were anxious to have someone else get the new color on.

exterior painting progress

The first day they were here they scraped more, sanded and caulked.

exterior painting progress

The morning of the second day they covered up anything that we didn’t want to paint, like the pipes that hook up to our AC unit, and spot primed any bare wood. Mico what quite intrigued by the whole deal.

exterior painting progress

Any by the end of day two they had a few new coats of white trim paint on everything, including our gutter (which we were convinced we needed to change out, but they salvaged), and the new color still catches me off guard and makes me smile uncontrollably.

exterior painting progress

For some reason they didn’t paint the telephone box, so I’ll have to tackle that at some point (add it to the list) but they did paint the electric panel, that was already almost the same gray color. Go figure.

exterior painting progress

They actually used a paint sprayer that was very similar to the Homeright sprayer we used on the parts of the exterior we did tackle ourselves. And here are a few points of interest from our experience with the exterior painting project.

  • prime the trim (if necessary) first – if you spray the siding first then you have to cut in on the trim twice, once with the primer and again with the paint, if you prime before you spray the siding you don’t have to be as neat about it and only have to cut in when you do the paint on the trim after you spray, I learned that one the hard way when we sprayed above our front porch before I primed the trim

exterior painting progress

  • we left the inside corner trim pieces gray because they got a solid coverage of the gray paint when we sprayed … but they aren’t primed so we’ll see how long we can go before I need to go back and prime and repaint

exterior painting progress

  • it seems less noticeable if some gray paint creeps up on the white trim than if some white trim creeps out onto the gray paint, when cutting in the trim I didn’t quite bring the white paint all the way to the siding for that reason
  • one super cool thing about the sprayer we have is that clean up is a breeze, you just run water through it until it runs clear, that takes about 5 minutes and then place the sprayer nozzle in water in between uses, no cleaning required … and definitely hold onto the manual if you do get a sprayer, I’ve referred to it every time we’ve used it so far to  troubleshoot … it was a quick reference to remind us to thin down the paint just a tad when we had trouble getting it run properly the second time around.

One more step in beautifying our curb appeal. We’re far from done, but any reduction in the peach paint makes us happy.

covering up our faux brick exterior

You can read all about our curb appeal ideas, how we removed the faux brick and even how we raised the roof. She’s coming around. 🙂

house exterior April 2014

Now, back to the bathroom.

  • « Previous Page
  • 1
  • …
  • 19
  • 20
  • 21
  • 22
  • 23
  • …
  • 169
  • Next Page »

Copyright © 2025 · custom theme design by this bold girl · Built on the Genesis Framework 

  • pinterest
  • facebook
  • instagram
  • rss