This post may contain affiliate links which won’t change your price but will share some commission.
This post is part of a complete series explaining how to diy a shower pan from start to finish. Including the framing and prep work, installing the shower liner, building the pan, preslope, installing the drain and tile. You can also start with the preparation and planning post or with creating a preslope.
Alrighty, we’re back on track with the shower pan project. Which is a good thing because the tile is officially on the way. Which is exciting and nerve racking all at the same time. I don’t know why. The tile just seems like such a huge part of the final room it just feels like such a big step. We are so ready for it, but having it actually on the way reminds me of everything still on the to do list. So let’s get cracking.
Installing a pvc shower liner.
Now, you guys. I thought this step was going to be a breeze. I mean it’s a rectangle piece of plastic and I have a mostly square shower. Lay, wrap, nail, done. Right?
Not so fast.
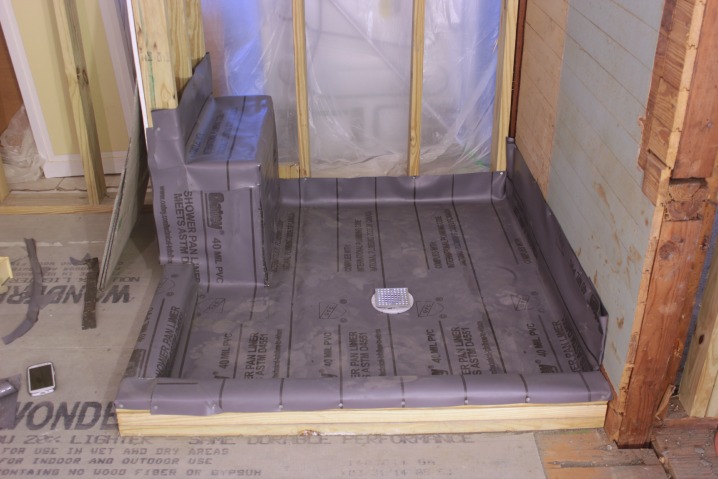
This whole liner deal took me about 3 hours from start to finish, including time taken to snap extra photos and an afternoon snack break. Apparently this task also makes one hungry. 
Determine how much liner you need.
Which proved a little tricky for me. #GoFigure If you don’t have a bench, this is pretty straight forward. Just add about 1 foot to both the length and width of your shower pan. So if your shower pan is 3′ x 3′ buy a liner that is 4′ x 4′. If you have a bench you will want the liner to go up and over the bench and then up the wall again about 6 inches … so you do the math. 
Gather your supplies.
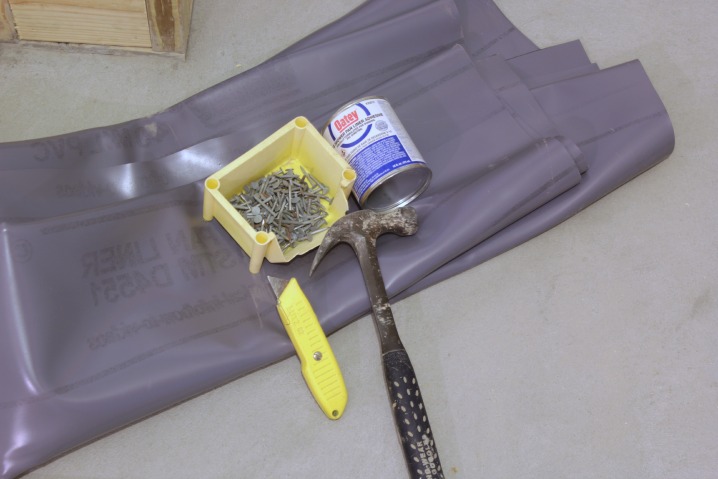
Some say to use an adhesive under your liner, some don’t. I took out a tub and bath adhesive that we had on hand, but didn’t end up using it. I figure a plastic liner sandwiched under tile, mortar, the cement shower pan and over another layer of cement might just stay in place. 
- pvc liner
- utility knife
- hammer
- roofing nails or another galvanized nail with a large head, you could probably use a stapler as well
- pvc liner adhesive if you are going to need to make cuts, or these corner clips
Tip!!! Don’t wear shoes while you do this step. Then you won’t unexpectedly step on anything and track it onto your new liner and inadvertently puncture it. (And I’ll apologize now for all the bare feet action visible in this post.)
Finish off your curb.
If you haven’t already, make sure your curb is at least two 2x4s high and add blocks in between your wall studs. I used a combination of 1 x 4s and 2 x 6s (just scraps we had on hand) to block in between the wall studs.
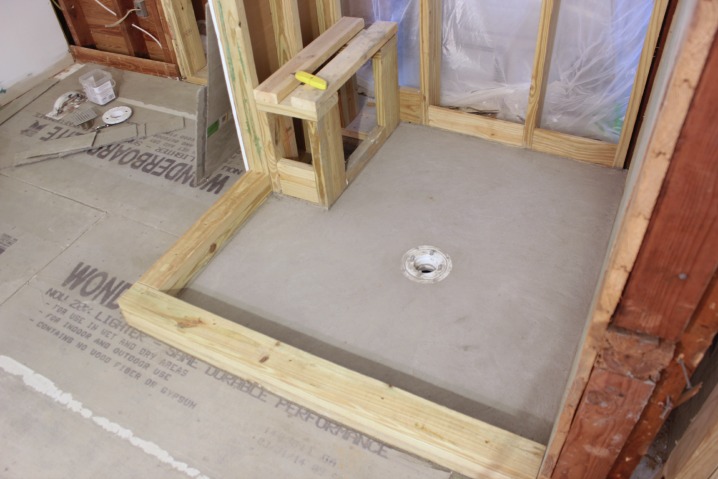
You may remember I had just installed one layer of 2 x 4’s for a curb, so I just nailed in 2 more right on top. How high you need your curb will depend on how large your shower is and how much a slope you’re going to be adding. Adding 4 1/2″ of curb for our 4′ x 4′ shower should leave us with about 1″ of curb when all is said and done because of the unevenness of our old floor. The depth of the shower pan adds up quick so I say err on the high side when it comes to the curb.
Lay out your liner.
Lay it over your preslope to see what you’re working with.
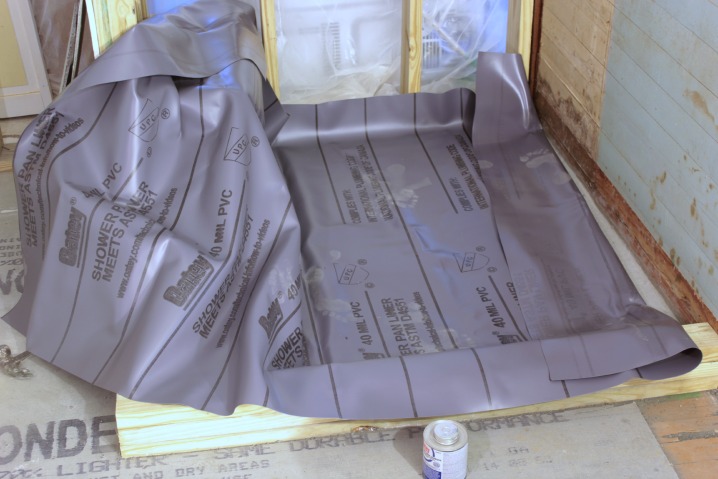
The rule of thumb is that you want the liner to come up each wall about 6″ and wrap all the way around your curb. Our local Home Depot only sold a 5′ wide liner so for our 4′ deep shower the liner comes up about 5″ at one and doesn’t wrap to the bottom of the outside of the curb.
I figure, if we’ve got water issues on the “outside” of our shower curb, those problems are bigger than the liner anyway.
Decide which corner to tackle first.
Can I just tell you, I read my fair share of useless tutorials on this topic. With tips ranging anywhere from “don’t ever cut the liner”, “just fold it like you’re wrapping a present” and my favorite “tuck it in between the wall studs at the corner”.
Well, I challenge anyone who has exposed wall studs to check them out and see exactly how many of you have a perfect little gap in the corner to just tuck your pvc liner.
Oh well, this corner was my first victim and in an effort to poke and prod the thicker-than-it-seems liner into the teeny gap I did have I ended up with this.
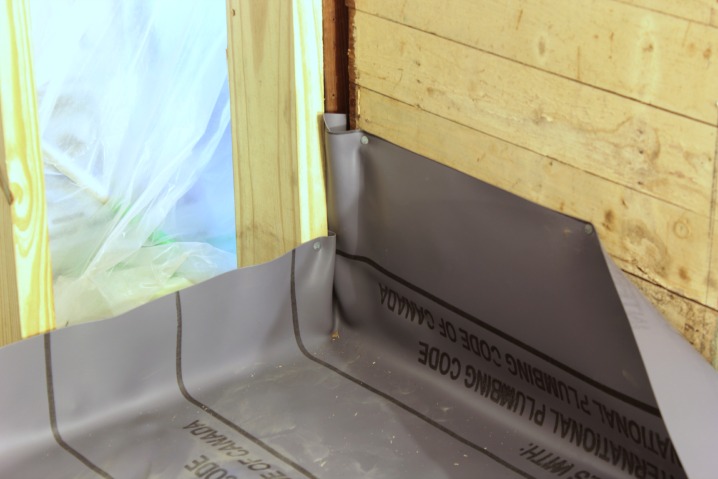
Far from perfect, but remember you will be installing 1/2″ cement board on top so there’s a little added leeway in the corner for you. And I didn’t cut the liner, so there’s that little success.
Tip!!! Nail into the liner as high as possible, just to prevent puncture holes near the base.
Work your way around each corner.
I had to do something different for each corner. For a little play-by-play … this corner came out the worst I think, it was the “fold it like you’re wrapping a present” idea that I tried. Honestly, the folds create such a bulky look in hind sight I wish I’d just cut it and used the adhesive. But that’s just me.
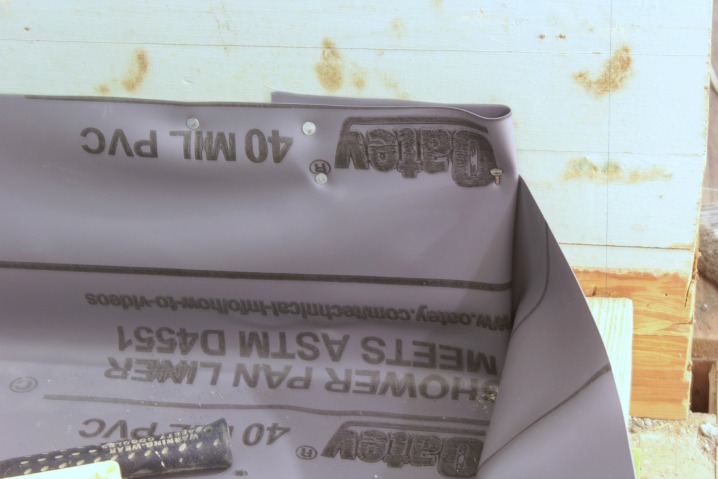
I did use the utility knife to cut the corner so it would lay flat on and over the curb.
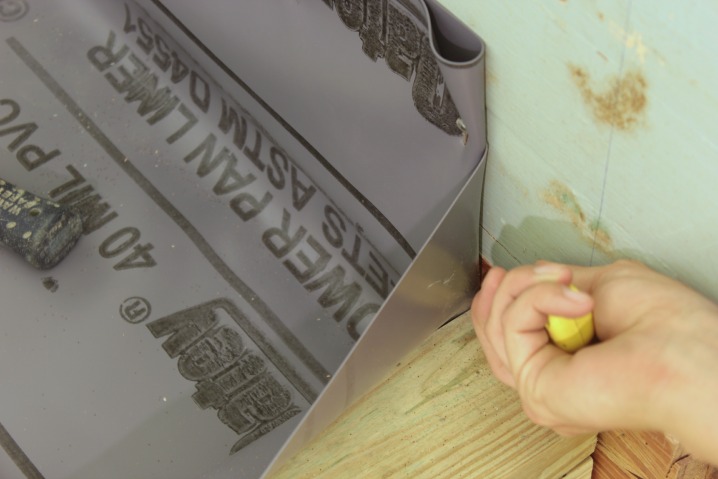
And here’s how far it comes over the curb. You can kind of see how bulky it is at the fold in this picture, too.
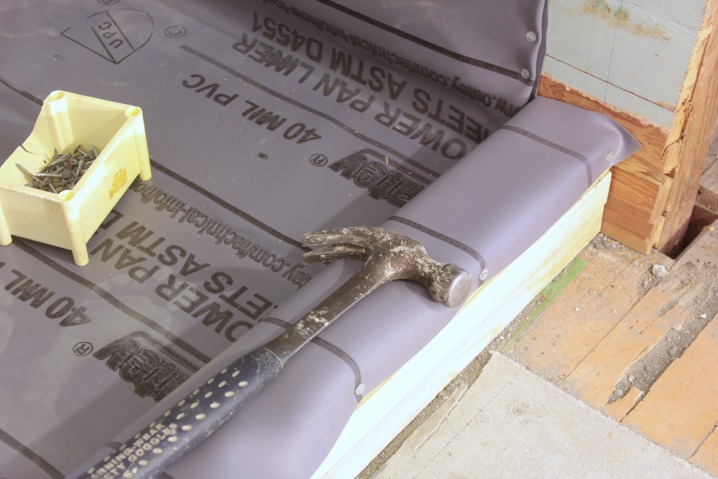
Tip!!! Use those bare feet to hold the liner tight down on the preslope while you pull it taught up the wall and in the corners and nail it in.
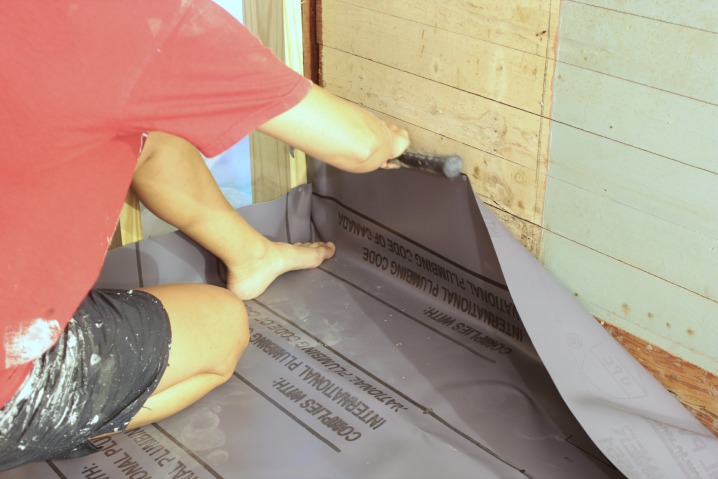
The corner that just went up around the curb was my first use of the glue. I tried a different little “fold it like wrapping paper” technique and just didn’t like the bulkiness of it so I made the minimal amount of cuts I could to get it to lay flat.
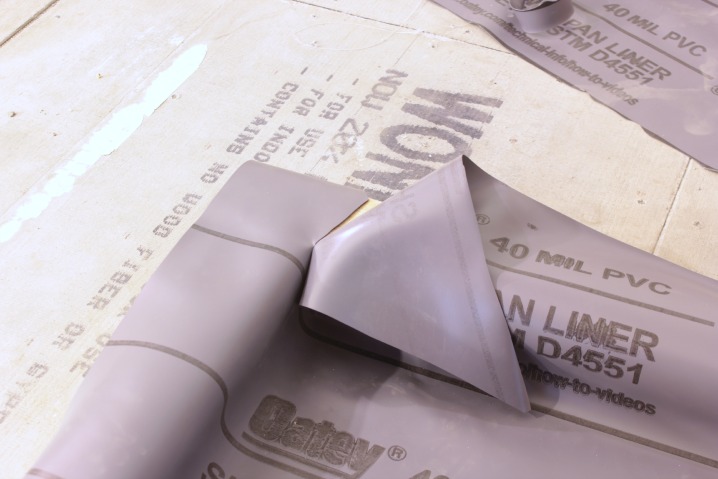
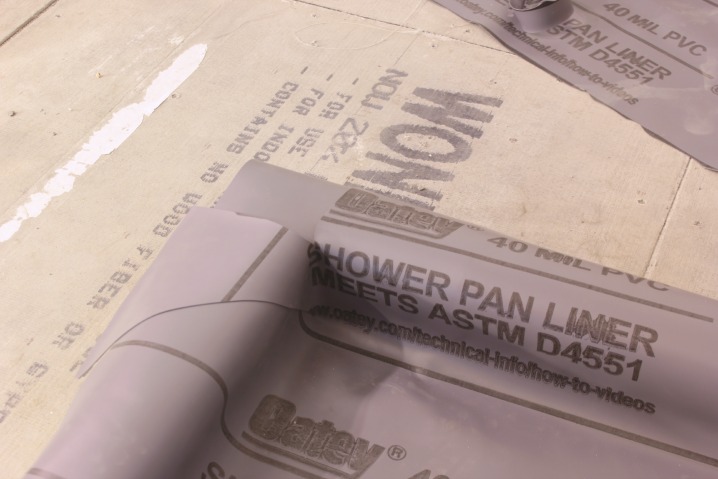
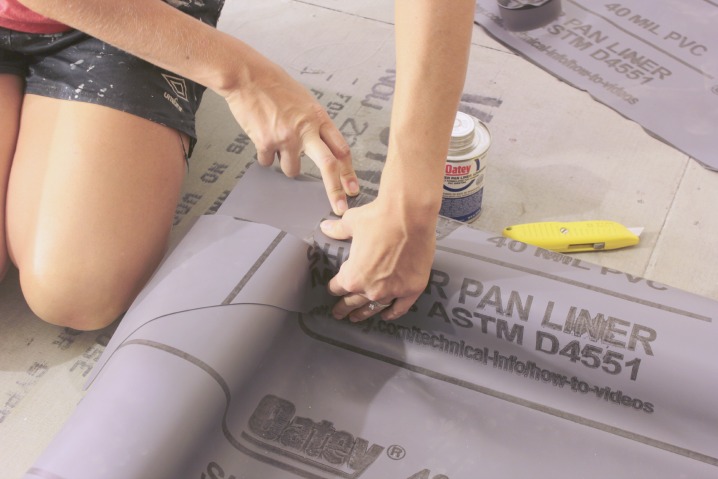
And the glue turned out super easy to use. It comes with the applicator so I just followed the instructions on the can. Apply to both sides, let dry for one minute before adhering the two pieces together and then hold them tight for about 30 seconds. My fancy time keeping apparatus was my phone.
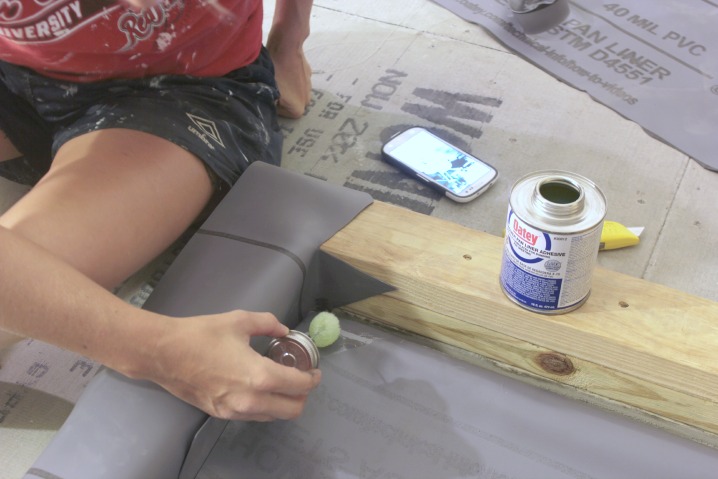
Tips for installing the pvc liner around a shower bench.
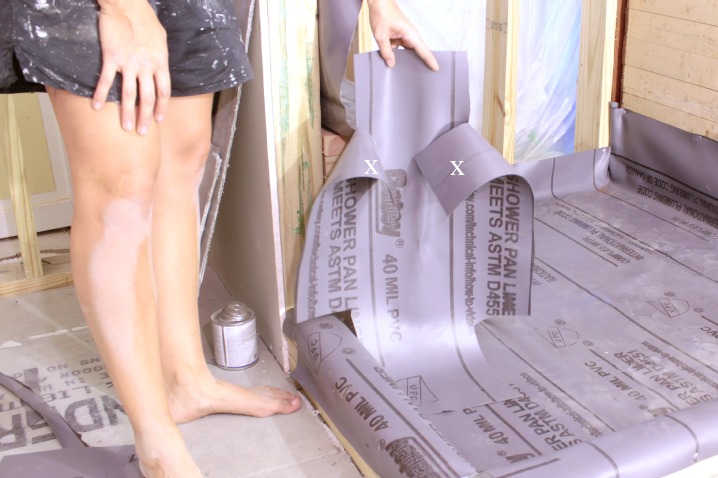
The other tricky area where I needed to use the glue was on the side of the bench. The thought I kept in mind was to always overlap the pvc liner so the piece on the top was facing away from the source of the water. So I didn’t have the side panel of the liner come up over the piece on the top of the bench, I tucked it underneath. Going with the theory that if water somehow gets under the tile on the bench and trickles down the side it will go all the way to the slope of the pan and to the drain and not somehow sneak into the glued seam.
I started but cutting a weird shaped piece of the pvc liner so it would bend around the edges of the bench. The two hanging top flaps (marked with an x) got cut off after I took the picture, I was thinking they didn’t need to be cut off entirely. I was wrong.
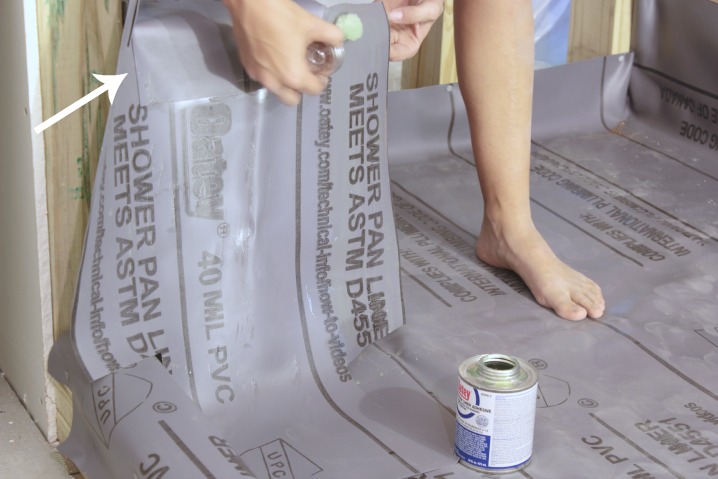
Then, just one edge at a time, I glued. The top was pretty easy to tuck under but the side inside the shower was the toughest. You can see the top is already done here as I’m gluing the side piece.
Cut out the hole for the drain.
Just feel for the drain and with your utility knife cut an X over each bolt head and in the drain.
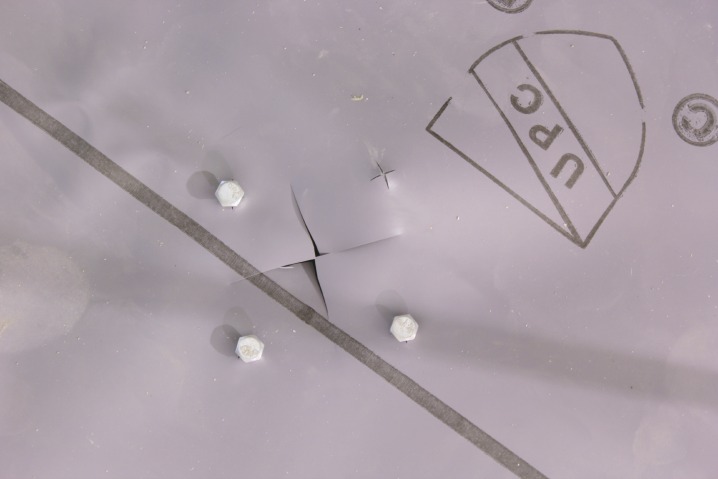 Then you can push the pvc shower liner right over the bolts and tighten them once you have added the second part of your adjustable drain. And then just finish cutting out the drain.
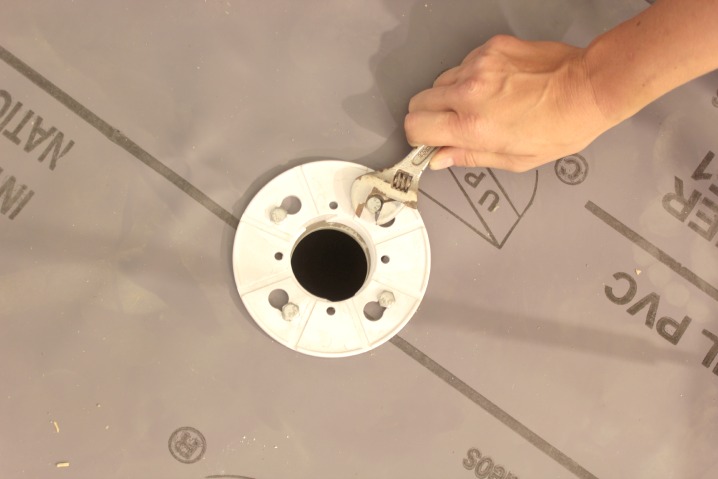
Getting this step complete feels like such a success. If you have your drain pipes hooked up you could even check for water tightness now by filling your shower pan with water and letting it sit overnight. We don’t have our drain lines hooked up so we’re going with the theory that we trust the glue to work and I didn’t puncture the liner.

There’s only one more step in this shower pan ordeal and then we’ll be ready for some cement board and finishing up the drywall in the room.
Many of you have said you’ll be tackling your own shower pan project eventually. If you have any more specific questions just let me know. Some of the details are easy to overlook when typing it up. Like that back corner where the bench meets the back wall … I actually did that corner twice. I noticed after I took this picture that it was doing the bulky thing …
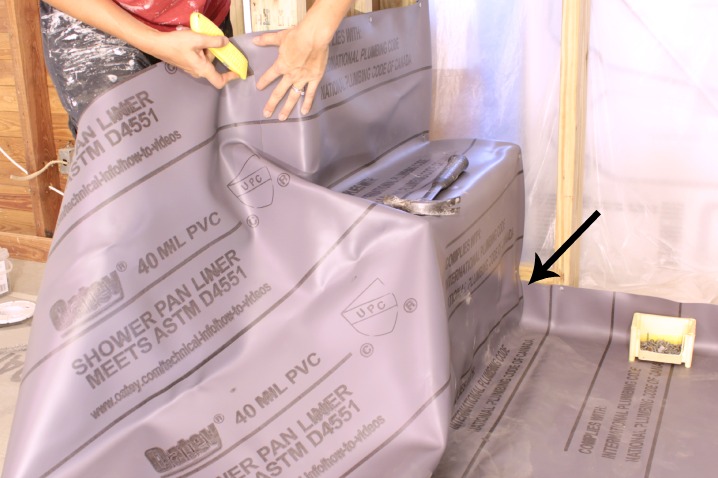
So I removed that 2 x 6 I had added that is kind of hidden behind the arrow in the picture and tucked the liner in there and then added the 2 x 6 back. And this picture reminds me that it was quite a decision process to figure out where to cut around the bench and not totally ruin the liner. So yeah, just shout if you’re doing this, sometimes it helps just to talk it through.
Update: The shower pan series is complete. Here are the other posts that might come in handy if you’re making your own shower pan.
And to see what direction we’re headed with the tile just click here.
Here’s the supplies list again to get you started:
- pvc liner
- utility knife
- hammer
- roofing nails or another galvanized nail with a large head, you could probably use a stapler as well
- pvc liner adhesive if you are going to need to make cuts, or these corner clips

Scouty says
Inspiring! All your information has been noted for a future project! keep up the good work, it is appreciated!
Karah says
Thank you Scouty! I’m glad you found it informative
David says
Love all the real details!! This was really helpful.
Karah says
Great! Just let me know if you have any other questions about the process!
Lana says
We have a new construction house in the country and are doing the custom showers ourselves. I’m a bit confused…over the plywood subfloor, I should first put down cement board, then do a preslope, then the PVC liner and finally the mortar slope? The slope and preslope angles is what confuses me. Do I give 1/4th an inch for every foot during the preslope and also for the final mortar slope? And do I cover entire curb in cement board? I am also using Red Guard at the end. I was confused about needing the cement board AND a preslope ANDmortar after the liner. So there are two concrete steps and a concrete board with liner? I’m reading your blogs and am just trying to get it right. We have serious work over here to get done and my job is to research and help do the work. I can’t wait. Thanks!
Karah says
Hi Lana! Sounds like you have quite the project ahead of you!! I’ll try to answer all of your questions as best I can, I’ll be honest, I did have to go back to the posts to remember exactly what we did. Haha And I’m not claiming that my way is the best way, but I never did find another all-inclusive step-by-step guide and ours worked out really well for us. As for your questions … I did cement board on top of our subfloor but not along the curb. I did a 1/4″ slope per foot for the preslope (which some people say you don’t even need) and the final mortar slope. And I finished it all off with Red Guard. I hope that clears up my process. If you have any other questions please don’t hesitate to ask and have fun with your projects!
Ruth Nero says
Nice work. Very detailed and also easy to follow. Thanks for posting.
Doug says
you need to apply silicone between drain and liner before you bolt top section downp
brian says
this pan will leak or have serious moisture issues. I give it less than a year. How is it holding up. This pan may pass some inspectors but it won’t work in the real world. The pan left of the bench will leak. You also have un covered areas of liner to the left of the curb inside the wet area. Water will wick up to 9 inches. This illustration is why I get calls at least once a month about pan failures. It’s time I post a how do video.
Karah says
3 1/2 years later and no leaks
Rachel says
So I am replacing a leaky old rib job with a tile shower. The tub was 60×40? Maybe a little more (garden tub style) and the joists appear good but I added another layer of plywood subfloor anyway because I have replaced much of the subfloor in that side of the house due to water damage from years ago. I’ve been very successful in the many plumbing projects I’ve done over the last 17 years but much of it was trial by fire situations where I didn’t have the budget to bring on a real plumber anyway I’ve watched about 4,000 videos and read blogs and forums… And I still feel a little lost. I mean I could do it, but I really want (read want-not expect) to get it right the first time and save myself the money time and grief of doing it over… what size pebbles did you use for the weep holes, or did you? And did you cover the whole bathroom floor just to level it out for tile? Thanks for sharing your mistakes and issues, along with success!
Karah says
You have probably already figured out what you’re going to do but I’m sorry for my delayed reply anyway. And I don’t recall using pebbles for the weep holes.
Cindy says
Thanks for the comprehensive details! This definitely has shown us what to expect – still trying to decide if we are up to the task!
Karah says
I hear you Cindy. If you have any questions that might help you feel more comfortable just let me know!