Monday we were talking about exterior house paint ideas and that got me to thinking about all of the other details we’re hoping to accomplish on the now not-so-charming exterior of the house. Otherwise known as Mission: Get rid of the peach paint and puney patio posts.

![]()
I’ve admittedly made myself a regular on our hope-to-be-new-street while we’ve patiently waited for this house buying process to pan itself out. Now, having stopped short of being a creepy stalker lady with a camera, I have exhibited significant self-restraint by refraining from actually taking pictures while I’m trolling the street. 🙂
But let’s take a look at one picture I took during the inspection and get a feel for what we’re working with.

Can you say room for improvement?!?!? 🙂
One thing we’re not going to change is the size. We have definitely traded in square footage in exchange for the location we want. We feel extremely fortunate to be in a position to be one of the select few who own (well, as of hopefully tomorrow anyway) a slice of paradise on this little 2 mile by 4 mile island. Maybe one day we’ll be in a farmhouse in the country, but for now, we’re soaking up the sun and relishing the idea of taking our 1274 square feet in Key West and having the potential to make it our very own.
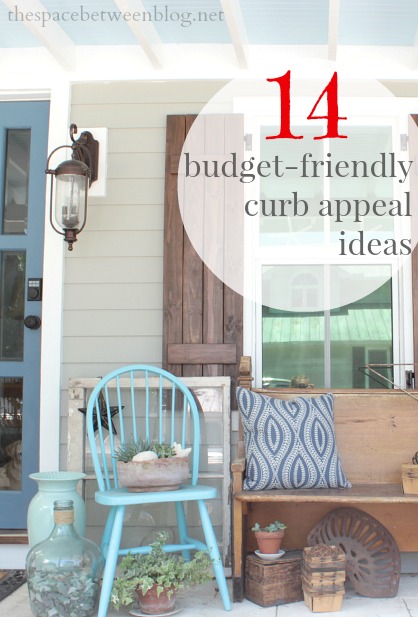
Are here are a few of the curb appeal ideas that are making our hearts go pitter patter these days.
 1 – Update the house numbers. Right now they are cursive and spelled out and they kind of scream “I’m from the 1950’s”. I think this is a little touch that I might go on the modern side, just to bring in some juxtaposition.
2 – Pick a fun color for the front door. #needIsaymore I’ve debated getting an entirely new door, this one has some wood detailing as well as stained glass (painted over on the outside but not on the inside) that I can’t figure out if I love or hate. But I’m leaning toward not hating, which isn’t love … but it isn’t hate either … which means it’s workable. 🙂
Update: I am an idiot and what I first referred to as stained glass turned out to be plastic, see how we updated the door with beveled glass door panels here.
Update: We painted the front door Martha Stewart Blue Suede, see all of the details here. There are all kinds of fun Key West front door inspiration pics in the post, too.
3 – Do something about the bright brass. And I’m only talking about that deadbolt. I might be considering working with the tarnished brass. There is actually a built in mailbox door that is just to the left of the picture that is also a tarnished brass. Having 3 elements with the same finish might create a fun, eclectic look … add in some modern house numbers for that touch on juxtaposition … it’s an idea.
Update: We installed a keyless entry system and are totally in love.
4 – Remove the faux brick. It serves no purpose. It’s unattractive and removing it will help us with a few of the other items coming up on the list.
Update: We covered right over it to create a flat surface for our new siding here. AND we called in professionals to change-up our roof line to give the front of the house a larger feel, see our new vaulted entry here.
Update: We finished installing new hardiboard siding, she looks totally different, check her out here.
5 – Paint. Oh peach how I will not miss you. These are our exterior house paint ideas.
Update: We took our first spin with a paint sprayer and started the exterior painting process here.
(and just so you don’t have to keep scrolling up to analyze the picture and develop your own plans for the space … which I highly encourage btw)
6 – Update the light. I hate to get rid of something that is perfectly functional, but the current light is another element that is indicative of it’s era … something a little more modern will help bring the space to life.
Update: I changed out the front porch light with one that we bought on clearance many years ago and offer up a variety of alternatives I would buy if we were were shopping for one today.
7 – Update the windows. I have really high hopes for this change. Once we remove the faux brick we open up the possibility of installing full sized windows. These stubby little ones do nothing but make the space feel even more stout than it is. This porch was built with no spare head room (see how it’s pretty flush with the top of the front door) so having the vertical vision broken up even more with stubby windows and the faux brick only serves to make it feel … well … stubby. We are tossing around the idea of raising the roof (only for the porch) … but that is a much more major project that we’ll tackle if the plan to unify the house color and update the windows doesn’t enhance the look of the space enough.
Update: We installed all new impact glass windows and changed the size of the front windows dramatically here.
8 – With new windows comes the need for new shutters. Not only the longer size to work with the new windows, but a fun and lively color … or a reclaimed wood look. I keep going back and forth between the two ideas. It will depend in part on what color we end up with on the door. And a fun Florida fact is that if you have windows with impact glass (shatter resistant) your shutters don’t have to be functional … that opens up our options a bit to maybe design our own shutters. Although having pretty and functional shutters would be the best of both worlds so we’d love to try to accomplish that, too, if possible.
9 – Goodbye office furniture and hello rocking chairs. I’m pretty excited about beautifying this space a bit, I have to admit. And I’m sure we’ll go through a myriad of set ups and arrangements and overall random porch updates until we find what suits us for the long haul. But one thing I now for sure is that we have 2 old rocking chairs heading our way and they are going to be happy to be out of storage and given a porch to call their very own.
Update: Not only did we use our rocking chairs but I may have used as many street side finds to decorate the front porch as possible. And a huge thank you to Better Homes and Gardens for featuring the new look of the front porch!
(you’re welcome) 😉
We’re keeping our fingers crossed that the little guy to the left of the office chairs is heading out with the current residents, too. 🙂
10 – Puney posts to pretty and powerful. These porch posts do nothing for us. We really have no idea about this one (somehow create stately round columns right over those puney guys?!?!) but we think if we give the puney porch posts a little more punch they could really perfect the picturesque porch feel we’re going for.
And yes, this post is brought to you by the letter P. 🙂
Update: Holla!! We installed chunky 6 x 6 posts here.
11 – Sky blue. One really cool trend down here is that people paint the ceilings of their porches a light, sky blue. We’re definitely going to get in on that fun.
Update: We completed the beadboard on the ceiling, and actually installed it in between the porch ceiling joists to gain as much height as possible. It’s one of our favorite features!
12 – Clean and freshen up the trim. This is actually probably step one, but I’m hoping a good swift scrubbing will give this space a little kick start. And those rolling blind thingys will probably magically disappear, too.
Update: I used a simple tip for getting rid of the mold, it’s not a permanent thing, but for anyone looking to quickly freshen up the look of the exterior of your house, this is the perfect remedy here.
13 – Plant some plants. We’re hoping to use a variety of planter boxes and update whatever shrub they’ve got growing there to add a little color and life, and maybe a little privacy, to the space.
Update: I decided using all greenery, instead of a variety of colored flowers, gave the front porch the feel we were looking for. The plants add the perfect softening touch to the entire look.
14 – The wall. I’m not sure if we’ll be painting, removing or somehow updating with pickets the current look of our front wall, but once we have the curb appeal foundation with the other updates above we’ll be revisiting the front wall and making some decisions about how best to incorporate it into the over all look.
So basically we’re not leaving one surface untouched. And I haven’t even mentioned the covering for the concrete carport. That post will be brought to you by the letter C. 🙂
Update: Check out the house tour video to see what the inside of the house looked like before we started renovation. So far we’ve created a yardscape and removed the drop ceiling in the living and dining room. See what we uncovered here.
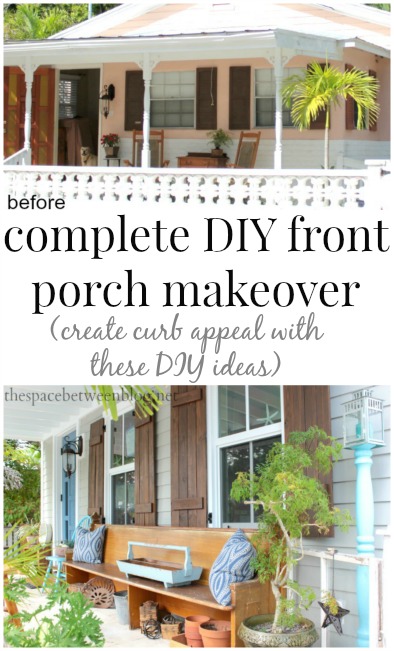
Update: The porch is practically unrecognizable now, read all about our complete DIY front porch makeover.

But what sticks out the most to you? What would you change first? Are you all about a new paint color or would you go to town with some fresh plantings?


 (
(