the space between

upcycle, repurpose and reinvent your space

  • about
  • aruba
  • key west
  • curacao
  • projects
  • house tours
  • privacy policy

our new look {hardiboard siding installation}

February 6, 2014

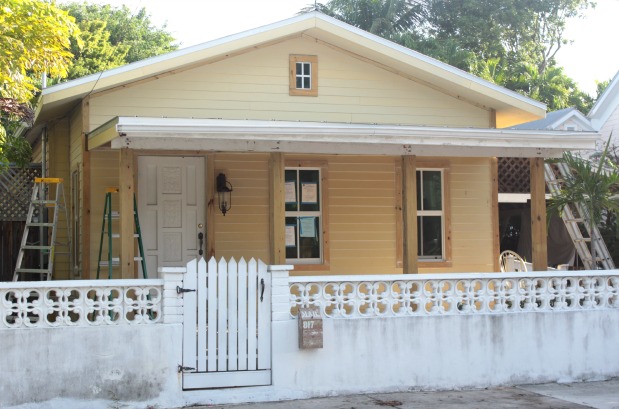
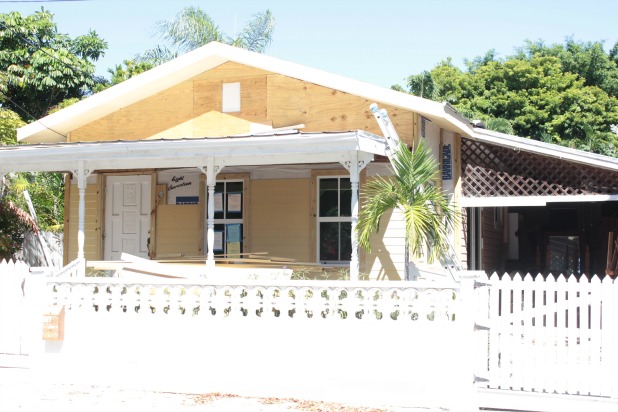
I feel like celebrating this hardiboard siding installation accomplishment, but before I go giving myself a pat on the back I feel like a little background information is in order to explain how we got to our new look. Maybe it’s because this project actually started over Labor Day 2013, that would be almost 5 months ago for any other score keepers out there.

house exterior January 2014

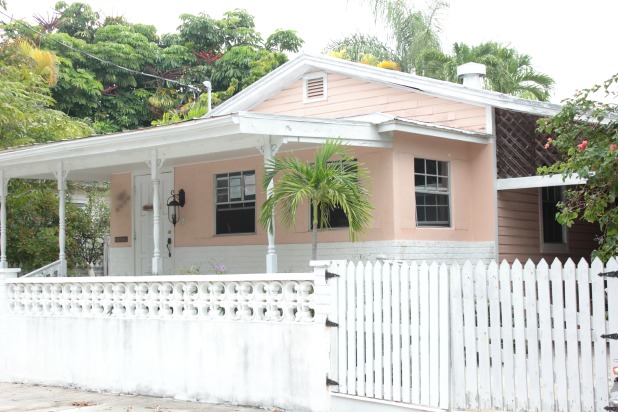
Granted, she is a far cry from finished, but remember the peach paint, faux brick facade, stubby windows and unfortunate brown color shutters that made us say “we need to own this house” back in April 2013?

covering up our faux brick exterior

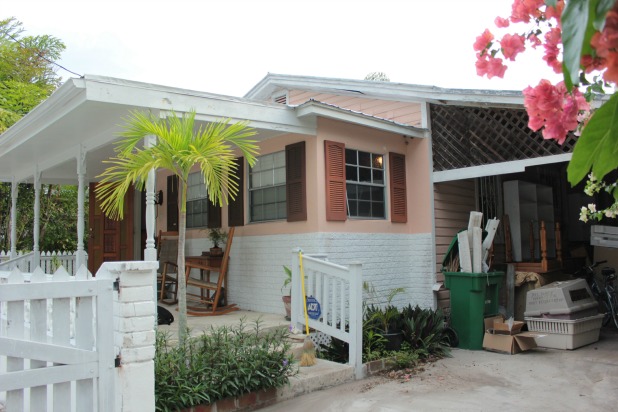
That photo hurts my head.

We knew if we were going to make any significant impact on the overall curb appeal of our diamond in the rough the whole front look of her needed a facelift.

So we hired a small crew who worked over Labor Day weekend and got rid of that awkward 3-roof-line look and raised the roof on the front part of the house to line up with the gable we had over the rest of the house.

key west house exterior October 2013

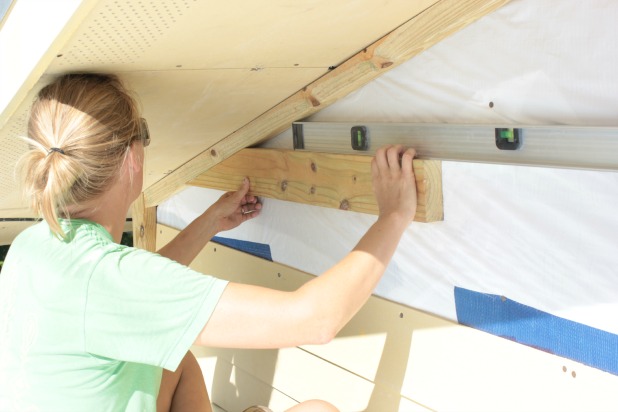
Here’s another shot of the roof raising in process. Here they are leveling the new ridge board, the length of that shows the length of the roof we raised, it’s just over 6 feet of new vaulted ceiling. That we still adore.

house exterior roof raising

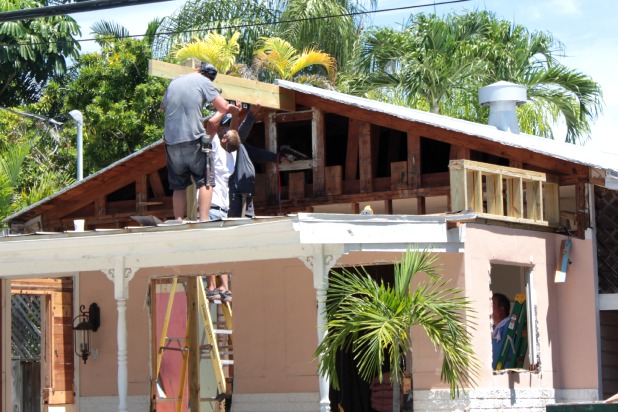
You can also see on the section on the right where they heightened the wall, they framed it in with 2 x 6s so it would stick out farther than the previous exterior wall so we could hang the siding over the old faux brick.

Oh faux brick, how we don’t miss you one iota.

key west house exterior old roof

Once we had the new exterior framed out to a flat surface, all the deets on that here, and all of the trim around the door and windows, all the deets on that and why we did that first here, we were finally ready to get our siding on.

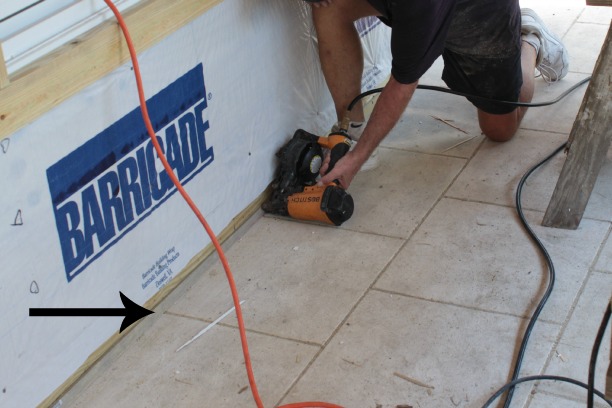
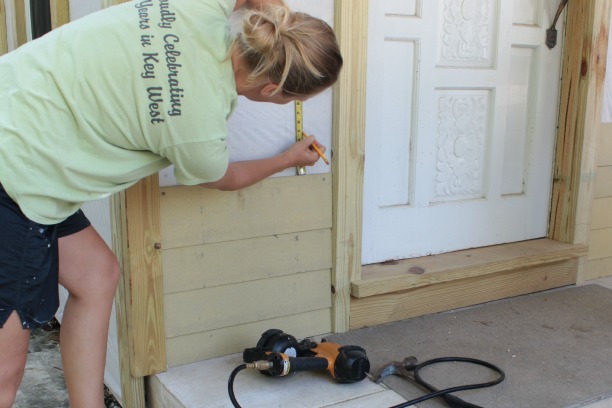
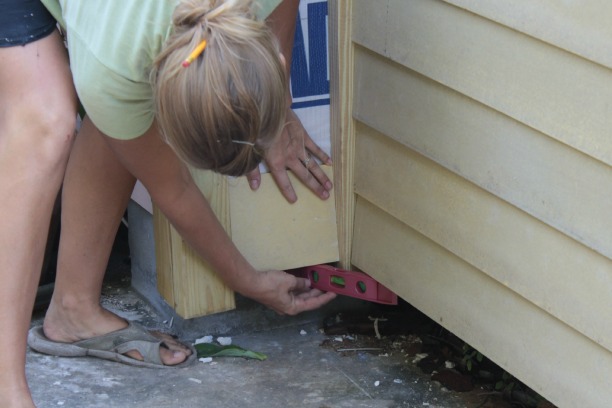
Sometimes just getting started sometimes can be tricky. Our porch floor, like most, is not level, it slopes away from the front door and away from the house, which is typical to encourage any water away from the house. But what to do with that first row of siding? I didn’t want a gap between the siding and the porch, but I didn’t want it to look wonky either.

I did some serious research took a walk around town to see what the first row of our neighbor’s siding looked like. Armed with the knowledge of what the masses were doing, we hung the first row of siding flush with the porch floor. So, it wasn’t level but it created a smooth transition from the porch floor to the siding.

house exterior siding

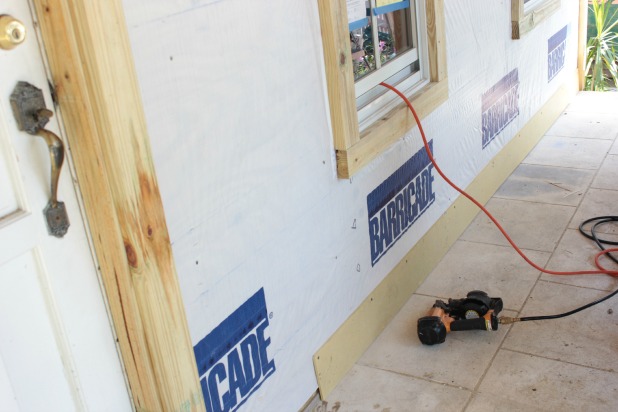
And actually behind the bottom of that first row we attached a small strip, about 1 1/2″ of the hardiboard siding to the wall so the bottom edge of that first row would tilt out like ever row to follow.

hardiboard siding installation instructions

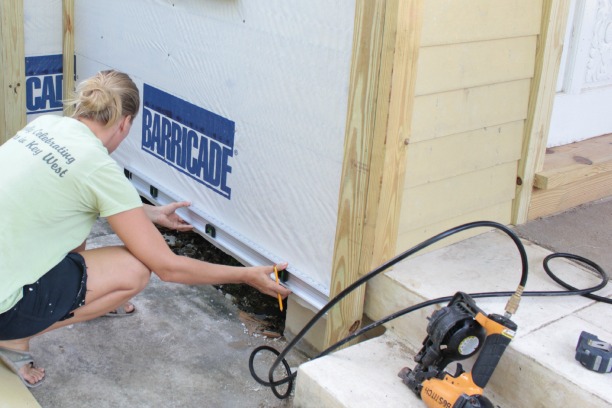
As for tools, we borrowed the nail gun from a friend, it’s a roofing gun with coil nails, we used 1 1/2 roofing nails. Check with your local building department to find out what code is for your area regarding installation specifications.

Here’s an affiliate link to the nail gun and the nails that we used.

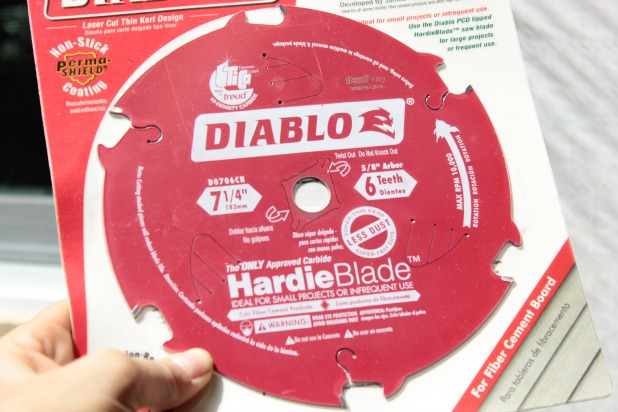
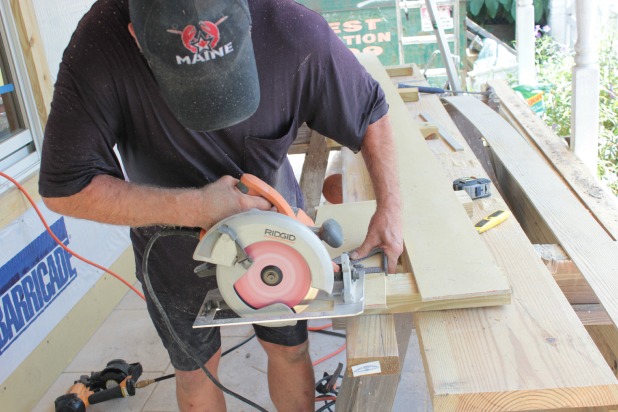
As for cutting cement board siding, it is dusty. Like crazy dusty. We bought this special blade and it cut just like wood, except for all of the additional dust.

hardiboard siding installtion - what blade to use

Now we’ve got our first row in place and all of our tools accounted for, now to figure out how much of a reveal we wanted per board. That’s how much of each board shows per row. Our building code said we could pick any measurement between 4″ – 6″. And the winner is …

hardiboard siding installation revealYeah, don’t ask. There was a lot of measuring and marking, we even whipped out a chalk line. I think we were trying to figure out how to line it all up so we wouldn’t have to notch around the bottom of the windows … or something. My advice, just pick a measurement and go from there, it’s impossible to anticipate every little notch you’re going to encounter, and it’s not worth the energy, and confusion. We eventually had to circle with a marker the marks we were actually going to use.

hardiboard siding installation reveal

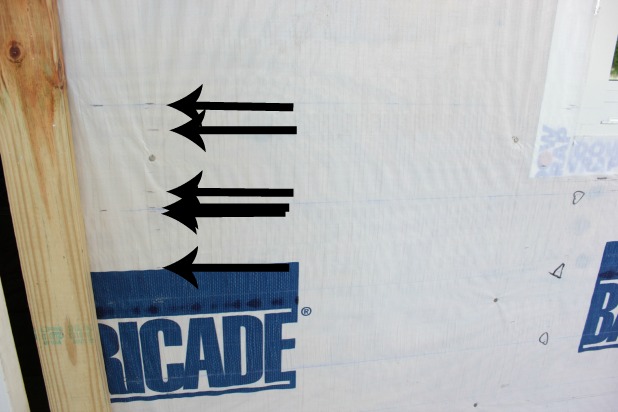
And I didn’t even have room to add more arrows pointing to the chalk lines. Ay de mi!

The boards measure 6 1/4″ wide and with our reveal of 4 3/4″ that left us a 1 1/2″ overlap, plenty of room to nail in each board with a “blind nail” that would end up hidden, and also left a nice chunky siding look.

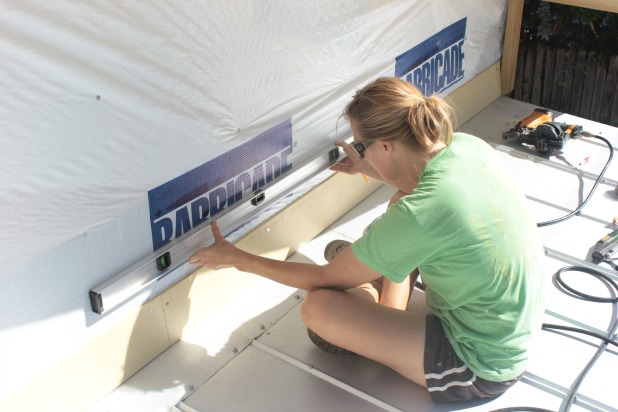
Once you decide on your reveal, keep in mind that the reveal on your first board is not going to be even. The second row is where you start to make everything level so measure up your desired reveal from the top of the board you have already attached and then mark a level line using a 4 foot level.

That reveal on the first row will vary slightly from end to end but the level second row will provide the perfect starting point for your hardiboard siding installation from here on out.

hardiboard siding installation reveal

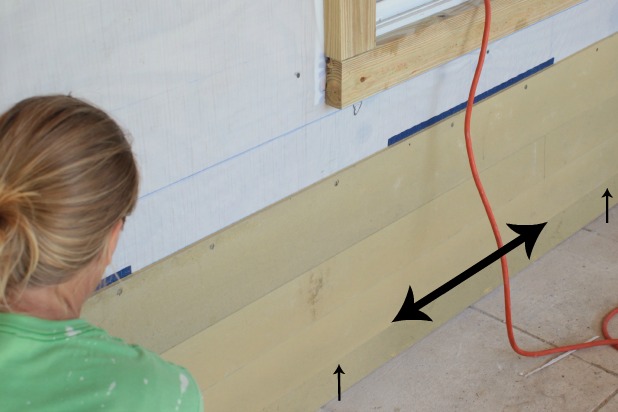
Now you’re good to go. Measure the amount of your reveal up from the top of each installed board.

hardiboard siding installation

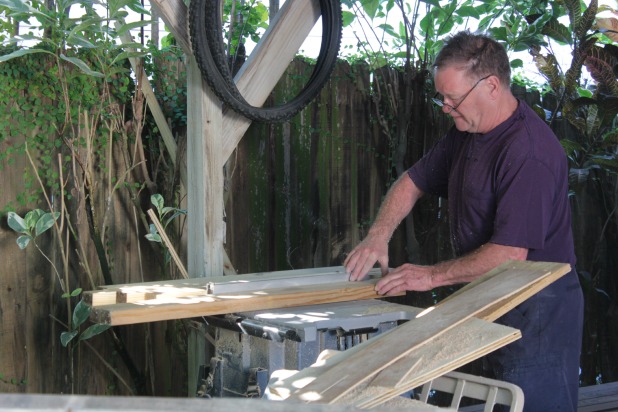
Install the next row, make cuts where necessary, or have my your dad do it.

hardiboard siding installation

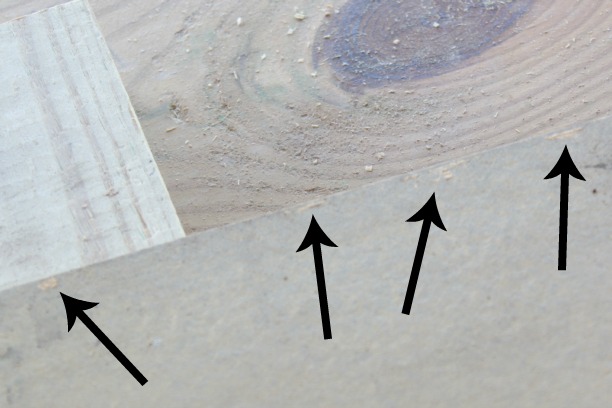
Take a look at your siding before you install it and try to hide any manufacture imperfections by installing that side on the top, it will end up hidden by the overlap of the next row.

hardiboard siding installation

For the side of the house, I just picked a starting spot where the siding board would overhang the old wall and drew a level line, and proceeded up the wall with each row level.

hardiboard siding installation

When siding around corners I just used a small level to make sure I started at an even spot so the rows would line up as I went up the wall.

hardiboard siding installation

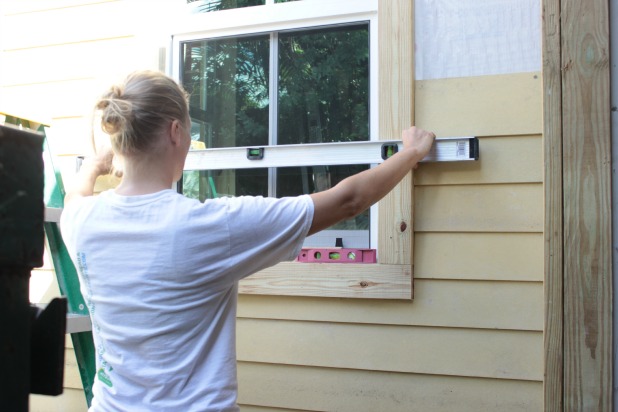
Once we reached the windows, my dad marked and notched out the openings with the circular saw and we used liquid nails for any part under the window so we wouldn’t have to face nail it, meaning the nails would be left visable since there was no row overlapping to hide it. We didn’t want to do that.

hardiboard siding installation

When I was installing the siding on either side of a window, I would use the 4 foot level every few rows just to make sure I was staying even on both sides.

hardiboard siding installation

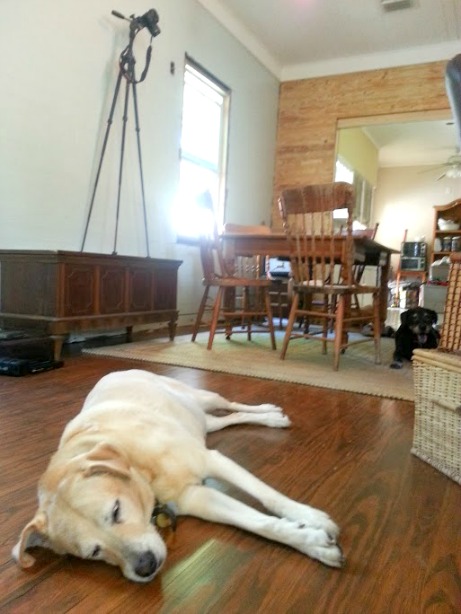
It was at this point that my dad left and we got a little sidetracked with staining our floors and blowing in insulation and those pesky holidays. I definitely took a second to wonder what the neighbors would think of me crafting a little upcycled Christmas tree when the front of our house was missing half of its siding. Then I grabbed the hot glue and kept at it.

And it then the day came that we were sick enough of having saw horses on our front porch for months that we finally finished up this project.

We used the same techniques above the porch roof like laying the first row right along the roof with a thin shim piece behind the bottom to wedge it out a bit and then measuring up and leveling each row after that.

hardiboard siding installation

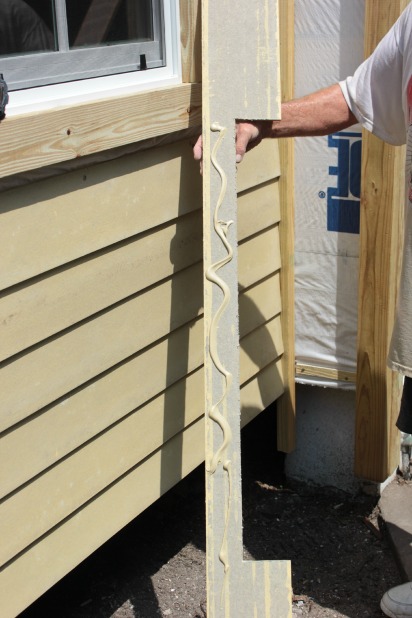
Instead of actually figuring out the angle of the pitch of the roof, because that seemed way too mathy, we cut a piece of scrap wood and using a level just kept shaving off the angle until it sit level and flush with the pitch of the roof.

hardiboard siding installation

And then we would just measure up the distance of our reveal and mark where it hit the angle on the roof and measureed from there across.

hardiboard siding installation

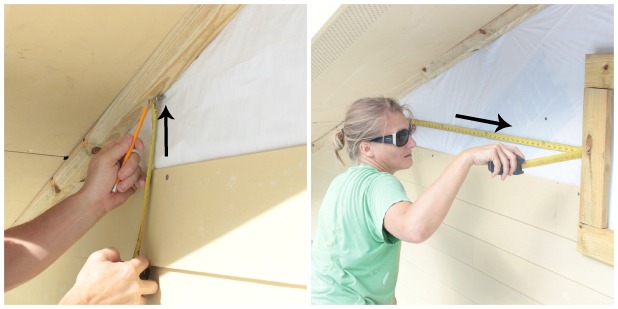
To make the cuts, I’d line up the scrap wood template with the edge of the hardiboard siding and cut the angled end and then cut it to the right length to fit the space.

hardiboard siding installation

Did I cut them all perfectly?

hardiboard siding installation

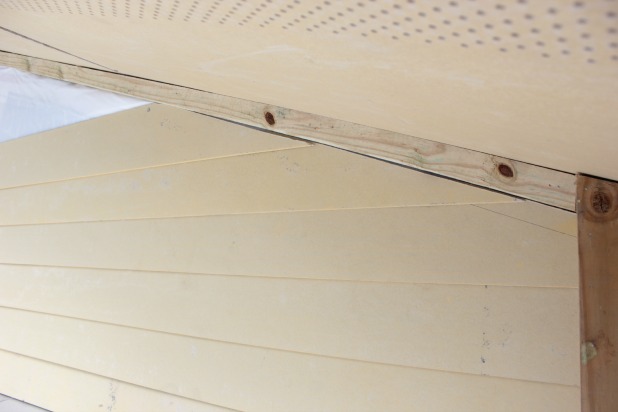
“Nothing a little caulk can’t fix” became the tagline for the day. 🙂

The roof actually overhangs that area by two feet and once all of the seams are sealed up good she’ll look perfect.

So, yeah, whenever I need a break from book projects or the actual writing itself I can be found with this in hand.

energy efficiency audit

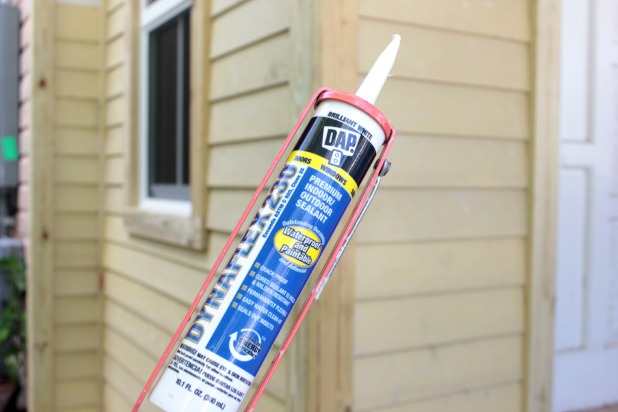
Talk about a thankless task, I feel like I can caulk the little seams for hours and have nothing to show for my work. But we want to keep this house baby protected from the elements so we’ll be happy for all of this work in the long run. At least that’s what I keep telling myself.

So tell me what you’ve been up to. Any siding projects? Caulking projects? Glue gun projects?

And you can check in over at Remodelaholic.com to see how I went subtle with Valentine’s Day ideas this year and chose to bring in a few extra pops of red to spread the feeling of love.

7 ways to decorate with red

how this whole book deal went down

January 29, 2014

Update: The book is now available for pre-order here.

DIY Wood Pallet Projects Book Pre-order

Well hello there. I’d like to say I’ve been busy whipping this house into shape, but that has been tasked to my dad for this week.

dad-table-saw

And don’t worry about those bike tires hanging there or all the scraps of wood on the chaise lounge chair. This area is much more work shop than it is back yard these days. And I think those bike tires got hung there on moving day and I haven’t noticed them since, until this picture. Note to self, put the mountain bike tires in the attic since there are no mountains in Key West.

Ever since the book announcement my world has been pretty much all about the book. And I know this blog isn’t all about the book, but I do try to meld in everything as it relates to our DIY adventures and I’ve gotten some great questions from some of you guys asking “how did this all happen?”. And honestly, who knows how the process works from the publisher’s side and how long they had been looking for an author for this book and how they landed on me, but I thought it’d be fun to give you the run down from my end and a bit about how it’s going. You guys have been awesome in sharing my excitement and I really wish I could invite you all over so we could settle in on the couch and dish about the whole thing, but I guess a blog post will have to do for now.

But picture us sitting in these chairs chatting the day away, ’cause it’s been cold where many of your are. Yikes!

12Jun karah on dock kw

That was from our first ever trip to Key West before we even knew we were moving here, see more pictures of the trip here.

In October I was minding my own business when I got an email from a publishing company with a pitch about a book idea that about knocked me off my feet. It was clear they had done their research, they were talking about a project book with DIY tutorials and nitty-gritty specifics about how to make things for around your home with pallet wood.

I may have immediately tried to strategize ways to include some things for these gals complete with purely gratuitous shots of them splattered around the book.

Before responding I did some research of my own on the publishing company. They are called Adams Media, they are based in Massachusetts (high fives for New England!!) and they are the publishers for the Everything Series of books. But my book is not part of that series. They also just recently published a beautiful book from another blog I love, The Handmade Home. That’s an affiliate link to their new book.

So I decided to email them back and be all Joe-cool and say “um, maybe I want to hear more, not really, but since you’re practically begging, let’s hear it” … or something like that. 😉

And I went back to the usual, which included updating our patio posts to a chunky, craftsman style, that post is here.

curb appeal ideas - chunky patio posts

And after an awesome phone call with Christine, who is originally from Florida (two cheers for Floridians!!) I decided to submit some info at their request “to be considered among their group of potential authors”. Yikes.

All of a sudden I was faced with an opportunity I hadn’t ever really dreamt of for myself. And I wasn’t willing to let myself get all wrapped up in it just to be let down when they picked someone else.

So I went back about my own business, again, and reminded myself it was an honor to even be nominated considered and let myself get a big head for second about the academy a publishing company even knowing my name at all. Pinch me now. (Clearly someone is in the award show season spirit.)

Well, not right now, I’m a bit of a mess. I might not be drywalling, these days, like I was here, but I still manage to make a mess of myself on a regular basis.

installing drywall

And I didn’t even let my mind wander to the what-ifs because I know we have a full life as it is, writing a book wasn’t even on my radar, other opportunities would come my way down the road, it would be good to be able to just focus on work on the house without any major distractions.

So when they emailed me back with an offer I just stared at my computer screen, jaw dropped and silent for minutes.

I seriously have to take a minute every time I think about it to put all the pieces together in my brain to confirm that this is in fact a true, real-life happening thing.

You know, like that weekend we could see the sky out of our living room.

Then when I shared it with all of you I literally grinned from ear to ear reading your comments and responses and questions. You guys are the best!!

And because you seem to be interested, and I get excited sharing my thoughts with you, it helps distract from my fairly constant state of anxiety these days (I’m still getting used to the UNpressure concept), here are some answers to your questions.

Do you have to come up with all new material or are you able to use some of the projects that have already appeared on your blog?

It is actually part of the contract that I can use some material that has been already published on my blog. But, enter self-imposed pressure here, I want the book to be all new tutorials. So I will include some new pictures of old projects that you’ve seen on the blog, but I don’t plan to just regurgitate any tutorials that have already been published on this here blog. Whatever happened to that pallet slat crate I made in Curacao to house all of our canned goods in our kitchen?

I don’t want you fabulous blog readers to think “oh, I’ve already seen all that”. But I think it will be fun to see new pictures of old projects used in a new way, and maybe those ideas will lure unsuspecting book readers to the blog. Oh those future book readers have no idea what they’re in for. 😉

If it is all new material how will you keep up with your current level of blogging?

Ummmm, Idaknow.

Seriously, that is my answer. I’m winging it here. To think that 2 years ago when I wrote a tutorial about how to make a Christmas tree out of driftwood would have ever turned into a full-time job blog and now a book … no, I didn’t think that. But, I just truly believe this is one of those opportunities I could not pass up and no matter what, I can make it work. Well enough, I can make it work well enough. I spend a decent amount of time stressing about my remedial photography skills or the ability to explain complicated steps of a simple project or infusing the right amount of encouragement in the book to inspire people to use power tools they never have before without coming across like an insincere cheerleader.

repurpose old game pieces

Wait, that doesn’t even answer the question. Clearly my mind tends to gravitate towards that which stresses me out.

About maintaining the blog, I’m trying my best. I like to write posts in real-time as progress is happening so I think it’s natural that as less progress is made on the house there are less updates. But we are also trying to be smart with our time and tick off little things in the evenings and be productive around the house on weekends so even though we won’t be painting the whole exterior of the house, which we had really thought we’d have done by now, I’ll definitely share what we do accomplish along the way.

Tell us more about the book.

Ok. 🙂

I mentioned that it is targeted to be right around 60,000 words. It will be 35 different project tutorials (that number could change slightly) and then some extra chapters with information relevant to gathering the wood, creating the projects, using some tools and additional ideas for finishing off your projects. I have to work really hard to focus on the projects at hand and not just take one project and keep thinking of fun new ways up update it or embellish it or make it bigger/badder/better.

And these guys are always close at hand curious about what mess I’m making today.

marley-mico-dining-room

It’s an interesting study in self-awareness as I struggle to stay on task, work hard to balance multiple projects in various stages of completion and actually take the time to sit and write.

So, time to get back at it. A huge thanks to my dad for keeping the house improvements boat afloat and I hope to share a few updates here soon. Like, we actually have all of the siding on the front of the house done, it only took us almost 5 months, and we hung a ceiling in the new vaulted ceiling … and it’s not drywall. 🙂  I think I shared our ideas for that here.

  • « Previous Page
  • 1
  • …
  • 44
  • 45
  • 46
  • 47
  • 48
  • …
  • 169
  • Next Page »

Copyright © 2025 · custom theme design by this bold girl · Built on the Genesis Framework 

  • pinterest
  • facebook
  • instagram
  • rss