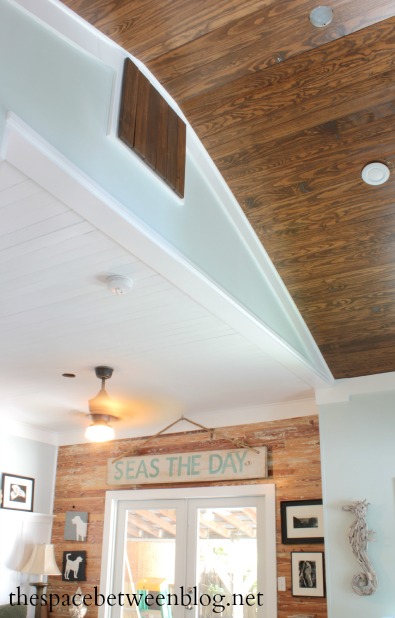
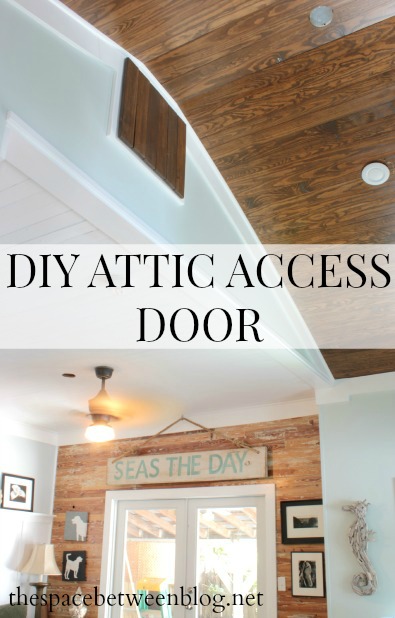
Well, we finally have a door for our front attic access. And I may have sent this picture to Joel with the caption “happy birthday”.
Sunday was the actual birthday and since he had to work I decided to get a few things done around here. And over the last few weeks Joel may have been leaving me some not so subtle hints that getting a door on the attic access was at the top of his priority list.
“Can you feel how hot it is up here?” While we were up on ladders finishing up the molding.
“It’s amazing how much cooler it is in the back of the house.” At random, with increasing frequency.
“Do you have everything you need to install the attic access door?” When he noticed I had actually made what could be a door and had purchased some hinges.
“Will you just install that door already?” The night before his birthday.
So, who am I to not use that as the perfect excuse to officially declare this little necessity a birthday gift?!?! I’m a giver, what can I say.
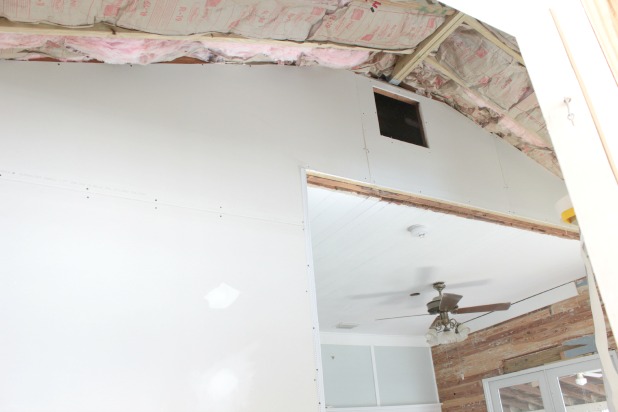
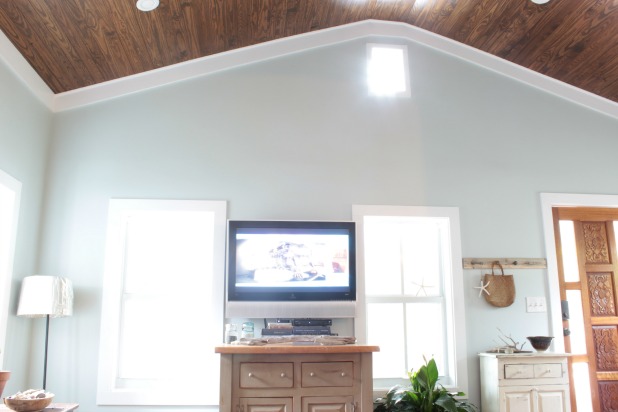
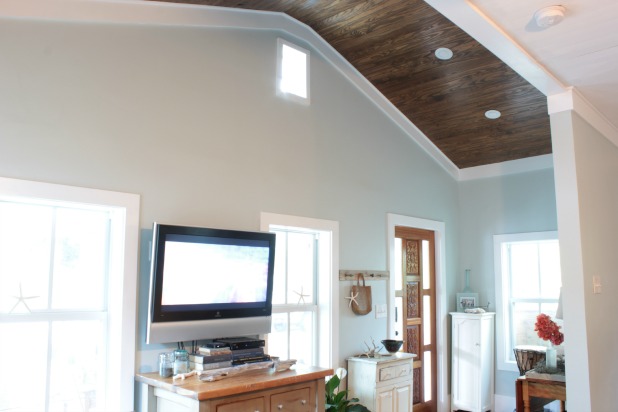
But seriously, I’m stoked we’re not still looking like this up there.
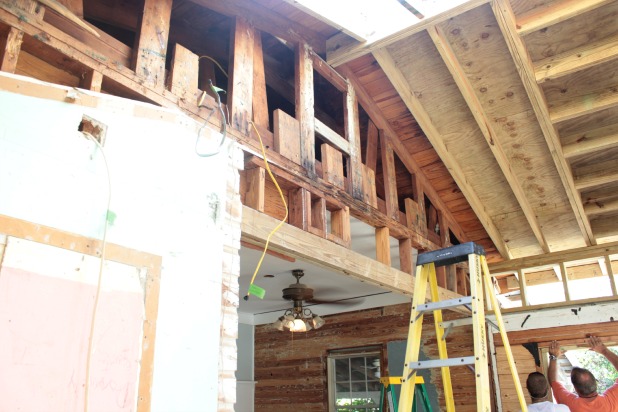
We wanted to keep an attic access in the front of the house for easy access in case we needed to update any electric or pretty much do anything up there like add more insulation or keep an eye on the underside of the roof. We do have a larger attic access in the ceiling of our kitchen but the new HVAC runs through the attic and pretty much inhibits any kind of maneuvering from the back of the house up to the front.
So after too many months with an open opening we finally have a door.
And just to prove his point, we’ll consider this sentence another birthday gift, I could immediately feel the difference in temperature in that vaulted part of the ceiling once the door was installed. I’ll be curious how much of an impact it will have on our electric bill. It hasn’t been ridiculously high so far, or you know I would have done this months ago, but it will still be nice to see a little bit of a difference. We will see.
As for the how-to, making an attic access door like this is really a simple DIY anyone can do. The whole hanging part is a bit of a different story, but we’ll get to that in a bit.
While we were finishing up the trim I also took some trim boards and framed out the square opening.
To keep the opening as big as possible, because it’s already a little snug, I just lined the trim right up with the opening and didn’t really worry too much about what things look like behind the door since the attic is an unfinished space anyway. Going with the same theory, that it didn’t matter if things looked a little wonky, I used a 4″ wide board along the top instead of carrying the 6″ size through. If you would like to venture into my attic to critique it I will make you stay up there a minimum of one hour. And I will not offer you any water. 😉
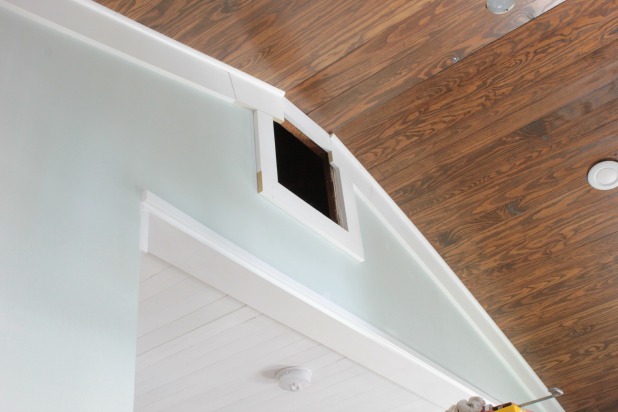
Once the trim was hung I measured the height and width, I wanted the door to sit somewhere on the trim, without totally overlapping it, so some white would show all of the way around. Knowing I was going to use 1 x 4s that I had on hand left over from making the shutters, I just figured out a measurement that was divisible by 3 1/2. (Because 1 x 4s are actually only 3 1/2″ wide.) The door itself measures 21″ wide (6 x 3 1/2 = 21) and 19″ tall. After figuring out that the measurement worked best to have the 1 x 4s run vertically I could just measure the height and take about 3″ off to leave a little trim reveal.
Using my miter saw I cut six 1 x 4s 19″ long and two 16″ long. Those 2 hold the whole door together. They needed to be long enough to be able to screw into each of the 1 x4s and short enough to fit inside the attic access opening.
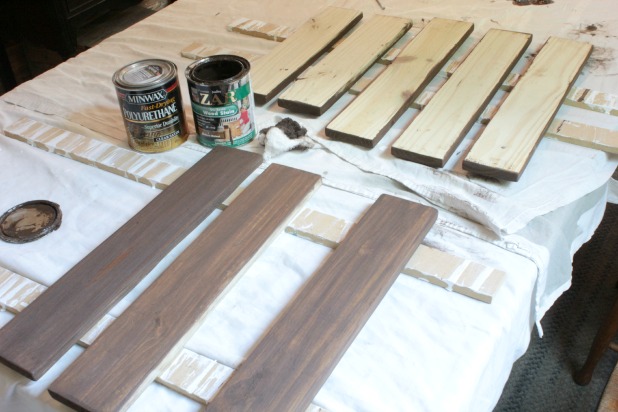
Before any assembly I sanded, stained and put a coat of polyurethane on each board. So far no out-of-pocket costs for this door since the stain and poly is the left over from when we refinished the hardwood floors. I did stain all sides of each board but I only poly’ed one side and all of the edges, just be sure to attach everything from the side you didn’t poly if you do that, too.
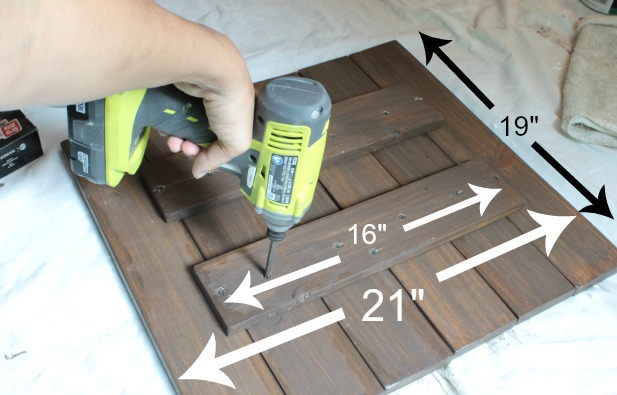
Use 1 1/8″ screws to attach everything, screw through the 16″ board into each of the 19″ long boards with at least one screw per board, some may need two if the board doesn’t want to sit flat with just one.
Now for the hanging, this really would be easiest as a two person job, but not only did I find a way to do it myself, but I also took a few “reenactment” photos for your benefit. If it was your birthday I would say “happy birthday” for this little gift. 🙂
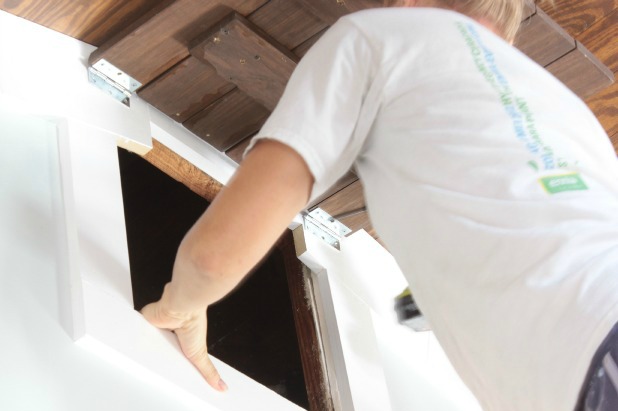
First I just held up the door to the opening to eyeball where it would work to attach the hinges to the door. Just to clarify, no tape measure was used from here on out. And the hinges were the only expense with this project. I love when a necessary update is nearly free.
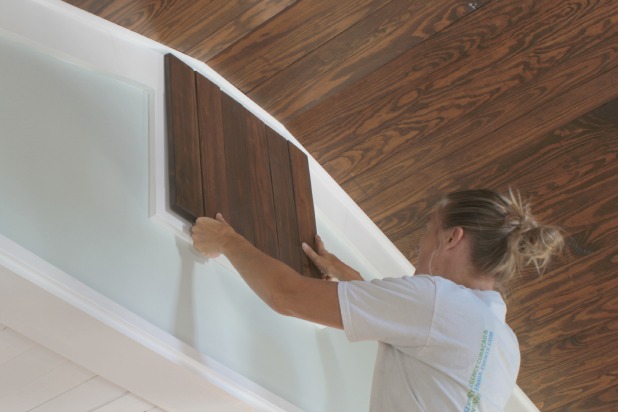
And note from this picture that the door actually ends up getting hung a little lower so the quarter round along the molding wouldn’t prevent the door from opening up completely. Along those lines, the only way the door could open up completely was to install the hinges on the top so the door would open up to the ceiling. The slope of the vaulted ceiling would prevent the door from opening completely if we wanted it to open to either side.
Luckily, adding the hinges to the top of the door also keeps them hidden from view so it seemed like the best approach all the way around.
And just to keep things real, I had to move where I had first attached the hinges because the 1 x 4 trim board running across the top doesn’t hang low enough to screw the hinges into.
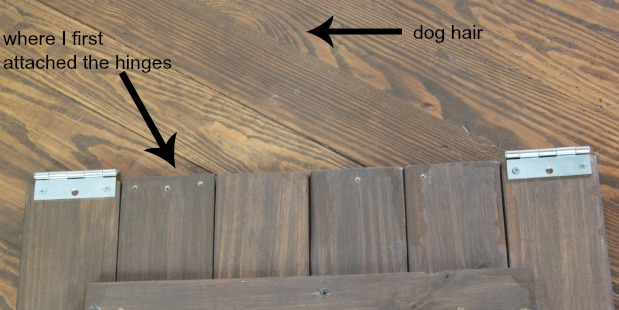
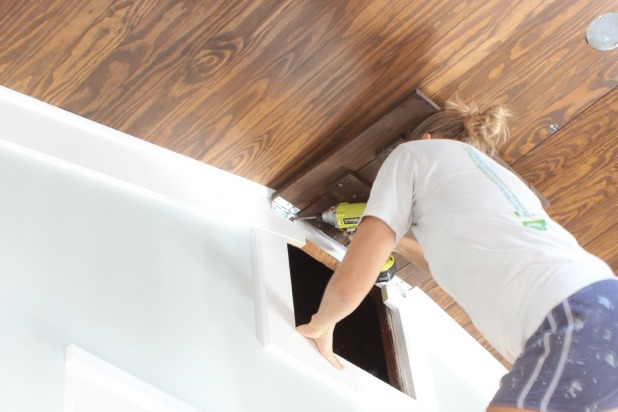
From here I precariously held the door up with my head as I eyeballed the right spot for the door to hang and screwed in one screw per hinge into the trim.
Just adding one screw per hinge here is enough to hang the door and double-check everything is where you want it. If you do need to adjust anything you don’t have as many screws to redo … or as many holes to patch.
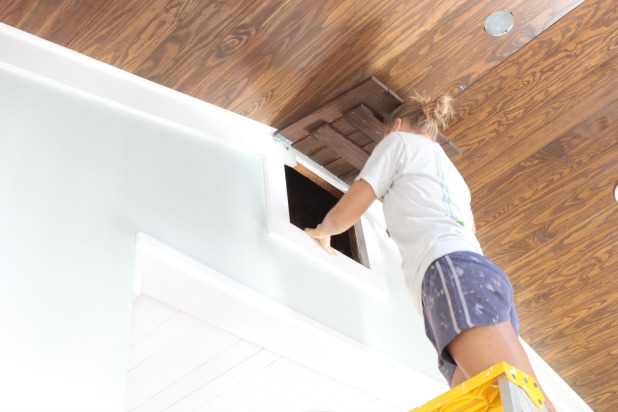
The left side was harder to screw in since I had to reach across my body and try to get the screw in straight, while keeping the hinge in the exact spot I wanted it. I held tight to the attic opening for extra stability.
Like I said, this would have been easier with an extra set of hands, but that just adds to the “value” of this birthday gift, right?!?!
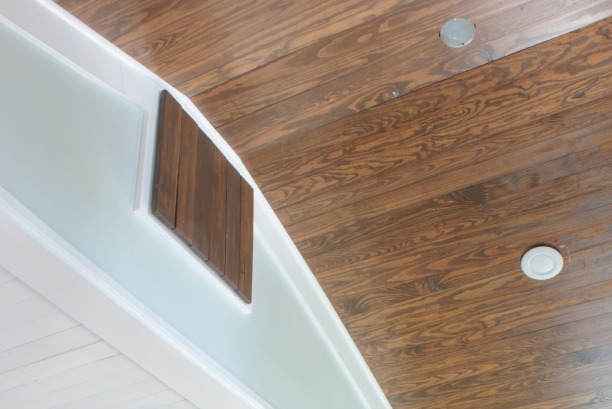
And it works to my advantage that this vaulted ceiling part of the house is only about 6′ wide. There really is no good reason for anyone to be standing directly in front of the new attic access door to assess whether it is perfectly centered. And it’s nearly impossible to get any sort of photograph from any other angle, so we’ll just call it perfect. 🙂
I am still pretty infatuated with the rich Modern Walnut stain color that we’ve infused into the guest bedroom, living room and dining room so far. It’s such a nice contrast to all of the light wall colors and bright white trim we’re using throughout. And I’m happy to have this one little item ticked off the to-do list.

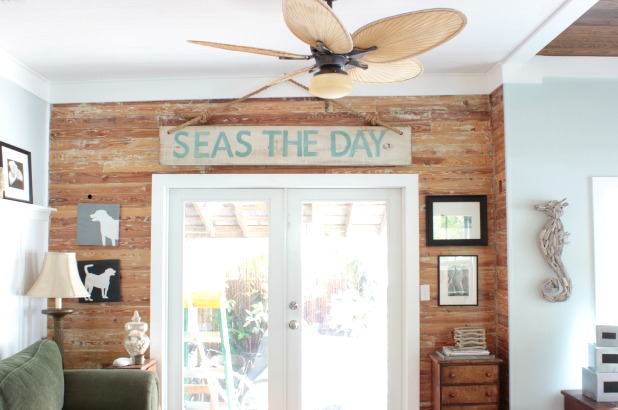
We’ve considered adding a dock cleat, like we used as “knobs” for the diy wood closet doors in the guest bedroom, but it’s not really necessary and right now I like it plain … but that may show up at some point down the road.
So, do you give completed diy projects at gifts? If you prefer a more traditional gift, check out the “you are the” word art I made for last year’s birthday. And we also bought a pair of these and when the order was complete a “happy birthday” was declared. 🙂
And have you entered the giveaway yet? There are FIVE $100 gift cards up for grabs. And there’s still time to vote for our porch in Better Homes and Gardens Ultimate Summer Bash challenge right here. Thanks!!
%20that%20you%20DONT%20need%20to%20be%20a%20good%20DIYer)