the space between

upcycle, repurpose and reinvent your space

  • about
  • aruba
  • key west
  • curacao
  • projects
  • house tours
  • privacy policy

diy pallet walkway, one huge project fail

June 27, 2014

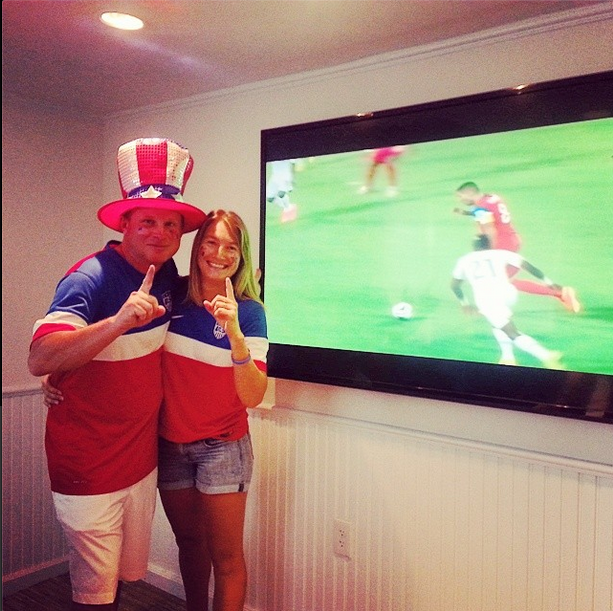
Happy Friday everyone! How about that soccer game yesterday?!?! U-S-A! It wasn’t a win but it was enough to advance. Who wants to watch with me Tuesday at 4 (eastern time) when we play Belgium? 🙂

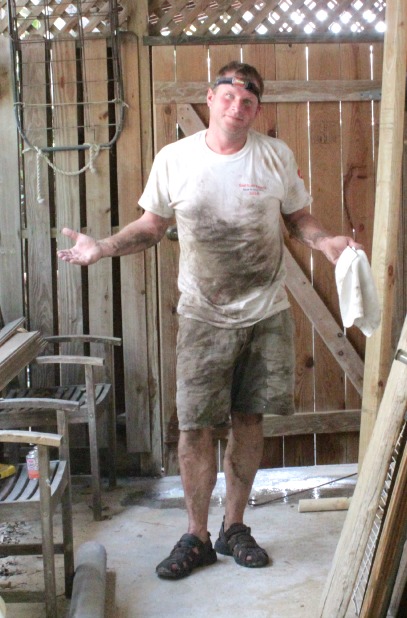
We are all consumed with the World Cup, we just can’t quit it. Luckily master renovation prep work like ripping up floors and stripping paint off wood slat walls seems to go by a little quicker with a soccer game playing in the background. I’m putting together a big update on where we are with everything, hopefully for Monday. Unfortunately we’re at the all out ugly stage, not one single thing is appealing to look at just yet. But progress is progress, and I distract myself with images of pretty faucets and tile. 🙂

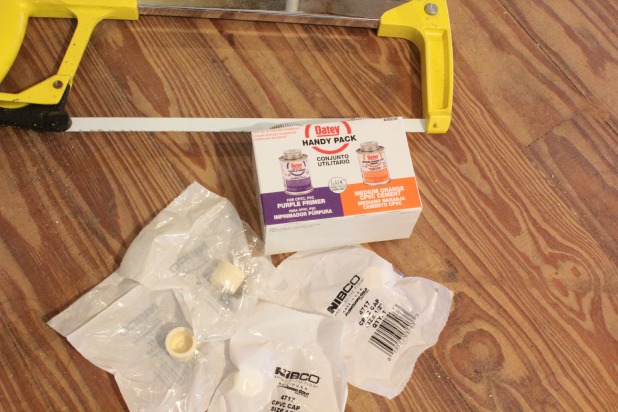
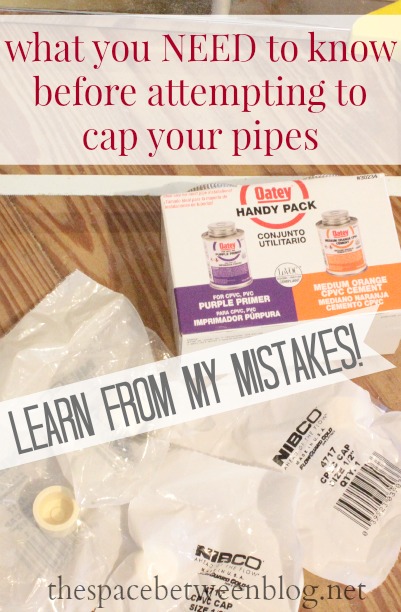
But today let’s talk about one huge project fail (with affiliate links) that happened when I was working on projects for the book.

 pallet walkway

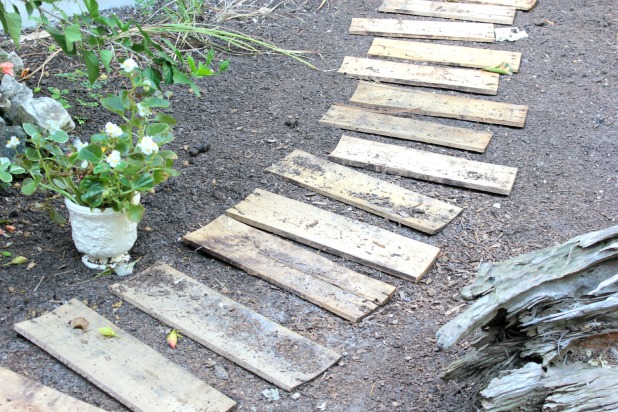
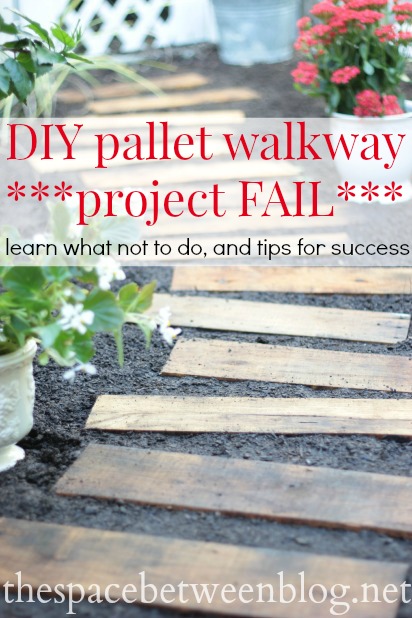
That is not exactly a functional pallet walkway. Womp womp.

Making projects for a DIY tutorial book is like compacting a year’s worth of projects into a 2 month period. And I sourced, brought home and disassembled each pallet slat that was used for all of the projects in the book. It took some serious time. Unfortunately, I didn’t have the time to wait for the “perfect” pallets and we just didn’t have the supply of pallets on this little island for me to pick and choose exactly what kind of pallet wood I really wanted for each and every project.

But I really wanted a pallet walkway. Not only for the book, but it would be the perfect addition to our small back yard.

yardscape ideas for your small garden

That lattice gate actually blocks a lot of random items (corn hole boards (similar to these, but I DIYed ours for Joel’s 40th brithday), dog pooper scooper (we have this one and love not having to bend over for that crappy job – ba dum bum) and extra landscape bricks) that we need access to even though we stash them behind the shed. So we’re often trekking across the mulch, not really a big deal but a defined path would be nice.

And I thought I had found the solution.

pallet walkway

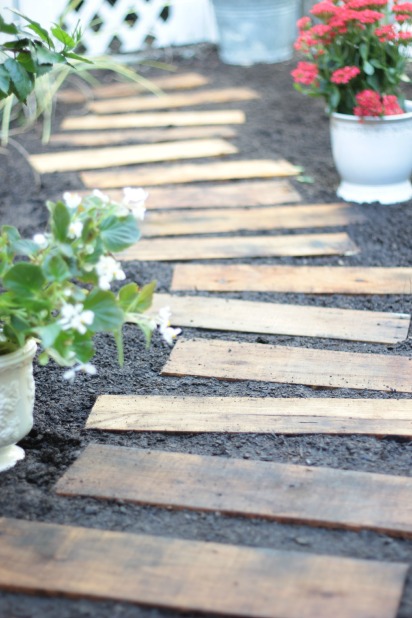
Not bad. I was really happy with how it turned out. But I was also really happy that it went bad so quickly that I knew not include it in the book. Only a few days later that walkway was looking more like this.

pallet walkway

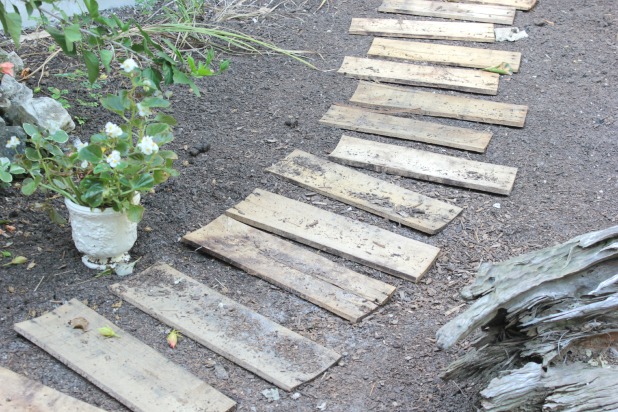
I don’t know if it was just the perfect storm of pallet walkway killing events. We had a rain storm pretty much immediately after I finished it. Then the sun shone so hot and bright I could almost see the pallet slats warping before my eyes. They even cracked when we stepped on them.

Total DIY fail.

If I were to try this project again I would:

  • Use what I call pallet support boards, they are not pallets slats, they are the boards that hold the pallet slats together. And they are thicker, similar in size to a 2 x 4. Maybe with that thickness the boards wouldn’t warp?
  • Stain or seal the wood to prevent water absorption. Always a good idea for any wood project outside, but not always necessary. Probably with the added moisture soaked up right from the ground this would help.

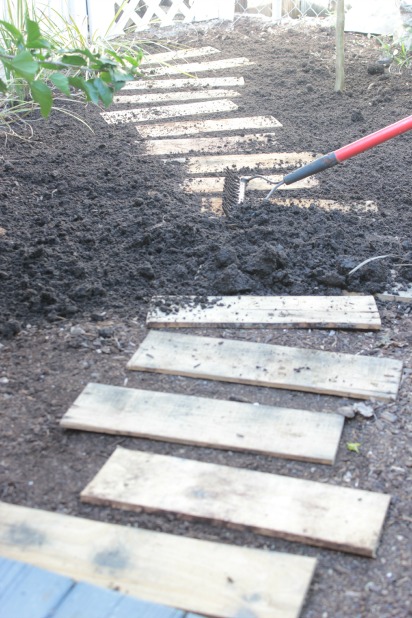
I wanted the walkway to be flush with the ground so I actually laid the pallet slats and then dumped a new load of mulch right on them and leveled it all out with a metal rake.

pallet walkway

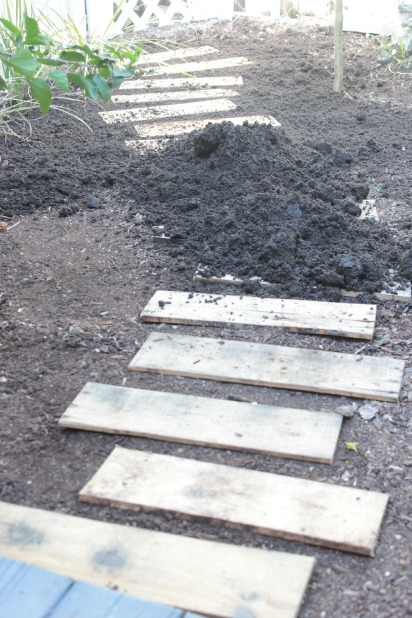
Using the back of the rake to remove the mulch from the pallet slats and keep the mulch on the ground flush with the slats.

pallet walkway

I think that strategy worked pretty good, and would do it that way again. But, in an ironic twist of fate, we have since decided (almost 100%, which means our minds will change 16 more times before we know for sure) to install a pool. It’s hard to believe I’m even saying that. We’re not pool people. But if we’ve learned one thing during our weekend adventures checking out open houses here in Key West it is the great impact of resale value a pool has in these parts. It is definitely an “after everything else is done” project, but also basically eliminates any need for that little walkway. And a quick dip in a pool has proven therapeutic after a long day’s work thanks to our lovely neighbor Katharine!!

Just a reminder, the book is available for pre-order and is set for publication on September 18th. If you like making projects with the rustic pallet wood you will love the variety of projects included in the book. There are 35 tutorials plus bonus information about making new wood look old and how to incorporate some of my favorite accessories to help your projects really come to life. And you know I didn’t include any project that I don’t absolutely love … I only share the bad and ugly here on the blog apparently. 🙂

DIY Wood Pallet Projects Book Pre-order

Do you have any project fail stories to share? Or have you made your own pallet walkway with better success?

Happy weekend everyone! Get out there and enjoy some summer!


DIY pallet walkway, a project fail with tips to make your project a success from thespacebetweenblog.netDIY pallet walkway, a project fail with tips to make your project a success from thespacebetweenblog.net

how to cap a water pipe, plumbing 101

June 25, 2014

Please tell me you all have World Cup soccer fever, too.

world-cup

We’re kind of into it. Big game coming up tomorrow. Go team USA!!

Now, if we had a nickel for every time we did something wrong in the DIY arena we’d be rich. Very, very rich. And we’d live here. Because it’s for sale. And it has a moat.

tom-brady-house

You know those people who start out every project by doing a lot of research and checking and double checking their strategy and then proceeding with caution?

Yeah, I know those people, too. We are not them. We’re much more the “how hard can it be” DIY type. We’re the “we can figure it out as well go” people. Not in a cocky way, just in a “we’re capable adults, with an average set of skills and a decent amount of common sense” way. You’ll never know if you don’t try, right?!?

And … to fast forward many, many years … that strategy has served us well. We’ve tackled projects way beyond the scope of our skill set and have somehow made it all work. The projects Joel and I have tackled together through the years are all fun to look back on and reminisce about. Here we are circa 2001 in the family room of our first house in Indianapolis, IN. #lovedthoseoverallshorts

joel-karah-indy-family-room-reno

Even the ones that didn’t work out well. Like the time we learned about primer. Ay yay yay!

The other infamous “well that didn’t go as planned” project that makes us laugh now even though it may have made me cry back then is the first time we tried to cap some plumbing pipes. We had no idea how to cap a water pipe. But, in theory, we could easily walk through the steps.

1. Cut pipe.
2. Glue pipe.
3. Cap pipe.

Sim. Ple.

STOP RIGHT HERE! I am going to save you from learning this lesson the hard way like we did. NOT ALL PIPES ARE CREATED EQUAL.

So, demolition is happening around here.

master demolition

And since we’re relocating a bathroom we need to relocate the plumbing. I’m pretty sure we’re having a professional do all of the new plumbing work, but we’re having a heck of a time getting a reputable one to give us the time of day. But, in preparation for demolition day we needed to shut the main water off to the house in order to remove the old toilet, sink and shower … which meant that we needed to cap those pipes once the day was done to be able to turn our water back on and do normal people things like … bathe.

I know I just proclaimed to stop! But this is where I tell you that this really is such a simple DIY it is pretty embarrassing how poorly we’ve executed (or failed to execute) this little project in the past. Here is the scene of the crime in a rental house we renovated in 2005 in a small town in Maryland.

choptank-upstairs-bathroom

Yes, we took out the old pipes to install PVC because we thought it would be easier than dealing with a torch and flux and all that mess. #anothernickelforus

Here’s what you need to be sure of …

Do you have PVC pipes or CPVC pipes?

That one little letter can cause Borderline Insanity Disorder. We were never officially diagnosed with this fake ailment, but I can assure you that we were on the brink of crazy when we tried to fix a CPVC pipe with PVC glue about 9 years ago. Glue, cap, wait, turn water on, cap bursts off pipe, tears, repeat … over, and over and over. It was very sad.

But here is the other big tip that can save you the headache …

Bring a piece of your pipe with you to the hardware store because they don’t know what kind of pipe you have without it.

They will be very helpful, and hand you parts like they have seen your plumbing and you will leave with a false sense of confidence. It’s not their fault.

Here’s what you’ll need, some affiliate links:

  • hack saw
  • caps the same size as your pipe, either PVC or CPVC
  • primer – the same kind works for PVC and CPVC
  • “cement” – the glue that will dry like cement if you buy the right kind, make sure you get the kind that will work with the pipes that you have

how to cap a water pipe supplies

Another fun fact:  CPVC measurements refer to the diameter of exterior of the pipe, PVC measurements refer to the diameter of the interior of the pipe. So 1/2″ PVC looks much larger than the measurement indicates. #notconfusingatall

So, from here on out, it really is a simple process. We wanted to remove the pipes from the floor entirely so they didn’t interfere with any additional demolition progress so step one was to go into the crawl space send Joel into the crawl space with the supplies.

how to cap a water pipe in the crawl space

But he can’t complain, I rolled out the red carpet for him. 😉

He proceeded to cap off the water pipes for the old bathroom sink, shower and toilet and we just put rags in the drain pipes for now. And it turns out that one rogue pipe was PVC so I had to trek back to the store to buy the other cement which is in a gold container like this.

how to cap a water pipe in the crawl space

And then might I suggest one showers. Because, well …

how to cap a water pipe in the crawl space

And we don’t have lights in our crawl space so that fancy headlamp makes it easy to maneuver and work without having something extra to hold on to. It’s not just a fashion statement. 🙂

how to cap a water pipe

This is part of our complete master renovation, you can get caught up on how we got started, what our floor plan thoughts are and how demolition day went down. And don’t forget to enter to win a complete Deck Care Kit from Thompson’s WaterSeal!

I’d love to hear what DIY lessons you’ve learned the hard way? Ever make a mistake over and over because you didn’t take the time to figure out what you were doing wrong?

And now if you wouldn’t mind indulging me for a second, while looking back through old pictures to try to find the shots of that old bathroom I found this.

joel-marley-night-one

Melt my heart, that’s Marley’s first night at home with us when she was just 8 weeks old in Indianapolis. Notice the painter’s tape all around. 🙂

And then there’s Mico’s first night at home with us about a year later.

marley-mico-day-one

Ugh. They are so cute. Mico immediately made herself right at home.

marley-mico-sleeping-couch

Ok. That’s it. No more. Ok. Just one more. 🙂

marley-mico-couch

Don’t be jealous of the 1970s sofa or the lion blanket. That blanket alone saved us loads on our heat bill during those Indy winters. 🙂

  • « Previous Page
  • 1
  • …
  • 28
  • 29
  • 30
  • 31
  • 32
  • …
  • 169
  • Next Page »

Copyright © 2025 · custom theme design by this bold girl · Built on the Genesis Framework 

  • pinterest
  • facebook
  • instagram
  • rss