the space between

upcycle, repurpose and reinvent your space

  • about
  • aruba
  • key west
  • curacao
  • projects
  • house tours
  • privacy policy

can we just talk about making decisions for a second?

July 15, 2014

Hey you guys!! Hope your week is starting off well. I feel like we’ve made it through the survival of the fittest stage (and we survived!) of the master bathroom renovation and one thing I’ve realized is that long after the physical tiredness and soreness fades the mental struggles continues to be challenging and around every corner a new decision has to be made. And it hurts my brain at times.

And because I don’t want to be the only one in “pain”, I’m going to share some current pictures of the bathroom that continue to be extraordinarily ugly and may hurt your eyes. The lighting is terrible, the shadows are everywhere and oh yeah, the room is still an overall mess. We can suffer together. You’re welcome. 😉

master renovation paint

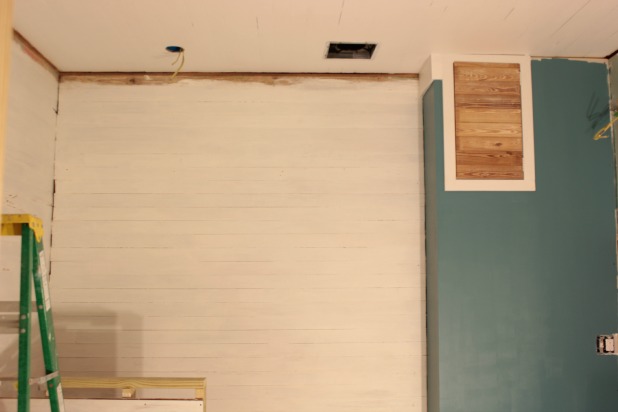
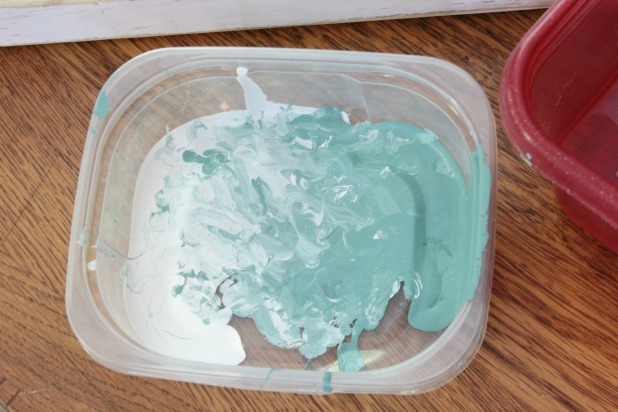
I white washed (with a heavy dose of white and a light dose of wash) the wood slat walls and tried a dark turquoise color on the new wall that will enclose the washer and dryer on the other side. The color is still drying in this picture. I also framed in and made a wood slat door for the little storage area we’re keeping above the washer and dryer. Should I white wash that door, too?

Last week I made my attempt to narrow down the overwhelming abundance of options we have available to us in the realm of fixtures and finishes. I’m happy to report decisions are being made, and that stage is incredibly fun. But there are so many more unavoidable decisions we have to make as we move along. #SoMuchThinking

How high should we make the vanity? Standard height is about 32″, should we lower it because I want vessel sinks? But 32″ already seems low. Is 32″ really a standard vanity height?

How high should we make the half walls? We need one between the toilet and the tub and one between the shower and the vanity.

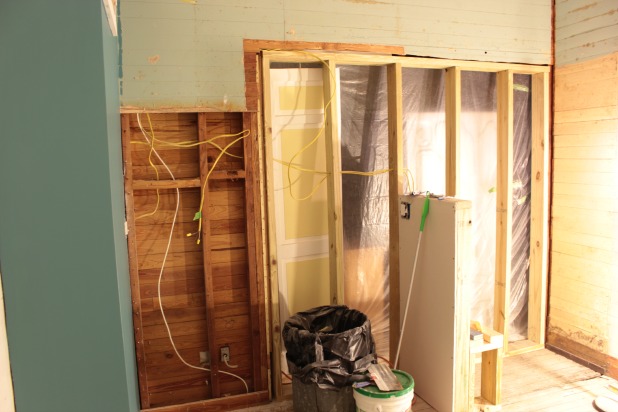
How much width do you need for a toilet nook?

master renovation toilet nook

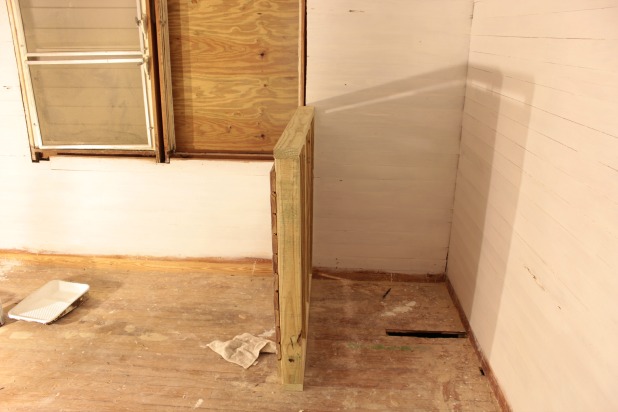
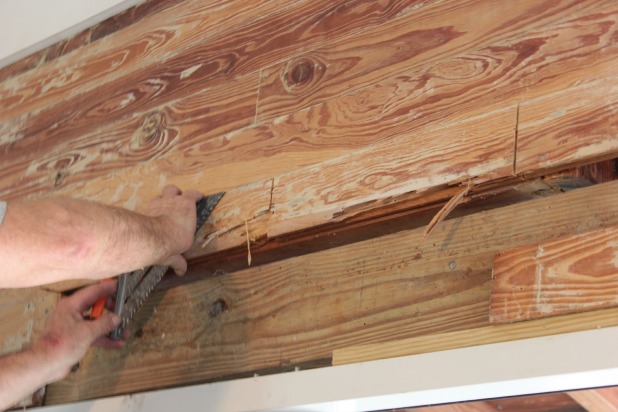
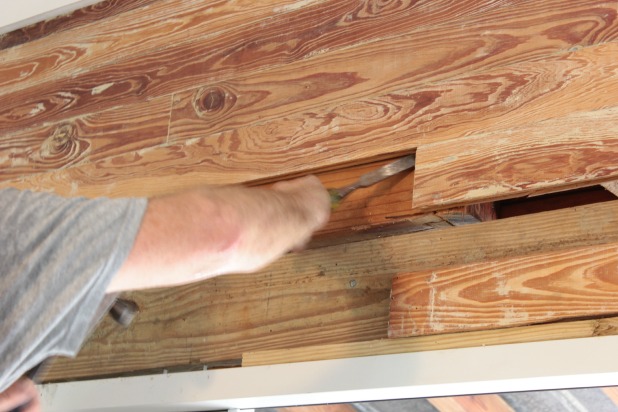
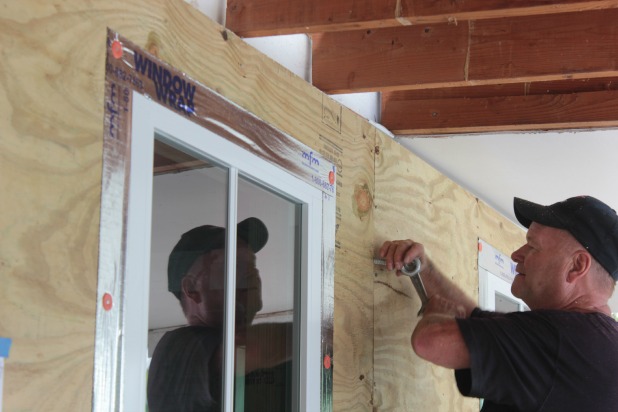
This is our new toilet nook. We made it as wide as we could, you can see how the half wall comes right up the side of the window. The new window is ordered, it will be about a 60″ x 60″ side roller … which means natural light. 🙂 The green tape that you can kind of see on the floor in the toilet nook (just in front of the wood slat we removed from the floor to look for floor joists as we start to plan for plumbing … ’cause we’re going to be plumbers) is where the front of the toilet seat will be.

How high do you hang a vanity light? Is it a certain distance from the floor or a certain distance above the vanity? Should the light overlap the mirror?

By the way, you guys gave GREAT advice on the vanity lighting question, the tip to pick the mirrors first really put things into perspective (Thanks Eryn!!!)  I hadn’t really put much thought into the mirrors and was picturing one large one, but am now thinking one above each sink and a light above each mirror.

master renovation vanity and shower wall

Where should we put the tv? Yes, we’re adding a tv. We added a tv to our master bathroom in a previous house and we loved it.

And where to put the outlets and switches? Where will the cable box go? Could we put the lights on a  motion sensor so they automatically go on when you enter the room. That would be cool. But which lights? Just the recessed lights … or the vanity lights … or both?

master renovation

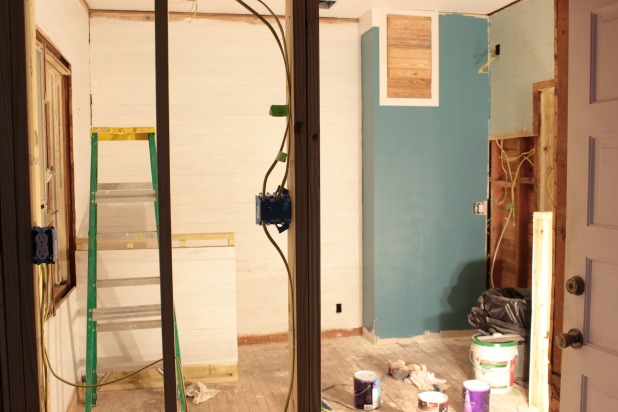
I stood farther back into the bedroom for this shot. You can see the higher outlet hole where we’re going to put the outlet and cable for the tv that will hang in that wall. The wood slats I stripped and took off the wall behind where the vanity will go got whitewashed and attached the tub side of the half wall.

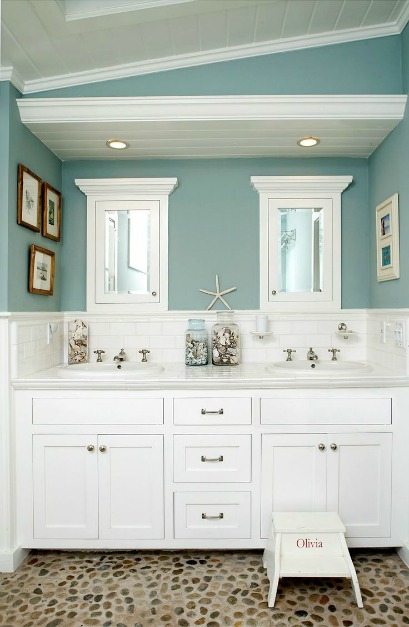
And the decisions just keep on coming. Should I sand the white wash to lighten it up a bit? Is that color right? Can you really even tell without having all of the tile installed? But the tile hasn’t arrived yet and the paint has. So I’m not going to stress about it. Paint is easy to change. Maybe that little punch out should be white so it’s not so pronounced? I still think that color will be awesome behind the vanity surrounded by white tile and mirrors and lights with a nickel finish. I was inspired by this picture.

master bathroom inspiration

(source)

But it’s just so hard to know. You know? It’s so easy to second guess yourself and get hung up on the little details. And the feeling of insecurity and uncertainty can be so debilitating. And unmotivating. And uninspiring.

I really just wanted to say … What. Ev. Er! Let it go. Don’t sweat the small stuff.

Treating someone with kindness and respect = important.

If the outlets beside our sinks end up a little higher than I really want = not important.

Pursuing your dreams and living a life you love = important.

If my first paint color choices don’t last a lifetime = not important.

I don’t mean to get all sappy or philosophical, it’s just that I am in love with all of this house stuff. And I’m so happy to do it for a living and share it all with you. And every once in a while putting it all in perspective is just what I need. Don’t spend too much time on things that mentally drain you (whether it’s a project decision or an exhausting friend), keep your eye on the prize (be it a finished, functional and beautiful space or a fitness goal) and above all else enjoy the ride.

Ok, now let me know what’s been on your mind. Anything trying to weigh you down these days. I say we band together and kill all the buzz kills. What do you say?

another reclaimed wood sign idea {seas the day}

July 10, 2014

Before we turned our main living areas into a closet slash tool shed slash everything-that-needs-to-go-somewhere-landing-zone combo room that plays World Cup soccer games non-stop (or however you would grammatically correctly write that statement) I showed you this.

living room side wall May 2014

And you guys like the SEAS THE DAY sign. Thanks! Yes, I did make it. And it’s super simple … and it was free since everything used was left over from something else (I love when that happens!). But let’s back up for a second and I’ll show you why I really wanted to hang something over that door.

Remember when that door was a window and the walls were covered in paneling? Oh, and the ceiling was lower before we raised the roof.

roof project progress

And then we removed the paneling and stripped the paint off of the wood slat walls. And had all new windows and doors installed. And were left with an exposed header above the door because the window was a little higher on the wall. Which actually made installing the new door header easier, so we weren’t complaining.

living-room-door

And I shared with you all of the ways my dad helped with exterior trim and repair, but I didn’t mention that he also patched up this little spot for us. But the one, and only down side I’ve noticed so far, to working with extinct wood like our Dade County Pine walls, is that it can’t be recreated. You’re welcome for stating the obvious.

So we had to use some of the slats that used to be below the old window, and they are noticeably darker.

wood-slats-above-double-door

Let’s just pretend this is a great shot, apparently in the almost 5 months these slats were exposed to the free world I didn’t bother to take one photograph, sorry. But it does illustrate that the patched wood was obvious. Nothing serious. Especially here, just one of the many things we’ve added to the “Key West Quirky” list. I think I’ve mentioned before that we like to frequent open houses around town and we have seen our fair share of Key West Quirky details in pretty much every home. So this little imperfection isn’t anything of real consequence, just a good excuse for me to take a few minutes out of the major renovation schedule to make a another reclaimed wood sign.

As for the patching I just stripped the paint off of the slats and finished them with a few coats of polyurethane while my dad used a square to mark and then cut the wood slats with the circular saw, just set the blade at the depth of the wood slats so as not to cut through any of the supports. We had a little termite damaged wood (very typical here in Key West) that we also got rid of.

patching wood slat walls

And use a chisel to clean out any part of the slat that you weren’t able to cut with the circular saw.

patching wood slat walls

Then just puzzle piece in the new wood, cutting it as tightly to size as possible.

Once the door trim was added it really wasn’t that bad. But this girl will use any excuse to make a sign out of reclaimed wood so I ventured out to the pile of lumber we have left over from various projects and I found a 2 x 12 x 8 and cut it with my miter saw to about 6 feet long, about the same width as the door. If I was going to buy wood for this project I would just by a 1 x 12 x 6.

reclaimed wood sign

A simple coat of paint, I used left over paint from the gray in the guest bedroom, no primer needed since I wanted a little wood knot bleed through and imperfect coverage. And then a thorough sanding with 220 grit sand paper to make it even more imperfect and it was time for letters.

reclaimed wood sign

I used the exact same method for the lettering that I used for the reclaimed wood sign I made for the guest bedroom. I first painted them all a solid turquoise color that I found on the mistint shelf at Home Depot a while back. I actually bought it for a book project. The quart was only $2.50 at the time, but technically free for this project I would say. 🙂

Now for the varying shades of aqua effect I had no idea what I was doing.

Seriously, if you learn anything from me it should be that you can wing it 93.7% of the time.

But, because I couldn’t think of one good reason why I couldn’t accomplish the paint look I wanted, I just put a little white paint and a little of the turquoise paint in a bowl and dabbed my craft paint brush in a little of each color, not really mixing the paint, then painted a little, then dabbed a little more, then painted a little more.

reclaimed wood sign

I used a small craft brush and just worked on each letter until I liked the look. The red bowl has water in it, I found it helpful to keep the paint damp and workable. Every letter is a little bit different and there is no real science to this at all. Heck, there isn’t even any fake science. 🙂

I finished the look with a little dark wax just to help the aged look along a bit.

As for hanging it, I was hesitant to drill into the wood slat walls because they are bare wood, and would be impossible to patch, so I decided to drill into the ceiling, which is painted wood slats which makes for a much easier patching process if it ever comes the time.

I used a level to measure straight up from the center of the door to mark where to drill into the ceiling.

reclaimed wood sign

I drilled a 3/8″ hole with my impact driver, because that was the right size for the eye hook I was going to use.

And as for the eye hook, do you remember the day we found out our porch roof wasn’t attached to our house? And I had to run out to buy something so we could tie up a support to hold it all together while we added joist hangers?

porch roof support

And the eye hook or bolt I bought (like this one) was strong enough to tie my elephant up to, said the nice man at the hardware store. So I untied my elephant … I kid. Since she helped us that day (The eye bolt, not my elephant.) she has just been waiting for a new job, so I screwed her into my new hole in the ceiling.

reclaimed wood sign

And used 3/4″ rope we had left over from our rope and wood accent wall in the guest bedroom, run through 1″ holes I drilled in either end of the sign and tied with slip knots thanks to Joel. Don’t ask me how. I don’t know. 🙂  But if you really want to know I can find out. In exchange for cookies.

It took both of us to get it level and hung at the height I we wanted. And the darker wood slats on the wall are hardly noticeable.

reclaimed wood sign

To cut the rope to length just wrap painter’s tape around where you want to cut and use a serrated knife, a piece of scrap wood prevented me from cutting into the actual sign.

reclaimed wood sign

With the painter’s tape still on the rope, douse the end of the rope in white glue and let it dry overnight before removing the painter’s tape. This will prevent the rope from fraying, obviously skip this step if you want the rope to fray. 🙂

reclaimed wood sign

And that’s it. I like the “seas the day” saying for obvious reasons. Just something else a little coastal to add to the mix and help the vibe of the home continue in the “we’re a home near the beach” feel.

reclaimed wood sign


And if its coastal decor you like, hop over to Remodelaholic.com to see a little collection I put together of some fun Coastal Decor Ideas. Think crafts, fabric and color schemes!

********************************************************************************

DIY Wood Pallet Projects Book Pre-order

  • « Previous Page
  • 1
  • …
  • 26
  • 27
  • 28
  • 29
  • 30
  • …
  • 169
  • Next Page »

Copyright © 2025 · custom theme design by this bold girl · Built on the Genesis Framework 

  • pinterest
  • facebook
  • instagram
  • rss