This post may contain affiliate links which won’t change your price but will share some commission.
How about some basically free DIY reclaimed wood frames for you?
This is a classic case of someone’s trash becoming my treasure. On an innocent little walk around the neighborhood many months ago I noticed a neighbor clearing out a lot of old wood and other goodies from her property and stacking it on the street for garbage pick up. Now, some might wait until after dark and make sure that no one sees them rummaging through someone else’s garbage. But we are so far beyond that point, any shame I once felt about dumpster diving seems like a previous life at this point. It’s not my fault that people throw out things that I covet.
 Last I checked “Thou shalt not covet thy neighbor’s garbage” wasn’t a sin. 🙂
From that one garbage pick up so far I have made the legs for the DIY wood bed frame and the reclaimed wood wall art in the guest bedroom. And now these perfectly rustic mirror frames.
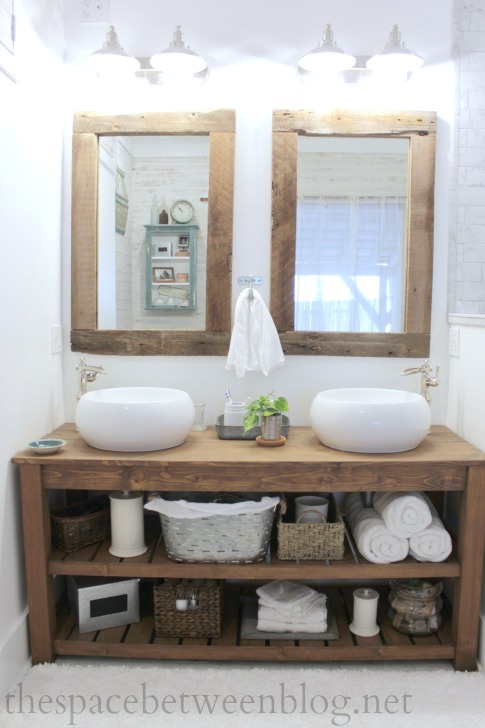
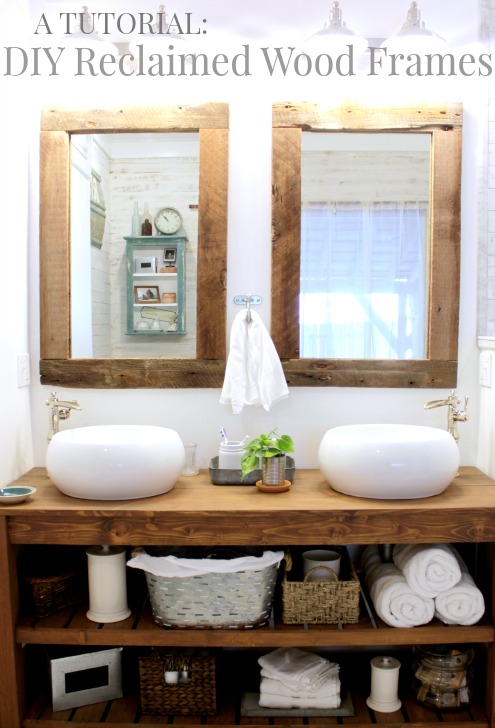
During demolition I found a plain mirror without a frame in the back of the old closet (that is now our master bathroom) that measured 20″ wide by 33″ high and I held onto it. As we got into the master bathroom renovation and contemplated things like one vanity light or two and the layout started to come together somehow it turned out that the mirror would be the perfect size for our little double vanity. So I ordered another mirror the exact same size from the same company where we have ordered all of our doors and windows without really having a plan.
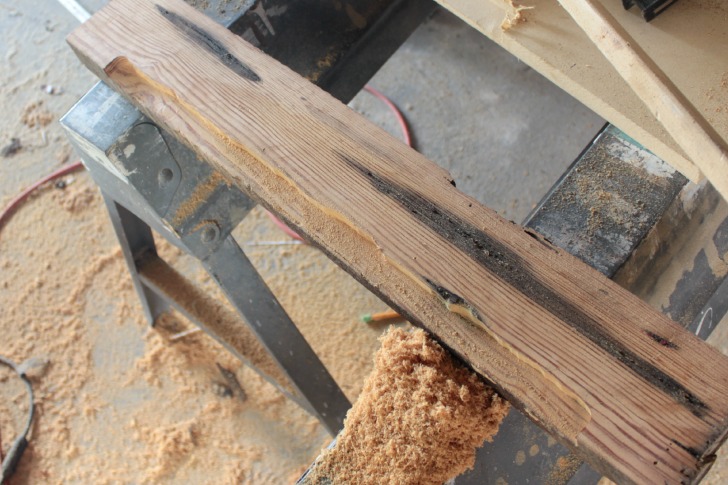
You could easily make this same style frame with new wood, a 2 x 4 would be a similar dimension. But what I did was take an old 4″ x 4″ post … and you know it was really old because it actually measured a true 4″ by 4″ … nowadays they measure 3 1/2″ x 3 1/2″ … and ran it through a table saw to rip the post down to 1 1/2″ thick slices.
Actually, a couple of friends helped me because the blade on my table saw didn’t come up high enough so they let me borrow their heavier duty table saw to make the cuts. And by “let me borrow” I mean they let me bring my post to them to cut. Our friends are the best.
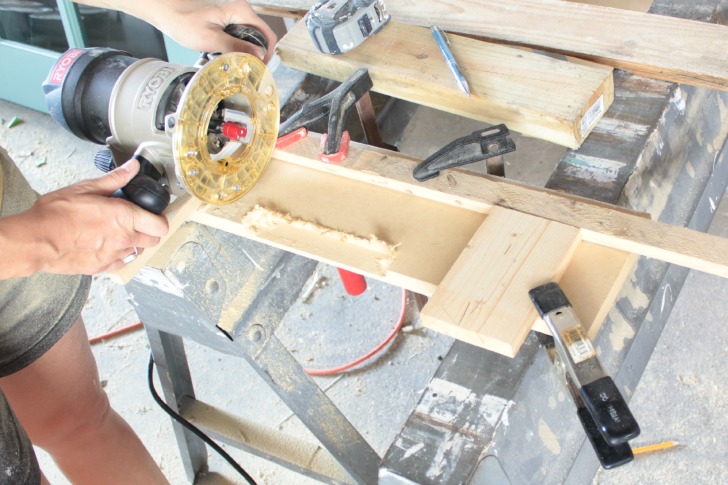
Speaking of friends, I emailed my friends at Ryobi and told them my idea to make some frames where I wanted the mirror to be set into the frame so the chunky reclaimed wood would sit flush on the wall so they sent me over their router to try out. Here is an aff link to the router that I have and this is the same size as the router bit I bought for this project.
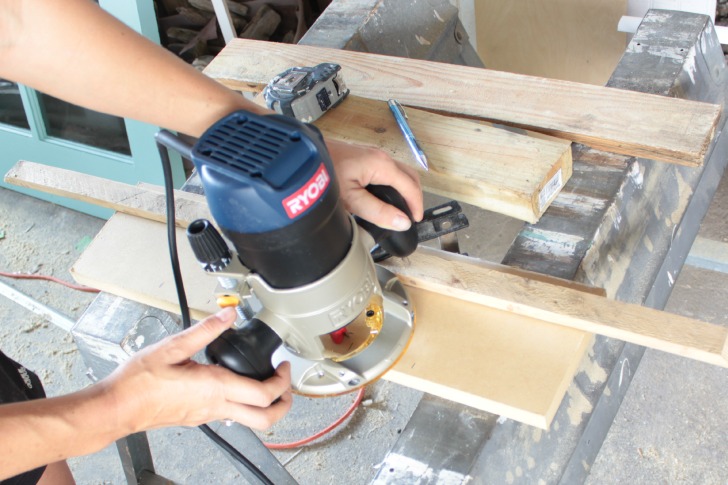
I had never used a router before so I started by clamping a straight edge to a scrap piece of MDF (I’d use real wood if I were you, sawdust from MDF is the worst and pretty much a router is a sawdust making machine.) and giving it a test run.
I made some marks for where I wanted to router out on my test piece and measured how far from the actual cut the router guide sat to know where to clamp my straight edge in place.
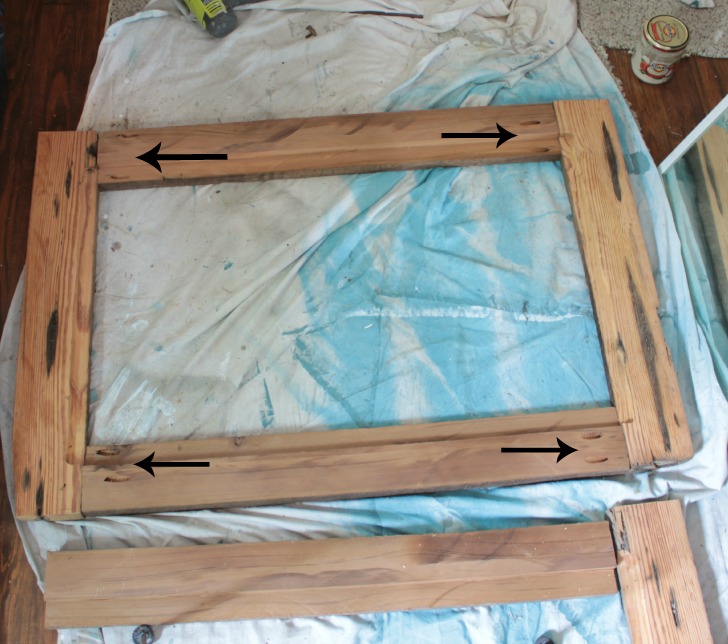
For the top and bottom pieces of each mirror frame I couldn’t router straight from one end to the other, I needed to stop so the ends of the wood would sit flush with the sides of the frame. You could miter the corners of the frames and then you could router from end to end without the cuts being seen, but I really liked the idea of just all straight edges so based on the size of my mirrors I used my miter saw to cut the reclaimed wood into pieces for the frames.
It didn’t take long to feel comfortable enough to make the actual router cuts on the reclaimed wood. I set the router bit so it cut 1/2″ deep so the 1/4″ thick mirrors would fit and also a 1/4″ piece of plywood would fit behind. I was thinking I would need the plywood to screw in some brackets of some kind to hold it all together. I was wrong … but we’ll get to that in a second. Routering (not a word?) only the depth of the thickness of your mirror would work just fine.
I even gave it a go without a straight edge as a guide because I knew these cuts would be safely hidden from the world behind the mirrors never to be seen by anyone at anytime.
Unless I decided to show you the madness that is me trying to router without a straight edge. 🙂
So, um, yeah. The guide was helpful. 🙂
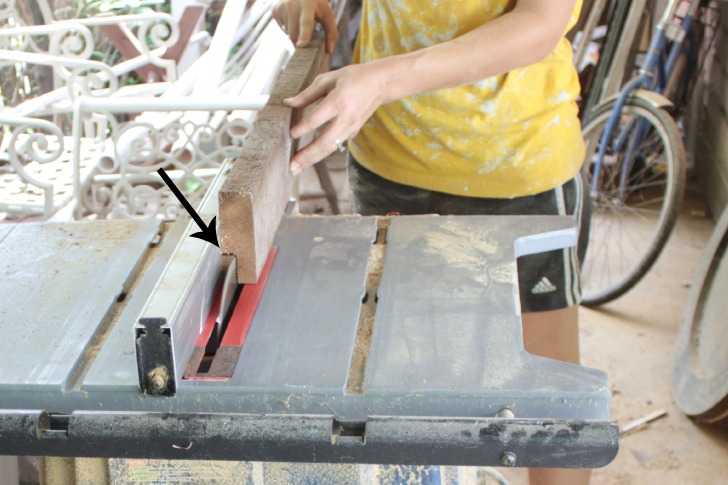
For the 4 boards that would be the sides of the mirror frames I just ran them each through the table saw cutting out a little rectangle of wood. Each piece had to be run through twice, make sure to lower your table saw blade so it only cuts into the wood as much as you want to cut out. One cut was just a 1/2″ cut to match the 1/2″ depth of the router cuts on the top and bottom frame pieces and the other cut was 1 1/4″ so make the cut out wide enough for my mirrors to fit in place.
Then just line up each frame, with the front side facing down, and mark where to drill your pocket holes. Since this is reclaimed wood this part is important because the wood is not exactly in perfect shape all around. I avoided any spots with old nails in it or holes and drilled two pocket holes in each end of all of the side pieces of the frames.
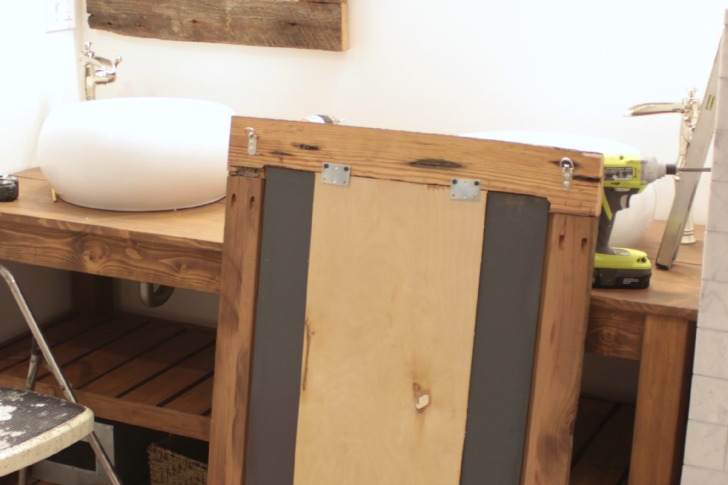
And remember how I was wrong about needing the 1/4″ plywood? I used these flat, square brackets (I can’t find a link to them online but I bought them at my local Home Depot) and just screwing them into the reclaimed wood and overlapping them behind the mirror and plywood was enough to hold everything in place. I had to add the plywood since I had cut my frames 1/2″ deep, but if you only cut yours 1/4″ you can use the same brackets just overlapping the mirrors to hold them in.
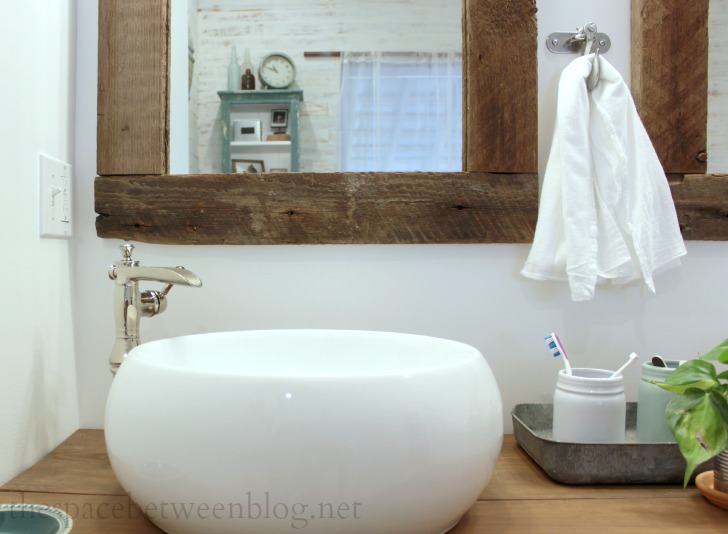
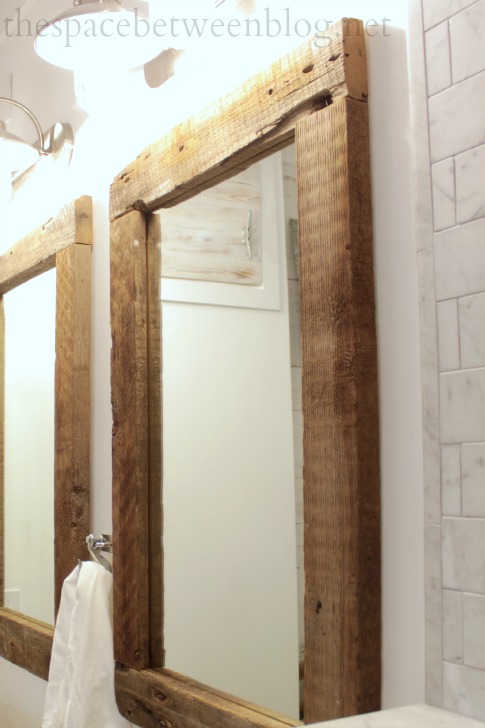
Two of these heavy-duty D hooks worked great to hang each mirror and then the hardest part was just centering and leveling everything. You know … centering and leveling everything just enough. There’s nothing perfect around here. 🙂
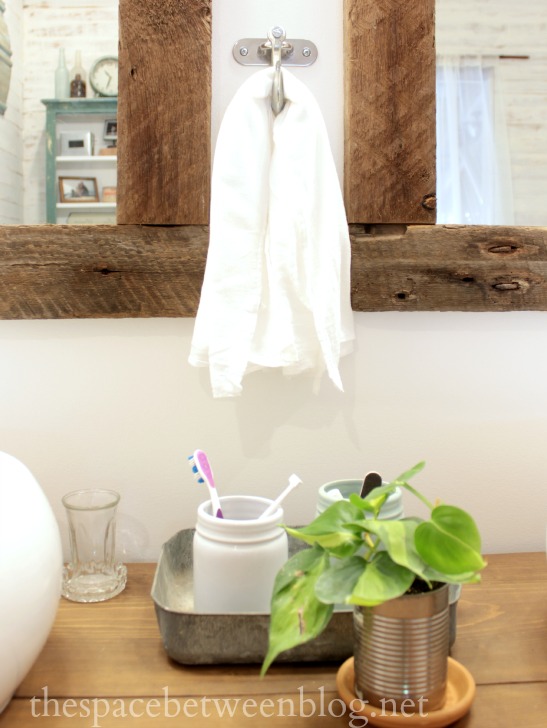
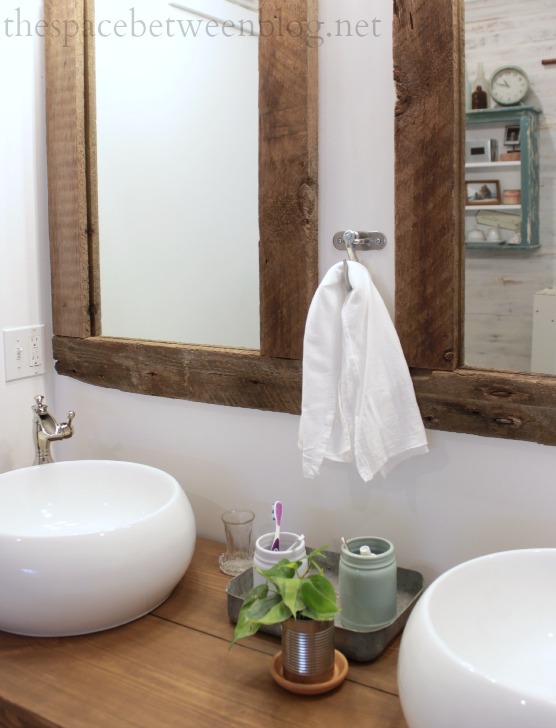
For a hand towel hook I found a great galvanized grab hook in the nautical supply section of our Home Depot. It’s similar to this one, and I bought the back plate at HD too but can’t find anything similar to link to online for you.
I love it. 🙂
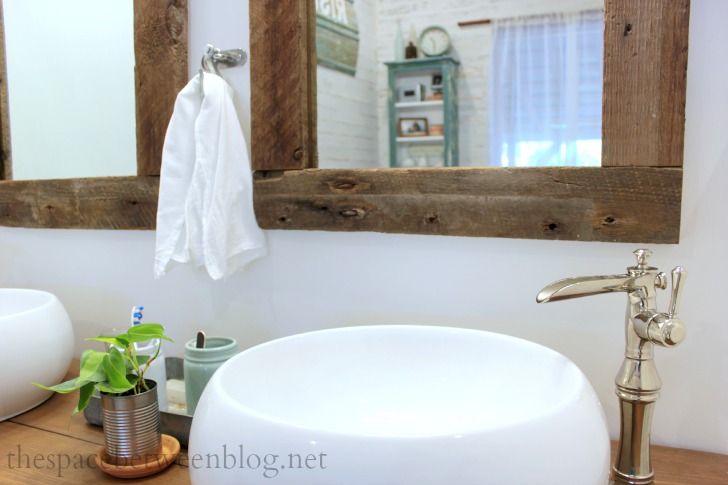
And the mirrors are my new favorite things. I adore them. It doesn’t hurt that they only cost me the price of the brackets and D clips. An upcycle and a bargain, that’s a recipe for love around here. 🙂

What’s the recipe for love around your place?
Get caught up on our entire home renovation here and read details about the master bathroom tile and all of the other free, rustic elements.

shopmakingit says
Love this! I need to find some old wood around here – I’m always DIY-ing the “rustic” into Home Depot wood, haha.
Karah says
Maybe check the “cull” section at your Lowe’s or HD, they have beat up boards that they sell for 70% off!
karen@somewhatquirky says
They’re beautiful Karah!
Karah says
Thanks Karen!
Karen says
I love how your bath is coming along. And I love how you find alternate uses for things. 🙂
On a side note: Because of your love of Key West we have decided to visit. Headed there this Saturday for a week. And I am so excited!!
Karah says
I’m so glad you like the bathroom!! And have fun here, I hope you love it!!
Daytripper says
Genius; as ever.
Casey says
This looks amazing! Thanks for the tutorial! I’m trying to figure out how to give our master bath more personality – might have to try this out 🙂
Karah says
have fun with your project, casey!!
Smart Girl says
I love these and I’m thinking one will be perfect for my guest bathroom. Thanks
Amanda Winkler says
These are awesome. Do you ever sell them?
Karah says
Hi Amanda! Thank you, but I don’t sell them. I only like to make something once, haha. 🙂
Sarah Graves says
Love these frames!
So, we have one of those lovely unframed mirrors already glued to the wall by the builder. I’m guessing I could just attach these boards to that so it will be framed. Do you think that can be done? I’m a newbie to DIY.
Karah says
Hi Sarah! I am so sorry for my delayed reply, but yes! I think you could do that. I would just make sure the back side of your boards is perfectly flat. You might need to run them through a table saw. But there is definitely construction adhesive that could be used to do what you’re talking about.
Andrea Sawchuk says
Do you have dimensions and instructions for the vanity?
Karah says
Sorry for my delayed reply, here is the post about the vanity, https://thespacebetweenblog.net/diy-wood-vanity-master-bathroom/. Good luck with your project!
Aarsun Woods says
That’s looks great!!! I found this wooden mirror frames very classy and its colour finishing is just mindblowing.
Sonia Biddle says
Love it! What stain did you use on the mirror?
Thanks!
Karah says
So glad you like them. I didn’t use any stain, they are unfinished.