This post may contain affiliate links which won’t change your price but will share some commission.
We’ve definitely transitioned from a few small pieces of molding on the floor to a full-scale demolition in our lining room (you know that room, the living / dining room combo room). Here’s the full house tour video {before} for a glimpse into where we started.
It was so fun to hear from those of you who watched the video … we’re excited to see the transformation, too!!
Knock on wood … because there is an abundance of it around here … but we’re pretty happy that we haven’t had to take any walls all the way down to the studs … yet. We’ve uncovered Dade County Pine on every surface (walls and ceilings) so far.
Luckily we love the wood slat look. 🙂
Now, we aren’t necessarily the ‘define a plan’ and ‘follow the plan in order’ kind of DIYers.
Especially when it comes to these older homes. We’ve learned to never get our heart set on one idea, because you just never know what you’re going to find when you start uncovering the changes the previous owners have made over the years.
Hello old front doorway hidden under paneling.
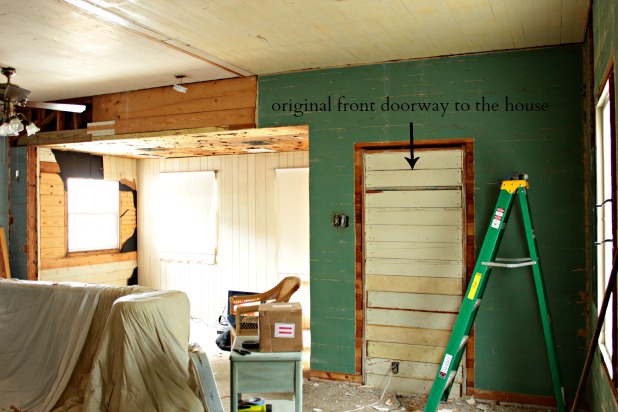
So when we first brainstormed ideas for this combo room transition I was in love with the idea of vaulted ceilings. We have high ceilings in most of the house, but this weird shorter ceiling in the very front, where you enter.
This front 5 feet of house was the original porch. And we love the added square footage the previous owners created by enclosing that porch and then adding a new porch to the front of that. But we don’t like this weird ceiling line it created.
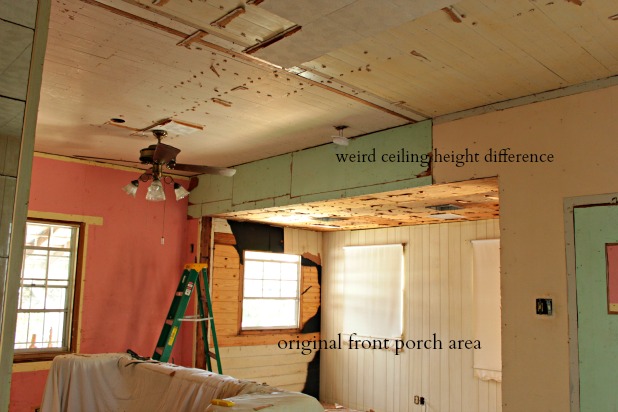
And that it is so short right when you walk in we think it makes the whole room feel smaller, even though the rest of the ceilings are 9 feet tall and this room is pretty good-sized (for Key West).
So, the whole design of the front part of that room had me thinking if we vaulted the rest of the ceiling it would make such a stunning statement (remember my inspiration shots?).
Lo and behold, we uncovered a complete Dade County Pine ceiling. Seriously, we get wood slats on the ceiling, too, and we don’t need to install any wood?
This reclaimed wood loving girl is in house heaven!!
And once I found my grove, the removal of the drop ceiling actually went pretty quickly.
Here are the steps for how to remove a drop ceiling.
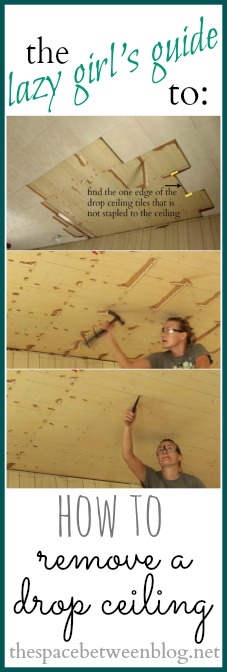
Supplies:
*hammer
*pry bar
*needle nose pliers
*safety glasses (obviously)
*ladder (depending on the height of your ceiling)
Step 1 – Use a hammer to wedge the pry bar under a few drop ceiling tiles to remove them.
Step 2 – Determine which edge of the drop ceiling tiles isn’t stapled into the ceiling. Typical 12 x 12 inch ceiling tiles will have 3 edges stapled to the ceiling, it is the edge that is not stapled to the ceiling that will be easiest to remove says Captain Obvious.
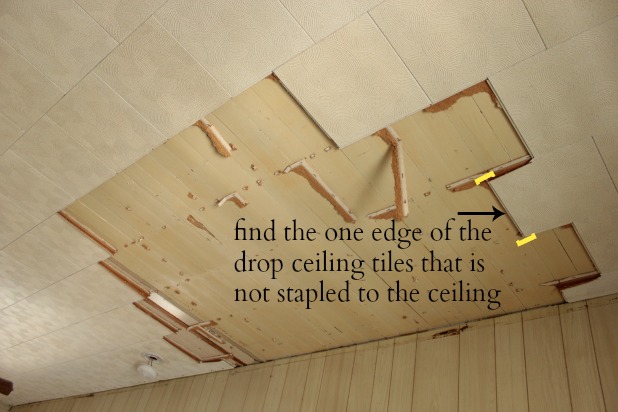 Step 3 – Using the claw of the hammer (the opposite side than which is used to hammer in nails) to pull down the ceiling tiles.
Step 4 – Use the claw of the hammer to scrape out as many staples as possible. This is an imperfect science. I was able to scrape the claw right along the ceiling boards that we uncovered under the drop ceiling tiles without damaging them at all. The size of the claw on my hammer was a perfect match to the size of the staples as well and pulled many staples right out. But, at a minimum, this step will remove the remnants of ceiling tile stuck in the staples and loosen the staples enough to prepare you for step 5.
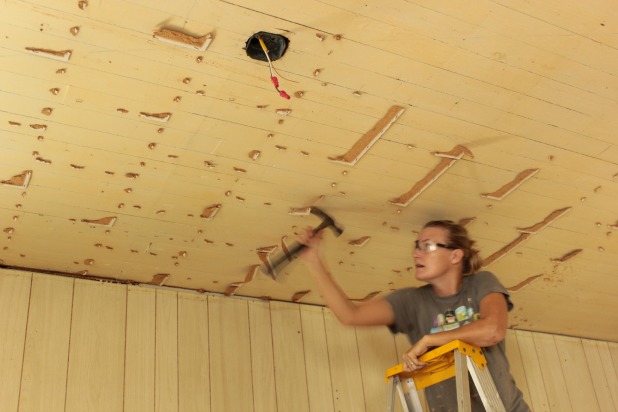
Step 5 – Use needle nose pliers to pull the remaining staples out of the ceiling.
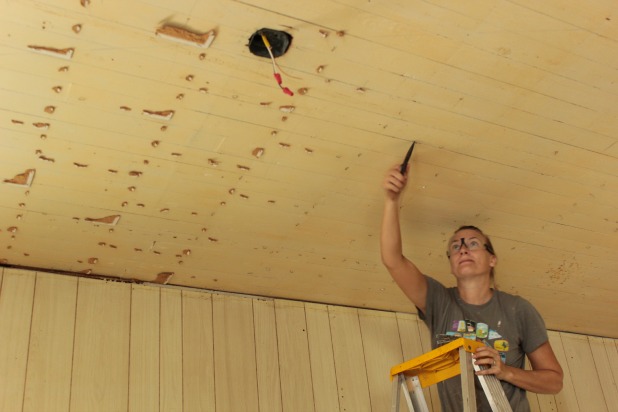 Since we are happy to end up with a somewhat rustic wood slat look I am not worried about the tiny holes from the staples. If your drop ceiling was attached right to your ceiling joists you won’t need to do anything about them either, just cover them up with your new ceiling of choice.
And, I worked about half of the ceiling by doing every step in as large of a section as I could reach from the ladder. So I would set up the ladder, complete steps 2 thru 5 then move the ladder and do it all again.
When Joel helped me take down the tiles, and nothing else, I was left with the other half of the ceiling looking like this.
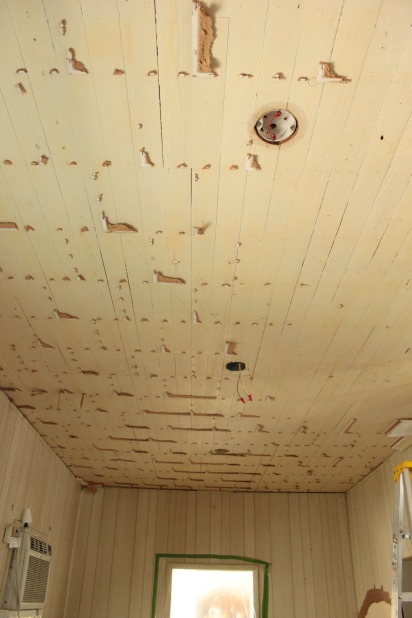
But I was pleasantly surprised to find out how painlessly the rest of it was since I only had steps 4 and 5 to do. And the inhibiting factor really is how long can you keep your arms above your head and scrape or pull out staples? Shoulder workout anyone?!?!
With all that said and done, and with the Dade County Pine ceilings in such good shape we will not be tearing them out to vault the ceilings. We are tossing around a few (bigger and badder) alternatives for that weird ceiling line in the front of the house though, so we’ll definitely keep you posted on that. But for now we’re excited to get some paint going on up in here!!
Too bad there is just a little bit more prep that needs to be done to these ceilings before they’re ready. I will definitely be ready to get back to work where my arms don’t have to be extended above my head for hours on end. 🙂
Update: We’ve forged ahead and you can see how to paint over cracked paint, the DIY lesson we learned the hard way and our first finished wall (board and batten baby!).
How about you, had any luck removing a drop ceiling before? Ever removed one and then wished you hadn’t uncovered the mess you did? Is your neck tired just from the thought of all that looking up?


Kelly @ Eclectically Vintage says
You’re going to have the buffest arms in the keys!
Kelly
Kelly @ Corner of Main says
My arms are tired from reading this 😉 Looks awesome though! What a great surprise to find wood!
Traci says
I don’t thing that there is any thing lazy about the work you are doing. No gym needed for you. The ceilings are going to be fantastic.
Traci
karen@somewhatquirky says
I’ve never removed a drop ceiling. However, I would be glad to if it meant that I would end up with a plank ceiling! LUCKY DOG!!!
Karah says
I know, right. It’s hard to complain about all the work since we’ve really found the best possible finds underneath. Except for the floor … helloooooo thick floor adhesive stuck to our wood floors.