This post may contain affiliate links which won’t change your price but will share some commission.
So, the one project I kept telling my dad that I wanted to accomplish while he was here was to trim out the windows and doorway on the exterior of the house so I could move ahead with the siding.
Just a refresher as to where we are today. Because I’m drawn to this picture like a bad accident.
Well, actually … this is happening right now and we’ll be very excited to have that behind us. #TheyCallItARoof
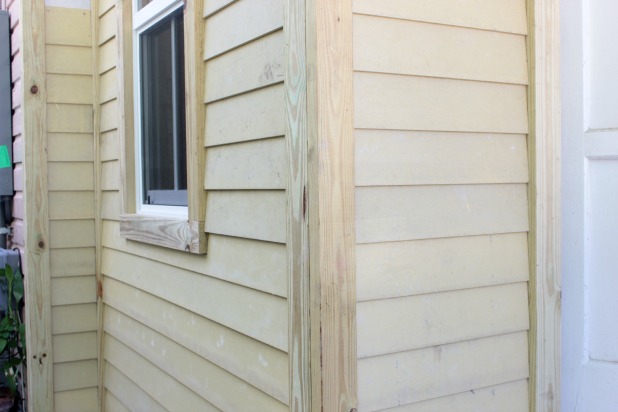
As for the trim and siding, the product we are using for the siding is a cement board product that is very low maintenance and easy to install. And to make it even easier our contractor friend suggested we install all of the trim first which would create nice little areas that we could side right in between.
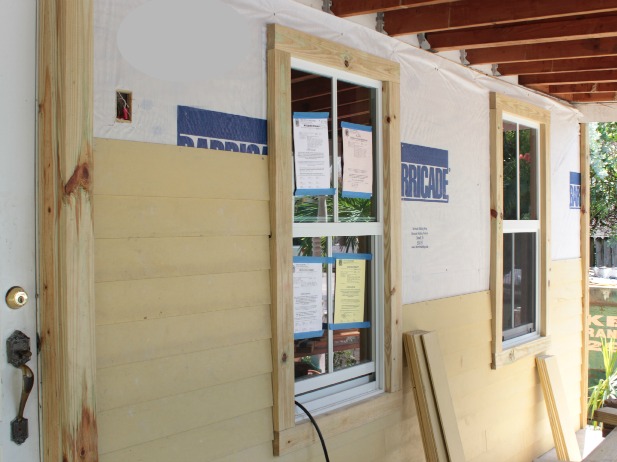
See how clean-looking that is? If we installed the trim after the siding we would have had to caulk a ton to fill in for the different levels the layered siding creates.
We used pressure treated 2 x 4’s for the trim around the windows and the doorway and then we had to create trim corners for both the inside and the outside corners, like the ones in the picture above.
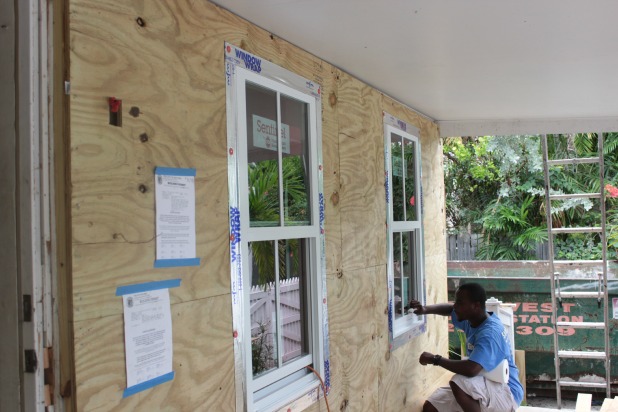
What complicated this project is that the windows are replacement windows and were installed from the outside with a flange that overlaps the window opening.
So we couldn’t just slap some 2 x 4’s on there and call it a day.
This was one of those projects that I was really glad to have my dad’s guidance. Like most of the intimidating projects though, in hindsight, I could have tackled it on my own … and after a little trial and error it would have worked out. But it was nice to have my dad’s experience and know-how just for that added vote of confidence.
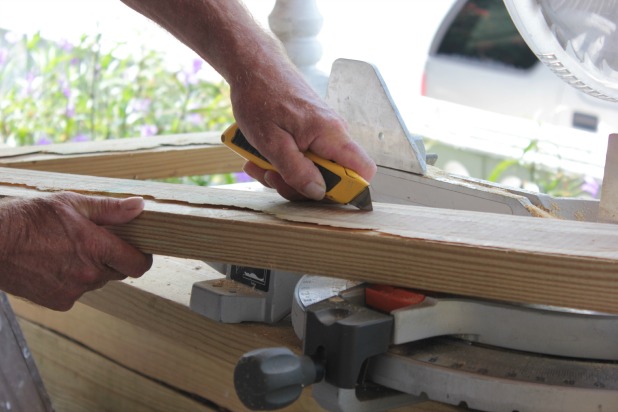
Turns out, one little run of each 2 x 4 through the table saw to create a 1/4 inch notch where the trim piece would overlap the flange of each window was all it took.
As you probably know the width of the saw blade is 1/8th of an inch, so after we ran the boards through we ended up with pieces that were still attached, but they came off easily with the help of a utility knife.
And one other great tip I learned from my dad was to cut the two trim pieces that needed to be the same length at the same time.
You know how you want your top and bottom trim pieces to be exactly the same and each side piece, too?
The best way to ensure that is to cut them together … how many times do you miss your mark by just-that-much. 🙂
Smart, right?!?!
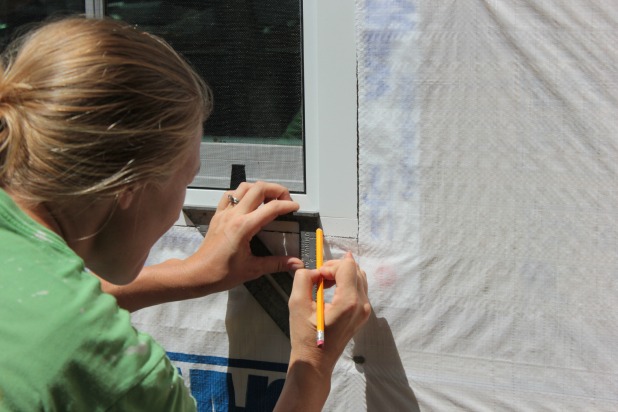
We decided on a 1/2 inch reveal of the window casing so I just marked the bottom on one side …
… and we’d line the piece up with the one mark and then measure level.
Then install one side piece and make sure it’s plumb (that’s level on the vertical). For the second side piece just attach it at the bottom. Then attach the top piece over the side that is fully attached and plum.
Now you can line up the loose ends of the second side piece and the top piece and finish attaching them.
We got into a pretty good rhythm so this next shot already has some siding installed, but I was really happy with how the trim turned out. There looks like more of a reveal on the top of each of the windows, but that is actually the window itself and not the casing.
My dad also had a great idea to attach our outside corner pieces to each other before attaching them to the house. That just made sure that the corner would be securely attached at 90 degrees even though the exterior of our house might not be perfectly square.
What, with all of the faux brick covering and build-out measuring I would have no idea why our house would be anything but perfectly square. 🙂
In the picture above we were attaching a 2 x 4 to a 1 x 4, which we used on the two corners that created the transition to the walls of the house that already had trim and siding.
For the inside corners we actually ripped a 2 x 4 down to a square 1 1/2 inches on the table saw.
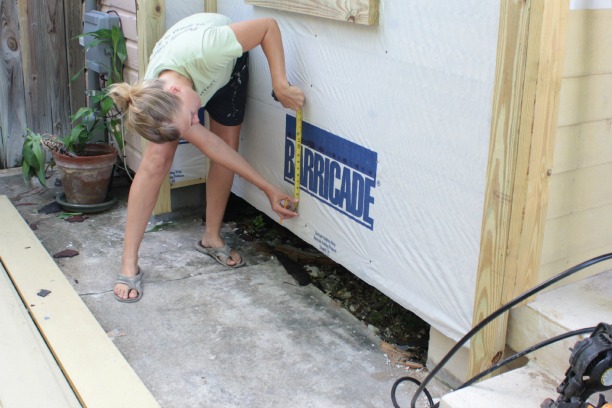
We installed all of the corner pieces with a lot of extra length at the bottom. These will be easy to trim to exactly the right length at the end.
And my dad notched the front door trim around the new threshold so it would run all the way down to the porch floor. That one long, straight line of trim made the siding install super easy.
And that’s how we got our exterior ready for some siding!
After the unexpected porch roof project, the unexpected entry doorway threshold project, the complicated math build-out project and this always-takes-longer-than-you-think-its-going-to trim project we were more than ready to get to some siding already!!
And we really did get into quite a groove once we finally made it to that point.
When we get it all complete I’ll give you the full rundown. We just have that last little window above the porch roof to install and trim out and we’ll be ready to keep moving out there.
While my dad was here he did all of the cuts so I’m looking forward to trying that out for myself since it’s cement board and requires a special blade. #intimidatingnewthing
Until then we’re shifting focus inside and let’s just say we passed all of our inspections which means drywall’s a comin’.
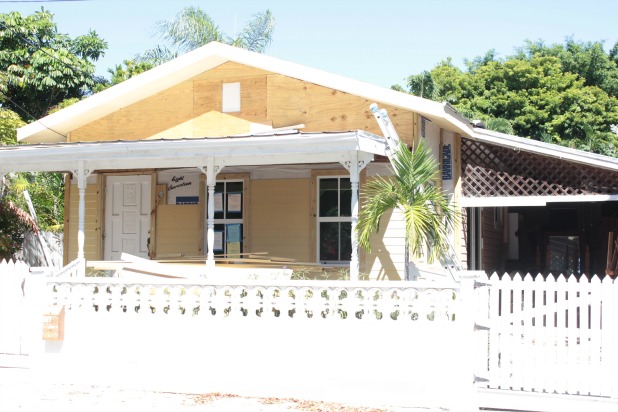
But just for fun … remember what the house looked like when we bought her?
 Granted, we’re at that awkward in-between stage where she doesn’t necessarily look any better … but just the new window sizes alone make me happy.






cassie says
love that trim! looks great! sometimes sorry is the hardest word, too, ya know.
Karah says
seriously! I love Randy Pausch’s take on apologies, that a proper one includes 3 parts. glad you like the trim … i feel like it means that we’re getting close, at least that’s what I tell myself
Crooked Smile Creations says
Your dad is a genius. We did the cement board on our exterior gable a few years ago when the builder grade siding was getting warped. That stuff is crazy durable, and scary as heck to work with, but it’s all worth it. Looking good. Love the siding so far.
Karah says
Thank you! We are so excited to get it finished!!
Catharine says
Your Dad is not only a genius he’s kinda fun—too!
Lisa Nanette Allender says
Hi there; read your “Married unemployed…” post and am tickled for you. I think you are very creative and your husband is fortunate to have you!
Peace to you, and keep writing!
Lisa Nanette Allender
http://www.lisananetteallender.blogspot.com
Karah says
Thank you so much for taking the time to visit and comment, Lisa! xo
Traci says
The outside of your house is looking fantastic, Keep up the good work.
Traci
shirley@housepitalitydesigns says
I remember how great is was to have my dad help us around the house…I miss that…you are so blessed to have your dad with his wonderful skills help renovate your home…you will always think of him when enjoying your beautiful home…
Karah says
That’s so true, Shirley! He has taught me so much and it’s so fun to work together when we do!!
karen@somewhatquirky says
Oh my! Drywall! That’s going to make all the difference in the world. The new windows do look great.You should be patting yourself on the back each night.
Karah says
I would if my shoulders weren’t so sore 🙂