This post may contain affiliate links which won’t change your price but will share some commission.
Hi there! How are you today?
I am doing great. To say that Joel and I are like kids in a candy store settling into our new space is an understatement. We thought we had an understanding about how much we really missed tinkering around a house and yard and creating a space we love. But seriously, even we didn’t realize exactly how much this little move would fill us up.
AHHHHHHHH!
Yeah, that’s pretty much what it sounds like inside my brain on a regular basis right now.
But that’s not to say it’s all warm and fuzzy all the time. I am constantly oscillating between unpacking more boxes and then organizing the madness that has been unpacked.
One of my personal priorities is the shed/tool storage and getting everything in order so there is at least a little sense of order when we start tearing apart every room around here. And getting everything out of order.
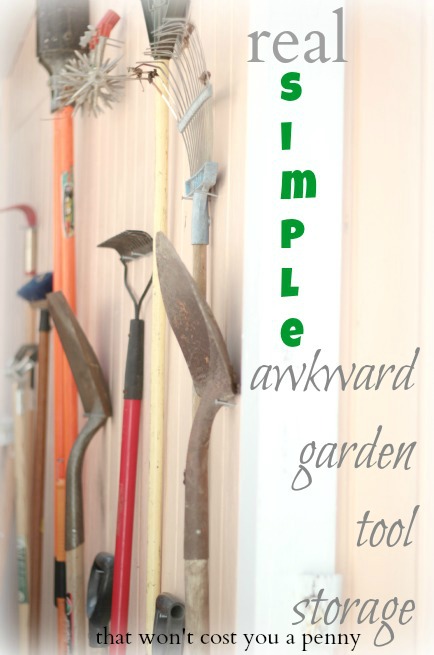
![]() And as quickly as I try to find a place for everything and get everything in it’s place, my dear sweet husband is working tirelessly to turn our little yard into a cozy retreat. And leaving a trail of garden tools in his wake.
And as quickly as I try to find a place for everything and get everything in it’s place, my dear sweet husband is working tirelessly to turn our little yard into a cozy retreat. And leaving a trail of garden tools in his wake.
So in order to prevent myself from starting to twitch every time I find a random garden tool lying around I found a little out-of-the-way space and created some real simple garden tool storage without spending a penny. Score!!!
Seriously, this is so simple, and so out of the way, and so easy for Joel to access when he needs to and hopefully so simple for him to keep his toys garden tools organized and out from under my feet.
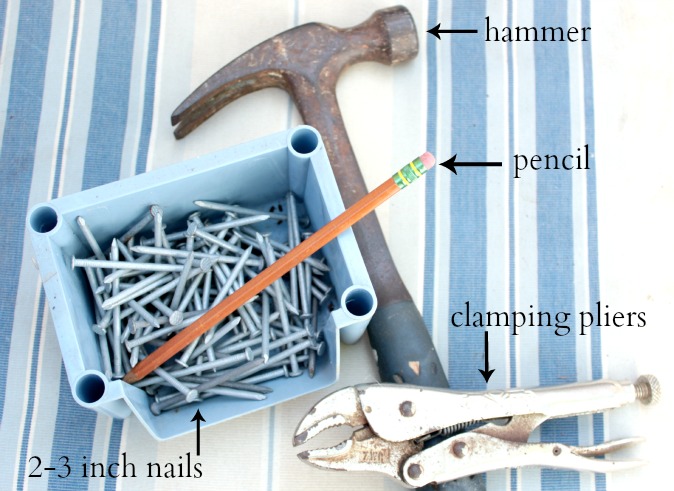
The only supplies you’ll need are a not oft seen exterior wall and the following:
So, side note, but do any of you have labels for your things in your shed or garage? I told Joel that I wanted a label maker and he said “you should totally get one”. And I said that I thought it would help him keep everything in the right spot in the shed. And he said “that’s stupid”. 
Is that organized or anal?
Ok, back to this husband proof real simple garden tool storage idea.
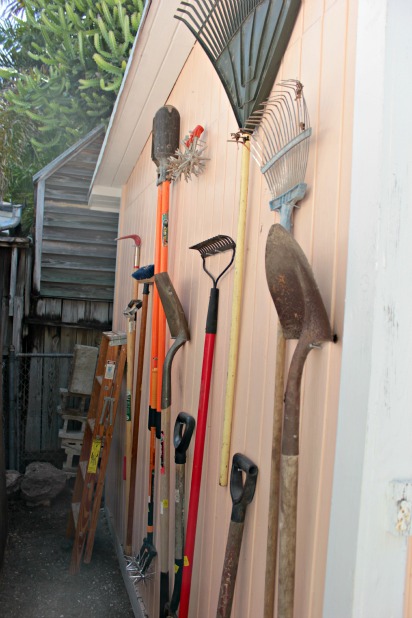
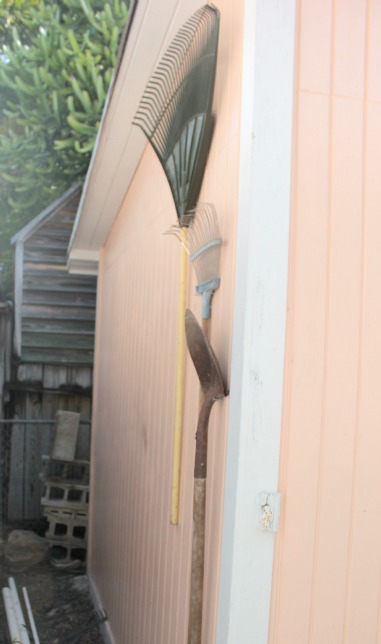
After tripping over the garden tools a handful of times I decided to just take the side of the shed that is only 2 feet from our property line and create a little grid of sorts of hanging garden tools.
I had actually laid out the tools on the ground and then totally disregarded my plan. Here’s what I ended up doing.
Step 1 – Take your largest, most awkwardly shaped tool (ours is the large lawn rake) and find a spot where it will fit well.
Step 2 – Use your pencil to mark where to put your nails.
Repeat steps 1 – 3 until all of your tools are hung.
A few bits of info that worked well for me.
1. For our space, it is a one entrance little nook, so I was sure to put the most used (rakes and shovels) tools toward the front end and least used (post hole digger and hoe) at the back.
2. Stagger the heights you hang each tool to maximize space. I wanted to leave room for the inevitable future awkward garden tool purchase. I think the best organization and storage solutions are those you can grow into and won’t immediately grow out of, if you know what I mean.
3. Angle the nails downward so they hold each item like a little DIY hook. And if at first you don’t succeed, just hammer up under the nail to adjust the nail once it’s already in. 
Oh, and as for the clamping pliers … these are for sure one of my favorite tools. I love that they clamp right to whatever you’re trying to bend, turn or screw/unscrew so you don’t have to put your energy into holding them tight … they do that work for you. We have a pair similar to these.
I only needed them for this project because we have this garden cultivator thingy with the spikey things to basically turn up small areas of your yard like a rototiller would and the hook at the handle end of the tool had been turned so the spikey cultivator end wouldn’t lay flat up against the she wall unless I bent around one of the nails.
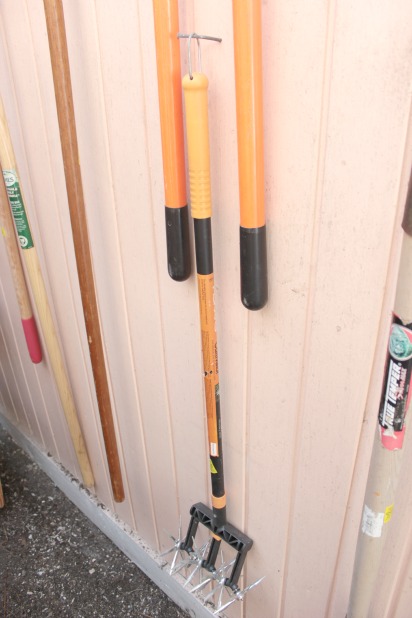
That picture really does nothing to illustrate anything other than the spikey end lays flat against the wall so you’ll have to take my word for the fact that I MacGyvered the nail with my clamping pliers to exactly the right angle to give me the desired result.
And there you have it. One real simple garden tool storage idea that will keep me happy and my man organized.

Update: We have started the whole house renovation inside. You can see how to remove a drop ceiling, how to paint over cracked paint, the DIY lesson we learned the hard way and our first finished wall (board and batten baby!).
Have any real simple storage ideas of your own to share as this new home owner embarks to organize every nook and cranny of this place?



Audrey Zumwalt says
Hi Karah … looks great, but I just wonder how long it will stay that way. Sometimes, we forget what goes where. On my tool peg board, I drew an image of the item or wrote the name where to hang it. Works pretty good. So glad you are excited with your new home. Wishing you much happiness. You will have so much fun putting your stamp of approval on everything. Keep us posted.
Hugs,
Audrey Z. @ Timeless Treasures
Karah says
Luckily there is some flexibility in what fits where … but I love the idea of marking the peg board …
Thistle says
Karah,
I am so glad that you are all settling in! Great idea with the storage!
blessings,
karianne
Ashley@AttemptsAtDomestication says
Ugh! This reminds me that I need to reorganize the garage! I worked on it last summer, but Jesse never puts things back where they go
Karah says
I’m glad I’m not alone!
Kelly @ View Along the Way says
You’re telling me there’s another way to keep garden tools that doesn’t require them falling on you every time you open your shed doors?! <– that's my life.
Jessica @ Stay at Home-ista says
Pinned since apparently just having a million shovels on the floor of my garage doesn’t actually constitute “storage” !
Debbie says
Good job! And yes, you need that labeler so they get put back in the right spot. Imagine if the tiller was put where the shovel should be, it will be sticking out again! lol
Our garden tools are organized in a similar way, with nails but the are in the lean-to on the back wall. Which is great, except when Larry has his 2 ATVs parked in there and the riding lawn mower…makes it impossible to get to them. I need to move them closer to the entrance, but I still want to keep them under the roof so they don’t rust too much more.
Debbie
Karah says
You know, I had thought about the rust … I’m hoping this side of the shed is facing the right direction, it seems to be facing the opposite direction that weather comes, so that should help a little. 2 ATVs …. sounds fun!!
Kelly @ Corner of Main says
What a great idea! We could definitely get organized like this…thanks for sharing!
Heather says
Love this simple, easy and quick way to organize garden tools! Love your ideas as always! Pinned this to Project Inspired group pinboard! Thanks for linking up!
Sarah says
(Without the labeling) we did this growing up. Unfortunately, my current place doesn’t have enough of an overhang to store tools outside and the inside walls aren’t finished. Our current “solution” is to lean them up against the wall in a couple of jumbled messes. Supposedly, we are organizing the shed in a couple of weeks, but I will believe it when I see it.
Karah says
Hahaha, Sarah! I feel your “I’ll believe it when I see it” mentality. Inside our shed is a hot mess, thank goodness the tools have a home all their own on the outside.
Sarah says
Alan is currently informing me that it will be done the weekend after our camping trip. If it does happen, I’ll probably blog about it. Like everything else, the shop’s pretty much been ignored for the last year and a half, and is therefore a certified disaster area.
martyweil says
For an alternative solution, you can re-purpose an old golf club bag. Find an old golf bag and simply stick your awkward tools with long handles, such as shovels and rakes, into the slots where the golf clubs used to go. The golf club bag idea has advantages: it doesn’t require any labeling nor does it take up precious wall space. In fact, one golf bag sitting in the corner of the toolshed would probably accommodate just about all of your long handled tools with far less labor involved.
Karah says
That’s a great idea!!
clytha says
I like the idea, looks great, easily found ….what about wind, rain, snow…???
Karah says
Hi Clytha! We live in Key West, FL and I put this up on a north facing wall and even though we’ve had plenty of wind and rain we haven’t had it affect the tools in anyway … it might not be the best winter idea if you live up north.