This post may contain affiliate links which won’t change your price but will share some commission.
You know, when this master renovation project began I had visions of creating these all-inclusive checklists of what to do and in what order if you, too, want to tackle this project. But the reality is that my mind just does not work that way. In the way that is clear and concise and orderly. Its rhythm is more of a roller coaster ride combined with bumper cars that all take place while you’re going down the part of the log flume where you get soaked no matter what.
Even still, somehow we’ve managed to get to this point, complete with Mico at her perch just inside the kitchen because she’s still afraid of the madness, but too curious to ever be too far away.
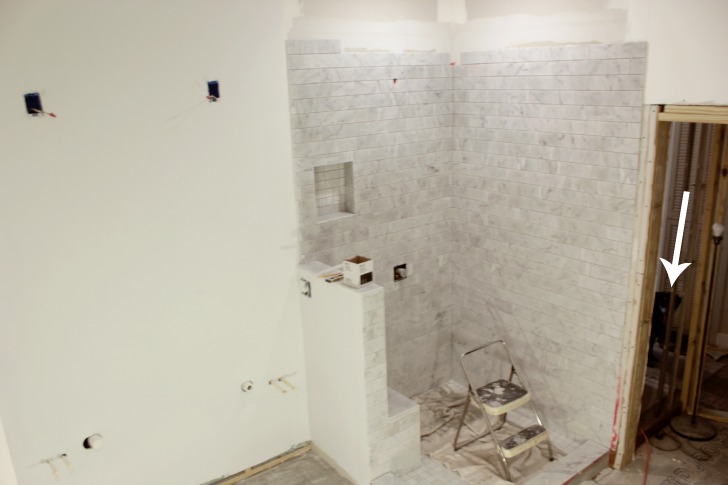
The tile is happening! And it is quite the process that we will discuss another time. After the shower is complete there is still the whole floor to tile and then all of the grouting. I might be done by the new year. 😉
I find around here we work well when we work on multiple things at one time. I like to be able to mix it up on a daily basis to avoid monotony. I like the ability to take a break from a not-so-fun task and shift gears to something entirely different while keeping the forward progress moving. Where it becomes inconvenient is when I try to put it all into words and share it all with you guys. Cause we are all over the place right now!
One of the really exciting parts of this whole deal is watching the finishing touches arrive. While our dining room has served as a closet since we demo’ed what was our master closet, our living room has quickly become a landing zone for all different kinds of things. And I find myself pretending the toilet is a sink to gauge how the new faucets will look against the white.
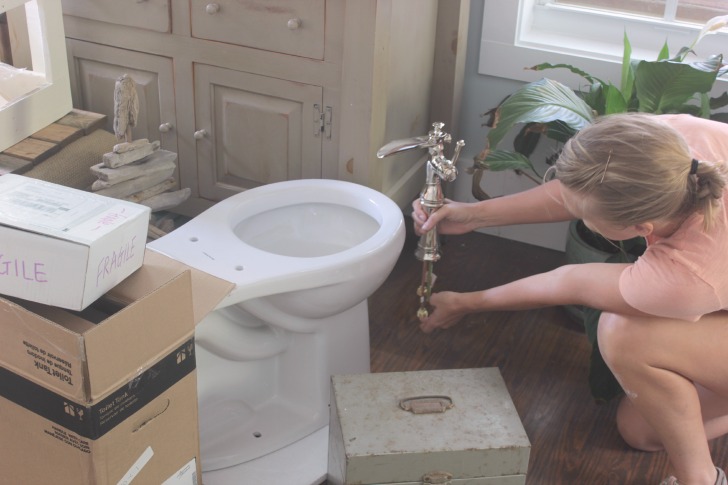
Or would clear glass sinks be better? (Spoiler: I went with white.)
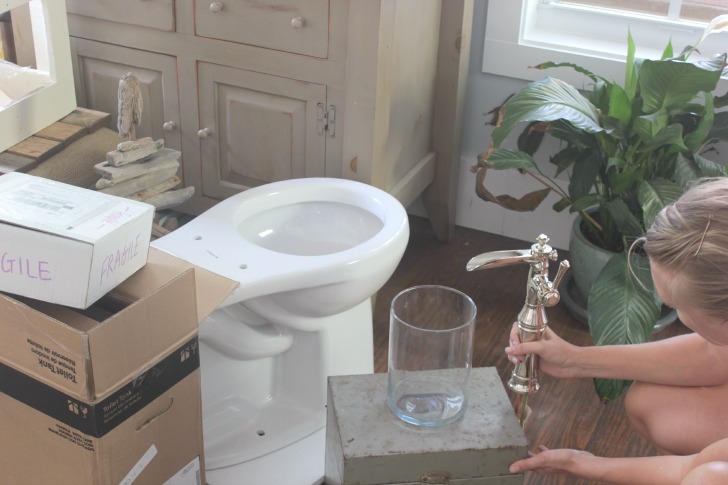
Again with all of the choices.
I knew I wanted light tile (based on the bathroom images I have been drawn to) and with tile styles in mind I had a couple of ideas for wall paint color swirling pretty consistently in my mind. I even tried one here. But I quickly realized I needed to pick a vanity first. Having the vanity style, color, shape, etc defined here seems important because we’re going with a double vanity so it will essentially be the largest (and possibly only) piece of furniture in the room.
I spent some time on Pinterest and Google Image Search (yes, I still do that, I think it has great results), I actually opened one of my Pinterest boards, aptly titled “bathrooms”, and checked out my pins.
And it jumped right out at me that a rustic, wooden, open-shelves-underneath type of vanity was what I was really drawn to. So I’m going to try to make one, but that is for sure a discussion for another time. I haven’t even come close to starting to build it so if it is an epic fail I might need a hug. But here’s a console table that vaguely resembles the idea in my head. Minus all of the living room-esque tchotchkes, of course.
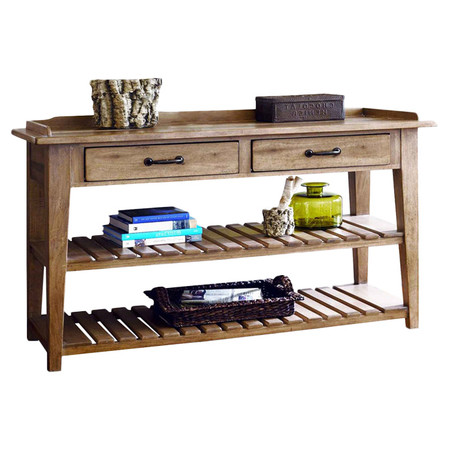
(source)
The other accessories and details have come together piece by piece, pretty much as the vision for the room became more clear in my head. And true to form, in no real particular order. Light finishes (polished and brushed nickel), white fixtures (sinks, tub and toilet), with accents of wood tones (the vanity will be stained) and sea inspired colors. Although, after I tried a Vintage Teal color on the wall it became crystal clear the greens and blues I love so much-needed to be more in the accessory and accent realm than a full on dominating feature. While all of the beautifully colorful walls catch my eye, what I’m really craving is crisp and clean and white.
And marble.
Throughout this whole process I really couldn’t shake it. The thought of marble. It is light without being white.
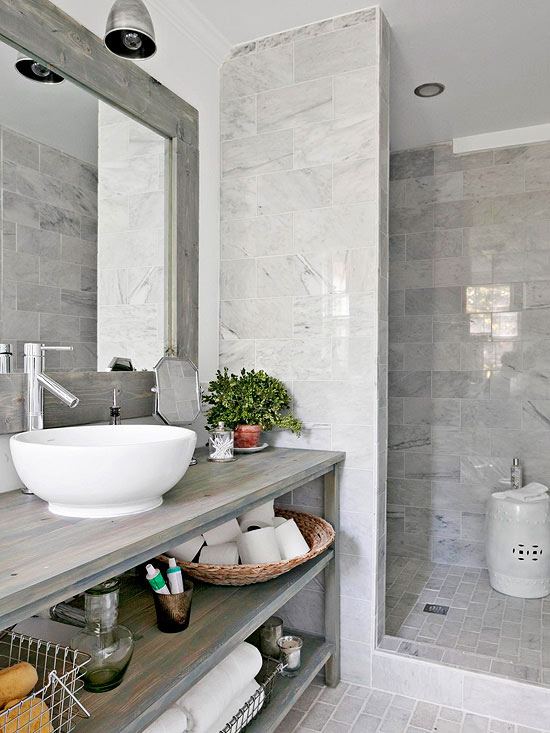
And it is luxurious without being over the top.
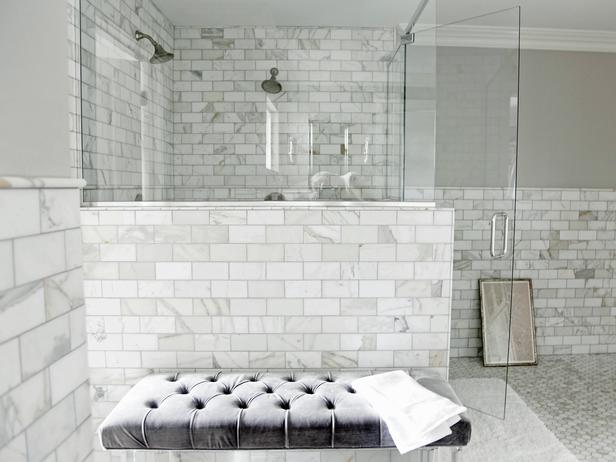
It felt like just the right pop of fancy to mix in with the otherwise rustic and casual feel we wanted.
So I spent hours researching and debating. Would the natural stone be too high maintenance? Would I find a good combination of tile to cover the shower pan, walls and the bathroom floor without it feeling all … marble-y?
And then I found it, the Long Octagon.
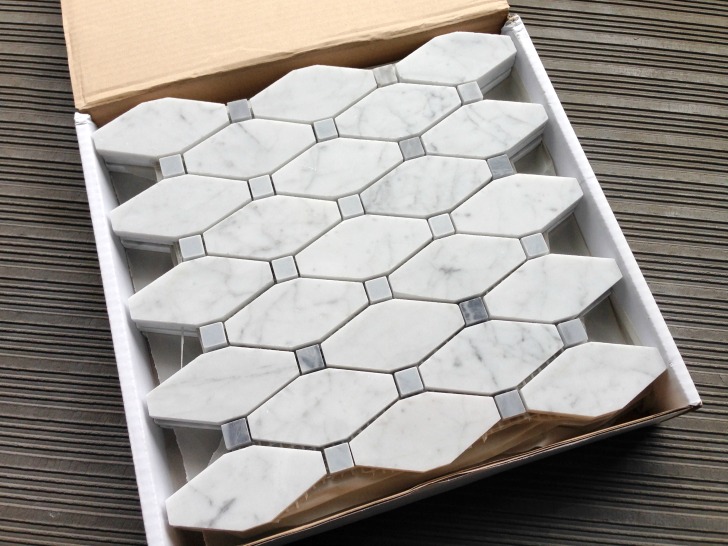
It has movement and color variation and I had never seen it before. And since we like to use gray grout on tiled floors (yes, for dirt hiding purposes) the added gray dot in the tile felt like the perfect accent.
And in an email discussion with my contact at The Builder Depot here is what I learned about sealing marble.
“… all marble is porous and it allows water to soak through it. A sealer from a company like DuPont Stonetech series, maybe their new bullet proof sealer would do a good job. Then follow the instructions of re-application. However in the shower pan, I would double up and make sure it was covered.
So now you have to decide is sealing what you are willing to do every 2-3 years? Some are 5 years. But again in a shower pan, I would do that every 12 months, it would only take 2 minutes to coat it with a sponge.”
Which immediately answered the “is marble too high maintenance for me in a bathroom”, I can definitely handle a few minutes of sealing once a year.
So the deal with me and our marble tiled bathroom was sealed.
Ba dum bum. 😉
What about you … would you use a natural stone in a shower?
PS: I reached out to The Builder Depot after doing my online research for bathroom tile and I am stoked that they have provided me with the tile for this renovation.

cassie says
ooooh i love love love the inspiration pics!!!!!!
Carmen says
I do like that tile but personally speaking, wouldn’t do marble, wayyyyyyyyyy too much maintenance for me. LOL
Kara says
Looks incredible!! And sealing once a year, not a big deal at all!!
Karah says
Thanks Kara!!
Anna@DirectionsNotIncluded says
Oooooh. I love where you are going with this!!
Karah says
Yay, thanks Anna! And I’m so excited we’re doing the run together!!!
Nancy Carr says
Karah, I have not fallen off the planet. I have been very busy getting my house ready to sell and sorting all the crap I have collected. I plan to move to Ft. Myers when I get around to selling my house, but first the crap to release and am selling the furniture I don’t want to ship. I love the bathroom and the toilet paper in the big basket bowl. I have my tp in a small basket now, but it does not have the effect that the picture you show. Once in awhile I get time to read my favorite blogs and you know I love you and your blog. Please give the doggies a hug and you can give your handsome husband a hug from an unknown older woman. Love you, Nancy
Karah says
Hahaha, Joel loves hugs from “unknown older women”. Thanks for stopping in and best of luck with your prep to move!!
Hanna says
It looks amazing!!! My mom did a bathroom with tile on the walls and slate on the floor. It was gorgeous mix of natural and spa. 🙂
Karah says
That mix sounds awesome, Hanna!!
Jenny Ballard says
Would I use it? Never!!! (I says while laughing at myself). The reason being that while a few minutes each year doesn’t sound like much, with my habit of taking months to get to some jobs on my ‘to-do’ list, it could be ruined before I get around to it. So thanks for the tip, I now know I should never use marble in a wet area.
Karah says
Note to self: Put the sealing project on my calendar every eleven months so I actually get to it in time. 🙂
Megan @ Our Pinteresting Family says
I think it will be well worth it to seal every once in a while. It is going to look amazing. I love your faucets.
karen@somewhatquirky says
I imagine it feels great to have some tile up and see some pretty things happening. I LOVE the tile you have selected for the floor. This room is going to be fantastic!
Karah says
Yay, I’m totally infatuated with the tile myself!
Ally says
The tile in the shower pan wouldn’t be a big deal to me with the annual sealing. It would be the initial install that I wouldn’t want to do, but that’s me. Your place will look gorgeous.
The wood in one of your inspiration photos looks like it may have been aged with the steel wool and vinegar process. I’d like to experiment with that myself. One of my to-do items.
Karah says
Yes to the steel wool and vinegar technique, would love to try that. I’m tempted to do a grayish stain on the vanity, but I can’t get a rich dark stain out of my mind either. And I’m totally with you on the install being the issue, namely all of the grouting in my near future. :/
Heidi @ Decor & More says
It’s going to look fantastic!! Loving the direction you’re headed… haphazard or not! 😉
xo Heidi
Karah says
It’s always a bit haphazard around here. 😉
Erin says
What about using it just for the shower and then getting “wood” tile that would match the rest of the floors in the house?
Karah says
I do love some of those wood look tiles, I’m considering them for the kitchen. 🙂
Jeff says
Your end results look very nice, but unless there is a missing photo you didn’t Redguard all the way to the drain, allowing water to readily drop down to your pre-slope and then eventually to the weep holes. It may or may not cause an issue as the years go by but can cause long-term damage to the preslope if it doesn’t dry out.
If you ever do this again, there are much better / faster materials to use for the walls like Fin-pan’s Pro-Panel. It’s like a Wedi board or Kerdi board but much less expensive – is super light (maybe 6# per 3×5 board) and easily cuts with any sharp knife. Cement board etc is heavy, messy and a pain – and still has to be water-proofed. The tile ready foam core boards are inherently waterproof.
Similarly, for the base, a linear / trench drain would have saved you many hours of work to create that pre-slope. You could have a single pre-slope with surface layer water-proofing using any combination of membrane liners (Wedi Sublayer Dry, Mapei) or just use a really good liquid product like Hydroban (not to be confused with the cheaper and inferior product that Laticrete sells through Lowes). A huge advantage is the pre-slope is a single pitch allowing for large format tiles on the floor, which can match if desired to large format outside the shower. We like having 12×12 stone tiles – less cuts and a lot of really dramatic flair. All that gets tied-into a nice drain like the one Zurn makes – which provides a lot of flexibility to move the linear drain around and accommodate last minute shifts as the walls are tiled down to give a perfect fit.
Also, I assume since you didn’t mention it, that you skipped doing a flood test with a standard 2″ test plug (24 or even 48 hours) to ensure that your preslope / liner combination was truly water-tight.
I certainly agree that there will be 10 differing opinions from 10 different contractors as to “how to do it”. Some of them are just plain wrong. I always do my own shower-pans and give them a full flood test. A proper pre-slope is tried and true but very labor intensive and messy. The newer way is surface waterproofing on top of the slope, that ties into the drain in the same type of way. I personally prefer using Wedi Subliner dry for the bottom – it’s designed for steam showers and German-made and is very thin so isn’t laborious when one hits corners. It’s really quite reasonable and allows for a fast and very waterproof solution without all the mess and fuss of traditional solutions. It’s also easy to use Hydroban as a quick coat to help reinforce corners or seams – as well as shower niches – just make sure there’s a bit of slope in that framing to force water to keep going out and down like it needs to.
Anyway – best of luck w/ your shower. May it provide you with much joy!
Karah says
Awesome! Thank you so much for all of this valuable information, Jeff!!