This post may contain affiliate links which won’t change your price but will share some commission.
Ok, I don’t know about you, but when someone says they’re going to write about installing drywall … not that I know anyone who does that but me … I get all “oh yay”, “that’s super”, “I don’t know a more exciting topic”. Ummm, asphalt maybe? 😉
Hopefully you note the sarcasm in there. I don’t know, it just seems so blah. But for some reason it has kind of become my thing around here. People that come in ask who did our drywall (ok, so it’s only family and they’re obligated to over-admire, it’s a requirement of visiting) and walk up and touch the walls (for an awkwardly long period of time) and squint and look for seams and cracks and imperfections.
While I pray they don’t notice the little areas that I’m pretty sure only I know about.
It’s true, I don’t think any wall can ever truly be perfect, but what I’ve come to figure out over the years is that it’s just one big mask for any other imperfect surface.
And who doesn’t like a masquerade ball? It’s like our house is always ready to just hop into a fancy dress and party the night away … and no is the wiser that this newly vaulted space in our living room used to be a dreary little porch.
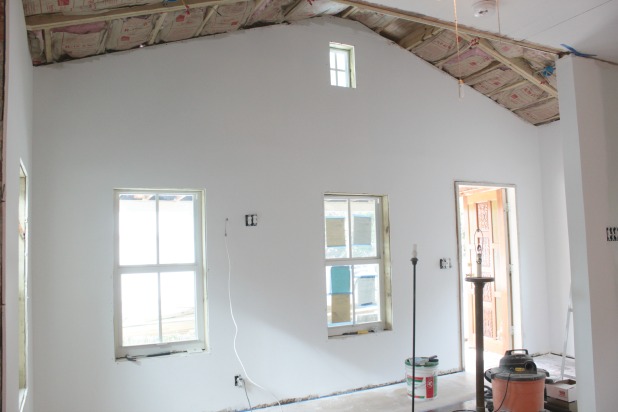
How’s that for an unexciting process shot?
Picture me saying “Hey, wanna see my big white wall?”. 😉
But the amount of work that went in to getting us here is pretty awesome, which might help explain the extra-long length of this post. And the thing with spackling is that it takes time. An irritating long period of wait time between coats, especially when you’re working with wonky walls … a lot more on that in a minute.
Joel keeps saying to people “Yeah, she knows how to make the wall end up looking great, but I’m not sure she’s the most efficient at it”.
Love you too, man. 🙂
But from the outsider who jaunts off to the office every morning and then returns after 10 hours or so looking for mind-blowing progress … this is definitely not one of those projects.
So let’s take a look at what she looked like all ready for drywall.
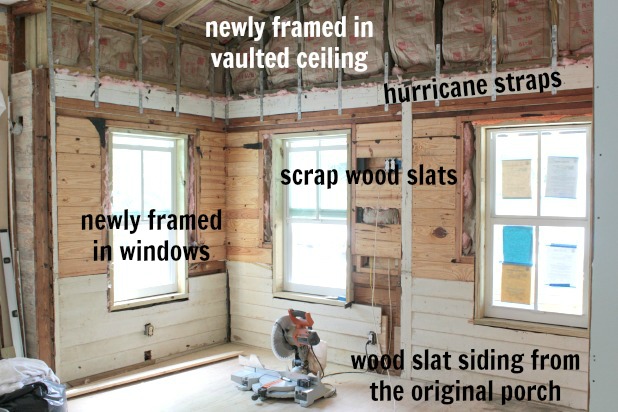
Wonky, right?!?!
The wood slat siding is typical of exterior siding so it doesn’t lay flat, they overlap each other, creating different depths. The required hurricane straps I’m sure will be awesome during a storm but didn’t really do many any favors when it came to attaching drywall … it only took me a few times trying to screw into the metal straps to learn that. 🙂
And the new 2 x 6 window frames for the most part lined up with pretty much nothing. That’s an exaggeration, but just further evidence that you can take a wonky wall and put a mask on her and she’s ready for the ball primer and paint.
I can actually install the first row of drywall by myself. The technique I’ve grown to prefer is to just cut the sheet of drywall to the right length and cut out any outlet holes and then screw it to the wall and cut around the windows after … less imperfect measuring on my part always equals a good thing.
With the sheet installed I just measure how far down the window opening needs to be.
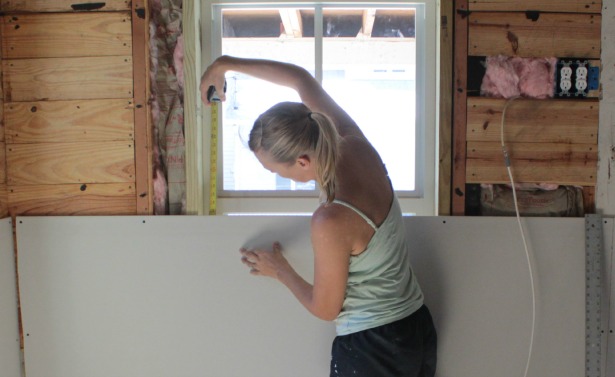
Then I use my drywall square (similar to this one – affiliate link) and line it up with the edge of the window frame and use the measurements right on the square to know how far down I need to cut.
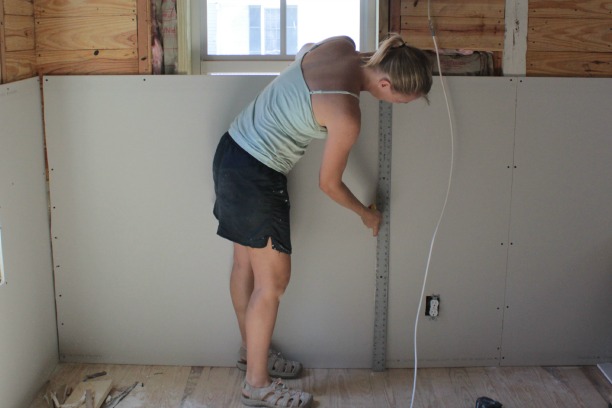
I just hold the square in place at the bottom with my foot and run my utility knife right up it to score a line, but you could mark it first … my lines are always straighter if I use the square as a guide.
After I do that on both sides of the window I go back with the utility knife and cut all the way through the drywall. This usually takes a few passes.
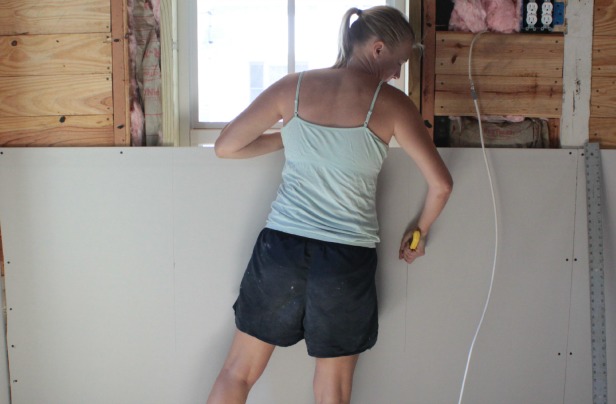
Then I reach in behind the drywall and score a line on the back along the bottom of the window. Remember, this doesn’t have to be perfect, it is all going to get covered with trim. #ihearttrim
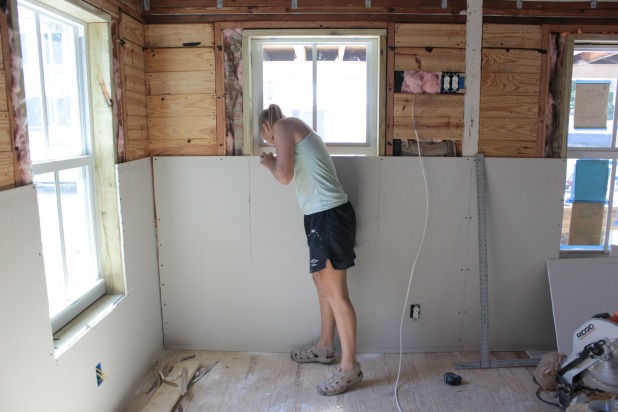
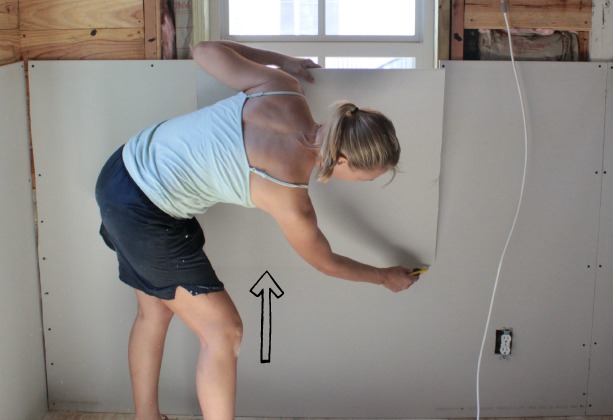
With the side cuts going all the way through the drywall and the scored line on the back side of the bottom you can bend the drywall out from the window and it will break along that bottom score line and then just cut the paper on the front with your utility knife.
It is really faint but you can kind of see where the break mark shows you where to cut the drywall along the bottom.
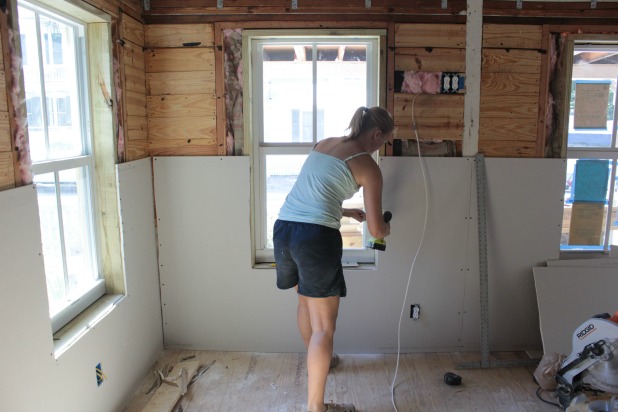
Until that point I had only screwed in the drywall around the perimeter of the sheet, now it’s easy to screw it in around the window frame, too. I’m using a new Ryobi Impact Driver that I am in love with. It’s part of the 18 volt lithium battery line.
My dad says the professionals usually start with the top row of drywall so there is a manufactured edge along the ceiling, easier for spackling, and even the smallest of baseboard is usually installed in any house so the manufactured edge is necessary on the bottom.
I had three comments to that, 1) I’m not a professional (I just play one on the internet), 2) we’re installing crown molding so all of the edges where the walls meet the ceiling will be covered up, and 3) I can manage the first row of drywall all by my girl self so if it means getting started that’s what this girl’s gonna do. 🙂
If only it were a perfect DIY home improvement world.
And speaking of imperfection, remember those hurricane straps and how they did me no favors during this drywall process?

Turns out the straps all run inconveniently through the 8 foot high mark on the wall. Which is how high two sheet so of drywall are on top of each other. So unfortunately we needed to cut off about 6 inches from each sheet on that row. And you know what that means. :/
We cut them so we could screw them in along this seam that runs the entire width of the wall.
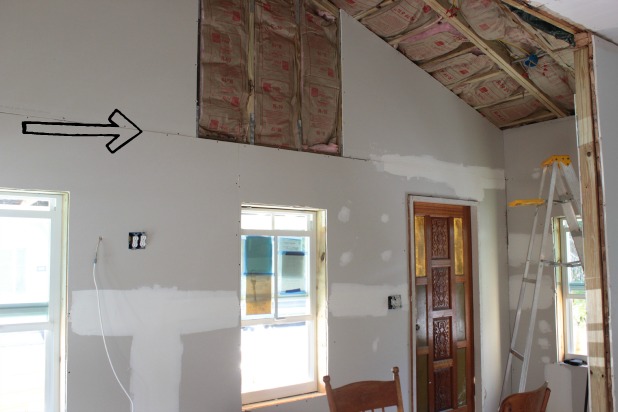
Here’s a closer view.
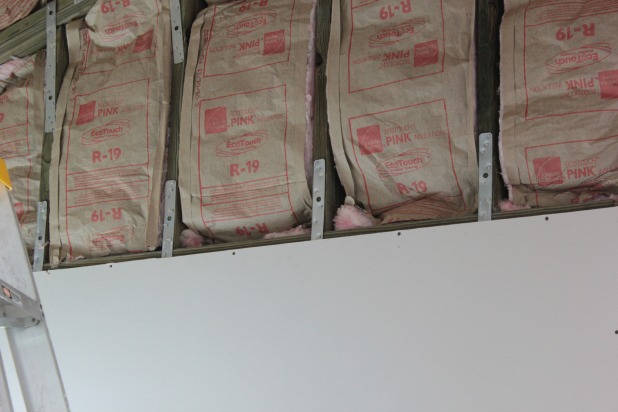
And then when Joel and I were laying the third row above that with the nice manufactured edge, Joel saw the difference and said “glad I’m not in charge of the drywall”.
Again, love you man!
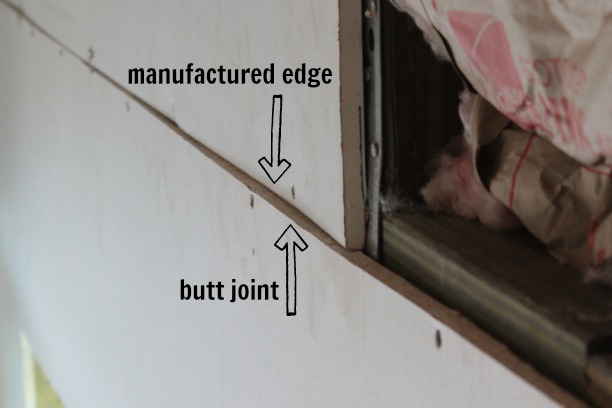
But, what I did end up not hating was this manufactured edge and butt joint combo.
So much easier in my opinion that two butt joints.
Basically it’s just more build-out over a farther length of drywall on the manufactured edge side and very thin coats on the butt joint side.
I know it’s impossible to really see in this picture (because I’m a mad drywaller) but the original seam between the two sheets of drywall is much closer to the lower end of the spackle than in the middle of it.
And here’s a close up of what it looked like after my first coat of spackle, I didn’t even bother to smooth out the top part of spackle (over the manufactured edge) because I knew a few more layers were needed to actually build it out to the depth of the butt joint.
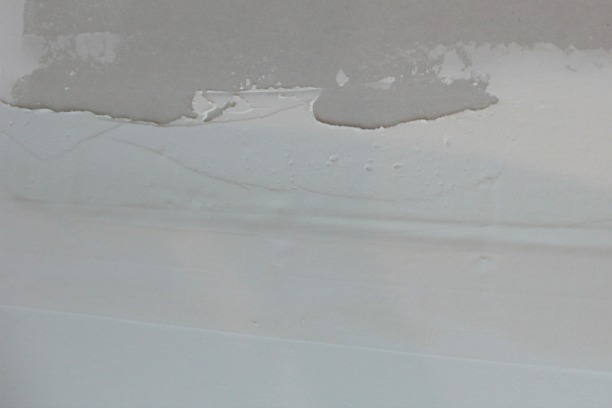
And you don’t want to make each individual coat too thick or they will just crack. Ask me how I know. 😉
Daily, or twice daily layers to get to the depth you need do you good.
And one other area that we didn’t touch on in my original drywall posts (here and here) is the always interesting outside corner. Dun dun dunnnnn. 😉
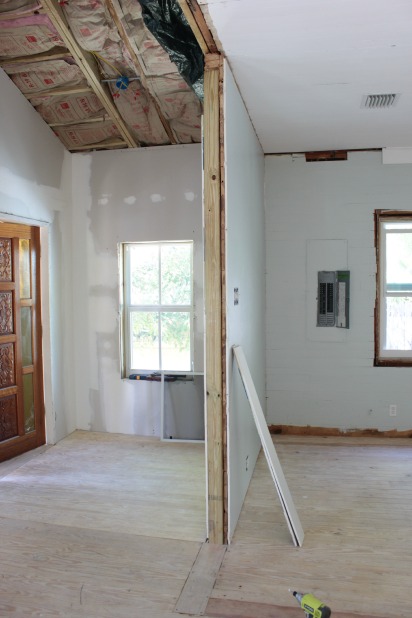
When it came to drywalling I actually kind of forgot about this little edge at the end of the partial wall that is right inside our front door. I was thinking maybe we would cover it with a trim board, but since the walls on either side of it are different heights, thanks to our newly vaulted ceiling in the vestibule, drywall was a much simpler option.
After I had my little pieces of drywall installed I just used these plastic pieces to give a nice clean edge to each corner. You can find them near all of the other drywall supplies at your home improvement store.
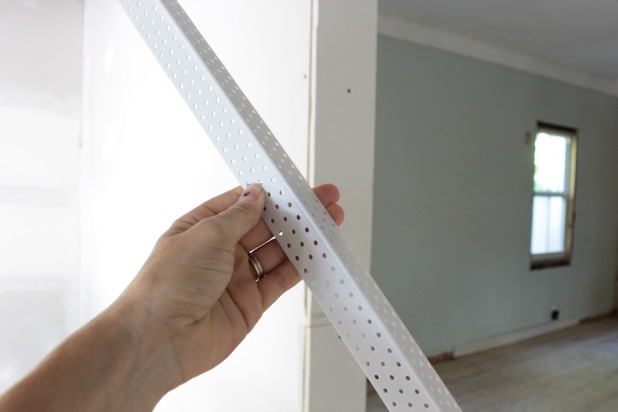
They come in 10 foot lengths and they are easy to cut to length. I just use scissors through both sides.
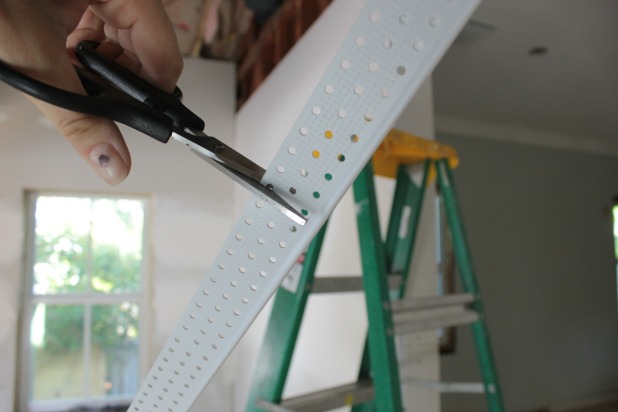
Then just bend and snip the corner.
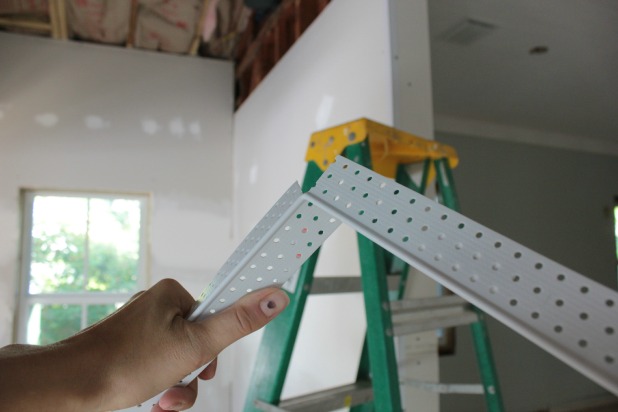
To install you just screw through those holes on either side to attach it. Super easy, really. Just don’t over-screw in the screws and create bumps in the plastic. You can see here how the right side laid nice and flat for me but the left gave me some trouble. I just kept adding screws until I knew the little bubbles were small enough to get covered with the spackle.
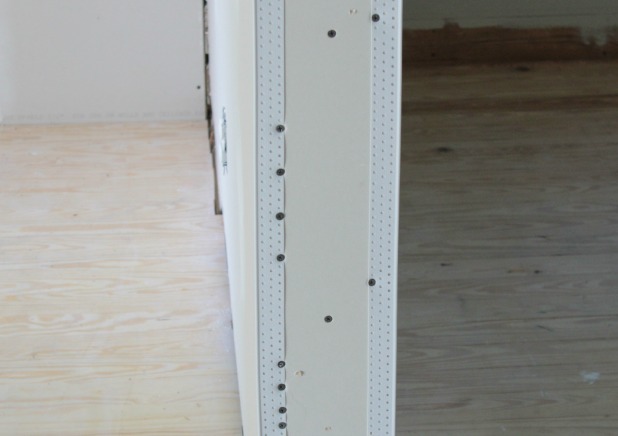
The larger spackle knife worked better on this small edge since I could just run it up the wall and the two corner pieces with the long knife worked to create a flat edge.
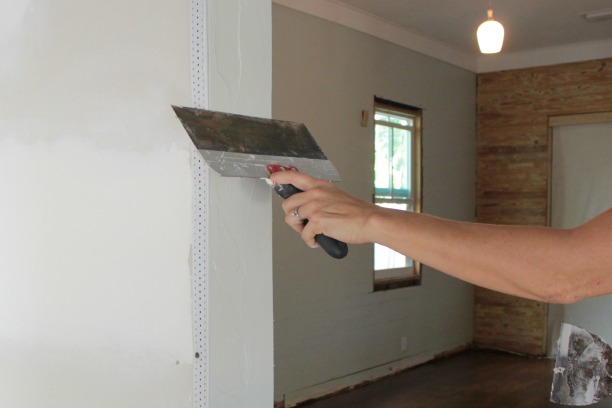
A couple things I was reminded of along the way:
- Don’t take too much time on the first coat of spackle, I always try to get really particular with it and then when I’m doing my second coat I think “man, I wasted all that time because it just gets covered up anyway?”. Just be sure you have enough spackle under any taped seams to secure it don’t leave any thick edges. (Kind of like the thick edge I showed you above, so you can break that rule, too, if you know you are going to need to build out past that point.)
- After each coat is dry take your empty spackle knife and scrape it up over any clumps or globs that have dried. This will remove them and ensure a flat surface for your next coat. Indentations are totally fine because they are easy to fill in, it is the little specs that will cause you trouble. Here I’m moving the knife upwards and you can see the little specs accumulating.
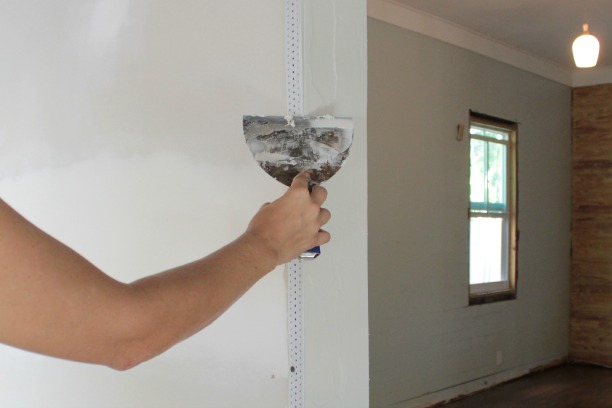
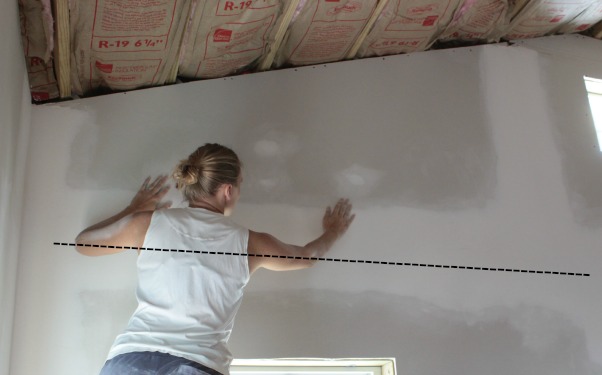
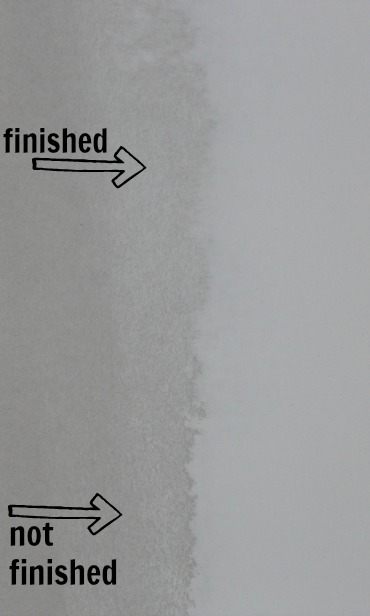
- I go over the entire surface with my bare hands to feel for any random spots that might not be smooth, sometimes they’re easier to feel than see, but they will definitely show up when painted. That’s what I was doing in that shot above where I put the dotted line through the picture. And here’s a snap shot for comparison of an edge that is partially sanded completely. It is a very slight difference, but once painted you would definitely be able to see where that spackle line is on the bottom part, whereas the top part is totally smooth
sailing.
 So, um, yeah. Probably more than you ever cared to know about drywall but I really am proof that anyone can do it. Over multiple years of trial and error I’ve found a process that consistently works for me … even if Joel doesn’t think it’s efficient.
I don’t see him volunteering to take over. 🙂
And because it’s been awhile … remember what our little old porch/entry/vestibule looked like when we moved in?
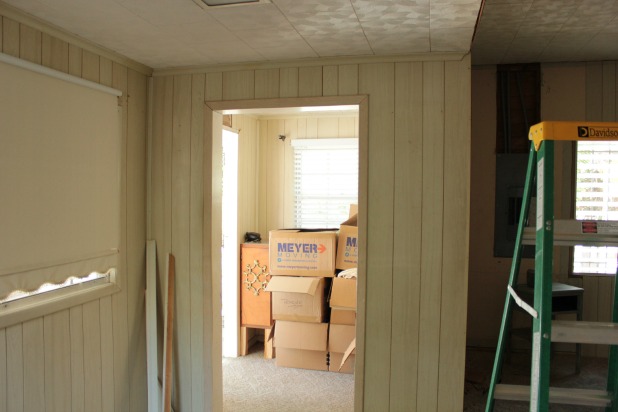
Yowza! I had even forgotten about that extra doorway. How quickly the ugly is erased from my memory. 🙂
And that same spot from a slightly farther away view now.

If you missed all of the ceiling drywall tips, drywall finishing tips and inexpensive wall repair tips and you’re getting ready to tackle your own drywall project they are also worth a read. But take a minute first, you’ve earned it for getting through this. 🙂


clairelynn311c says
Wow – I can tell you have worked hard on the drywall. I think I would NEED help, lots of help. Thanks for the tips – you really did a great job – we know your hubby thinks so too.
Karah says
Thank you so much, we are happy to be past that stage … at least in the living room. 🙂
Sandra says
The end looks awesome!!
Karah says
Thank you!!
amanda says
I am mid DIY drywall project right now and am thrilled to find all of your tips. As insane as it sounds I actually enjoy spackling quite a bit and am eager to get to that part. I’m sure I’ll be implementing your tips during the process.
Karah says
I’m so glad you took the time to comment, Amanda. I’m with you, I don’t mind an afternoon of spackling or even caulking as long as I have some good music to listen to. Enjoy your project!
Stephanie says
I love this blog already!! We too are in the process of renovating and updating a 1930’s house in Manitoba, that has spent most of it’s life, until we bought it last year, being unloved.
I totally related when you made the comments about spackling and finishing drywall on uneven, wonky walls. Seems to take me f-o-r-e-v-e-r!!! I work all day on them and they don’t look much different at the end of the day.
Such a dusty, messy job too that requires as much time in cleanup as I spend working every day.
Back to work I go!
Karah says
Hi Stephanie!! So glad you like the blog. Aren’t the wonky walls the worst! And sometimes after days of working hard and seeing very little results I just need to step away from that specific project and give myself some fresh perspective. I just did that with our current master bedroom, bathroom and closet. We are at the stage where I work hard all day and I’m still just in the demolition/prep stages to build back together so everything is ugly and old. Took the day yesterday to watch the World Cup and recharge, I feel motivated to tackle more ugly work today. 🙂
Philip Godfrey says
Ive read a lot of home improvement DIY projects, but rarely laugh aloud. Your spirit is great and humor is priceless… Keep up the great work and thanks for sharing your information. For rookies like us, the confidence you provide us that anyone can do it, is very helpful. Best, Philip
Karah says
Haha, thanks for the comment, Philip. Glad to entertain and instill confidence. If I can do it, anyone can. 🙂