This post may contain affiliate links which won’t change your price but will share some commission.
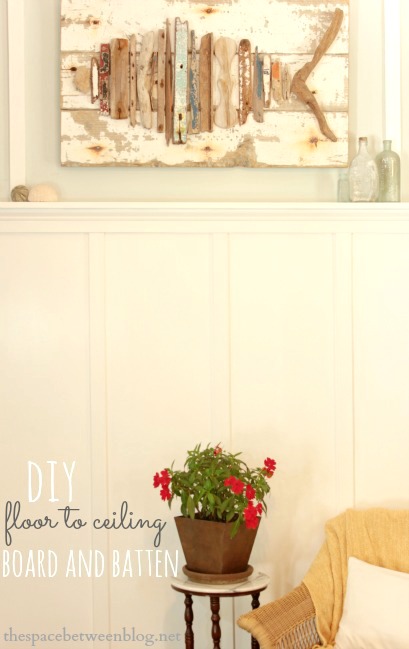
OK, where did we leave off? Oh right, we have a high board and batten wall!!!
Have I mentioned we love it?!? Yes, it is the only finished wall in this place, but we are still in love.
![]()
To get all of the background on this wall and how we learned that part of it used to be a hallway and how this board and batten (some call it wainscoting) is the perfect solution to cover up all her imperfection go here.
This is going to be a full rundown of how you, too, can design and create your own accent wall that can serve the purpose to cover up an unsightly wall.
We definitely added to the amount of time it would take to do this project by doing all of the cuts on our own. But, if you have the right tools, it will save you a bunch of money. And since we were also at a stage in this house renovation process where we needed to add baseboard and crown molding we had even more cuts than most.
These were the cuts we had to make with our new table saw:
3/4 inch sheet of 4′ x 8′ MDF
*cut 3 strips 8 inches wide (the width of our baseboard around the entire room) and cut 4 strips 6 inches wide (the width of our crown molding) – we have many more of these sized cuts to complete the baseboard and crown in the living and dining room.
*you could make your shelf out of this also by cutting 2 strips 4 inches wide
1/2 inch sheet of 4′ x 8′ MDF
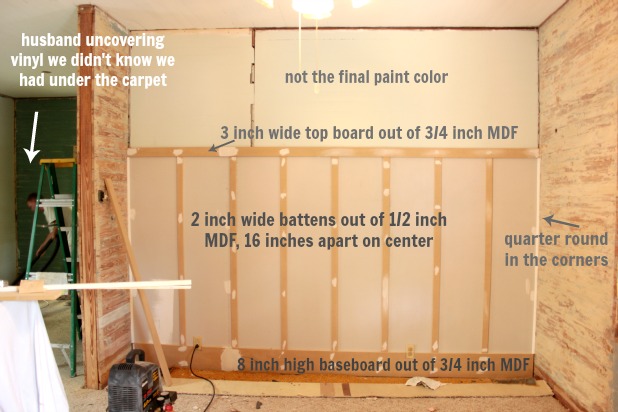
*cut 8 strips 2 inches wide (one is long enough to cut in two pieces to use for the top two battens)
*cut 2 strips 3 inches wide (the need for two is because our wall is longer than 8 feet, the length of the sheet of MDF)
Since this was our first soiree with our new saw, and those sheets of MDF are heavy with a capital H, we ended up with some edges that looked like this.
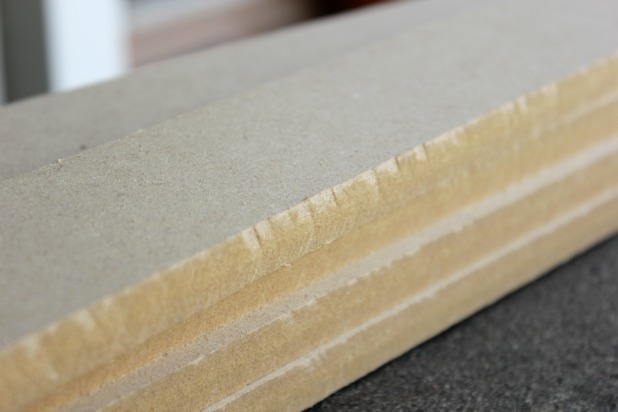
Clearly we’re still perfecting our new tandem table saw technique.
I was so worried about it that I actually sanded, primed and painted a piece before we moved forward with the project to make sure I was going to be OK with the final look.
Take my word for it, it all ends up looking great. 🙂
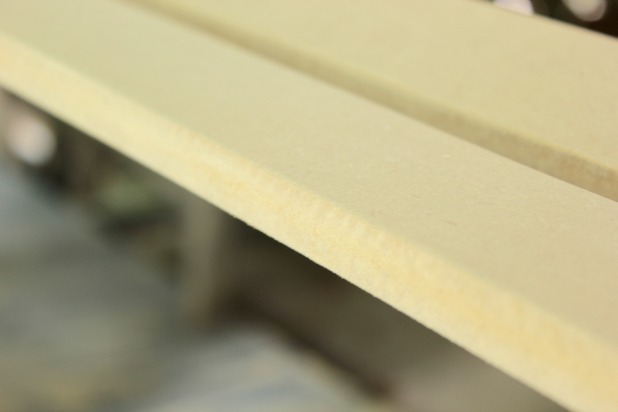
After you have all of your cuts made, use a palm sander to smooth out all of the edges, and I even rounded the edges just slightly just because I like the look.
 If you’re at the empty wall stage, like us, you’ll need to install the baseboard of your choice. We’ll be giving the baseboard their due one day, but here the one big thing we had to do was notch around our outlets.
I knew I wanted a really high, craftsman style baseboard and for some reason none of our outlets are at the same height. So instead of trying to make the baseboard smaller to avoid notching, we just went with it. My tip would be to notch around the outlet plate cover entirely so the plate cover will lay flat on your wall.
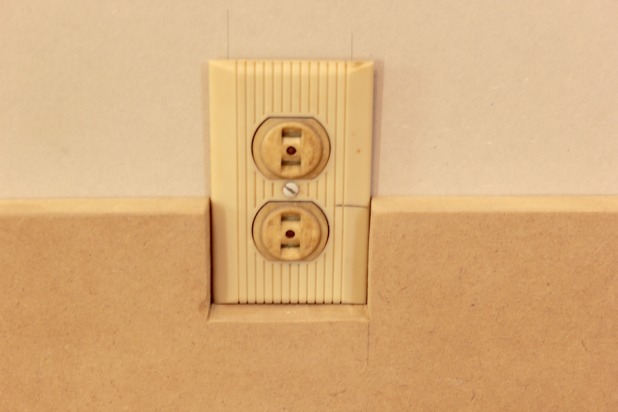 Yes, those fabulous outlets days are numbered. 🙂
I’m having fun using my awesome notebook from my favorite sister-in-law as a sketch pad for ideas for this house renovation.
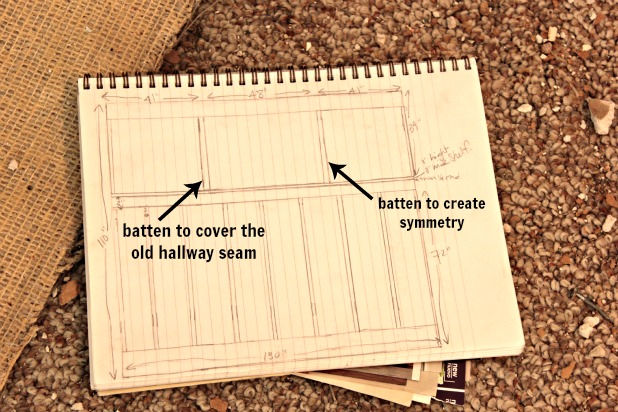 Please just excuse that carpet, we’re using it as a built-in drop cloth. 🙂
The height of our top cross batten, the first batten we installed, was basically determined by the spot on the wall where the Dade County Pine boards started lining up all the way across.
We used our nail gun and 2 inch brad nails to install all of the battens. Since we were nailing into drywall, then wood slats and then the studs … you could probably get away with using 1 1/2 inch.
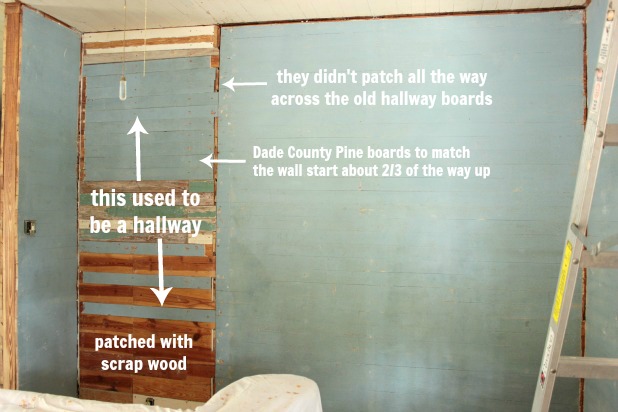
I would say make sure that top cross batten is as close to level as possible. With these old houses everything is a little out of whack. We’ve learned through the years that sometimes our new additions need to be a little out of whack too to actually fit in with the old character of the place. I say use your judgement and make it look right to you. 🙂
From here, put on your thinking cap and figure out what distance apart your battens should be based on the size of your wall.
Take the width of your wall, minus any trim you’re going to put in the corners (we used quarter round), divided by how many battens you want to get your measurement. Then just take the width of your battens into consideration and make a bracket out of scrap wood to keep the distance between each batten consistent.
Here’s the big math:
(width of wall) @130 inches – (width of quarter round times 2) almost 1.5 inches / (how many battens we want) 8 = @16 inches apart.
That 16 inches includes the width of our battens, 2 inches, so I cut a bracket 14 inches and used it to determine where to attach my battens.
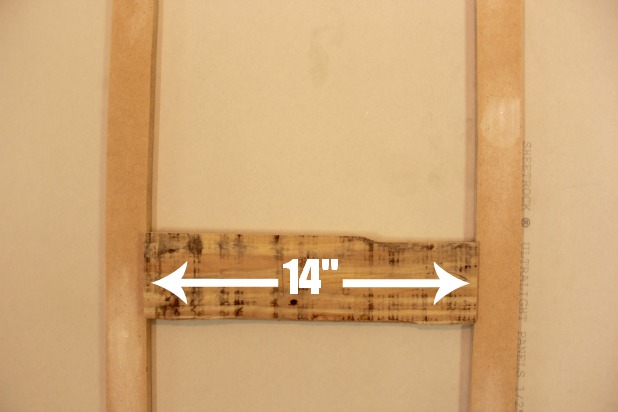 There may be a few millimeters out of place here or there … but I’ll never tell where. 🙂
Since we had first installed the drywall, and now the battens (the top cross batten at 3/4 inch thick), we had an inch and a quarter sized ledge for our shelf. Add in a little trim piece underneath and we thought a 4 inch wide shelf would be wide enough to add a few small (and, yes Joel, light weight) accessories and large enough to add some architectural interest.
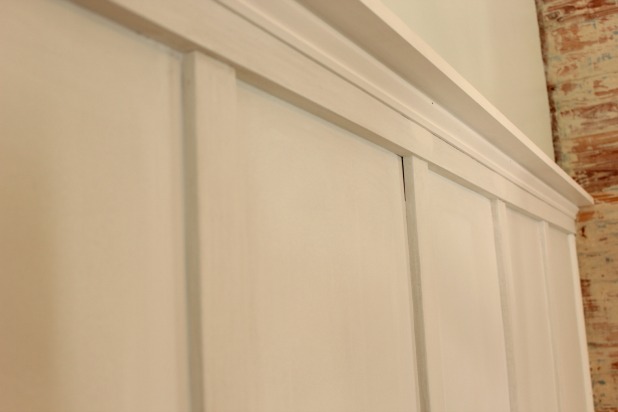 And then like magic it will all be primed. 🙂
Just kidding. After you have it all installed it’s time to spackle all the nail holes and caulk all the cracks.
Now, I usually spackle then sand then prime then caulk. The reason is that you can paint right over caulk, and sometimes primer will fill in the smaller cracks. I think it saves me time and I end up caulking less. But that’s just me. 🙂
If you’re working with a wall that you’re trying to cover up, you’ll have the upper battens to install here too. Just by installing your crown molding if you want it and then attach the battens over those imperfections to hide.
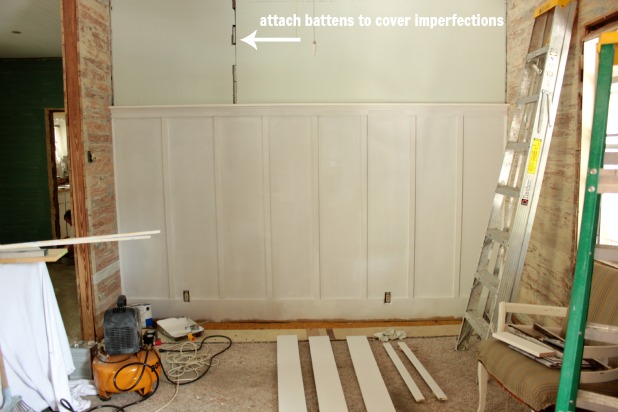 Tip!!! Paint the wall above first so you don’t have to cut in or tape around the new battens after. And be sure to cover up any bold color with the perfect primer!
Then, badda bing, badda boom, install the upper battens you need, quarter round on the edges if you want and done!
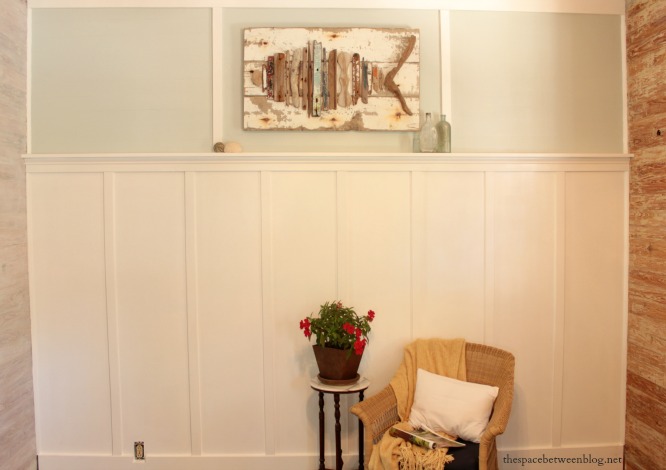 Welllll, we’re not exactly done. 😉
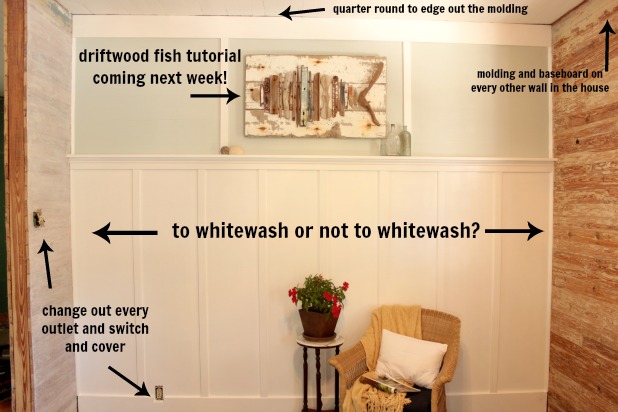 And you want to see something funny. hahahaha
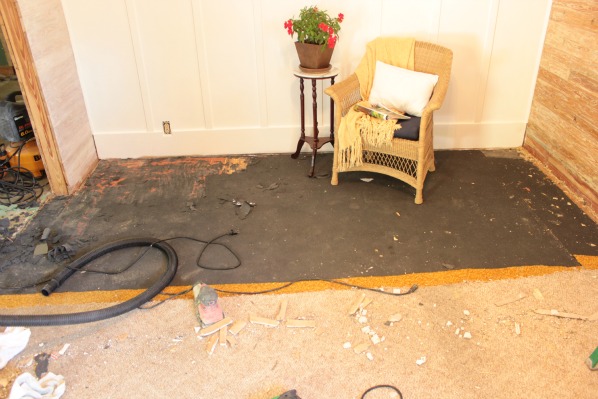 Yes, I just pulled in a little table and potted flower from the front porch. That chair is actually a patio chair but it serves as a good break chair in our living right now. 🙂
And look what fun we have to contend with on the floor. That black is the back side of the orange carpet glued directly to the hardwood floors. Which is below the berber carpet that is attached with tack strips.
At least I don’t have to keep my arms above my head to do the floor work, right?!?!
If you want to see where we started in this room check it out here, and see how we removed the drop ceiling, spackled the cracked paint and got started on the board and batten wall.
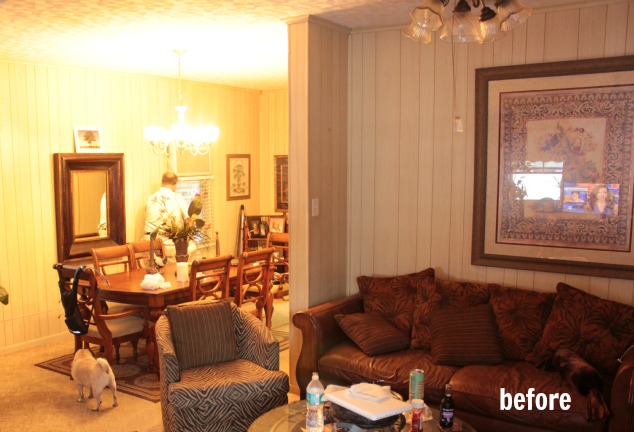
And a little trip down memory lane for this wall, starting with what it looked like during our home inspection when we were under contract on this house.
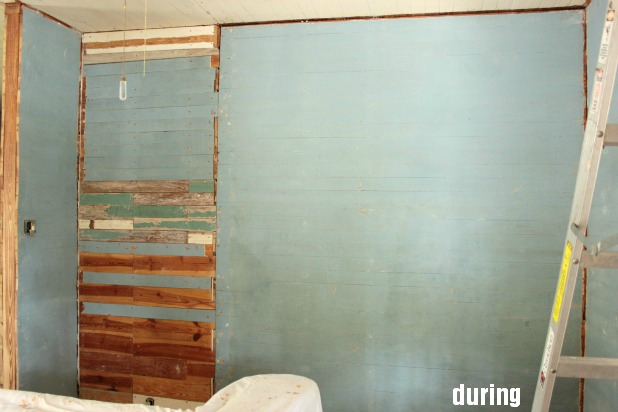
 And after we removed the paneling and drywall and uncovered the old hallway.
 And now!!

And to keep up with the progress on this room you can watch the full before house tour video … link to the other projects we’ve done are on that page as well. 🙂
And tell me what you think. Do you have any accent wall ideas of your own. Like the look of high board and batten or prefer the short versions? Are you maybe a little bit in love with that driftwood fish?!?!?!


Marilyn says
Karah,
AWESOME tutorial! I pinned it for future reference!
Marilyn
Karah says
Thanks Marilyn!
Linda @ it all started with paint says
I’m loving the b & b AND that fish! Can. Not. Wait. For the tutorial!
🙂 Linda
craftythriftydecoratingwifemom says
No driftwood fish, lol.. Never lived in paradise 🙂 But we have a beadboard wall in our living room.
Janet
Karah says
That counts!!! And that fish could be made from any reclaimed wood … no paradise required! 🙂
Christine Leahy (@women_stand_up) says
Looks amazing so far!!! I can’t wait for the driftwood fish tut…I could really use that in my house!
Christine
Karah says
I’m posting it on Thursday, Christine … start collecting your driftwood now!
Kristy says
Waiting , waiting, waiting patiently on the fish tutorial!!! Love the wall…awesome job! Love to the furry babies! Kristy
Traci says
The board and batten wall is terrific but as you predicted I am in love with the drift wood fish. I am going to the beach both this weekend and next so I might just try it. Thanks for sharing. Have a great weekend.
Trish and Bonnie @ Uncommon says
Gorgeous! Looks amazing Karah!
Karah says
Thank you so much ladies!!!
Jessica@HomewithBaxter says
Wow Karah! It looks amazing!!
Rachel Moran says
Thanks for the great tutorial! Looking forward to the driftwood fish one. 🙂
Karah says
tomorrow, tomorrow … tutorial tomorrow, it’s only a day away. 🙂
melissa says
How can i find the fish tutorial. Love it
Karah says
Hahahaha, Joel’s birthday is coming up and I convinced him “he” needs a framing nailer. 🙂
Roeshel S (@DIYShowOff) says
Wow, Karah! It’s gorgeous! Beautiful work!
Karah says
Thank you so much for checking it out Roeshel!
Trilby says
Love it! What color paint did you use on the top section?
Karah says
Thank you, Trilby. The paint color is Sherwin Williams Rainwashed mixed 50% lighter than the paint chip.