This post may contain affiliate links which won’t change your price but will share some commission.
This project could also be categorized as ‘just another reason to use my new framing nail gun’.
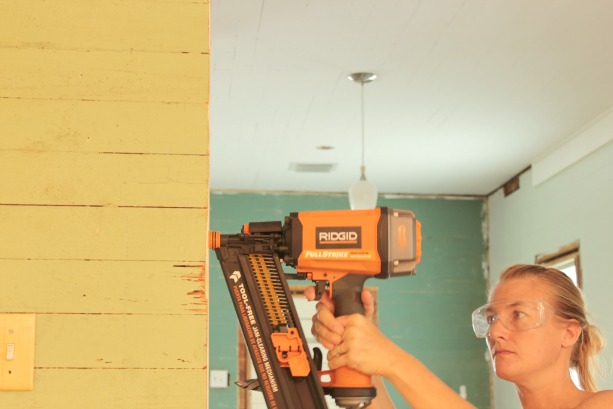
With just two, fairly straight forward, projects under her belt she has already saved us a ton of time. Joel and I joke all the time about having the right tools. I can’t even tell you how many times we’ve tried to accomplish a project and the only thing standing in our way was the right tool … or actually the lack there of.
Lesson = learned. Thank goodness. It may have taken a few hundred projects to actually get it. But, an investment in a good tool can make all the difference in marital bliss the success of a project.
Apparently a nail gun speaks my love language.
And for the project at hand … I we really wanted to make more of a seamless transition from the large living room and dining room combo room into our kitchen.
I don’t know about your, but I just like to have the kitchen feel like it is in the center of the action, even if the action is not in the kitchen. No matter what we’re doing, whether it’s preparing a quiet dinner in, entertaining friends or just refilling our wine glasses we find ourselves in and around the kitchen a lot. And who wants to feel separated from all of the action* while tending to business in the kitchen?
*I fully expect all of the gigglers who were so entertained by all of the ‘stripping’ to be equally entertained by all of the ‘action’.
Here is what the doorway looked like when we moved in.
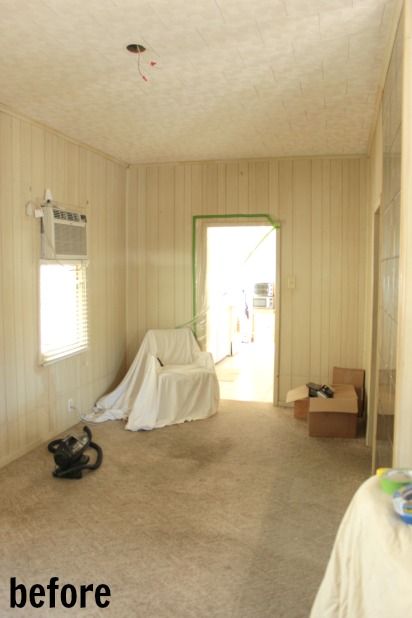
No, that bright light isn’t heaven … that’s just the kitchen.
And here’s that same view today, with the back door shut to block all that natural light.
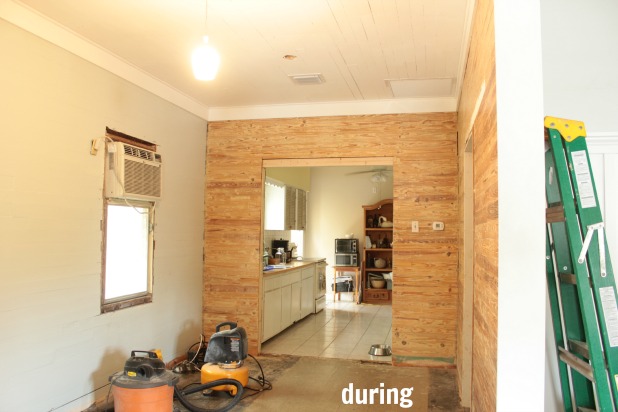
BAM! I’m in love.
Joel’s first reaction was that we’re really going to have to have an awesome kitchen since it’s now baring it’s soul to everyone who walks into the house. To which my giddy, excited reaction was “I know! I can’t wait!”.
We discovered that I apparently suffer from a bit of DIY beer goggles. Maybe it’s all of the hours I spend brainstorming ideas or perusing catalogs but I really can only see the beauty in this old girl house. I don’t know, just every time I open a drawer that sticks or shut a cabinet door that refuses to stay shut or discover our refrigerator leaks (Yes, that happened!) I am picturing what she is going to become and not worrying one second about what she is right now.
I’m in love people! And lucky for me my husband does not mind my emotional affair. But he still sees her a bit more like this.
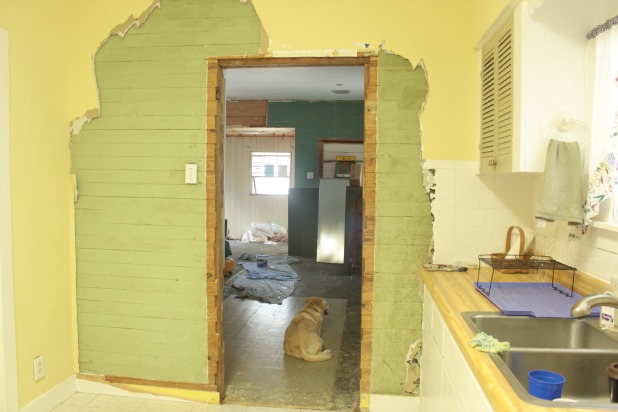
Aaaaanyway, I love that the opening is now much less of a doorway and much more of small wall with great wood slats.
And for the DIYers out there, here is what we’ve learned about how to frame a doorway.
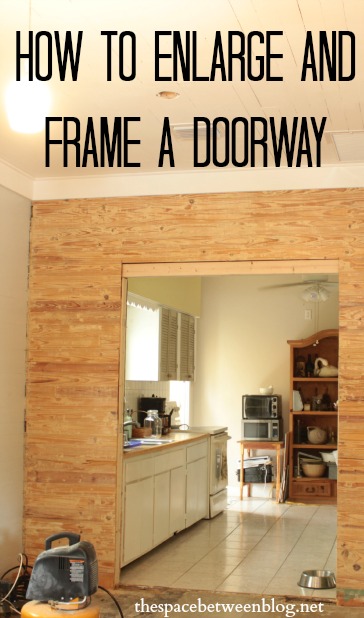
This is another one of those Step #1 – Call my father projects. Which proves it’s not super intricate from a do it yourself perspective, since it can be explained over the phone, but parts did get a little tricky for us as we tried to work with the super solid old wood we have. More on that in a bit.
First things first, we got professional advice on whether this was a load bearing wall or not in the form of our house inspection when we first bought her. Lucky for us she’s not so our options were wide open.
We decided we didn’t want the kitchen counters creeping out into the doorway so we used that as our measurement for how much to open the doorway. We learned that a standard counter is between 25 and 26 1/2 inches deep so we just made each wall 26 1/2 inches wide. That means when we trim out the door we really won’t have to worry about the stretch below counter height and we’ll be able to trim it right up to the counter.
We made our measurements and using a drywall T-square (because it’s 4 feet long) we marked long straight lines.
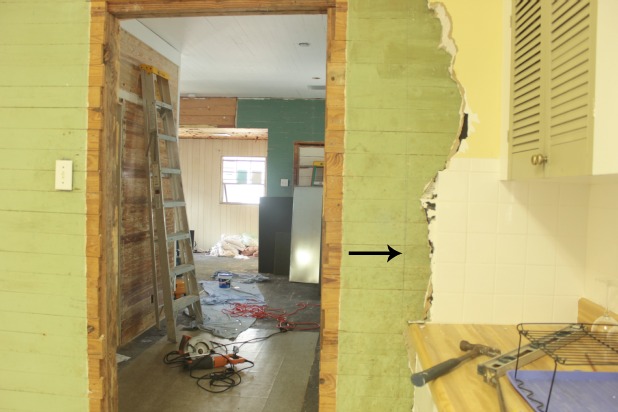 Clearly I removed a layer of some tile and drywall on the kitchen side, too. And all of the prep work I did on my own so we were ready to just get to cutting when Joel was available to help.
He asked me what he needed me to do exactly and I said that I just wanted him to be around to find my finger in case I cut another one off.
Totally kidding of course, I’m a super safe DIYer.
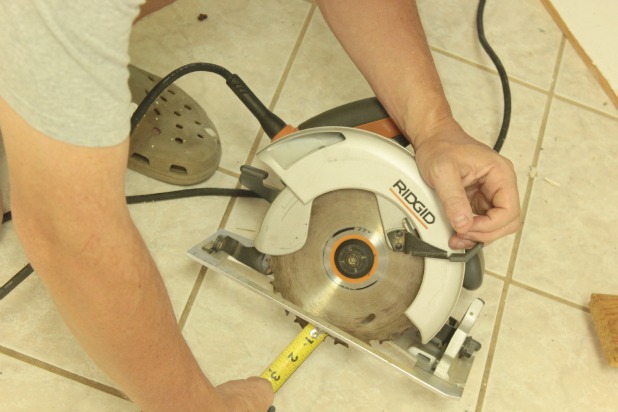
With our measurements and marks in place it really is just some straight line cutting. I knew I’d get a cleaner cut with our circular saw so I started with that.
Tip!!! Measure the depth that you need to cut and then adjust the depth of your blade so you can sink the blade into the wood and not have to worry about cutting anything in the wall you don’t want to cut.
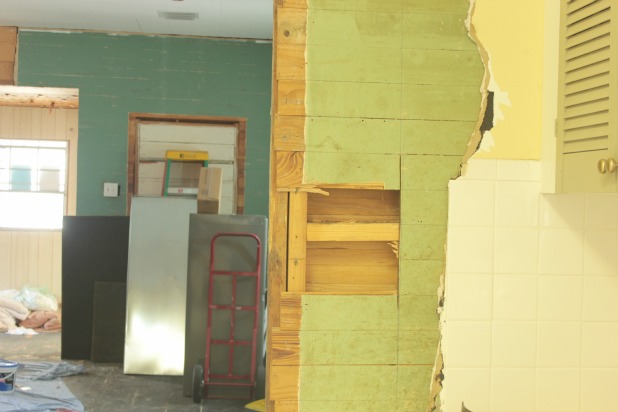
 We just cut a few slats first and pulled them out so we’d get a better peek into the wall to make sure there wasn’t anything unexpected like wires or anything.
 And then we made pretty quick work of cutting down both sides of the wall. It ended up that using the reciprocating saw (or a sawzall) was much quicker and I quickly got over my desire for smooth, straight lines with the reminder that they were just going to get covered up by trim anyway. Using a brand new blade helped, too.
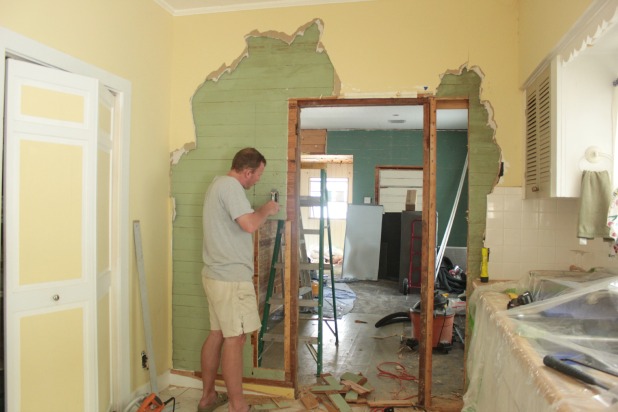 The other side was a little bit trickier because we did have to relocate two light switches, but thanks to my handier-than-he-lets-on husband that all went off without a hitch.
Oh, and if you’re working in and around an area that you’re living in that last-minute drape of plastic over our kitchen counter, sink, coffee maker, etc proved to be a good one.
Now this, regardless of the whole switch switcharoo, is where I’m not sure if things got a little tricky or if we just made things a little tricky for ourselves. Here’s how it went down.
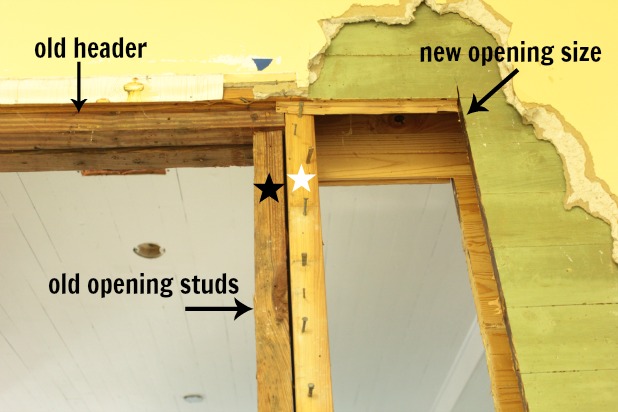 See that old header and those old opening studs? Those needed to be removed to make way for the new and enlarged doorway opening. We realized at this point that we could make the doorway as tall as we wanted as well because we were totally getting rid of the current structure.
So, we measured a height we liked and made the vertical cuts and ripped out the wood slats and separated the jack stud (black star in picture above) from the king stud (white star in both pictures) and got to this point.
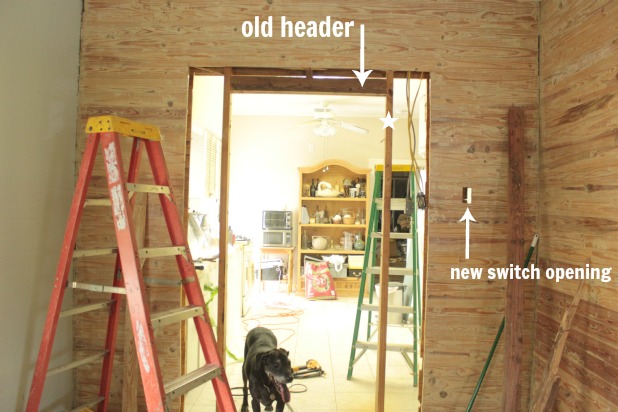 This is where we realized there was no way we were going to get that king stud out above the point where we had cut out the new opening. Meaning that unless we cut out more of the wood slats on the walls, with our current cuts, our new opening was going to be the same height as the old one. It worked for us before, that height would work for us again.
This realization also told us that all of the muscling we had just done to separate the jack stud from the king stud was nothing more than a good workout because we could have just cut the sucker out. Picture us rolling our eyes at this realization because we were too tired for any other reaction.
Those old studs are just so manly solid. It’s amazing. 2 x 4’s of today are like the creme puff version of what used to be incredible quality wood products. I’ll say it again, truly amazing when you’re holding an old 2 x 4 in one arm and new one in the other.
Anyway, turns out that the new, higher opening we had made was going to serve a purpose and that was to enable us to get the old header out and cut the king stud out high enough that it didn’t interfere with our larger opening and new, longer header.
With a few swipes of the reciprocating saw we had the entire new opening cut out and ready for our new studs and header.
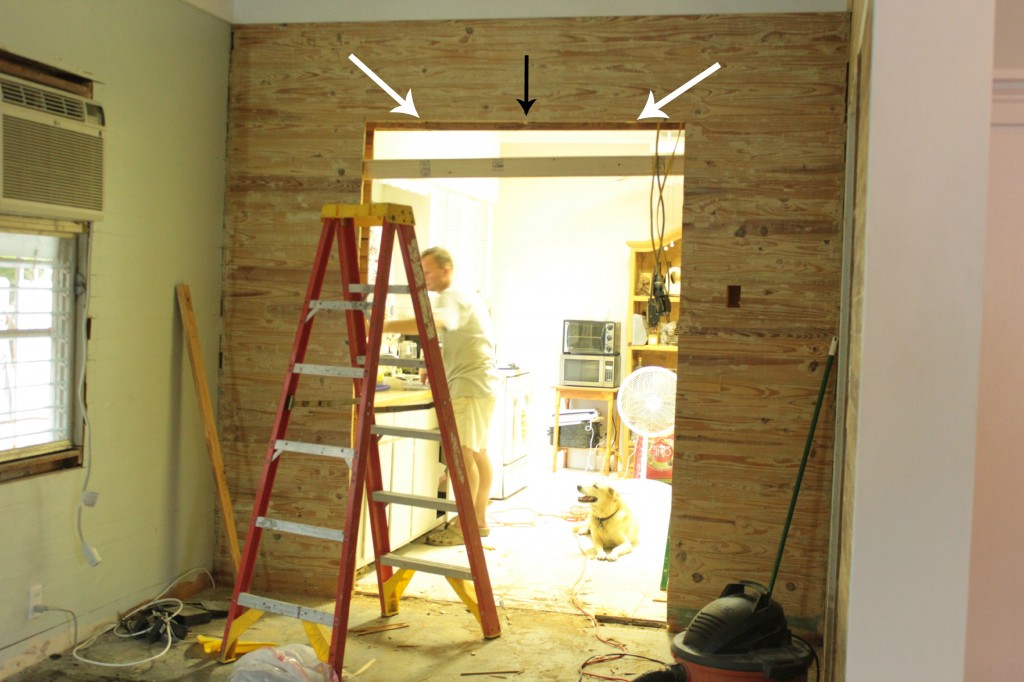
The white arrows are where the king studs are still behind the wood slats and the block arrow is that middle stud that goes from the ceiling down to the header, called the cripple stud. Here’s a shot looking from the floor up into one corner of the open wall at one of the old, now cut, king studs. The cut is not going to be straight or level or perfect in any way. But it is going to do.
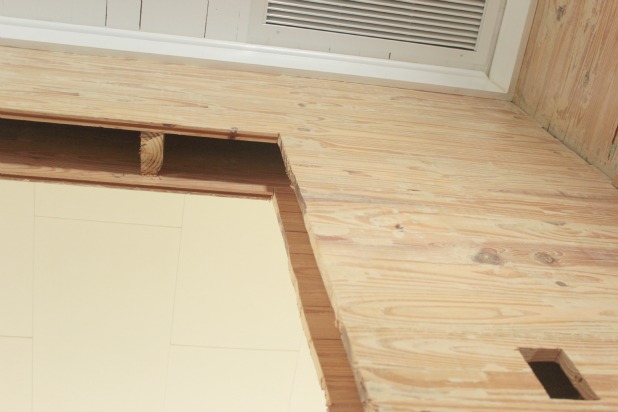
Truth be told, those last few swipes of the sawzall on top of arm wrestling the jack studs out, really took it out of us. We wanted the cuts to be as high as possible since that was going to determine the height of our header. So to get the right angle we used a long reciprocating saw blade. But we didn’t want to inadvertently cut through the wood slat walls we had worked so hard to strip already in the dining room and are hoping to resurrect in the kitchen. The angle was awkward, we had to be on a ladder to cut them and it was reaching the end of the day.
But now that we had the open all … open, it was hard to stop here. We measured into the wall to see how far set back the current wall stud is. Obviously, make sure your breakers are off long before you get to this stage of this project if there are switches or outlets near your work area.
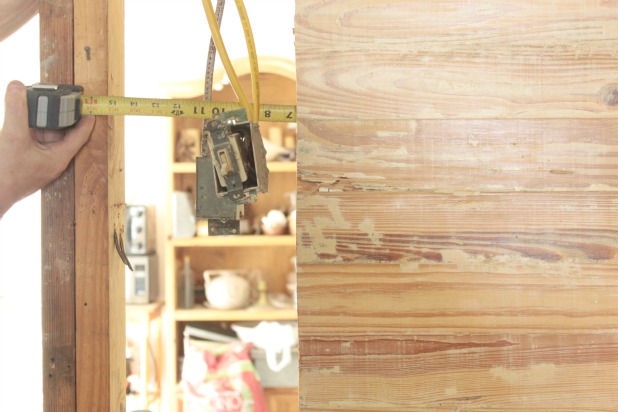 Yes, you can see we measured this before we actually cut out the old studs. It was once we got our new king stud cut (the one that goes all the way up to the ceiling) that we realized there was no way to get it into the wall until the old studs were cut out. Take it from us, no need to measure until this point.
Given the measurement in the picture above, that the current stud was 6 inches into the wall, and the width of two 2 x 4’s together is only 3 inches, and you want the jack stud to set out from the wall just a titch to secure what will be your new trim to it, we shimmed out from the current stud the spare 3 inches. Which, if you remember all the way back to the beginning of that run-on sentence, is also 3 inches so we just stacked a couple blocks of 2 x 4’s.
And remember when I said that those last few cuts really took it out of us? What I meant was that it apparently eliminated my patience with taking breaks to take pictures of these little steps. Ack! Sorry about that.
So let’s put on our x-ray vision goggles and take a look inside that wall to get a better idea of what I mean.
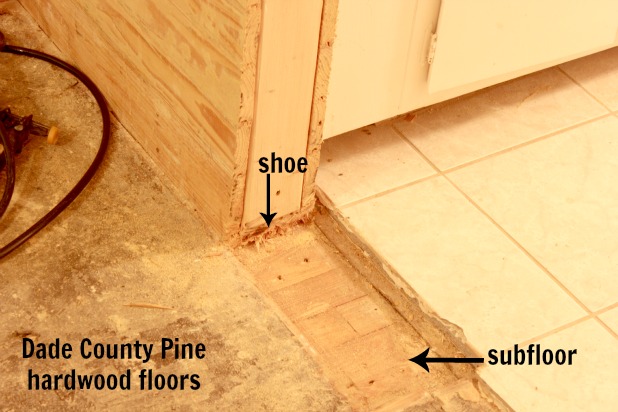
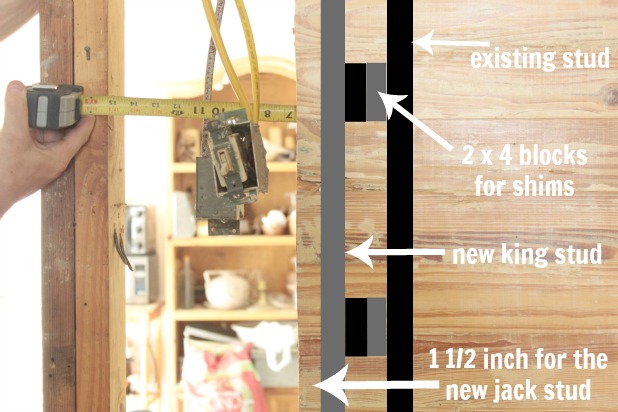 To measure how long your new king stud needs to be get your tape measure into the wall there and measure up from the floor (actually the “shoe”, which is the 2 x 4 that is on the floor as the base for the studs) to the ceiling and cut your new studs to size.
Here’s a picture of our shoe all cut to our new opening size. We used the reciprocating saw to cut as low as we could and then a chisel and hammer to cut the rest. It doesn’t need to be perfect, it’s going to get covered by trim, but you don’t want it sticking out past your new jack stud. Note, this picture was taken after we installed the jack studs, which is also the easiest time to cut your shoe to size.
With our new king studs in place and one header 2 x 4 cut and dangling not in place we called it a day. And true to form I got to play around with next steps and project clean up and pictures while Joel made me dinner. #ilovethatdeal #joelhastwoblondeadmirers

(You can see that we haven’t cut down the shoe yet in this picture.)
We really wanted to get the new switch location in place before we finished the doorway off just in case anything unforeseen came up, most likely would’ve been that there could have been a horizontal 2 x 4 in the wall preventing us from running the electrical lines down without opening the wall. And we really wanted to do that in the morning when a) the attic is cooler (we needed to get up there to rerun the lines) and b) we are refreshed and ready to tackle a new DIY.
So let’s talk electric another day and skip to the grand finale, k?
Measure the width from king stud to king stud (there’s gotta be a joke in there somewhere) and cut two 2 x 4’s to make your header. For a very detailed explanation of a header go here.
Butt one of the 2 x 4 boards up to the now cut ends of what were the old opening king studs and nail into place through your new king studs. Then do the same with the other and you’ve got a header.
Now measure the distance from underneath the new header to the top of your shoe and cut and install your jack studs, then trim your shoe to size. And there you have it.
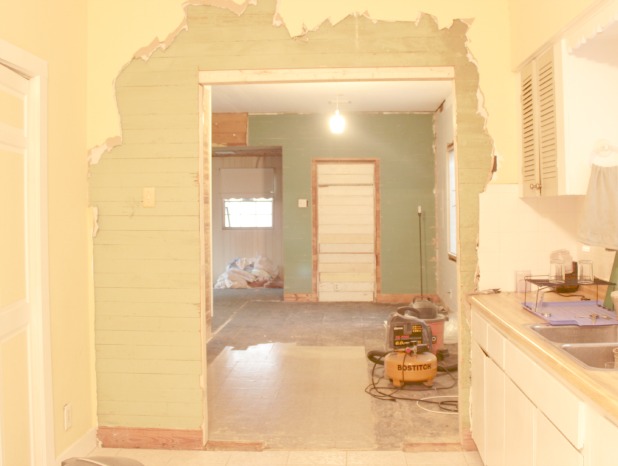 Yes, we clearly still have a lot to do in this picture alone. Like trimming out the doorway which we can’t do until we get those floors figured out. Which we’re hoping will be all taken care of next week. Fingers crossed. And the weird spots where the wall used to be will be covered up when we redo the kitchen floor. You definitely have to take that into account if you’re going to tackle this project.
But I love the impact of the larger opening … a reminder of the before.
 I love how it doesn’t even feel like a doorway anymore, just a transition to a new room … but still in the middle of the action.


Anne@DesignDreams (@ddreamsbyanne) says
Yep, this is one of my upcoming projects too – thanks for the tips!
Traci says
Things are really coming along. Your new larger opening will definitely give the rooms an updated look. Can’t wait to see what you do with the green walls in the kitchen.
Traci
Ashley@AttemptsAtDomestication says
You guys are so awesome! That was a great idea! And the larger opening looks so much better! The kitchen is definitely always the life of the party. We always tend to congregate there.
Em Hoop says
>snip This is where we realized there was no way we were going to get that king stud out above the point where we had cut out the new opening. Meaning that unless we cut out more of the wood slats on the walls, with our current cuts, our new opening was going to be the same height as the old one. It worked for us before, that height would work for us again. <
<
I am missing something here. I don't understand why you couldn't cut the king stud any higher, if that is what you wanted. Am sure it's something I'm overlooking, but seeing how 'clean' the area is in the later pix, why NOT just cut out some more slats?
Thanks for the great tutorial. It tells me enough to know that I will hire my favorite carpenter/handyman to do this, unless I can sell my old house first!
As usual, great job. It looks beautiful so far. The proportions of the opening are just right, from my POV. Thanks again.
Karah says
Thank you so much, Em! We could have cut more wood slats out to cut the king stud higher, but that was the problem, we didn’t want to get rid of any more wood slats and since we also didn’t want to paint the wall (which could have covered up any patching if we had cut them out and replaced them) we decided that current height worked well for us.
Ada Gonzalez-Decorator says
It’s looking GREAT! When DIY’s my tool belt is my best friend (i love having what I need close by). Cant wait to see more reveals.
Ada | http://www.adasinteriordesign.com/blog/