This post may contain affiliate links which won’t change your price but will share some commission.
Before we turned our main living areas into a closet slash tool shed slash everything-that-needs-to-go-somewhere-landing-zone combo room that plays World Cup soccer games non-stop (or however you would grammatically correctly write that statement) I showed you this.
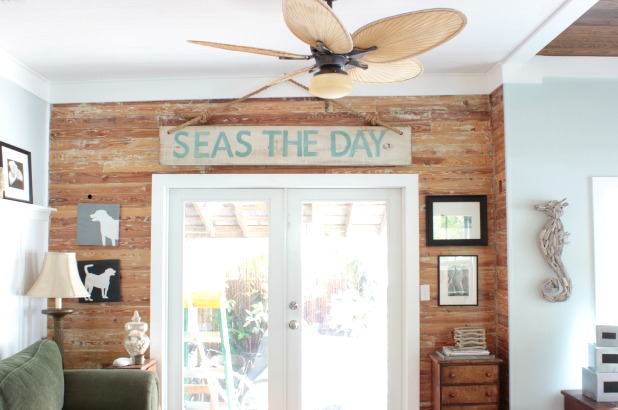
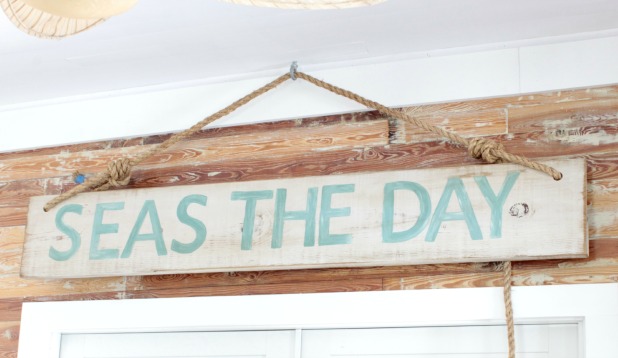
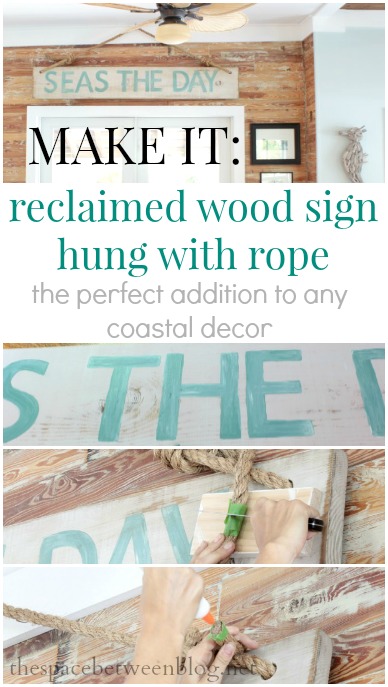
And you guys like the SEAS THE DAY sign. Thanks! Yes, I did make it. And it’s super simple … and it was free since everything used was left over from something else (I love when that happens!). But let’s back up for a second and I’ll show you why I really wanted to hang something over that door.
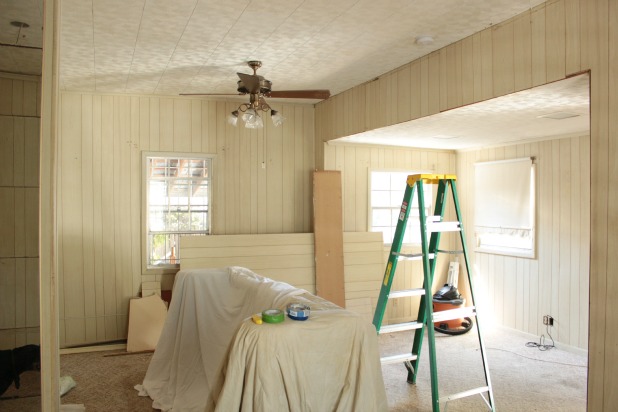
Remember when that door was a window and the walls were covered in paneling? Oh, and the ceiling was lower before we raised the roof.
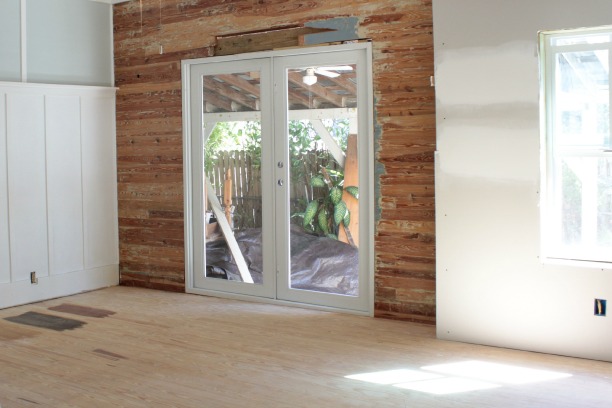
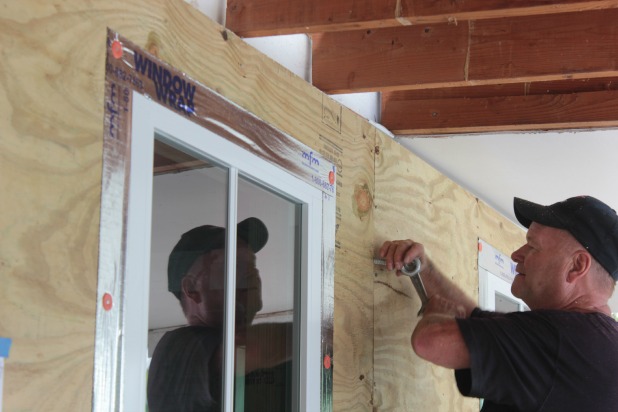
And then we removed the paneling and stripped the paint off of the wood slat walls. And had all new windows and doors installed. And were left with an exposed header above the door because the window was a little higher on the wall. Which actually made installing the new door header easier, so we weren’t complaining.
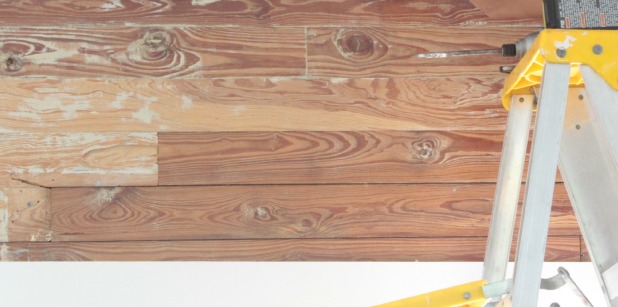
And I shared with you all of the ways my dad helped with exterior trim and repair, but I didn’t mention that he also patched up this little spot for us. But the one, and only down side I’ve noticed so far, to working with extinct wood like our Dade County Pine walls, is that it can’t be recreated. You’re welcome for stating the obvious.
So we had to use some of the slats that used to be below the old window, and they are noticeably darker.
Let’s just pretend this is a great shot, apparently in the almost 5 months these slats were exposed to the free world I didn’t bother to take one photograph, sorry. But it does illustrate that the patched wood was obvious. Nothing serious. Especially here, just one of the many things we’ve added to the “Key West Quirky” list. I think I’ve mentioned before that we like to frequent open houses around town and we have seen our fair share of Key West Quirky details in pretty much every home. So this little imperfection isn’t anything of real consequence, just a good excuse for me to take a few minutes out of the major renovation schedule to make a another reclaimed wood sign.
As for the patching I just stripped the paint off of the slats and finished them with a few coats of polyurethane while my dad used a square to mark and then cut the wood slats with the circular saw, just set the blade at the depth of the wood slats so as not to cut through any of the supports. We had a little termite damaged wood (very typical here in Key West) that we also got rid of.
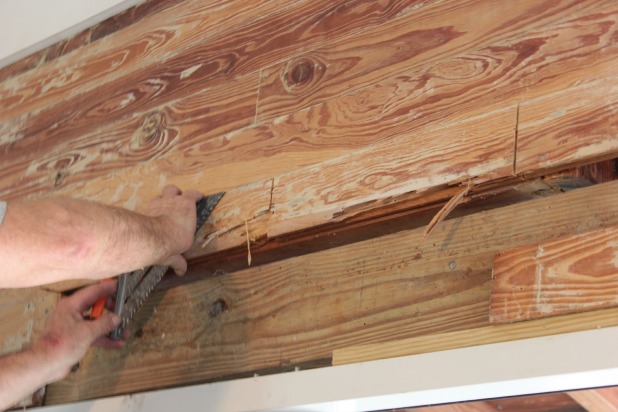
And use a chisel to clean out any part of the slat that you weren’t able to cut with the circular saw.
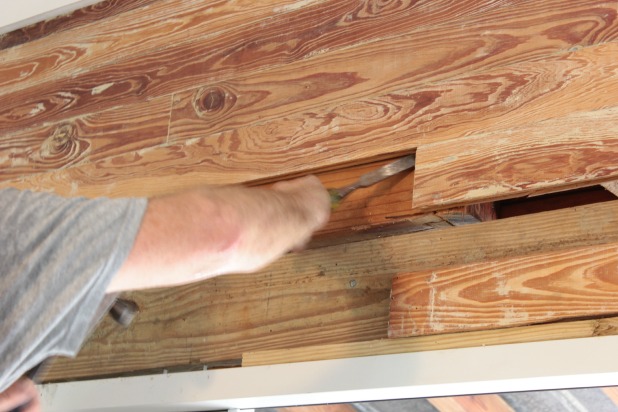
Then just puzzle piece in the new wood, cutting it as tightly to size as possible.
Once the door trim was added it really wasn’t that bad. But this girl will use any excuse to make a sign out of reclaimed wood so I ventured out to the pile of lumber we have left over from various projects and I found a 2 x 12 x 8 and cut it with my miter saw to about 6 feet long, about the same width as the door. If I was going to buy wood for this project I would just by a 1 x 12 x 6.
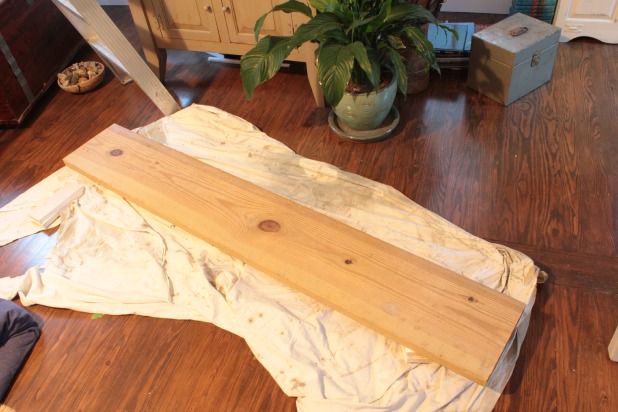
A simple coat of paint, I used left over paint from the gray in the guest bedroom, no primer needed since I wanted a little wood knot bleed through and imperfect coverage. And then a thorough sanding with 220 grit sand paper to make it even more imperfect and it was time for letters.
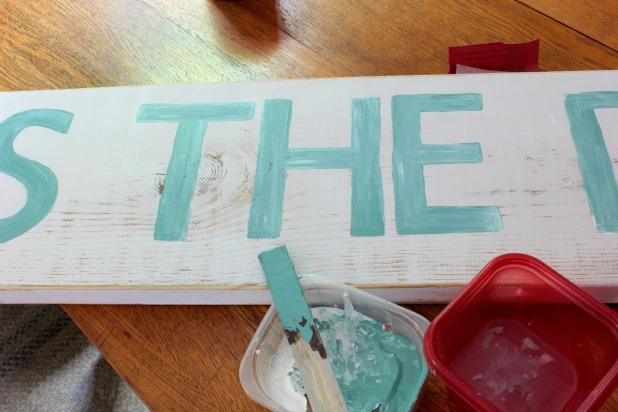
I used the exact same method for the lettering that I used for the reclaimed wood sign I made for the guest bedroom. I first painted them all a solid turquoise color that I found on the mistint shelf at Home Depot a while back. I actually bought it for a book project. The quart was only $2.50 at the time, but technically free for this project I would say. 🙂
Now for the varying shades of aqua effect I had no idea what I was doing.
Seriously, if you learn anything from me it should be that you can wing it 93.7% of the time.
But, because I couldn’t think of one good reason why I couldn’t accomplish the paint look I wanted, I just put a little white paint and a little of the turquoise paint in a bowl and dabbed my craft paint brush in a little of each color, not really mixing the paint, then painted a little, then dabbed a little more, then painted a little more.
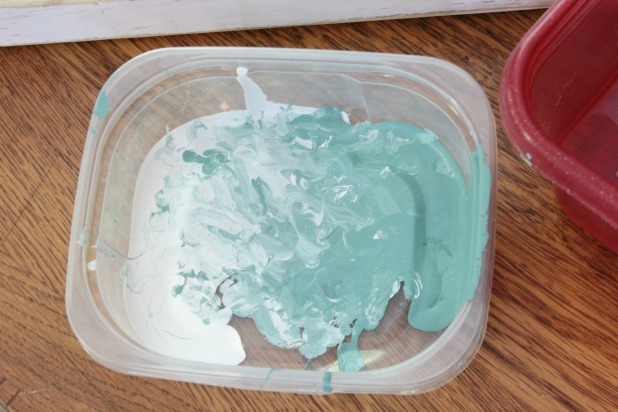
I used a small craft brush and just worked on each letter until I liked the look. The red bowl has water in it, I found it helpful to keep the paint damp and workable. Every letter is a little bit different and there is no real science to this at all. Heck, there isn’t even any fake science. 🙂
I finished the look with a little dark wax just to help the aged look along a bit.
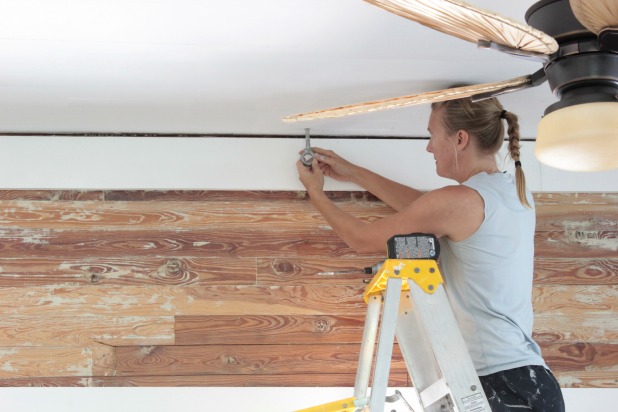
As for hanging it, I was hesitant to drill into the wood slat walls because they are bare wood, and would be impossible to patch, so I decided to drill into the ceiling, which is painted wood slats which makes for a much easier patching process if it ever comes the time.
I used a level to measure straight up from the center of the door to mark where to drill into the ceiling.

I drilled a 3/8″ hole with my impact driver, because that was the right size for the eye hook I was going to use.
And as for the eye hook, do you remember the day we found out our porch roof wasn’t attached to our house? And I had to run out to buy something so we could tie up a support to hold it all together while we added joist hangers?
And the eye hook or bolt I bought (like this one) was strong enough to tie my elephant up to, said the nice man at the hardware store. So I untied my elephant … I kid. Since she helped us that day (The eye bolt, not my elephant.) she has just been waiting for a new job, so I screwed her into my new hole in the ceiling.
And used 3/4″ rope we had left over from our rope and wood accent wall in the guest bedroom, run through 1″ holes I drilled in either end of the sign and tied with slip knots thanks to Joel. Don’t ask me how. I don’t know. 🙂 But if you really want to know I can find out. In exchange for cookies.
It took both of us to get it level and hung at the height I we wanted. And the darker wood slats on the wall are hardly noticeable.
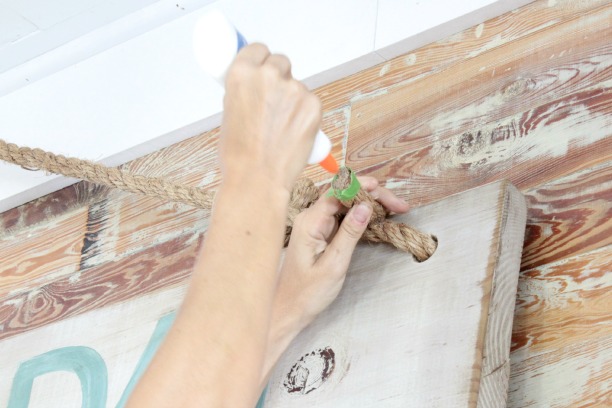
To cut the rope to length just wrap painter’s tape around where you want to cut and use a serrated knife, a piece of scrap wood prevented me from cutting into the actual sign.

With the painter’s tape still on the rope, douse the end of the rope in white glue and let it dry overnight before removing the painter’s tape. This will prevent the rope from fraying, obviously skip this step if you want the rope to fray. 🙂
And that’s it. I like the “seas the day” saying for obvious reasons. Just something else a little coastal to add to the mix and help the vibe of the home continue in the “we’re a home near the beach” feel.

And if its coastal decor you like, hop over to Remodelaholic.com to see a little collection I put together of some fun Coastal Decor Ideas. Think crafts, fabric and color schemes!
********************************************************************************


sue says
Until I read this, I didn’t realize you used rope to hang the sign. My powers of unobservance never fail to amaze me. 😉 Nice the Eagle Scout skills still come in handy. 🙂
Beth says
I absolutely LOVE everything about this space! The sign, the walls, the door, the ceiling fan – EVERYTHING! You are amazing, friend!!
Karah says
Thank you, thank you!! xo
laura@top this top that says
can’t wait for the book to see everything all in one place. it was sooooo great to see you again at Haven. you are the real deal! x0x0
kathleen says
it all looks fantastic! It was so nice to hang out with you a little on saturday night! I will be following along on your next adventures 🙂
Karah says
YAY!! It was so awesome to see you, so glad you decided to come in. We should connect on social media, I would love to see pictures of all of your kids. 🙂
Karah says
Hahaha, don’t scare the cats!!