This post may contain affiliate links which won’t change your price but will share some commission.
Dear Previous Owner of our Key West conch home,
Specifically the owner who thought it was a good idea to cover up beautiful hardwood floors with carpet …
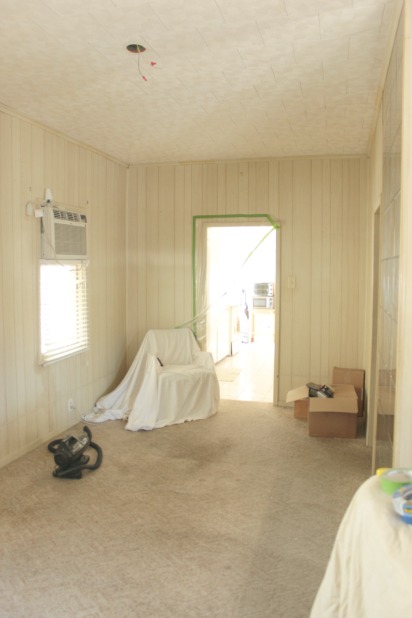
… thank you.
Because of you I do believe our beautiful hardwood has a better chance of being in good condition … which is more than I can say for the stank carpet. #totalgrossness
You most likely saved the beautiful wood from years of wear and tear and use. You protected them and preserved them …
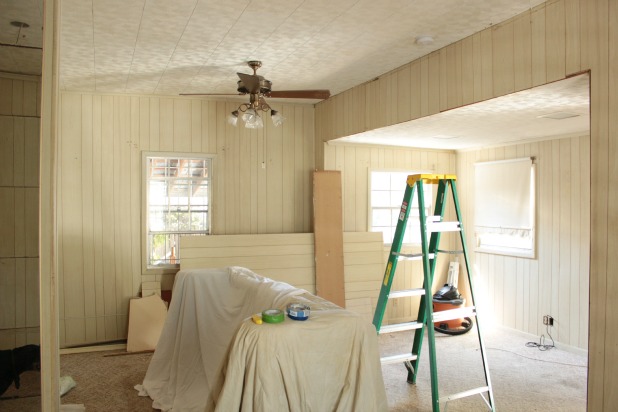
… just for us.
I think that is more awesome than words can express.
But, can I ask you just one question?
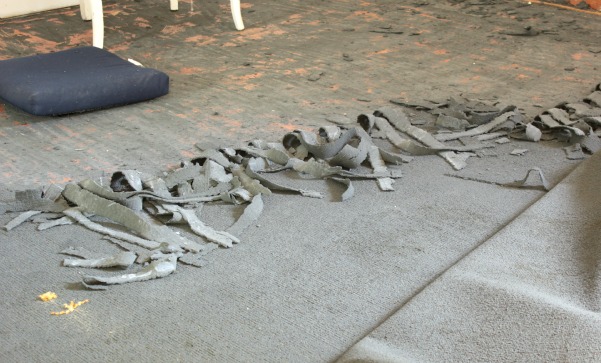
Why, oh why, did it seem like a good idea to glue the carpet pad directly to those beautiful hardwoods?
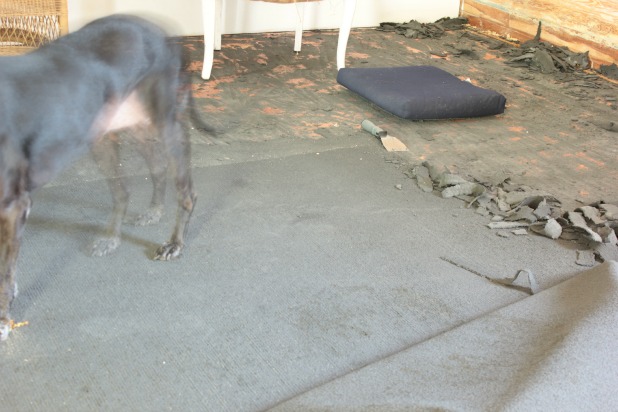
#puppyphotobomber #longexposureinlowlightcreatesextralegs
I’ll give you the benefit of the doubt … maybe it was before the era of the tack strip … because I see that you progressed to the tack strip when you decided to add a layer of berber right over the fabulous orange you chose originally.
Or were there two previous owners conspiring to bury those hardwood floors too deep to find?
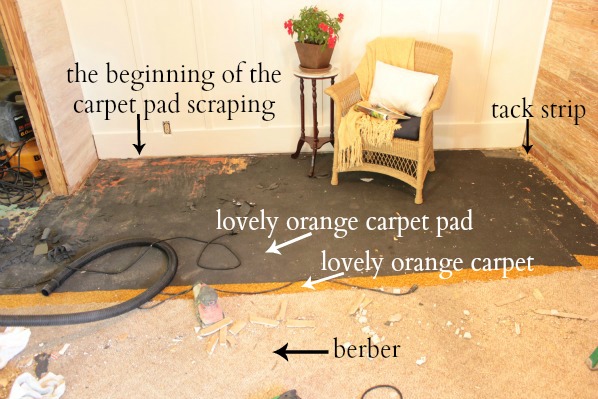
But, really, I so appreciate that you saved the hardwood for us.
My arms and shoulders don’t really appreciate the glue … but they’ll get over it.
Just like Mico will get over me getting rid of all of her padded laying grounds.
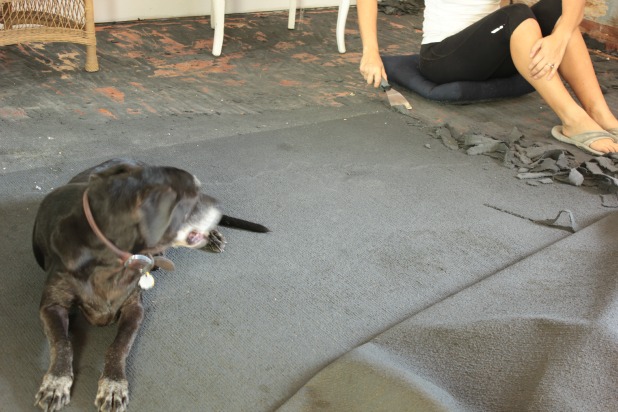
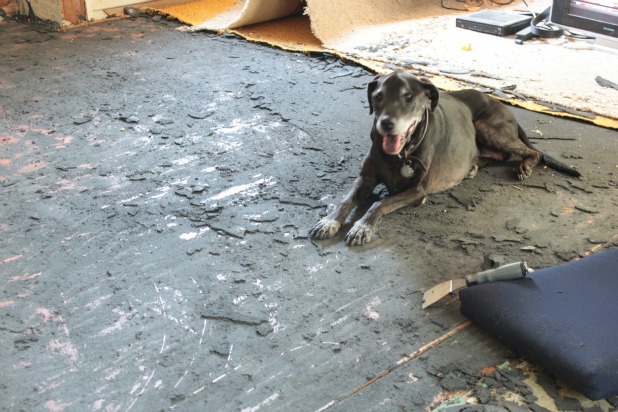
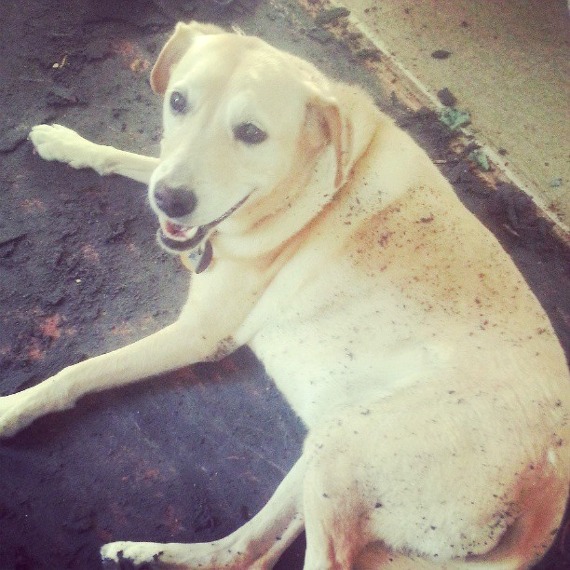
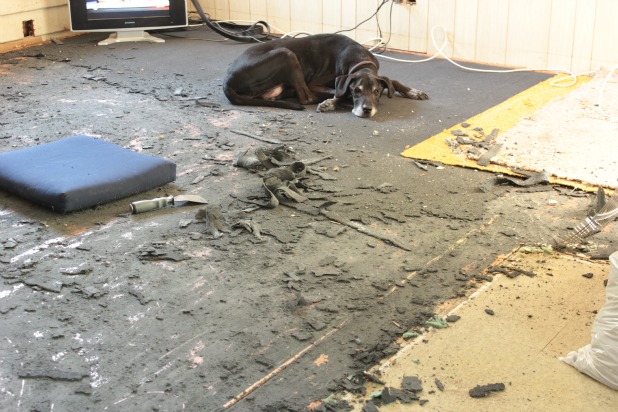 Just in case I haven’t mentioned it recently … I am madly in love with that black dog.
If you’ve been blessed with your very own glued down carpet pad over hardwood floors you are preparing to restore, here are a few things I learned along the way.
- Settle in and get some padding for yourself, this project will take a few days, I used a patio seat cushion that’s navy … which leads to tip #2
- This project will be messy (so don’t use a good, light colored sofa pillow as your cushion), in a bits-and-pieces-of-carpet-pad-everywhere sort of way. After I woke up to those bits and pieces in our kitchen and stuck in our bath mat and just fluttering around the house I learned to shop vac up (using one like this) at the end of everyday, a little extra cleaning each day = a little extra sanity for not only me, but Marley.
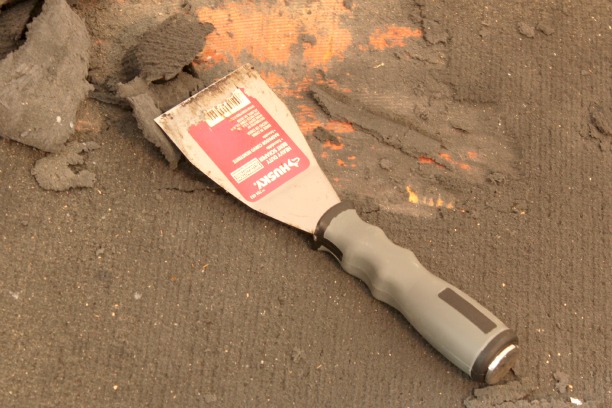
- We used an angled scraper like this one. It has threads in the end of it so you could screw in a pole, but I was more comfortable sitting down and felt stronger without the added length. And who doesn’t want to feel stronger? 🙂
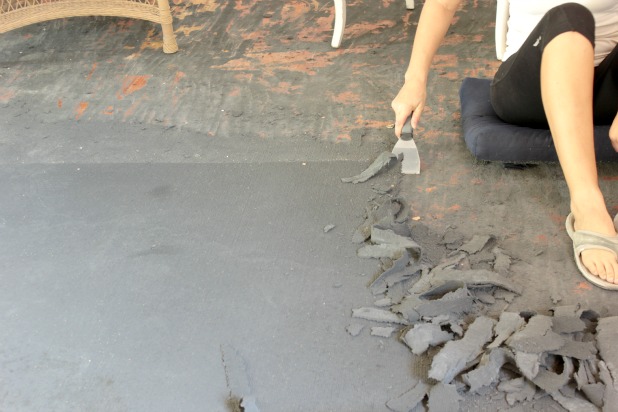
- After some trial and error I learned that I was able to scrape up longer strips (which is so much more fun and efficient than little bits) of the padding if I only tried to scrape about 1 inch wide strips.
- Be sure to use the scraper flat to the floor so you don’t gouge your hardwoods and scrape in the same direction of your wood slats.
- I worked from one side of the room to another scraping 1 inch wide strips about 15 inches long.
- Then just tear the scraped strips up and directly into a garbage bag. And repeat until you’re done.
It really is more time-consuming than difficult but every once in a while I needed a break so it was a good project to work on a few hours a day for a few days in between other projects.
But wait … there’s more … and not in a good way. 😉
In the living room we had the glued carpet pad and double carpet to contend with …
… in the dining room, under the berber carpet and a very easy, what I would call “normal” carpet pad to remove … you know … rip up the light weight pad, removed the staples that had held it down and done …
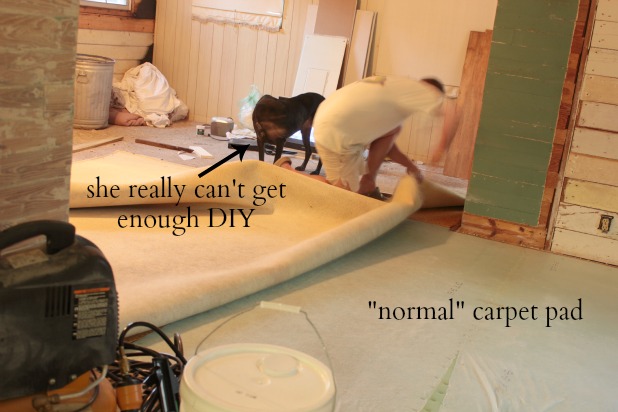 … and by “done” I mean left with about a 200 square foot section of asbestos vinyl floor tiles.
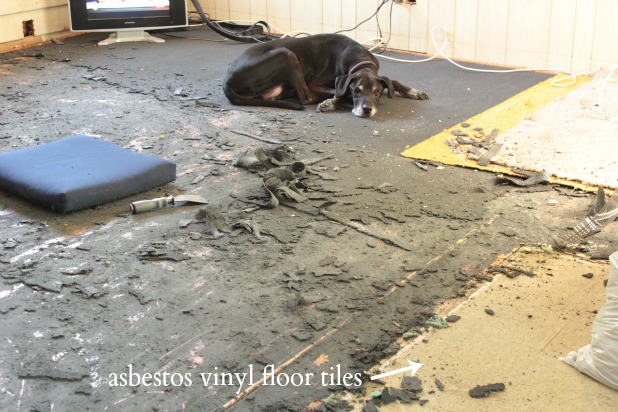
So we’re now in the process of researching our best options for taking that up without poisoning ourselves. We’ll be sure to keep you posted on that.
And we’re leaning towards having the hardwood floor professionally restored because there is still so much gunk on them, and we’ve never done it, and it’s the biggest room in the house, and the first room you see when you walk in, and not that we need anymore reasons … but we just don’t want to totally screw it up. 🙂


Kara says
Now I know we did not have glued hardwoods to deal with but we redid our hardwoods ourselves and just like we do everything else, watched a youtube video, read a little and just went with it. They are beautiful! I’d find out if the stand-up floor sanders will take off the extra padding and glue and if they will I really think you can do it. After sanding is done, it just takes patience because you literally have to watch paint (stain and polly) dry otherwise its not painfully hard just time consuming.
Karah says
Thanks so much for the thoughts Kara! We have unfinished wood floors (we think) in other rooms that we’d love to do ourselves. I’ll definitely ask about the sanders removing the carpet pad (and vinyl tile adhesive) though, that’s a good idea! Hope all is well in Indy!!
Donna Walker says
I was despairing that i was doing mine wrong till i saw this. Thank you for sharing x
Vonda says
Wow. You’re just working away! I love seeing all the progress already!!
Karah says
Thanks Vonda!!! The look of progress keeps us going. 🙂
Clare says
Oh my. You gave me flashbacks. When I moved into my house there was 3-4 layers of ugly (possibly asbestos) flooring in two rooms.. It took days to find the floor, which wasn’t in very good shape and I wound up covering it anyway. But at least it wasn’t that horrible ugly tile anymore! Good luck! Water Damage Seattle WA
Karah says
Oh, and you have to take the chance right, sorry for all the work and not finding what you hoped. Gotta love the journey, though!! 🙂
Mia B says
Definitely keep us posted on the asbestos tiles, I fear they lurk under the carpet in one room where we want to tear out and run HWF throughout.
We’ve restored HWF in one house, and had the glue down rubber pad in parts. I’d thought maybe moisture had just bonded the rubber in places, because it wasn’t 100% glued down like what it looks like in your photos. But the bits and pieces that get everywhere were just the same – crumbly, ancient rubber. We just rented a floor sander (the vibrating plate kind we got at Home Depot’s rental division, not the heavy belt kind that you can screw up your floor before you even know you’ve turned it on) and it was pretty easy. Slow and steady, repetitive, and boring, but not hard. The only thing I wish I’d done differently was I couldn’t sand all the pet/ moisture/glue stains out, so there are dark blotches in some places. Had I been less rushed, I probably would’ve figured out how to google bleaching stains out of hardwood, which is a real thing, but I didn’t. We still love how they turned out, but now six years later, when I go in that house I think… “damn. Should have googled.” We also didn’t stain the floor a darker color (it smells so bad we decided to skip it to conserve brain cells) but that would have hidden the glue stains, I’d bet.
Karah says
hahahaha, Isn’t google the best! We’ve found a lot of great resources about the asbestos tile, we’re going to get it up, but it’s definitely a “DIY at your own risk” kind of project. Aren’t HWFs the best though, worth all the work! 🙂
Kelly @ Corner of Main says
What a project!!! And your sweet puppies are covered in it. lol. Good luck!!
Karah says
They are so funny during these projects. The power tools are their worst fear right now. 🙁
Susan @ Uniquely Yours or Mine says
Umm… That’s some serious work, I would be crying I think! Good luck and I love the pics of the dogs, so funny!
Karah says
She is the best company, I actually took breaks so I wouldn’t have to get her up … but if I went in the other room she’d get up to follow me. Now that’s love. 🙂
DesignedDecor says
Karah, you and hubby are working your butts off! It will be so beautiful when it is done! You will forget about all those strips of glued down padding, NOT! I am sure you dream about it!
Karah says
LOL, they strangle me in my sleep! haha
Traci says
What a job! I like that you developed a process to get this done. The 1 inch strips look like Medusa’s hair. We had a similar with carpet pad stuck to the floor but I think it was just from the break down of the pad.
Where did the black dog come from?
Traci
Karah says
Hahaha about Medusa’s hair, that is so true!! We’ve had that beauty of a dog since she was 8 weeks old, she’ll be 11 this year and survived a tumor removal last year. We’re so thankful she’s still around. 🙂
karen@somewhatquirky says
I take it back – I don’t want to be there helping you… Have you tried using heat to soften the adhesive? Maybe a really hot hairdryer? I think maybe a heat gun (stripping) would be too hot. Do you remind your husband what wonderful cheap labor you are?
Karah says
Awww, come on … I just unpacked more boxes and there’s now room on the floor in the guest room for a guest. 😉 I did leave Joel alone for about 2 hours in the house with a hair dryer and the scraper … it’s not good from an asbestos standpoint, but I left him my respirator, too. Now that’s love. 😉 That’s my way of reminding him what wonderful cheap labor I am. Happy Memorial Day!
thistlewoodfarm says
That’s a lot of work, but it will be so worth it in the end!!
Hang in there!
Have a blessed and wonderful day!!
Cathy says
When I finally got a new furnace with air-conditioning, I had to have asbestos abatement company coming to remove the ductwork that was covered in asbestos but painted over. They had to wear respirators and bunny suits and close off the basement with plastic. Do you think it’s wise for you and your husband to do this with your linoleum? Personally, I wouldn’t take the chance and I would have a company come and do it. You might even be required to although I’m not sure of that. Your progress is looking good.
Karah says
Thank you so much Cathy! We have done a bunch of research and have are definitely bringing in some professionals to help us with these floors. It’s amazing the different types of asbestos, I know more now than I ever hoped to about the topic. lol I really do appreciate the concern.
Christine says
You could totally sand the floors yourself! We did ours a few weeks ago and they turned out great! Maybe our experience can give you a few ideas and tips: http://www.littlehouseonthecorner.com/how-to-sand-floorboards/ Good Luck
Old New House - Vintage and Antiques says
What a project! it’s going to look phenomenal when complete. Great work!
Tom says
Your blog is the first, and so far only, place I have found with someone else in the same position I am in right now. That black foam is exactly what I found when I ripped up the carpeting in the upstairs level bedrooms of my house. I knew there was no beautiful hard wood floor under the carpet, and have laminate flooring ready to do gown now. The black foam stuff was from the previous carpet that had been replaced 15 year ago, by the stuff I just removed. I’m sending out a sample of the black foam to be tested for asbestos. My question to you is did you ever determine if the black foam stuff was hazardous? It is so far deteriorated on my floors that most if it is just a fine powder now and its scaring the heck out of me.
Tom in Wisconsin.
Karah says
Hi Tom! I didn’t have the black carpet pad tested because the flooring professional who came and sanded down the floors said it wasn’t contaminated. That was just his opinion though so I don’t know for sure. Doing some quick online research I found that it would be very rare for even the oldest carpet pad to contain asbestos. I hope your tests prove the same. 🙂