This post may contain affiliate links which won’t change your price but will share some commission.
Hey hey! Happy Friday!!
I am going to jump right in and say I feel like we’ve been purging money lately. 🙁
You know, just walking out into the street and throwing my hands up in the air and letting loose handfuls of cash. Then just watching it blow away into the universe.
Ugh, I can feel my heart rate increasing as I think about.
There aren’t many things less appealing than spending money to this thriftress.
But it is inevitable.
We’re trying to resurrect a neglected old Key West Conch house. And we’d like to actually get it to a stage where we can move our furniture into the house at some point.
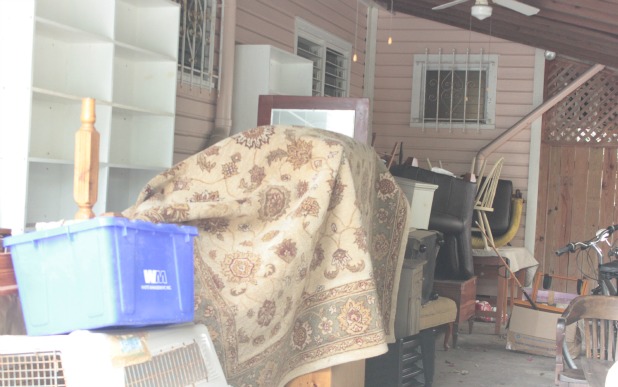
What? Your furniture isn’t piled up in your carport with a nice rug draped over it? How modern of you. 😉
And luckily we took all of the large expenses into consideration when we decided to buy this house. But the reality of actually writing the checks and watching the hard-earned savings change hands is still painful.
So, we didn’t make the decision lightly when we decided that we are leaving our new window installation to the professionals. This is another one of those ‘been there, done that’ projects, like this one. About 7 years ago we installed a whole house full of replacement windows at our house in Maryland.
One window at a time, slow and steady as the budget would allow. It was the perfect way for us to do it then.
And now, after negotiating a deal with the professionals for basically a ‘rough in’ window installation (we will do all the work up to removing the old windows, they will come in and set the new windows and then we will complete all of the trim and finishing work), we’ll be able to save a bunch of money on labor costs and also save ourselves a bunch of time by having a crew come in and make quick work of the installation process.
I’m thinking “avoiding any mishaps of mis-measurements” and “10 hands are better than 4” and “they have exactly all the right tools and know-how for a quick installation” and “we’re ready to use our new AC already” which we haven’t yet because of our rickety old windows. So let’s get to this already. 🙂
As a bonus, our negotiated price for only a rough in installation still leaves us with some DIY to tackle on our own. Winning!
And first up is what we’re calling our “get out of jail free” work.
Otherwise known as removing window bars, because what says jail more than window bars? And since we’re tackling this project on our own it’s FREE.
Is it normal that the heart rate immediately slows when I write about free projects?
And back up it goes remembering the not free projects …
So let’s not think about that right now. 🙂
Let’s talk window bars.
Do you have any? Have you ever? The thing with these bars is that they were meant for security, so it wouldn’t really make sense to have them installed with screws that could easily be unscrewed, right?
But, a handful of our screws just needed a simple little square drill bit to get them out.
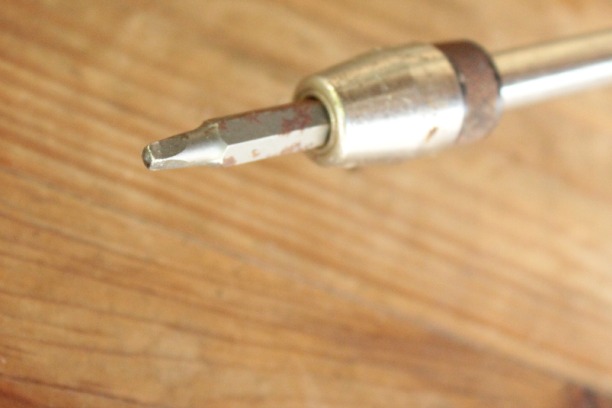
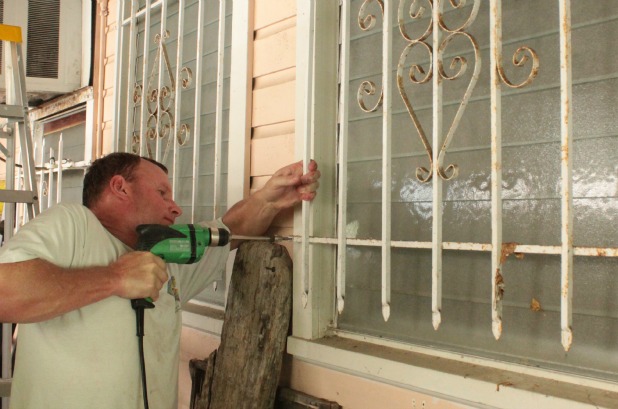 And it was when we had those babies removed that all of the super simple parts of this project were complete.
This turned into an afternoon of blood, sweat and struggle. Luckily no tears. But, because we are wacky DIYers that can get the giggles when all we really want to do is give up, there were a few laughs.
Me to Joel with a smirk “that one is really kicking your a$$”. He just laughs to avoid the initial reaction to smack me upside the head.
I’m a keeper. 😉
But seriously, they kicked our a$$. But we were finally able to manhandle them to death.
Here’s how it went down.
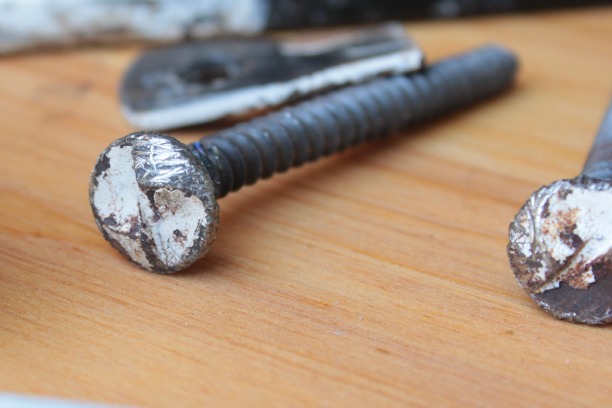
We first realized the screws looked like this … see how you can easily screw them in but there is nothing for the drill bit to grab onto if you’re turning counter-clockwise.
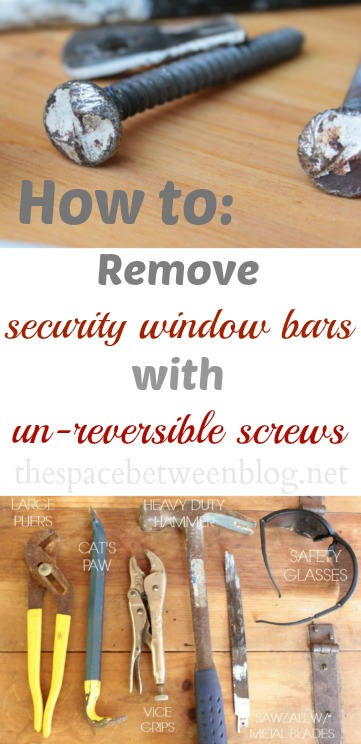
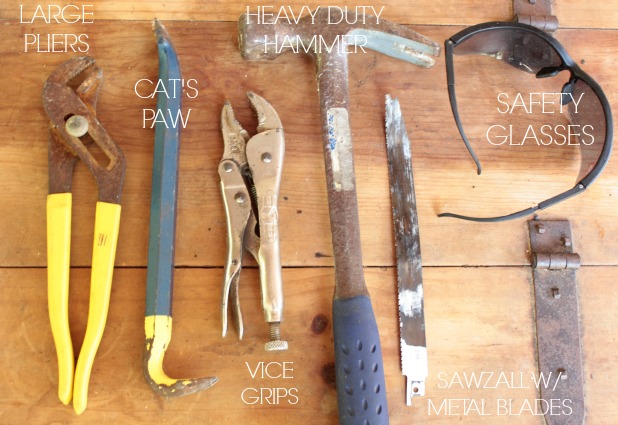
So we did a little online searching and asking around and gathered our repertoire of tools.
This post may contain affiliate links which won’t change your price but will share some commission.
- large pliers
- nail pulling tool we call a cat’s paw
- locking pliers called Vice Grips
- heavy-duty hammer
- reciprocating saw, affectionately referred to as the sawzall … because it saws all
except window bar screws - metal sawzall blades
- safety glasses
- leather gloves wouldn’t have been a bad idea either 🙂
Now, I did see a suggestion to use tile nippers to loosen the screws, but we bought a pair and immediately returned them because they didn’t open up enough to fit around our screws. 🙁
Removal Option #1: Sawzall the top of the screw off and then unscrew the nub of the screw with the vice grips.
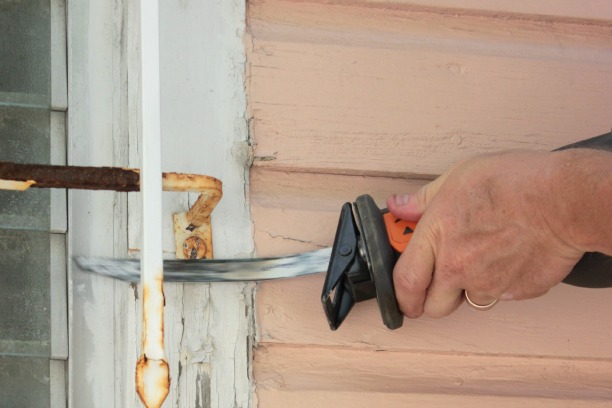
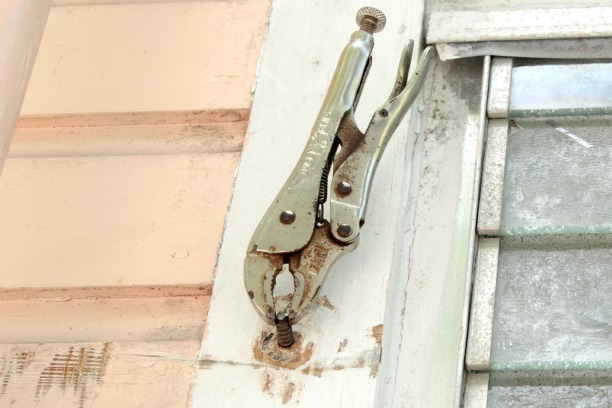 We had high hopes for this approach.
And it did work. And all those saw marks are no issue to us since the exterior of the house will be getting a makeover sometime soon. But we wore down the two metal blades we had on hand in no time at all. And it took For. Ev. Er. And you really had to put your body into it, if you know what I mean.
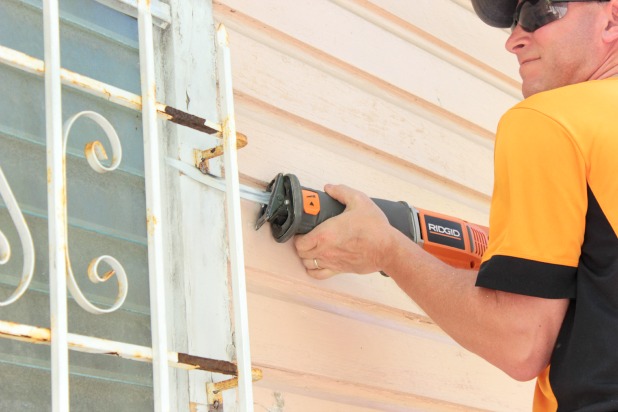 That’s the look of hard work right there.
And, you really need an open work area for this technique to work. See how you have to have the sawzall hugged right up to the house, with any obstructions it was really hard to get the right angle, and the windows on the other side of the house were in tighter quarters so in lieu of heading out to buy more metal blades we opted for an updated approach.
I will say, if you’re going to stick with this option, cut the screw in front of the window bar (like in the picture above) and not behind, like this picture below.
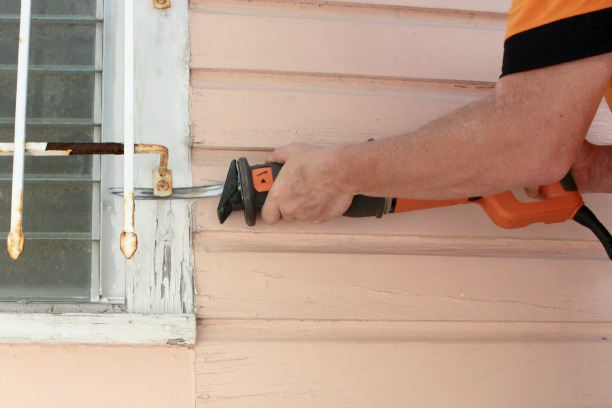 That way you’ll have more of a nub for your vice grips to hold onto when it comes times to unscrew. Which will in a bajillion minutes from when you start. You’ll think you’re making good progress, and be sweating, and your arms will be aching from all of the vibrating of the reciprocating saw. And then you’ll take a look at the screw and see you’ve cut through about 1 millionth of a millimeter. 🙂
Which brings us to …
Removal Option #2: Loosen the screw with the cat’s paw, beat the crap out of it with the hammer, unscrew a bit with the large pliers until you can separate the window bars from the connector piece and finish her off with the vice grips.
Yes, this actually worked.
And since it was multiple steps with different tools Joel and I could work pretty good in tandem. So this is also where the action shots came to a halt for the most part. We were working hard here people. 🙂
Joel was in charge of getting started with the cat’s paw and then the beating up part.
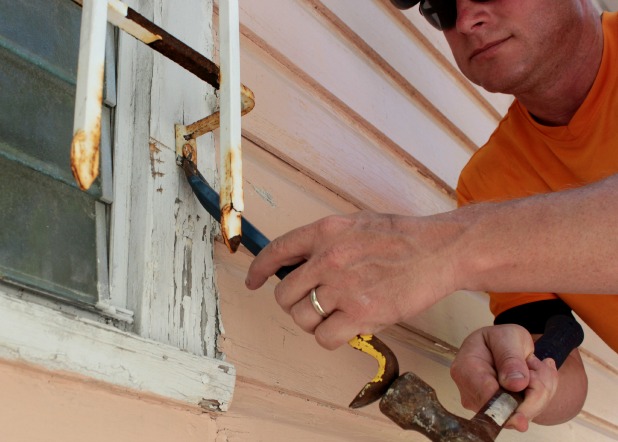 In his words he just ‘whacked it a bunch of times with the hammer’ until he could get a grip on it with the pliers to get the unscrewing started. The objective is really just to loosen the screw tip from its death grip on the window bar piece.
This is where I would come in to take over the unscrewing. It’s easier at this point to use the pliers than the vice grips because you can only unscrew about a quarter of a turn at a time until you can get it loose enough to pull out the bars.
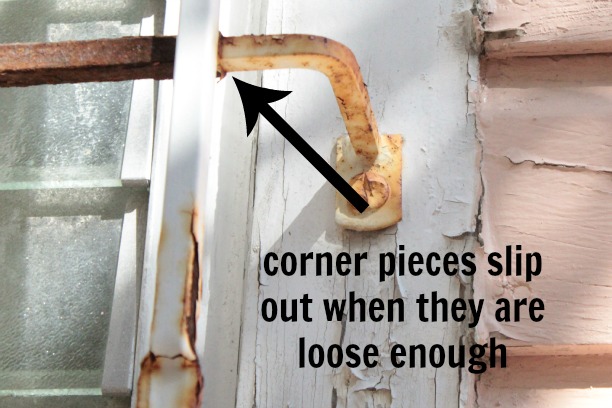
You can’t really tell from the pictures, but the corner pieces of the bars slipped right out of the actual front part of the bars when they were loose enough.
At that point it worked great to lock the vice grips onto the screw and just unscrew it.
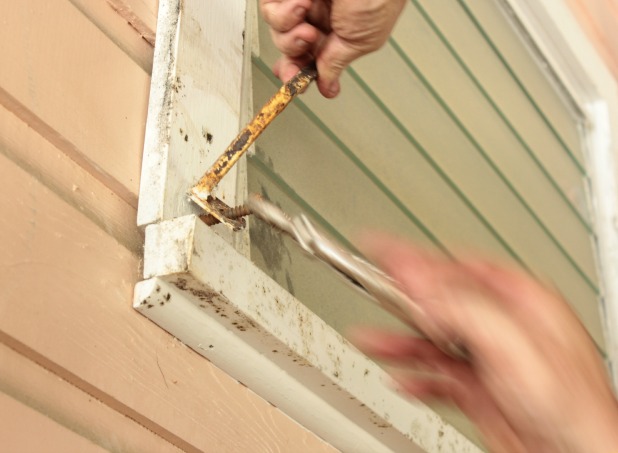 How’s that for an action shot? 🙂
Overall, it took more time than we had anticipated like pretty much every other DIY project we’ve ever done. And was more tiring than expected like pretty much every other DIY project. And we found ourselves finding pleasure in bending and breaking metal and screws. Small victories.
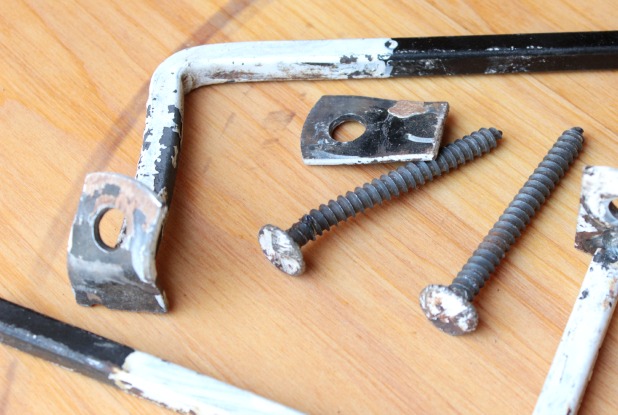
But when we were done we felt super exhausted accomplished. And this is the kind of project that is nice to have behind us.
![]()
Yes, we see the chipping and dirty paint on the outside of our house, too. There is still a lot to tackle on the exterior. But this is one big step in the right direction.
There is no dramatic ‘after’ shot here since our exterior is still a hot mess work in progress … but we were super excited to get these architectural drawings that are necessary as part of the permit process.

I know they don’t look like much, but they mean a new roof line and fence and windows and house color and so much more to us.
They mean progress. Real, substantial, changes you can see kind of ‘progress’.
So let’s not talk about how much that little drawing cost me, k? 😉


Marty@A Stroll Thru Life says
You guys are really impressive. I can’t believe you are tackling such a huge project. Great job. Hugs, Marty
Nancy Carr says
Karah, you never cease to amaze me with your projects and all you can do. I have the security bars on every window and door and porch and carport. I never thought about having them removed and how much it would take, nor do I plan to have it done. Are you planning to put the bars back up at some time?
Karah says
Hi Nancy!! Bars really aren’t necessary around her, although we got very used to them in the Caribbean … but we are required to install impact glass which will not shatter … because of hurricanes, which makes the bars even less necessary. 🙂
Nancy Carr says
You can use those iron bars or even sell them for the iron. You could make a headboard, a trellis, and I am sure you have your own ideas, too. They still have value.
Traci says
This does not sound like a fun project so I am glad you found something to giggle about.
laura says
Hmmmmm. Wonder how you will repurpose the bars???
Mia B says
Karah, are you going to install your own Hardieboard on the exterior of your house? We had ours contracted out on two houses, and am thinking about trying to DIY it on my current house – would love for you to blaze the trail! 🙂
Karah says
This comment makes me smile! 🙂 We do have some changes planned for the front of the house where we’ll need to install some new siding. We’d love for it to match the current siding we have on the majority of the house and I’m not 100% sure if it’s currently Hardieboard or not. But would love to be able to DIY whatever it is we need. Thanks so much for the vote of confidence. 🙂
craftythriftydecoratingwifemom says
You are both stronger and more dedicated DIYers than we ever were!! You guys amaze me with how you tackle and defeat obstacles. Great job!!
Janet
Kelly @ View Along the Way says
New windows are a CRAPTON of work! Good call to split the work between you guys and the pros. I can’t believe how quickly you’re moving!
Karah says
hahahaha crapton is totally a technical term I like to use, too!!
Jason says
Crapton, lol
Dana @ Cooking at Cafe D says
Karah,
Just catching up on some reading 🙂
Man, can we identify with watching handfuls of cash blow away into the universe. ($365 water heater replacement, sure. $1300 car repair bill, no problem. Um, did I fail to mention the unemployment and under-employment?)
No worries – we’ll just keep on keepin’ on 🙂
Blessings,
Dana
Santos says
An easier way….. Get a grinder, then grind the outside of the screwhead. Grind the top and bottom of the screwhead flat, which will then allow you to get a better grip with visegrip pliers. You can now grab both sides and just turn it counter clockwise to unscrew the screw/bolt. This is the easiest and fastest way to tackle this job.