I feel like this post has the potential to feel like a kindergarten classroom where all the 5 and 6-year-old boys want to talk about is poop. Followed by uncontrollable giggling. Given the topic it can’t be helped. Because when I posted the video tour of our new place in Aruba (almost 6 months ago now which is really hard to believe) I got a lot of comments, emails and questions about the little mulch areas we created on our balconies for the girls to use as, let’s say, their facilities.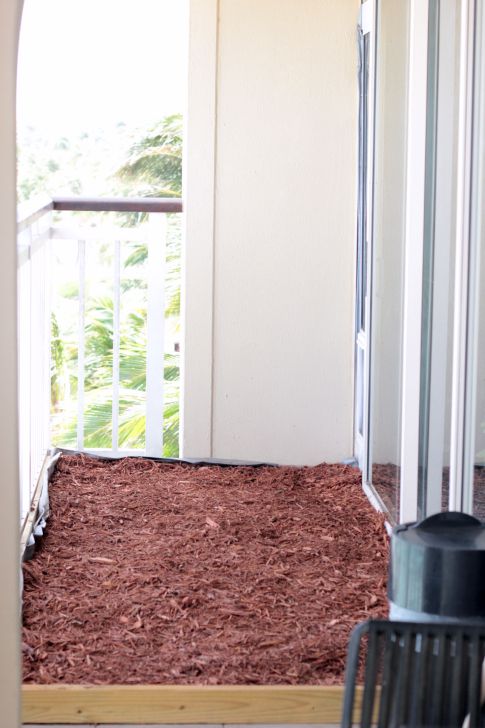 This definitely isn’t the most glamorous of topics, and won’t be accompanied by the most beautiful photos you’ve ever seen, I can promise you that. But this one little feature has actually had the biggest impact on the daily happiness of all four of us as we’ve settled into this new abode.
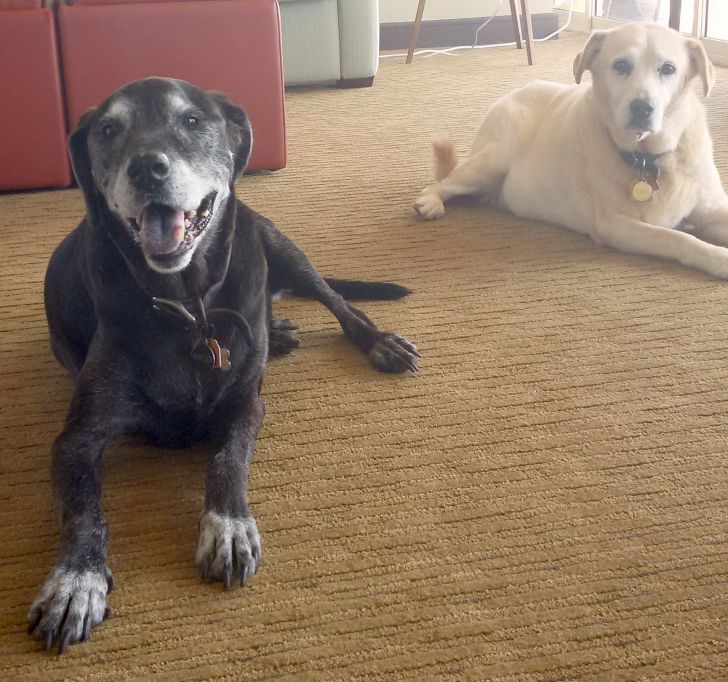
And I know this isn’t an ideal situation for everyone, living on the 5th floor with two large dogs. And we couldn’t have done this at earlier stages in our girls’ lives. But as they approach 13 and 14 years old they are perfectly content to nap all day, with access to use the facilities whenever they see fit, and then go for a leisurely stroll in the evening. This is not intended as an exercise area or an attempt at a “dog run” or anything like that. It is strictly for the business of #1 and #2 for these beauties.

Funny story, I actually bought a porch potty from Amazon before I moved here. Joel came down for a week and scoped out the living situation and the idea of the pet porch potty was born. My brother, who travels a lot for work, mentioned there is a porch potty in Sky Mall magazine. It’s about 2 x 4 feet, so would fit perfectly into the corner of the balcony, it seemed ideal really.
But … have you ever actually observed your animal as they prepare to do their business? It takes time, and space, and in Marley’s case, a few laps around an area to find just the right spot … which happens to be pretty much the exact same spot every time, but she doesn’t seem to know that. 🙂 We knew before even bothering to put it together that the little 2 x 4 foot porch potty was more a cruel joke to the girls than any sort of functional area for them to do their business.
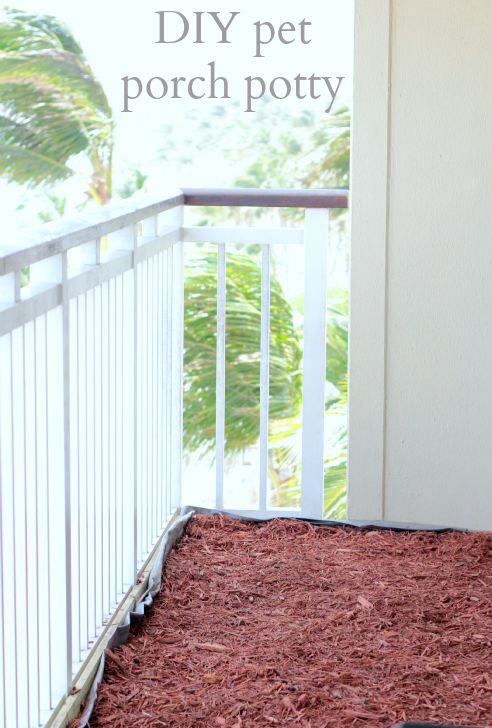
So, after a misguided attempt with some sand and a few shallow bins (let’s not talk about it) we came up with a simple DIY, and there are so many ways you could finish off your area more than we did to make it pretty-ish. I didn’t bother with any paint or even an attempt to hide the tarp under the mulch, but it serves its purpose of ease and convenience for the girls and therefore makes it the best DIY we’ve made here in Aruba.
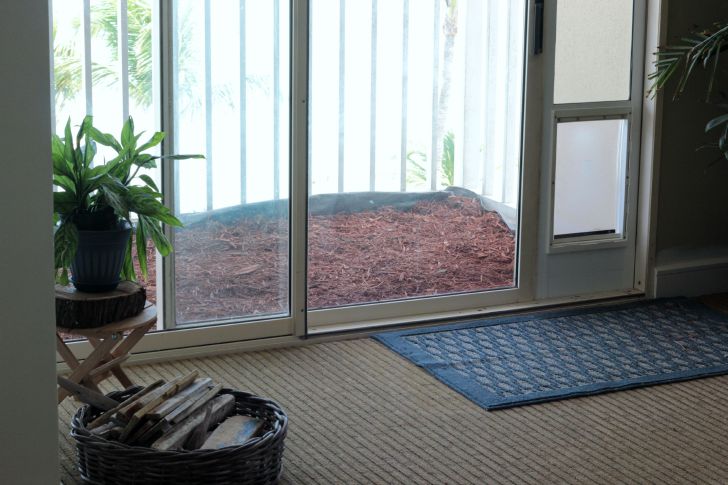
The entire area is about 14 feet long by 5 feet wide and we’re lucky that we have two different entrances to the same balcony. The dog door we put at one end goes right out into the mulched area for the girls and we can use the other door when we go out to use the same balcony. We have a small area rug (one that we inherited with the apartment and is not my favorite) just inside the dog door for the girls to wipe their paws when they come back inside. I kid. But it does give some of the mulch that is tracked in a landing zone.
And taking pictures from the inside out of this sunny locale will always challenge me, I can promise you that too, unfortunately.
As for making one for your own porch or balcony all you need is a tarp a little wider and longer than you want your mulch area to be, getting a grey or brown one (like this option*) will be less noticeable than the typical blue tarp color, and then a couple of pieces of wood.
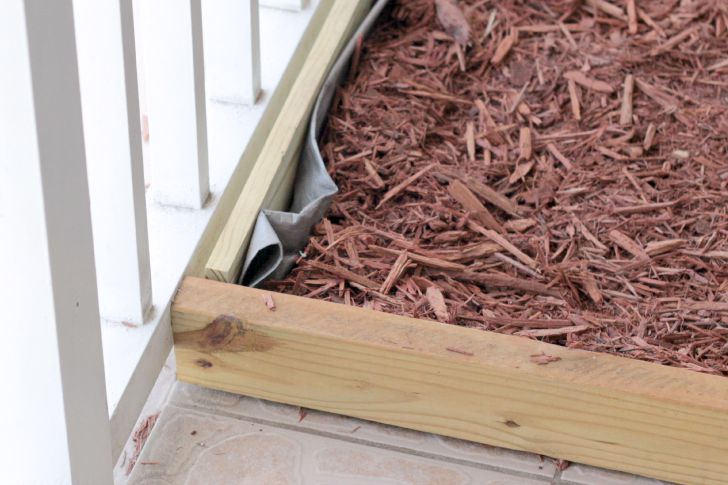
We used a 2 x 4 cut the exact width of our porch so it is just wedged in for a secure fit and then we used a 1 x 4 to run the length of the porch along the outside edge. We actually lived for about 4 months without that 1 x 4 but the tarp did find its way under our railing in spots so the board provides a nice barrier to prevent fly away mulch to the balconies below us. Both of these pieces are pressure treated, and would probably look nicer painted white or a color to coordinate with the porch, I imagine. 🙂
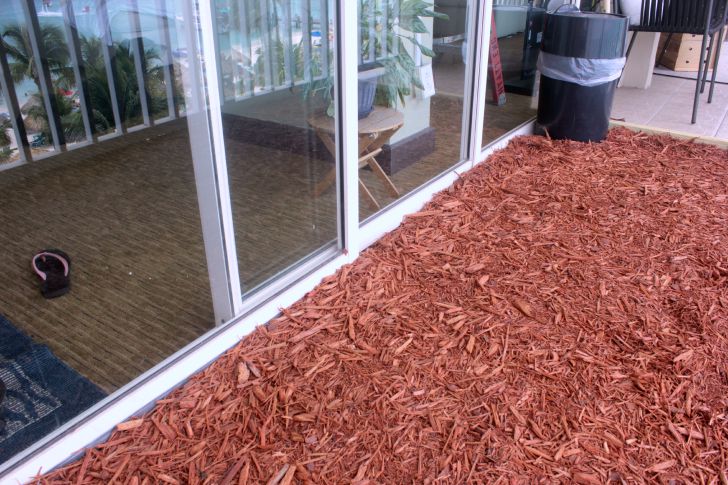
You can see in the photo above that we keep a trash can with a lid outside and pick up poop on a daily basis, bag it tied tight and toss it in the bin. We’ve lived with this system for about 6 months and we are just now ready to replace some of the mulch with fresh stuff. For regular maintenance we rake and shovel the mulch to help the areas peed on dry. And by regular maintenance I mean when we think about it, which should probably be every week or so. I also have a spray bottle of plain white vinegar that I spray on it every day or so. White vinegar is supposed to help counteract the natural odor. I’m not going to lie, 6 months in we have started to notice a little odor, hence the discussion about switching out the mulch, but replacing a few bags of mulch a couple of times a year is a pretty easy job to maintain an area for the old girls.
Thanks for all of the questions about the area, it has seriously made transitioning to apartment living with the girls totally doable. And just to reiterate where I rank in the whole family scheme, Joel just had a work conference and was asked to send along a photo of something he really cared about, this is the photo he sent. 🙂
*affiliate links included

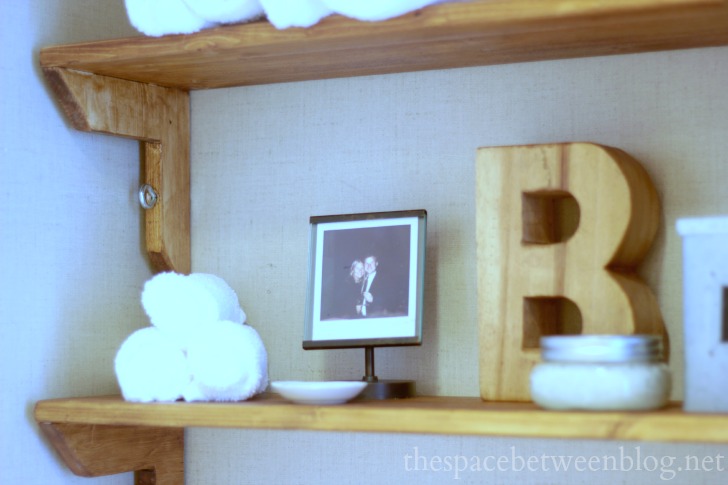
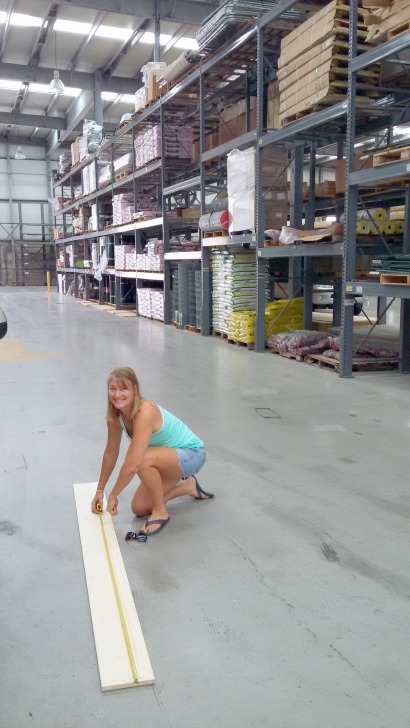
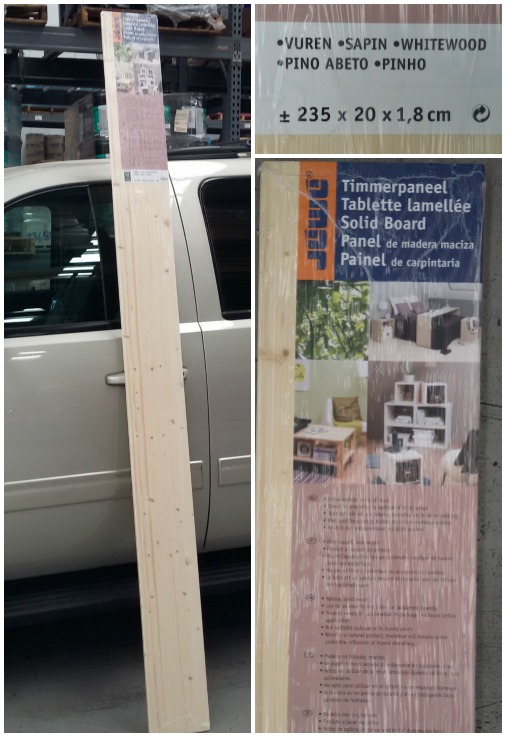 What I ended up with was an individually wrapped wood-ish board that measured just about right. Who says “close enough” only counts in horse shoes and hand grenades? It definitely also counts in pretty much anything you try to accomplish on a Caribbean island. Take that label that says “solid wood”. If by solid they mean pieces-of-wood-manufactured-together-to-make-one-large board then they are correct. But it serves its purpose and now I have two shelves for toiletries and such in our master bathroom. So I call this one a win!