This post may contain affiliate links which won’t change your price but will share some commission.
So we’re tearing out walls and building them back. And resurrecting old wood slat walls. And adding wood and rope accent walls.
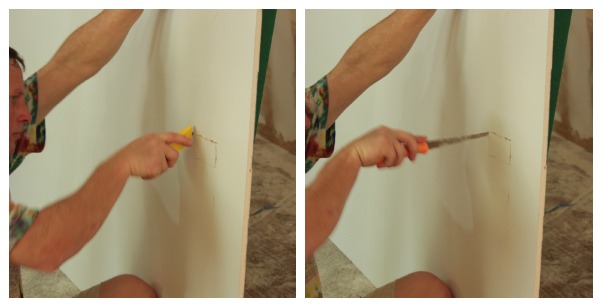
And all the while we’re running new electric and updating old electric and using old outlet holes that have previously been cut and cutting our new holes in new drywall trying to get all perfect looking outlet holes.
This might surprise you but probably not, but there are times that our cuts aren’t exactly professional grade.
They could either be off a smidge. Or maybe we got a little aggressive and the drywall paper ripped. Or we added a new outlet box after the new drywall and we end up with an imperfect looking outlet and cover.
We use a utility knife and a Stanley Utility Knife and a basic Jab or Punch Saw.
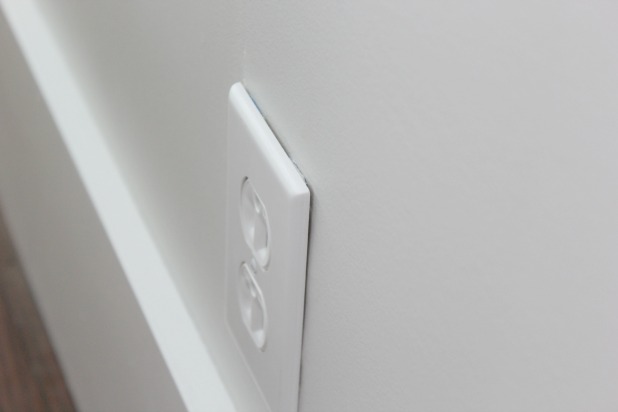
Womp womp.
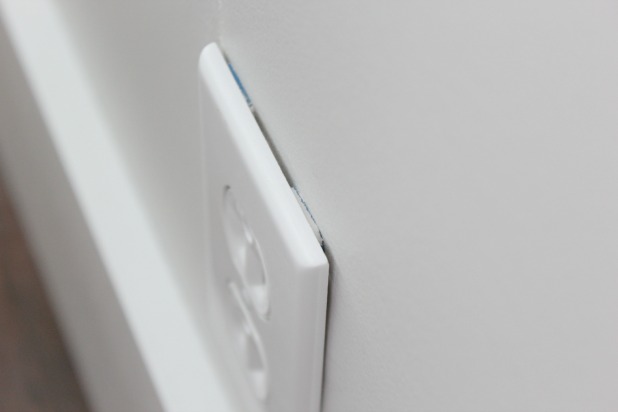
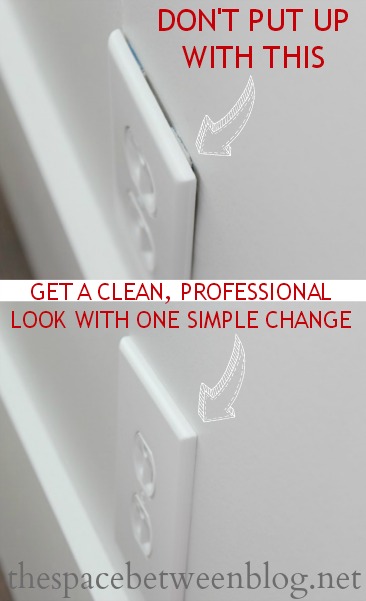
And upon closer inspection.
Double womp womp.
But this little problem has one of the most simplest (I say it because I can … according to my cousin leasest is a word so we’re adding most simplest, too.) solutions ever.
The trick to perfect looking outlet holes:
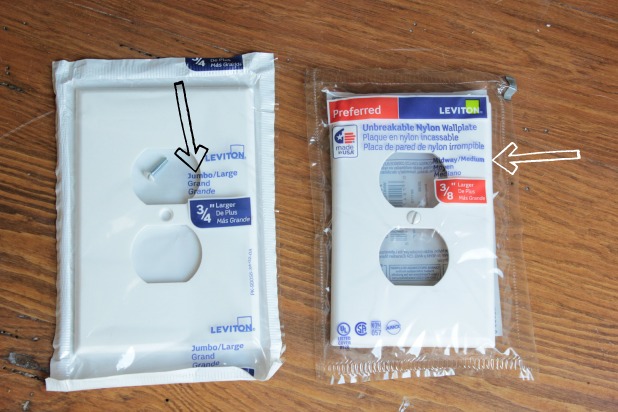
Outlet cover plates come in different sizes!
Buy the extra large size on Amazon here.
We actually learned this a number of years back when the err of our ways was much more egregious than it is now.
But every once in a while you’ll hear one of us say “this outlet is going to need a jumbo”.
That’s code for “I messed this hole up a bit”. 🙂
And then like magic, all sins are forgiven.*
*Let’s not go getting all sinful just to test the theory, k?
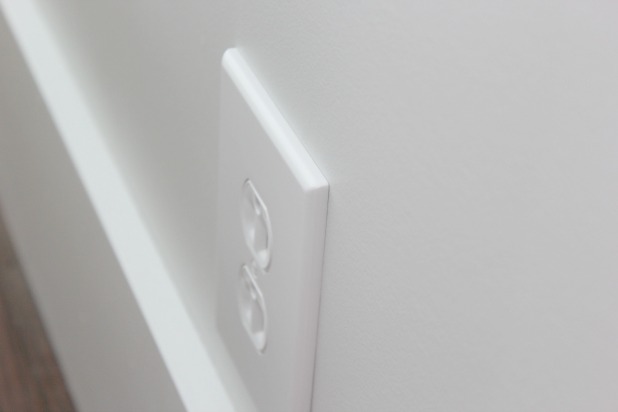
Here’s the same outlet with a large cover plate.
A much cleaner look, don’t you say? It really is the perfect looking outlet hole, no imperfections.
I have gone down the “just caulk that” road with this, too. It’s an option, but is more trouble than it’s worth if you ever want to remove the cover to repaint or for any other reason.
And if you’re having trouble getting our outlet to sit flush with the plate cover, you can solve that with this easy little tip.
This is part of a 31 day series of tips, find them all here.
*post contains affiliate links


Nancy Carr says
I did not know switch plates come in different sizes. Who knew? You knew! Karah, you know so many great things. Love you and am so grateful for your blog.
Karah says
Thank you for your continued support!!
elizabeth says
my husband had a reno company for many years before he packed it in ,(for health reasons) and I just loved picking up the little tricks they use when renovating, and the plate covers with caulking was one, they used caulking not just on outlet covers but on baseboards, and beadboard for ceilings and just painted white over it when dry and you didn’t know the better-love your site btw-I ll keep coming back
Karah says
Caulk is seriously a life saver when it comes to home projects!! So glad you lik the site!
George says
My uncle who was a trim carpenter called caulk “boo boo goo”.
Karah says
I love it!
Bill Lundberg says
The large ones are referred to,by those in the trades, as “goof plates”!
jedikittyJoanna says
This is so true but, how do you fix a whole whack (like, ALL) of switches and outlets that are crooked because some douchebag contractor was in such a hurry, that he just had to attach all the boxes to the studs in such a way that no matter how large your covers are, they will never fix the crooked/angled toggles or sockets? The only way I fixed them (most of them, but still many to go) was to undo the screws that held the boxes to the studs, then straighten the mount as much as I could…
Our house is over 30 years old, and I am in the process of replacing all the outlets and switches. I must say I love “Preferred” hardware and the oversized, nylon flexible covers! But, on some switches / outlets, the hole was not bad but the wall was not straight, so I had to build up with a putty, dry, sand, repaint. That solved many issues but, still, some boxes are still a bit “sideways”. I think, if the contractors actually took an extra 20 seconds per box, and attached them straight to begin with, and at the code depth, I would not be cursing them up and down about now…
Karah says
Oh my goodness, what a mess!! The crooked boxes are the worst because no matter what the outlets and switches will screw in crooked. Other than doing what you’re doing I’m not sure there’s another way. And they’re screwed into the studs? That is so weird, I’m having a hard time picturing it but it sounds like your tackling them. So sorry you had to deal with that. If you ever wanted to send me a picture I’d be happy to see if I had any other ideas!
Tim Selzer says
The crooked plugs can usually be fixed easily by adjusting the screws that hold the actual plug into the outlet box. TURN OF THE POWER TO THE OUTLET !! Loosen the screws and use a torpedo level to get it “straight” then tighten back down.
If you have an outlet that is not set into the wall deep enough, remove the outlet cover, remove the two screws that hold the plug into the box. Check to see if the box is loose or can be tapped/pushed further into the wall using a blunt object and a hammer. If it dos ot move, get some quick-set drywall compound and a 6 inch drywall knife. Using the drywall knife apply the drywall compound around the outlet in a circular fashion, going out 8-10 inches from the outlet and holding one end of the knife flush to the outlet build just enough of the compound to allow the outlet cover to set flush to the wall. Let it dry, sand then paint. Should look like a pro did it!!!
Mimi says
Oh my gosh! I never thought of that! I’m going out TODAY and picking up a jumbo and finally fixing an outlet that’s bugged me for a while!! I really thought I needed to have an electrician in to reset the box or ? This is much easier and cheaper. Thank you so much!!
Karah says
cheap and easy fixes are my favorite of all time!!
Sharon J says
They also make little foam insulation plate things that you can install behind the plate.
Darlene Bowe says
I tried clicking on your 1st blog and your most popular and both times I was told that I didn’t have permission or something like that. What’s up with that?
Karah says
I have no idea, that is strange. If you have a chance to try again and can send me a screen shot I can try to get it figured out. So sorry for the trouble. My email address is karah.thespacebetweenblog@gmail.com
Babs says
I’ve been looking for large cover plates but haven’t been able to find them. Would you be willing to share your source?
Karah says
I got mine at the Home Depot that we have local but I’ve also bought them at Lowe’s before. Here’s an affiliate link to an option on Amazon, I saw an oversized switch place and double outlet plate on Amazon, too. http://www.amazon.com/gp/product/B00002NAQN/ref=as_li_ss_tl?ie=UTF8&camp=1789&creative=390957&creativeASIN=B00002NAQN&linkCode=as2&tag=thespacebe078-20 Sometimes they’re called Jumbo and sometimes they’re called oversized. Good luck, I think they make such a difference!
Lawrence Adams says
Most any building supply store should have the oversize covers. If not.an electric supply may have them. If properly installed,the boxes should sit slightly deep so that there is no interference when fitting the covers.
Andrea says
Great advice, I have an outlet in my kitchen backsplash that is driving me nuts with a little space in between! Will have to remember this!
Karah says
it is funny how those little things can be so irritating, but they really are. glad to share a possible solution!
Marcy says
Karah – I just discovered these covers at Home Depot too, only to have my hopes of white outlets in our new home dashed when I discovered that the existing boxes don’t have center holes for the screw – only outer edge holes for securing the plates. Aside from caulking these plates to the wall, any suggestions on how I could still make these work? Thanks so much!
Karah says
Hi Marcy! That is so weird, I’m trying to picture an outlet without a screw hole in the middle, please feel free to send me a picture. One idea would be to switch out each outlet, they are actually inexpensive and easy to change out, just be sure to shut the circuit breaker off first. 🙂
Janene Doherty says
I’m not trying to cause you more work but your plugs appear to be in upside down? They used to install them in that orientation years ago but now it’s the other way (with the ground plug hole at the bottom) at least, that’s the way it is in most places I’ve seen. Your covers look great! They also make larger switch plate covers as well. Have fun with your project.
Elisha says
Every room has one plug that is upside-down. This is to easily see which plug is wired to the light switch. My house was built 2 yrs ago and they still do this 🙂
Karah says
I love that tip, ELisha!
Mark says
Actually her outlets are correct. Most people install them upside down. Go to any medical facility and you will find the ground on top, because they are required to be. You want the ground to go in first (that is why it is longer) when you reach down to plug something in you naturally tilt it downward allowing the neutral and hot to go in first. Also if a plung is not fully inserted, it is less likely to short if something metal falls down on the prongs if the ground is on top. If the happens the other way instant short. It’s not really a big deal, but that is the reasoning behind it.
Andrew says
Great comments on how to cover up the mistake. During a recent reno when I had to cut quite a few outlets through the drywall, I came across this product:
Calculated Industries 8105 Blind Mark Drywall Electrical Box Locator Tool
It is so simple its genius. Simple magnets lining up and giving you the exact spot to cut the electrical box. I have cut over two dozens outlet holes and everyone of them came out looking like a pro did the cut. So easy to use and a huge time saver. Google it and it will pop up as it is sold in quite a few places.
No more over sized outlet covers using this product. Enjoy.
Karah says
I need to find this tool for next time! Thank you so much for sharing it, Andrew!
Eric Baron says
This is a good tip. Even better in my opinion is that during construction before the receptical is intalled, you drywall right over the electrical box. This will ensure that even if a mistake has been made in boarding or if the box is set to shallow your cover plate will end up perfectly flush to the wall. The oversized cover plates are great in a pinch however they are kind of a cheat. 3/8 is not a lot, but it is distinguishable from regular sized outlet covers. If they are close to other outlets or switches it may be noticeable.
Robbie says
When my husband and I built our house 35 years ago (we were not pros), we applied lipstick to the edge of the outlets. Lifted the drywall in place and pressed it against the box. Then we took it away from the wall and cut out the pink outline. Perfect fit.
Karah says
I love that tip!
Hammer says
Looking at my custom built homes outlets, I don’t have any problems with holes cut too bit … that were not fixed before paint. However I do have a few outlets where the outlets not being set in enough versus the hole being too large. The real problem is that the outlets are not mounted flush in the wall. so even a bigger plate will not fix that. You “before” photo looks more like that problem versus a too large hole.
Robert Morley says
The box cover with the screws in the corners could be a utility style for square surface mounted boxes. The cover is usually made of metal.