This post may contain affiliate links which won’t change your price but will share some commission.
Ok, so here’s a little DIY tip for you.
You know, ’cause we’re a DIY blog.
We’ve talked a lot about having to update every single surface in this house. From the walls to the ceilings to the floors. (<– so many ugly fun before pics at those links, oh the memories)
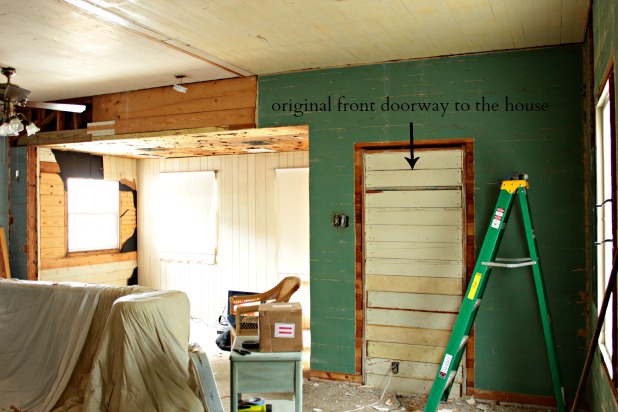
We’ve worked through layers of paneling and drywall and wood slats. Remember that weird old ceiling height in the front of the house and those little square windows?
And as we’re either adding or removing layers from our walls we have all of the previously run electric boxes to contend with.
They’re good quality boxes with upgraded electric … if you have ungrounded wires you might want to call in a professional.
So the only issue that we found ourselves contending with in most cases:
How to get our outlets to sit flush with the cover plates.
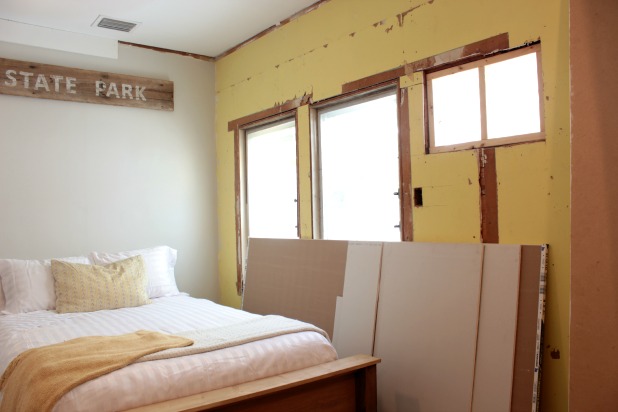
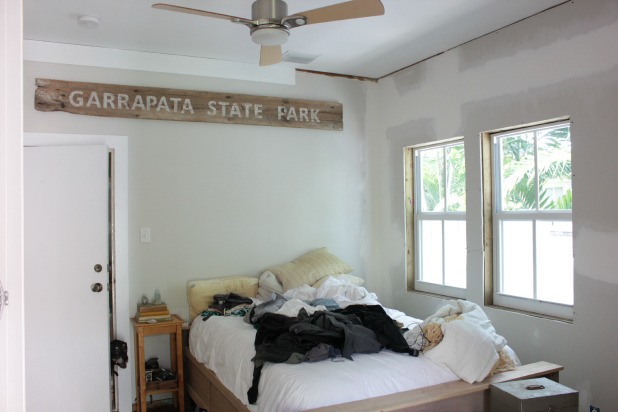
There’s this wall for instance.
The drywall was all torn and ripped and patched in weird places. And I may have been burnt out on demolition so we opted to just drywall right over it after our new windows were installed.
Let’s not worry about what is going on on the bed, look right past that and just check out the new drywall. Thanks. 🙂
So, adding a new layer of drywall added another 1/2 inch of depth to our wall, but we didn’t change the depth or location of our outlet boxes.
And then I’ve got another scenario for you.
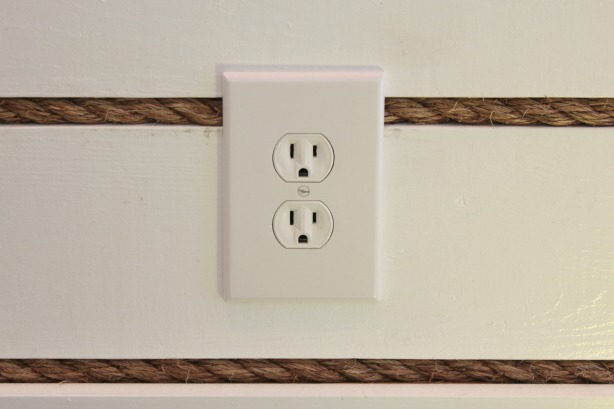
An accent wall. Or feature wall. Or whatever-you-want-to-call-it wall.
That I haven’t shown you yet. But looks like this close up.
Those are wood slats that are 3/4 inches thick. But we installed the outlet boxes for regular drywall at a 1/2 inch thick depth.
So what’s a girl to do?
You can’t just not screw in your outlets all the way or they will always move back and forth when you plug and unplug things. Trust me. 🙂
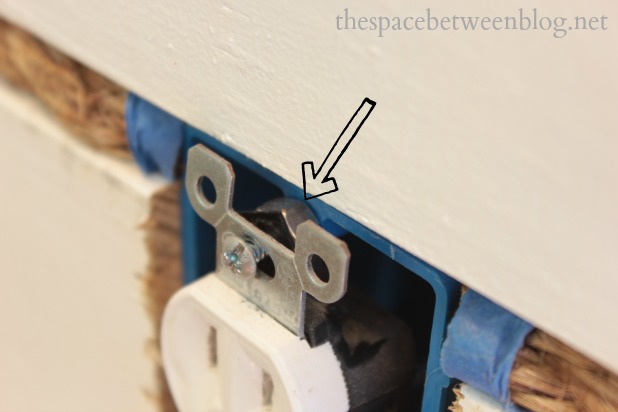
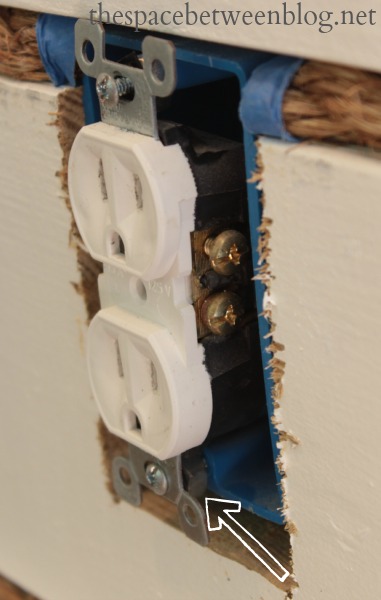
But, if you screw in a nut behind the outlet that will give you the added depth you need to screw it in tight but also keep the outlet set out a bit to sit flush with your cover.
Update: I received a comment that this method isn’t to code, I haven’t checked my local code to verify but here is an affiliate link to a product called an outlet box extender that is definitely to code in all areas.
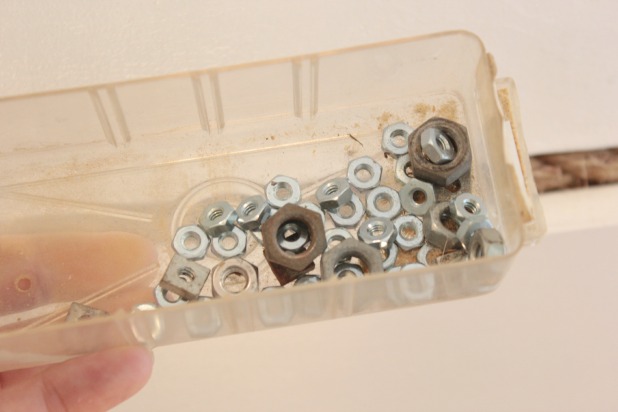
I just keep mismatched nuts in a little organizer in our shed. You can even double them up if you need to.
Update: I am reading this post, now published, drinking my first cup of coffee and thinking, man, I didn’t even plan that little nut pun. Geesh. 🙂
Easy peasy, right?!?!
Get caught up on the entire 31 day series here.


Nancy Carr says
I may have to use this idea this week. Just had a backsplash put on the wall and I bought a new switch plate cover and was wondering about putting it on. Again — you are so good. Thank you.
Karah says
Yes! This should definitely help. YAY!!
Dominic Sparks says
There is little rubber peaces that you can find at Home Depot. They are located in the electrical part of the store. They are called outlet spacer. They are black rubber horse shoe looking. They slide right over the screw with out even talking the screw all the way out of the work box.
Joan says
Went over paneling with sheet rock. Outlets are now sitting 3/8 of an inch inside of the opening. Wire are too short to bring forward. What can I do?
Karah says
Hmmmm, that’s a tough one. You’d have to consult an electrician to get advice that is definitely up to code in your area but I might try adding on a little length of wire. It might be easier to attach the maybe 2″ length of wire to your outlet and then attaching the outlet with extended wire to the wire that is coming out of your wall. Hopefully you have room in there for wire nuts over those connections. Again, this might not be up to code do I would definitely consult a professional. Good luck!
Carol Fowler says
Help.. My outlet is positioned as such the beadoard and chair rail isn’t as high on the wall to completely encase the outlet. Part of the outlet cover plate is 3 inches higher on the wall than the beadboard. So even if the outlet is flush with the beadboard, there will be a gap behind the plate in the area that is just the painted wall. Any way I can fix this without completely moving the outlet. The height of the beadboard cannot be adjusted. I have a partial wall on one side so for uniformity, it cannot be adjusted.
Karah says
The only thing I can think of is to put a frame like surround around the outlet hole that sits flush with the beadboard so when the cover is put on it sits on the beadboard and the new surround.
Kris Fazekas says
Since your at the box you can put pigtails on the recipticle and wire nut them to your old wires
Ian says
If you look in each corner of the outlet, there are little 45° “angled” score marks. Those are there so you don’t need a spacer. There built in to ever socket. You just have to bend those tabs “corners” to as much as you need it to be spaced. This way you will be to code and can make a perfect fit every time.
Karah says
So easy! Thanks for the tip!
Emma Frost says
OMG THANK YOU!!!! I have just spent the best part of an hour trying to get one outlet to sit flush and be stable, and you gave me the answer in two seconds!!! Tiling the kitchen really was the easy part of this job!
Karah says
Yay, I’m so glad this was helpful!
Audrey Zumwalt says
Good tip Karah. I hope I will remember this when and if I ever need it.
Audrey Z. @ Timeless Treasures
Sue says
Oh thank you thank you thank you thank you! We have an outlet in the workout room that was set too far into the wall for the cover to attach. A nut! What a great idea!!! Cannot WAIT to put the cover on the exposed outlet now!!! Ahhhhh…. 🙂
Karah says
Yay! Glad I could help!
Dennis says
please don’t use metal nuts as spacers. Small rubber gaskets, plastic nuts, or even better, commercial plastic outlet spacers that can be stacked to what ever thickness you need. Safety is #1 concern here.
Anne @ DesignDreamsbyAnne says
add this to the “why didn’t I think of that” category! Great idea Karah!
Traci says
This is a brilliant solution. I have a box that is just a bit too deep and thanks to you I now know how to fix it.
Traci
Wendy says
I had this same problem and came up with this same solution only I’ve always had a concern in the back of my mind, wondering if it was safe. If you did it and wrote about it, that must mean you believe it is ok, and that makes me feel better. 🙂
Karah says
Hi Wendy!! We talked to our electrician about it and as long as the outlet is still in a box it’s good to go. We also wrap our outlets and switches with electrical tape inside each box, that’s something we saw the professionals do when the upgraded our electric service right after we moved in.
Amy says
I loved this easy fix! I was restoring a dresser yesterday, and this came to mind as a repair fix for a drawer that riding too low. I did the washer trick under the drawer glide and it stopped it from dragging on the drawer below it! Thanks so much for these awesome ideas… Can’t wait to read them all and tuck them away in my MacGyver mind!
Karah says
AHHHHH!!! I love that you used it in another way … and that you have a MacGyver mind. 🙂
CeeCee says
Great solution. Thanks. I will definitely Use this idea.
Mick says
Hi Karah,
Love your site – but I have to call you out on this. The nut thing is illegal. I don’t know what your electrician told you but it’s not legal. What you need it called a box extender. It will sit flush with the wall and sit inside the box, bringing the outlet flush with the wall. Example:
http://www.homedepot.com/p/Unbranded-Electrical-Box-Extender-BE1-2/202708650?keyword=be-1#.UokArOLhF-w
I used them in older homes and they work like a charm and are code compliant. Below are the codes from the National Electric Code:
314.20 In Wall or Ceiling. In walls or ceilings with a surface of concrete, tile, gypsum, plaster, or other noncombustible material, boxes employing a flush-type cover or faceplate shall be installed so that the front edge of the box, plaster ring, extension ring, or listed extender will not be set back of the finished surface more than 6 mm (1⁄4 in.). In walls and ceilings constructed of wood or other combustible surface material, boxes, plaster rings, extension rings, or listed extenders shall be flush with the finished surface or project therefrom.
This might also be relevant.
406.4 Receptacle Mounting. Receptacles shall be mounted in boxes or assemblies designed for the purpose, and such boxes or assemblies shall be securely fastened in place unless otherwise permitted elsewhere in this Code.
(A) Boxes That Are Set Back. Receptacles mounted in boxes that are set back from the finished surface as permitted in 314.20 shall be installed such that the mounting yoke or strap of the receptacle is held rigidly at the finished surface.
I hope this helps. Taping the outlets and switches is a practice (not required by NEC) that prevents metal on metal contact. Not needed when using plastic boxes, but a good trait to follow. Feel free to ask any more questions…..
Karah says
Hi Mick! Thank you for all of this great info. Love the idea of the extender, there is a little gadget for everything. 🙂
Mick says
NP You’re welcome.
dh says
Among many other things in the code, that sounds like a nice subsidy for those selling these electrical box extenders. Other than an little bit of added left/right wobble on the outlet (which would be somewhat ameliorated by the cover-plate), it is difficult to see how adding a nut behind each screw is a concern. What a surprise that those writing the code are self-serving themselves and those in their industry.
Mick says
DH, You are welcome to your opinions, but this is not a subsidy. This is a practical solution to an existing problem. The code allows up to 1/4 inch gap. In residential homes most boxes are mounted to a wood stud or are situated on drywall both which are flammable unless this is very new construction where fire-proof materials have been used. If the gap is more than the allowable amount you risk the stud or drywall to catch fire if a fire starts in the receptacle box. Do you think a nut is going to stop/prevent this – No. File an insurance claim and watch your claim get denied because of this. No right licensed electrician would ever do that. (If he/she did, their license should be revoked.) The insurance company will know it was either the homeowner or a handyman. I am not here to start a fight, I am here to make this a safe install. 25 cents for a nut or $1-2 for a box extender? You decide but I think the choice is clear…..
Nancho says
Mick you seem sharp on electricity. I will take the liberty to ask you a question. I was finishing my projector setup at home and while drilling through drywall apparently the bit punctured and spinned into a wire causing a spark. Breaker went off along with two outlets on that same wall. I opened up a 2 x 3 square to inspect the wire and the bit did go through the insulation and damaged it. Eventhough this is a rental, I would like to provide a safe proper fix to this, since some have told me to just open the insulation, retwist the wires, tape them and patch the wall. Not an electrician but this sounds sloppy. A friend of mine that I believe is an electrician (not totally sure) told me the right way is to put a junction box and splice the cable and repair inside the box and put a blank plate over it. Sounds more like it to me. Just want to know your position if possible.
Mick says
Your “electrician” friend is correct. Do NOT bury the box – that’s illegal. Buy a new work box at Big Orange and nail it to the stud. If the stud is not close, use an Old Work box with wings that will secure itself to the back of the drywall. Splice the wires inside – color to color and when the wall is patched, painted and looking good. Put a blank cover plate on that matches your decor.
If your landlord doesn’t like that – you must replace the wire from Point A to Point B with the same type/gauge.
Option #1 is the easiest/cheapest. Good luck!
Ian says
Or you can just bend the spacer tabs on each corner.
Lori says
Thanks for the link for the extenders. I ran into this same problem when I put glass tile in my kitchen. My outlets haven’t fit right ever since.
Karah says
those should solve your problem for sure. Happy new year!
Cyndi says
My daughter just put a glass tile backsplash in her kitchen and she used the extension boxes for her switch and electric boxes and they worked great. They got them at Home Depot but Lowes will have them too.
Karah says
Glad the boxes worked for her, when we do our kitchen renovation we may do something different than our normal “nut” update.
Jim says
Karah: What can you do if the outlet box sticks out past the drywall? I have one that sticks out about 1/8 of an inch. Therefore, the outlet cover doesn’t sit flush against the drywall.
Thanks!
Karah says
That’s a tough one without being able to remove the box. What about caulking around it just to create a clean look?
Jim says
Thanks for getting back with me so quickly!
I definitely want a clean look, because I’m preparing the house for sale.
Caulking would definitely make it look clean. And I believe that I can keep the plate from moving over time, as long as I mount the outlet perfectly straight.
Also, I could probably add some additional caulk to the back side of the plate, to add thickness behind it, also preventing movement.
Caulk definitely sounds like the way to go! Thanks!
DerbyD says
Better than caulking, use deep wall plates. Find some here: http://www.kyleswitchplates.com/deep-switch-plate-outlet-covers/
Jim says
By the way, last night I had to mount an outlet into a box which was recessed. I used your idea of putting a few nuts on the outlet mounting screws, but that was before I read your post!
Karah says
Nice!
Eddie says
Thanks, the screw tricked helped me today.
asdasdffasd says
This is very wrong and against code.
Anthony says
Hey thanks for the tip. Was trying to think of a way to put something behind the thingy to make it extend out more and this was a better idea than anything I was thinking of. Thanks!
Raji (@RAJIROG) says
The electrical box extender linked above is too easy to install and too inexpensive to NOT use.
The bolt idea is creative, but just not safe, please don’t do it.
Matthew says
This is a fire hazard, and you’re doing your readers a great disservice promoting this terrible idea. You need an outlet box extender to safely cover the flammable material now exposed with this method.
Please don’t mess with electricity of you don’t know what you are doing–that’s a great way to burn down your home and have your insurance claim denied because of illegal and ill advised modifications like this.
J. A.. says
I TOTALLY agree with your comment!!!
J. A.. says
I’m sorry, but this article seems to be a little scatter-brained. It seems I missed the point. I have no idea what your solution was to make the plate flush with the wall. Did you add another nut to the back of the plate or the outlet?? Honestly, I was looking for a thin foam spacer between the plate and the wall.
Karah says
Hi J. A.! I just reread through the post and I see what you’re saying. I wrote it over 2 years ago when we were knee deep in a full house renovation that I was chronicling on the blog. If you stick with the post is does outline how I got my outlets to sit flush, all of the intro information was probably more beneficial for the people who follow the blog regularly and were knee deep in the renovation with me. You can learn more about our DIY journey, that now finds us in Aruba, here https://thespacebetweenblog.net/about/.
kylenightlights says
HI!
The plank and rope wall is amazing! I’ve had the same issues with outlets not sitting flush when I put board and batten in my kitchen and dining room. Your solution is creative 🙂
Becca
Mick says
Please re-read the entire post, replies and all and look for the box extender. Available at Home Depot and online. You will find easy to install and it is legal and safe. Nothing else mentioned here including the nut is legal. Metal conducts electricity and studs and drywall are flammable. Do the right thing and put these in….
Justin says
Not to offend anyone but electricity is not a DIY type project. Listen to the guys in here that are telling you not to use a nut for a spacer. Or hire an electrician that is licensed and insured. A little extra money to make sure something is right may end up saving a lot of money down the road. If you have a fire the insurance company would get out of paying on your claim if they found some of the repairs being suggested here.
DS4 says
Maybe this is one of those “ignorance is bliss” things but seriously, I don’t get the big deal about the nut behind the box…?
I agree with several things pointed out in the comments such as you shouldn’t mess with electricity if you know nothing about it, if your home was to catch fire this isn’t to code, etc. But outside of that..the portion of the receptacle itself where the screw goes is metal, the screw is metal, what does it matter if the nut is metal or if it’s there period (excluding not being the right way according to code)?
Laurine Halbur says
Nice information!
Hammer says
Or use nylon nuts!