This post may contain affiliate links which won’t change your price but will share some commission.
Clearly we’re still talking about drywall and spackle here. 😉
And it’s impossible to drywall without ending up with a few butt joints. You know, the butt joint, it’s when two edges of drywall come together that aren’t the manufactured, tapered edges.
Raise your hand if you think it needs a new name.
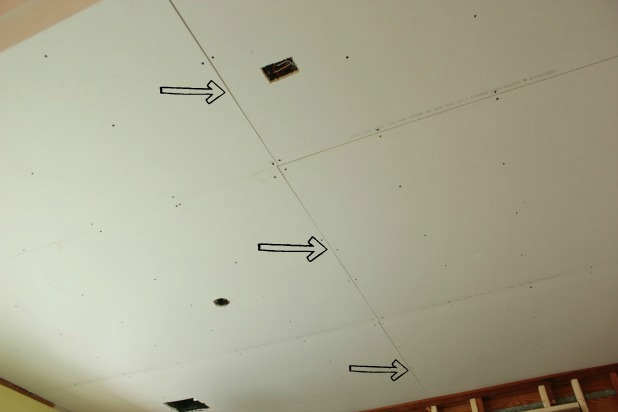
They are much harder to blend than those fresh, clean manufactured edges and I’ve gotten quite intimate with a few butt joints in my day (snicker if you must) so for anyone who is not totally over this seemingly-never-ending-parade-of-things-that-need-to-happen-before-we-can-decorate already, here are the tips I’ve learned along the way about drywall finishing.
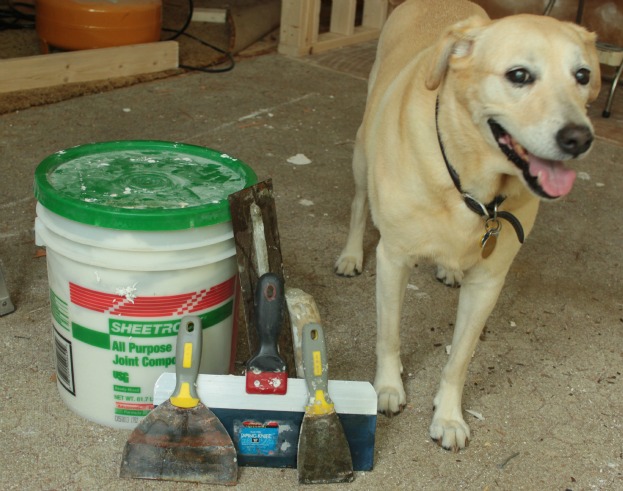
Supplies:
- all-purpose joint compound
- spackle knifes in desired sizes
- taping knife
- puppy*
*completely optional but 100% adorable
Obviously, not everyone will need a full 5 gallon jug of joint compound. There are multiple smaller sizes available.
And I used to think that long taping knife was intimidating, but it is actually a secret weapon when it comes to getting flat finishes on those tapered edges. And I know there are some super cheap, plastic spackle knives out there and I have one but if they get dented or dinged in any way and the flat edge of the knife is compromised (We’ve been watching the show 24 from the beginning and I now have this odd tendency to claim things as “compromised”. Joel “How is the house coming along?” Me “It has been compromised” Joel “what is for dinner?” Me “My cooking skills have been compromised”.) in any way it will be the detriment to your attempt at a smooth finish.
A few items to be sure are prepped before you get started:
- good lighting – I’ve made the mistake of trying to do this finish work in the dark only to wake up the next day and have the light show all of the little imperfections that I missed in the dark
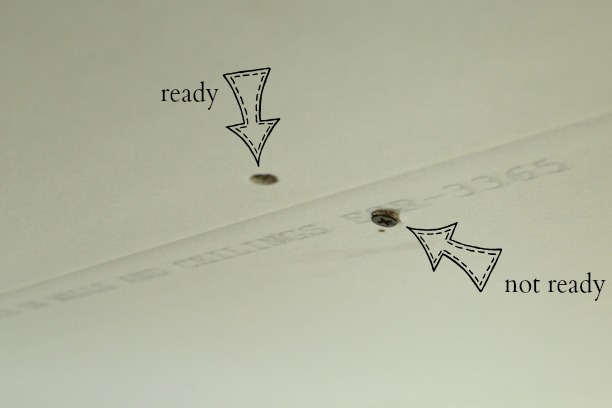
- make sure all of your drywall screws are a little embedded, even if they are flush with your drywall it will make this finishing step so much harder
- even the tiniest little piece of drywall paper will prevent you from getting an easy, smooth finish, you’re better off tearing it off than trying to cover it up
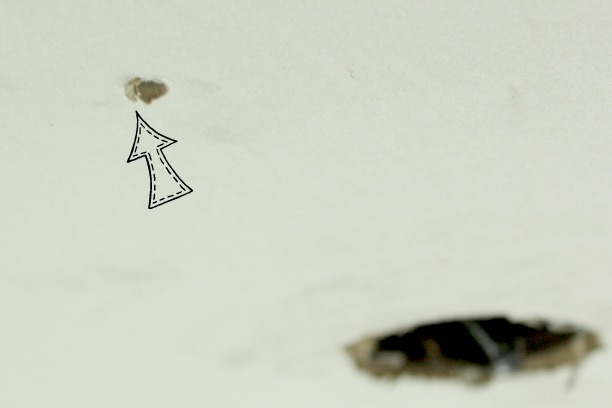
In the same vein, bits of dried joint compound will wreck the same havoc so keep that in mind as you’re working and try not to get any dried bit from your bucket or spackle knives into the wet compound you’re working with. To minimize the screws that you actually need to spackle try to keep in mind where you’ll be putting trim and molding. I like to screw as close to the edges as possible and still hit a stud or ceiling joist so any trim and molding we add will just cover them up. Joel doesn’t care nearly as much (guess who is the designated spackler in this house), and the slightest difference means the difference between spackling and sanding or just hiding.
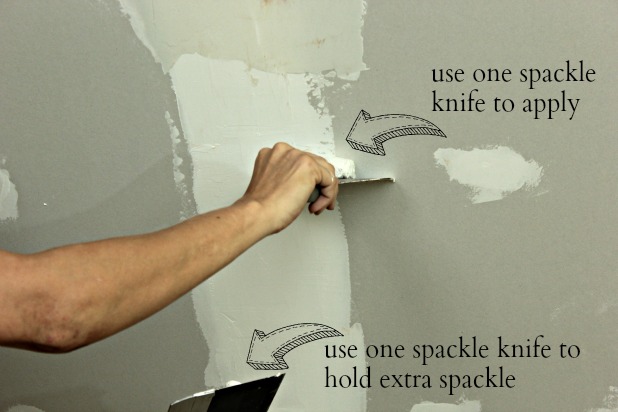
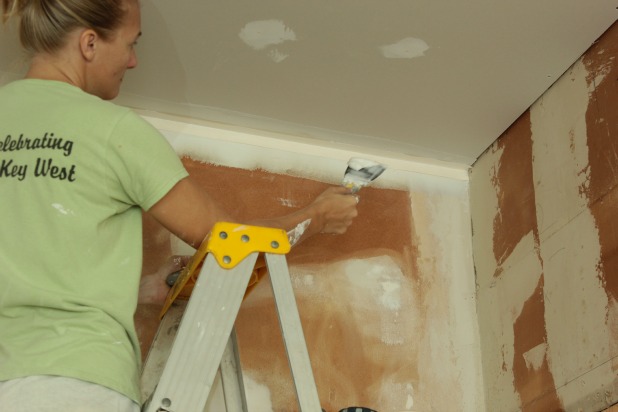
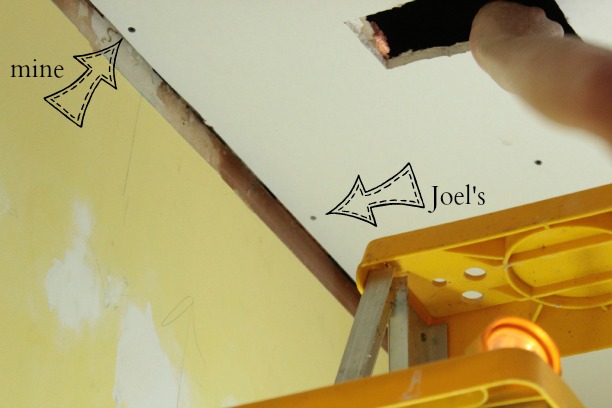 When it comes to taping the seams, and spackling in general I like to use two spackle knives at a time. One to hold the spackle and the other to do the spackling. It’s just handy to be able to load up with spackle and not have to make extra trips up and down the ladder.
And by design, the smooth, flat edge of the spackle knife is perfect clean edge to corral all that joint compound.
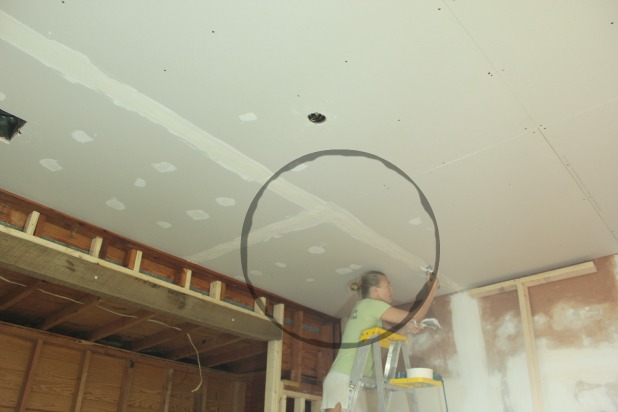
When I’m working on a full wall or ceiling of lines and screws, I like to do all of the screws within reach and then work on the line and by the time you’re done with the line the screws will be dry and ready for another coat.
This breaks it up just enough for me. Then I can get to sanding those screw spots sooner instead of doing it all at once.
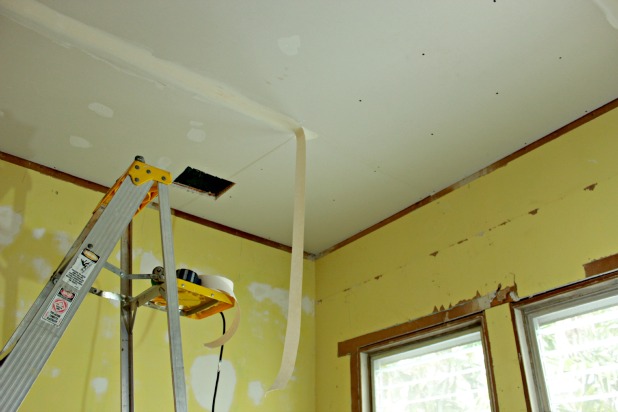
Oh, and on that first pass, when you’re applying the drywall tape, I just estimate how much I’ll need to get across the entire seam so I’m not working with ripped tape in spots. It’s definitely not particular or fancy, but I think the torn edges in the middle of a line are harder to hide in the end.
When you’re working on corners, either between walls, or between the ceiling and the wall I like to do both sides of the corner on the first coat and then only do one side at a time for each additional coat. If you try to do both at the same time it’s so easy to mess up one side while trying to make the other perfect. And definitely let each coat thoroughly dry before applying a new coat. It will just be a clumpy, cakey, frustrating mess if any part of the spackle is still soft to the touch … ask me how I know. 🙂
But if you’re installing crown molding there’s no need to even spackle that corner seam. Bonus!
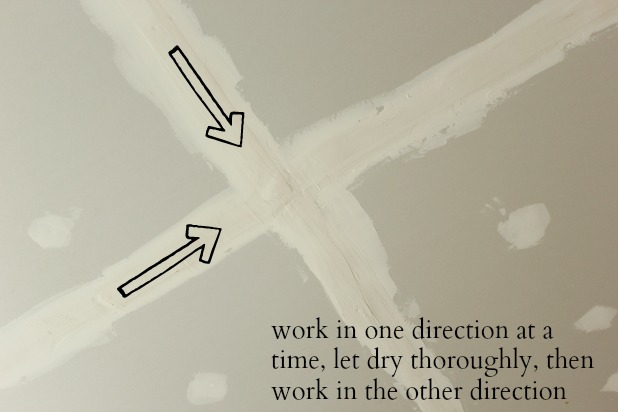
And the same theory holds true when you’re spackling an area where two lines intersect. Work in one straight line, let dry thoroughly and then work across your little spackle intersection in the other direction.
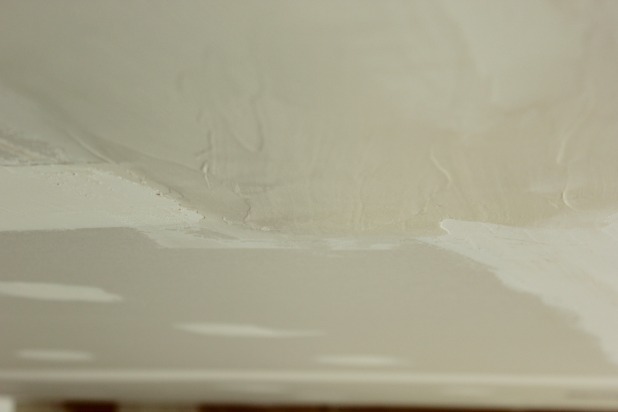
And that picture is after only one coat of spackle. You’ll be making your way around these walls 3 or four times before you’re ready to sand. TAKE YOUR TIME! I always want to rush this stage, but getting started on sanding before you’ve spackled enough to end up with smooth seams is the worst thing ever!*
*not really, but it’s not fun at all
Update: Staggering drywall joints throughout the wall / ceiling doesn’t provide any added structural support, the important point to keep in mind is to line up all of the joints with a wall stud or ceiling joist. Also, it is a good idea to avoid having drywall seams that line up with door and window corners. Those seams would be more apt to crack overtime from the use of the windor or door.
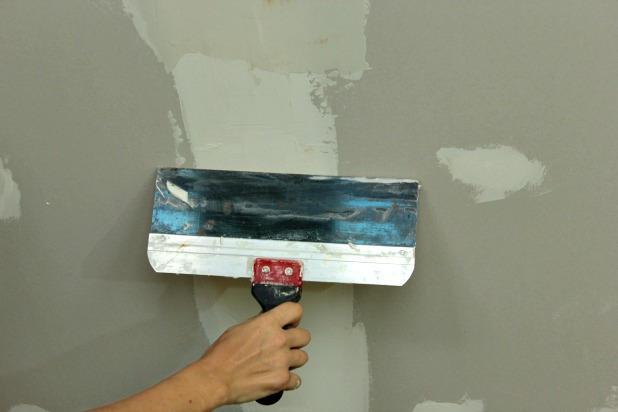
Now the secret to that mack daddy taping knife is that the width lines up perfectly with the tapered edges of the drywall. So the trick is to make sure that you don’t see any daylight between your knife and your spackle … if you do, that means you need to add more spackle. I used to think the narrower I could make my lines the more professional they would look.
But that is sooooo not the case, the tapered edge has to be filled in to the level of the whole sheet of drywall to create the perfect flat finish.
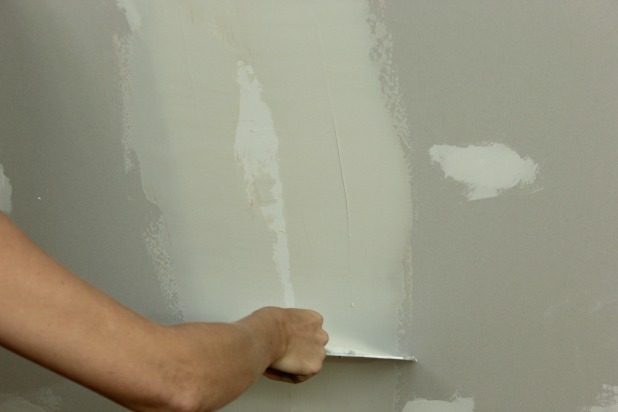
My third pass in areas is often only to make sure my line is wide enough to fill the entire tapered area. If you think about it, the first coat will create a bit of a hump directly over the line where you taped, now it’s just matter of filling in all of the areas around it until you get to smooth.
And when you don’t have the nice tapered edge to work with, you know, the butt joints, the overall width of your line helps create a really shallow transition from flat drywall to taped/spackled seam to flat drywall again. Butt joints can be hard, but going wide here helps make it all much less noticeable in the end.
I like wide butt joints and I cannot lie. 😉
Update #2 – My contractor buddy adds a good point here “A lot of the finish knives are concave. If not you can make it. I believe on the mac daddy one you have is a soft metal that holds the blade straight and onto the handle. It is flexible. Turn your knife with blade facing you kind of hiding the handle and look to see if it is in fact concave. If it is you can use this to your advantage. Hump out for butt joints and hump in for corners.”
But you’re definitely going to need to sand, no matter how expertly smooth you were able to make your lines.
From experience, I say you definitely want your lines to look more like this pre-sanding …
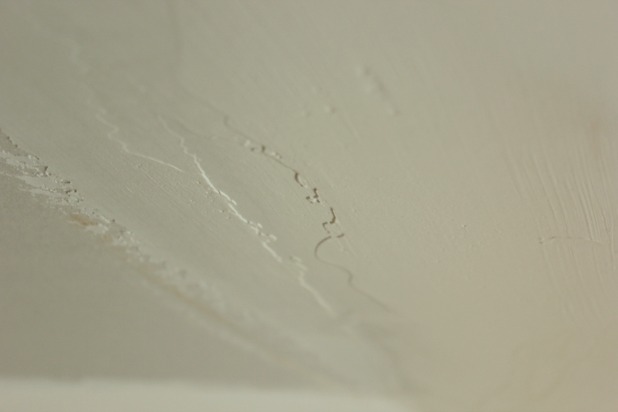
… than this.
I know it doesn’t seem like much, but trust me, the drywall sander in your life with thank you and love you forever.
As for the actual sanding, I really think that’s all a personal preference. The end game is smooth, flat finishes all around, so you’re going to need to end up with a really fine grit, about 220. But I do start with 150 and even 100 in spots (that look more like the picture directly above and need more work), and I’m even known to whip out the palm sander. But a contractor friend of mine uses a long pole and doesn’t even get up close to sand. Personal preference it is, you just don’t want to sand off the drywall paper.
And there you have it, how to get your room paint ready in 1400 words or less.
Now, did someone say paint ready? Oh yes, we’re ready for some paint around here For Sure!
If you missed the part about hanging the drywall it’s right here, and if you have existing drywall that’s in need of repair the guide on that is right here.
Update #3: I go into more detail about drywalling over a wonky wall, spackling outside corners and cutting around window openings here.



Kelly @ Eclectically Vintage says
I heard that’s why Joel married you – your way with butt joints!
K
Karah says
you know it!
sue says
A not-so-smooth finish is why I texture-painted all the walls in the massage room. Per Sean’s request. Ha!
Karah says
too funny, I could show that husband of yours a thing or two … as long as he made the playlist to play while we were doing it 🙂
Carla Pennington says
Looks like Marley (and maybe Mico, too?) pitched in to make certain you had no compromised butt joints. After all, what is worse (or more painful, maybe?) than a compromised butt joint? I think I saw a few of them in Wal-Mart yesterday, sporting short-shorts and stripper shoes.
Sorry, I couldn’t resist. Too much fun to keep typing compromised butt joints. giggle. And who can resist Marley and Mico?
Karah says
hahahaha, good to see that we have exactly the same sense of humor. 🙂
Lynn says
You are…..AH-MAZING! I am completely blown away at the amount of [hard] work you have put into your charming little Key West house; and always with a GREAT attitude. I am SO stoked to see some painting!
Oh… and cute butt joints btw!
Karah says
hahahaha, thanks for following along … and checking out my butt joints!
Kristy says
Those other brothers can deny!!! Baby Got Back! and top and front…you got it going on Karah!!! Love the dog pic!
Karah says
baby got back! I’m gonna be singing that all day!
Charisse Andrews says
Hi Karah, You might want to check, but I am pretty sure when you hang sheetrock you are supposed to have staggered seams whenever possible, by at least four feet. Yes, it is easier to tape it when you butt every joint, but staggered joints are what gives a wall strength. Also, seams should not line up with window or door corners. Just FYI. Love the dog! charisse
Karah says
Thank you so much for taking the time to comment, Charisse! There isn’t actually any structural benefit to staggering drywall. Good point to not line up with the door/window corners, I totally agree with that!
AndyM says
Staggering the butt joints is generally done to keep the but joints from running the full length of the run (ceiling or wall) as that tends to make them more noticeable.
Ethan says
why didn’t you stagger your butt joints they are much less likely to stand out and or crack after being finished
Etha says
and yes there is a structural benefit to staggering drywall. it helps link the trusses or joists together better. Also if one of the trusses or floor joists are lifting staggering the butt joints will help hold the truss down, if it does move enough to crack a joint only 4ft of butt joint will crack.
Sources: Carpenter and drywaller for the past 12 years
Karah says
That’s great information, thank you!
Big Al says
Yeah I’m new at hanging drywall. I do framing, finish trim, flooring, roofing among other things. I know the importance of staggering joints. Im doing a small drywall job for myself. Now the house is an old building and instead of strapping, the whole ceiling has boards nailed tight together to the ceiling joists. I figured since drywall is only gypsum with paper on both sides, it wouldn’t do much structurally. Figured it would be easier for the mud guy to do all the but joints together. He quickly tuned me in lol. In fact it’s harder to hide the joints when they are lined up. Well lesson learned but not changing it in this case. He’ll just have to deal with it this time.
Karah says
Yeah, 4 years later we haven’t had any trouble. I’m always learning new things, sometimes the hard way. haha
Kali says
Didnt read all comments but:
1. You never ever have mutliple seams meet. Creates weak points which then lead to problems. Stagger ur joints.
2. Don’t peel off the paper from screw holes. Use the metal part of the handle in the spackle knife to push them in-thats what it’s there for.
Karah says
Thanks for the tips!
John Andrew says
Drywall projects small or big, finishing is the main issue and with small patch-up or fixes this seem to be more frequent. May be laziness catches up ha-ha.