This post may contain affiliate links which won’t change your price but will share some commission.
Note: The girls and I have arrived safely in Key West and I’ve already started the house hunt! If you want to see some of my first impressions and pics out and about check us out on Facebook, Twitter and our brand spankin’ new Instagram account. As Annie would say … “I think I’m gonna like it here”. 🙂
So, they say the rooms that make the biggest impression on a person are kitchens and bathrooms.
Do you agree? I think I do.
I mean, there are so many ways to make a statement in a kitchen or a bath. Appliances, a fancy motion activated toilet, a rain shower. You know, the big ticket items.
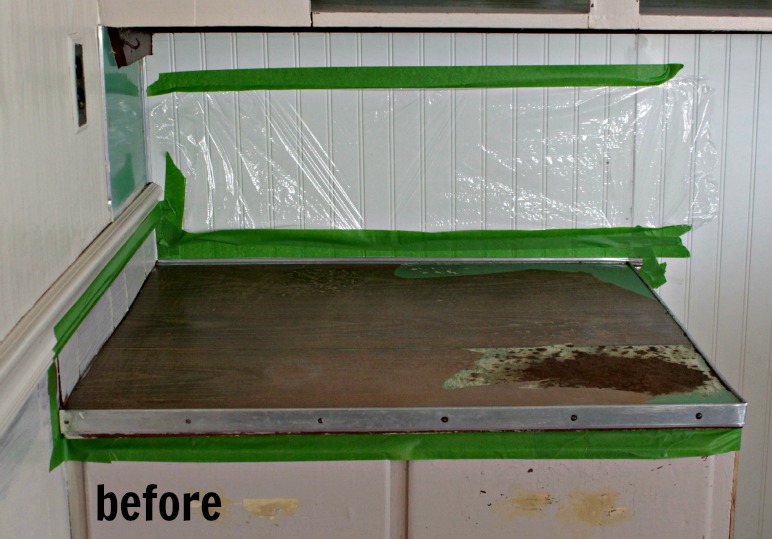
But what do you do when you’re trying to get the most bang for your buck and aren’t really in the market for over the top amenities? Heck, what if you’re starting with this?
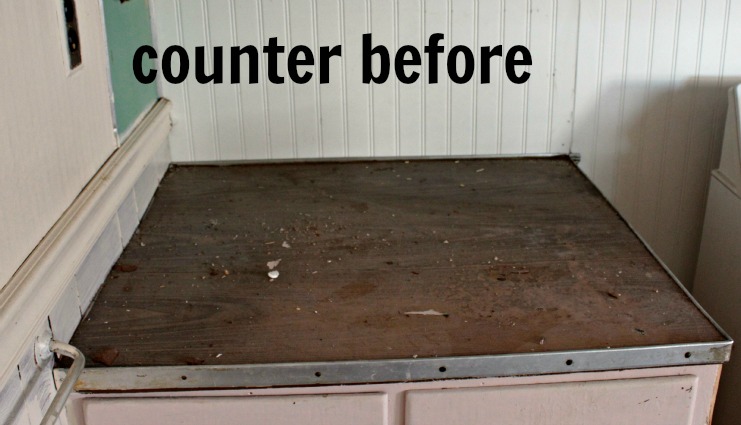
Yeah, I know, it’s bad. Really bad. That would be a wood grain sticker over a green laminate counter edged in chrome. I call it retro-not-at-all-chic.
When I saw the upgrade my buddy Roeshel did over at the DIY Showoff I knew I needed to give Rustoleum Countertop Transformations a try.
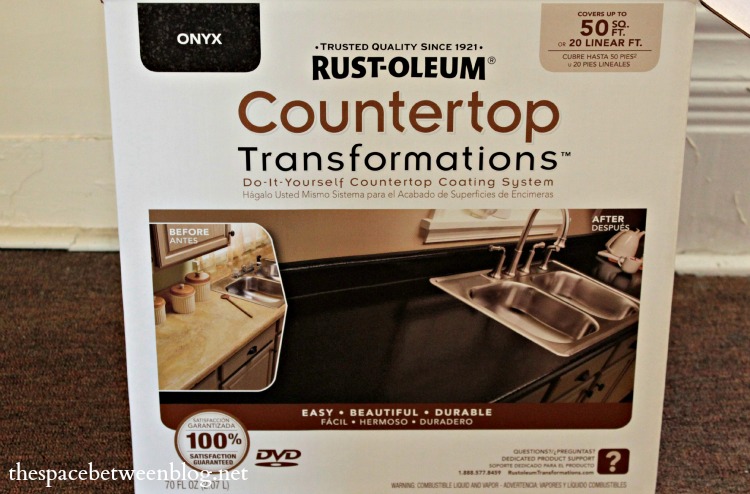
Armed with the Rustoleum Countertop Transformation kit in Onyx, here’s a step-by-step of how to take your countertops from that (ok, hopefully not that bad), to this.
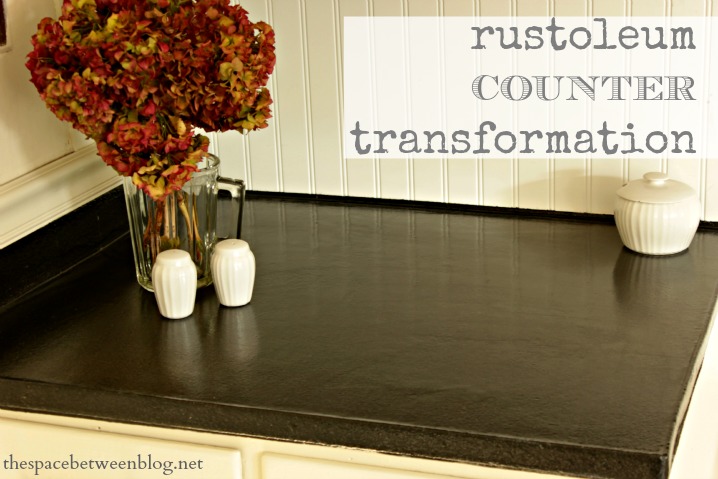
It’s a pretty awesome Rustoleum transformation, right!?!?!
I will first say, the set of directions included with the kit is all-inclusive, they even include a video tutorial and have all kinds of tips and details on their website. So I would recommend this kit for even the most hesitant of DIYers.
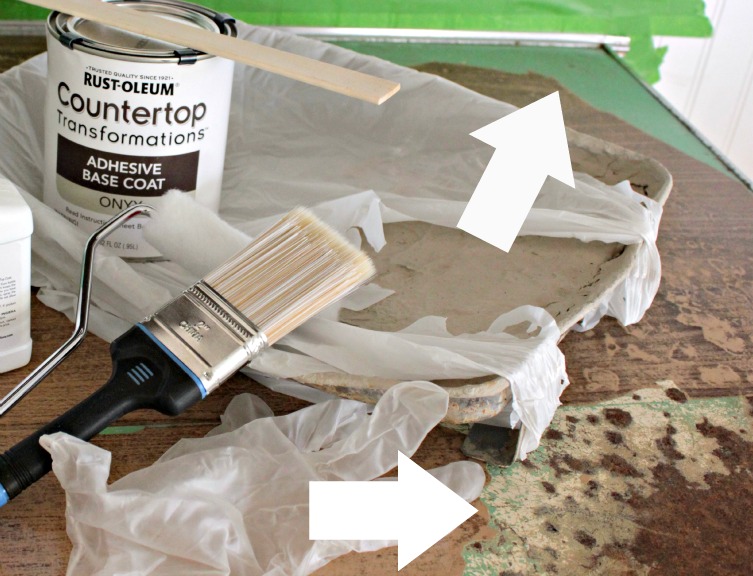
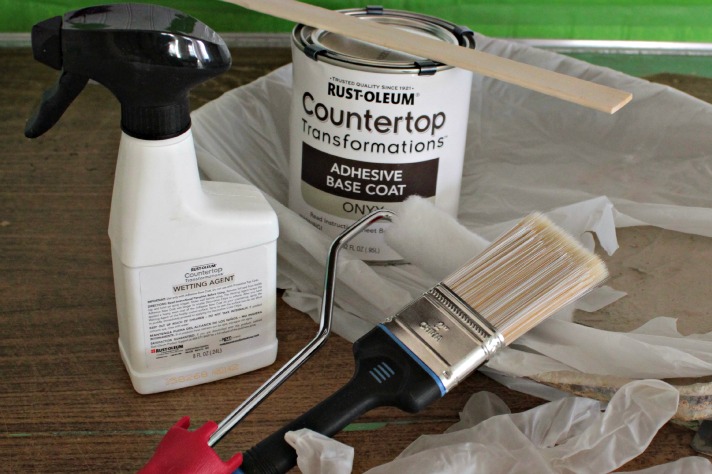
The supplies included in the kit are all listed and pictured here, the ones I used were the:
- paint stir sticks
- adhesive base coat and protective top coat
- spreader and decorative chips
- sanding blocks
Supplies to provide yourself:
- paint brush (I used a 2 inch)
- 4 or 6 inch foam roller (my counter surfaces were so small I didn’t end up using one)
- disposable gloves
- paint tray
- painter’s tape and protective covering to protect surrounding areas (I used Frog Tape and Saran Wrap)
- lint free cleaning cloth
*I have the wetting agent pictured below, but my counter area was small enough that I didn’t need to use it. It would definitely come in handy with larger counters.
The other area of counter I resurfaced was around the kitchen sink, and if you are a fan on Facebook you already saw my tip to use plastic wrap to protect smaller areas. It’s easier to manage than a whole drop cloth and its sometimes irritating quality of sticking to itself actually comes in handy when you’re wrapping it around a faucet.
And you will want to have drop clothes around the entire surrounding floor area … more on that in step 3. #dirtiestjobapplication
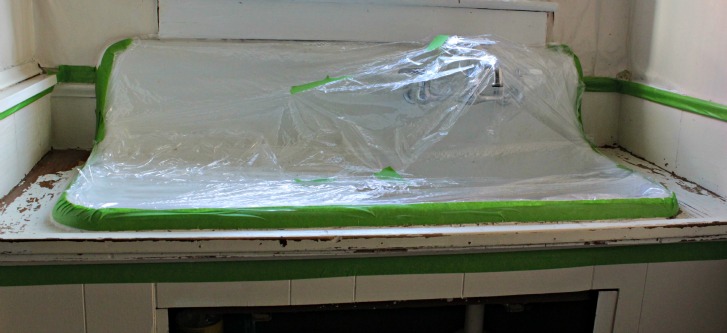 Step 1 – Prep the surface area. You can see in the picture above that I had already sanded the surface around the sink. A diamond embedded sanding block is provided and does the trick of pulling up any loose counter areas and scuffing up the surface in preparation for the adhesive base coat.
I was worried about the laminate sticker counter, but after the sanding it looked like this, and any sticker left was securely adhered and covered right up nicely by the adhesive base coat.
 After the surface is fully sanded you’ll need to wash it a few times. I just ran my hand over it after every wash/dry cycle and washed again if I felt any loose particles.
Step 2 – Apply adhesive base coat. The instructions are very detailed about recommended application. I found a 2 inch brush in long strokes the entire length of my counter worked well. Start with the back splash and work your way forward along the counter until you reach the edge. I worked in horizontal strokes first and then followed with strokes starting as the wall coming toward me. I used a very liberal amount … didn’t want any part of that old counter showing through, that’s for sure. 🙂
I didn’t get any pics here since working swiftly is key to make sure you get the decorative chips applied before the adhesive base coat dries.
Step 3 – Spread decorative chips and be ready to have them everywhere. This is the step that helps the post title make sense. The spreader is super handy, and definitely the best application process to attempt an even coverage, but don’t think you’re going to have much control over those dang chips. 😉
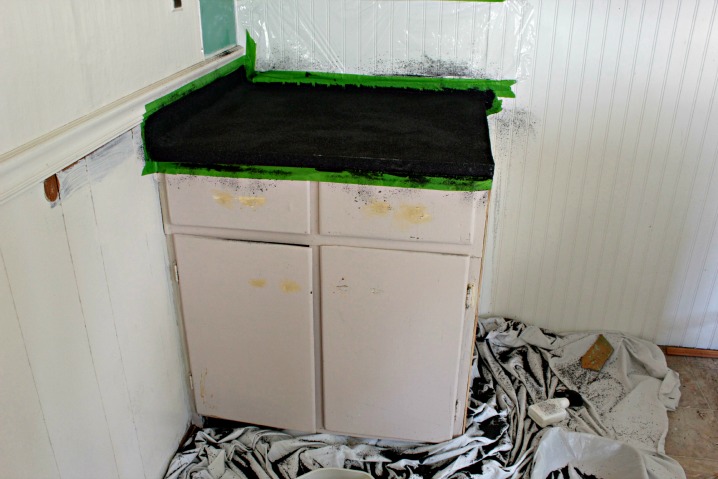
And somehow I didn’t get one single picture of my spreader. Oh the joys of DIYing solo. 🙂
I was stoked that I had taped that piece of plastic wrap to the wall behind the counter, can’t be too over protective with the surrounding areas I say.
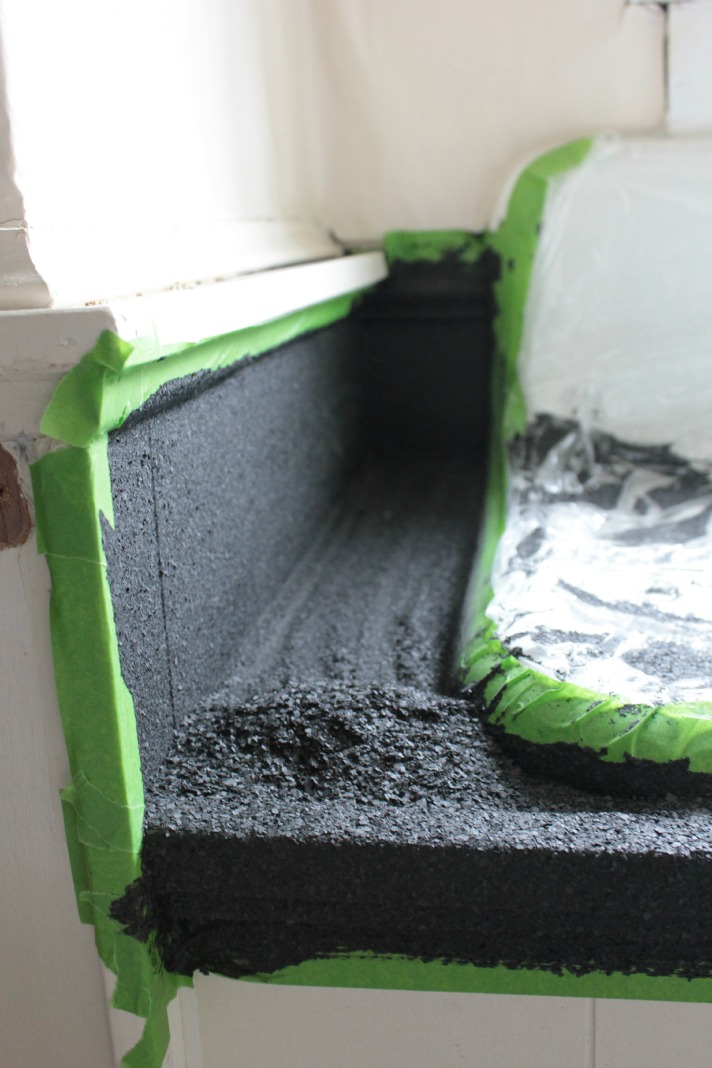
I used handfuls of the chips to get into some hard to reach areas around the sink.
That picture above was about halfway through the chip spreading process. You want to be sure there isn’t one bit of exposed adhesive coat. And see where I leaned up against the front of the counter to re-expose the chrome edge? I did the touch up the same day … just reapply the adhesive base coat and more chips … easy peasy.
After an overnight of dry time you’re ready to remove the excess chips and sand.
Step 4 – Clean up excess chips. This step would be super easy if you could use a shop vac. This house didn’t have the electricity turned on so I had to sweep and brush and clean some more.
I first used my hands to just scoop out all of the loose chips.
 Then I took the end off of a broom and used it as a hand sweeper, it worked like a charm. And speaking of charms, who doesn’t DIY with their Pandora on? 🙂
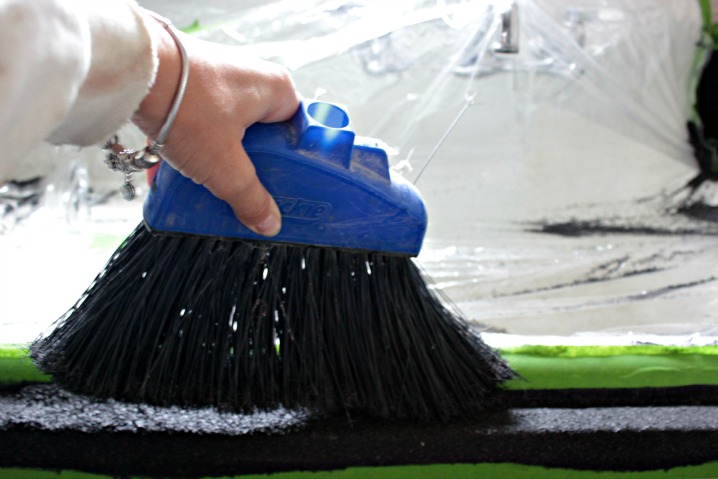 I could tell at this point I was going to LURVE this new look.
If you want to make a serious change in the look of your kitchen without investing in brand new counters this product is definitely for you!
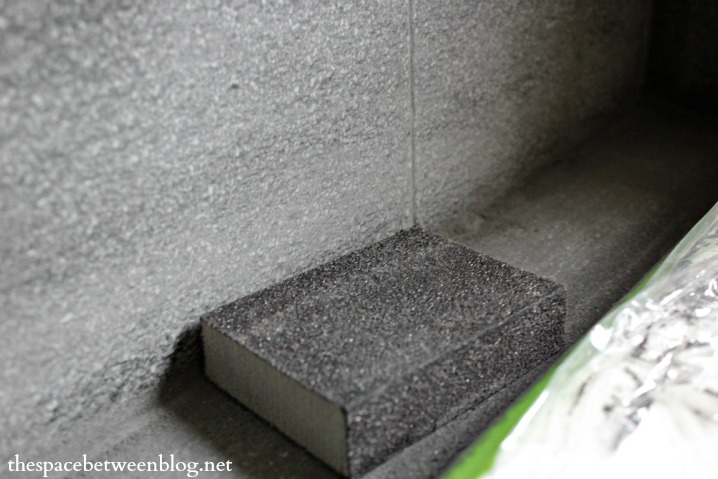
Now, Step 5 – Sanding. A sanding block is provided and worked great in circular motions.
Note – A scraper is also provided to scrape off the chips first but I found I didn’t really need it.
I used the same sanding strategy I use when sanding a patched area of a wall. Sand a bit,
then run my hand over to feel for smoothness, then sand some more if needed. Like my gloves? It was chilly.
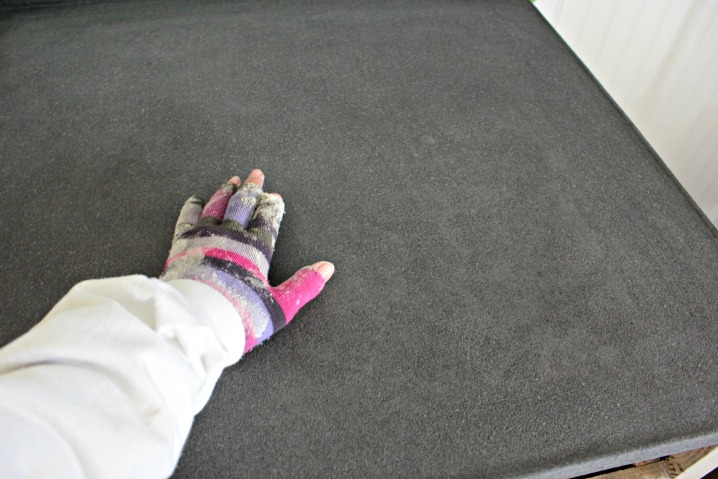
This process changes the finish to a charcoal grey color, but no fear, the protective top coat gives it the look we’re going for.
At this point you can gauge if you’re done with sanding when you compare your counters to the sample piece provided.
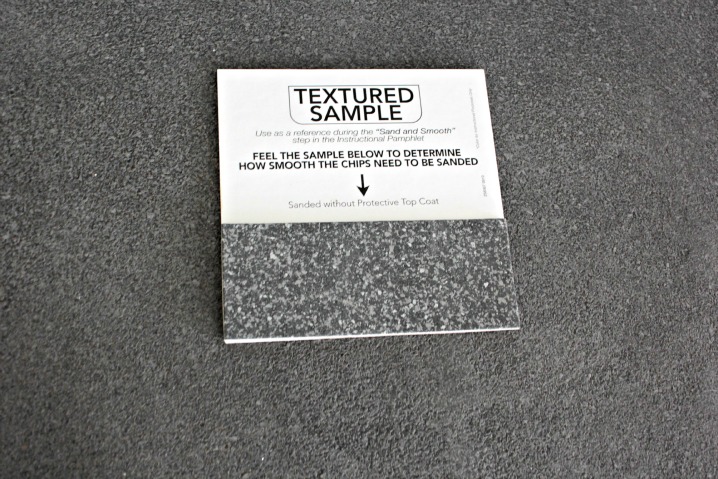 Touch up any areas by just reapplying the adhesive base coat and more chips.
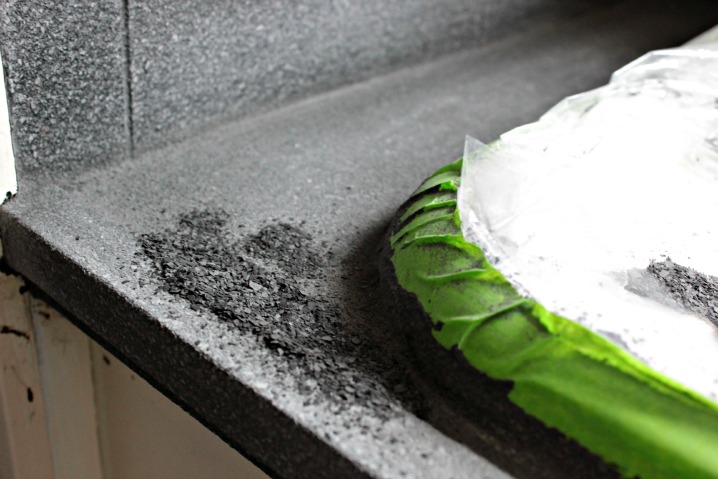
You can see a grove in the back splash there. The counter surround is actually wood paneling and you can see that the product doesn’t work to fill in the grove, but I knew the more cohesive look all around was going to work wonders for the overall effect of the transformation. The groves don’t bother me a bit.
Step 6 – Clean the surface thoroughly in preparation for the protective top coat.
Tip!!! The protective top coat is not a leveler so be sure you have your counter looking and feeling exactly how you want in terms of texture … it’s gonna stay that way. This also means clean and clean again with your lint free cloth to ensure no loose particles get trapped under your top coat. 🙂
Step 7 – Protective top coat. I could tell the instant I started with the protective coat that the finish was going to end up just perfect. Here I had applied the top coat to the back splash and not the counter … check it out!
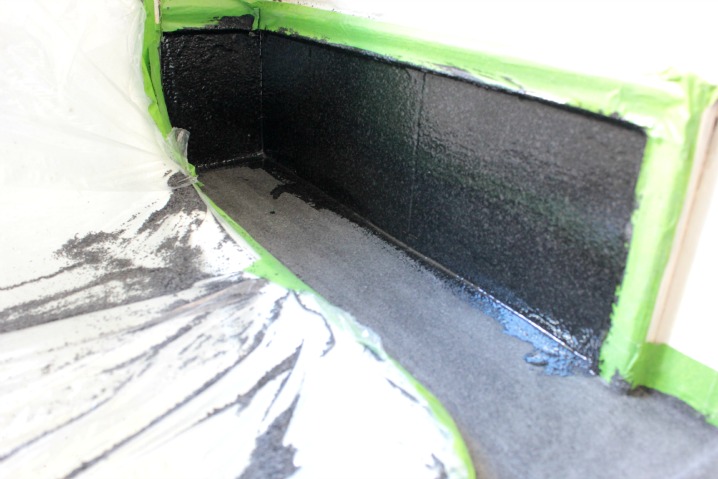 I love that feeling when I’m almost done with a project that I know is going to be awesome! So rewarding!
Let it dry untouched overnight and there you have it.
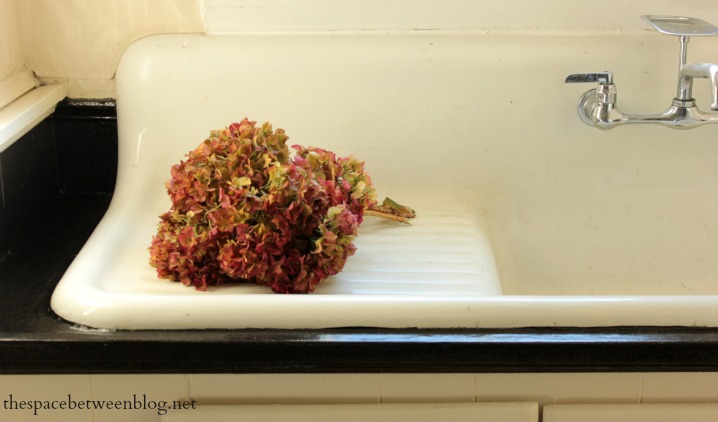 And please tell me you love that old sink as much as I do!?!?!
Now, we clearly have a lot more do to here, but I really can’t even tell you what a dramatic impact this one change makes to the entire kitchen. And I know it’s probably backwards to do a counter before the cabinets, but the countertop transformation products have usage limitations when it comes to weather … keep that in mind … I had to get this project done before the temps plummeted on me.
Let’s just remind ourselves what the before looked like.
 And the after … hard to believe it’s even the same surface.
 I’ve said it before and I’ll say it again, anyone looking to make a HUGE impact on a small budget in their kitchen needs to try out the href=”http://countertops.rustoleumtransformations.com/” target=”_blank”>Rustoleum Counter Transformation product.
And if you have any more questions about it, give me a shout, I’m happy to help!
And watch out, this is just the beginning of the upgrades we made at this old gem. We’ll be talking cabinets, hardware and wood soon. (And those are just the kitchen projects.)
Update: See the cabinet transformation here, cabinet hardware switch-aroo here and how to create a wood slat look in the back of open cabinets here.


Anne@DesignDreams (@ddreamsbyanne) says
Yikes! What a job!!! It looks fantastic, though. Great work!
Roeshel S (@DIYShowOff) says
I agree with you! It’s the best way to give an old countertop a new look – more affordable and easier than replacing everything. I LOVE that sink and the newly transformed Rustoleum countertops look amazing! Great job! What a difference in your before and after! Wow!
Karah says
Thanks Roeshel!!
Kristy Rohm says
Hi Karah…is this in the new place in Key West? If so I missed a few days…lol I love the transformation…looks awesome!
Karah says
This is in one of our rentals in MD … I’m just getting caught up on all of the DIY I did in December before the sudden move. Still on the house hunt here in Key West.
Whitney @ drab to fab says
You took that countertop from dingy and old to sparkling and shiny! It looks awesome….good work lady!!!
Karah says
I just posted it on social media and said it went from ‘drab to fab’ and thought of you. 🙂
Debbie says
That is the most amazing makeover that I’ve ever seen! I’m pinning and checking this stuff out!
Debbie
ps. I wish I had a Pandora bracelet 😉
Karah says
My mom go me the Pandora as a wedding present with just one charm and then we add one every year, it’s become a nice tradition!
Heidi @ Decor & More says
This is crazy awesome, Karah! I cannot believe what a difference that made! And yes, the sink is FABULOUS. Home run!!
xo Heidi
Karah says
It is really amazing what a difference it made it a still-needs-a-lot-of-work kitchen!
Kelly @ View Along the Way says
I can’t believe the difference! Countertops ain’t cheap and these look great!
Karah says
Thanks Kelly! It is a budget transformation I would highly recommend!
shirley@housepitalitydesigns says
Great transformation…and so glad that you and the girls arrived safely in the States!!!….Good luck on the house hunt!
Karah says
Oh, it is going to be soooo interesting, Shirley. Wish I had a few blogger friends here to experience it all … so many eclectic choices!
malia says
Wow that looks REALLY good!
Karah says
Thanks Malia!
katiegolds says
Wow! Looks wonderful!!!
Karah says
Thank you Katie, I am excited about the result.
maryanncaballero says
Gorgeous! I’ve been wanting to try that kit… amazing results.
Karah says
Thanks Maryann, I would definitely give it a try!
homastyle says
Wow!! It’s looks like soapstone…my dream counter top!
Karah says
Thank you Jeanette!
Kim Sand&Sisal (@SandandSisal) says
Those Rustoleum transformation kits are so cool. I’ve really been impressed with them. Your counter looks great!
Karah says
Thank you so much Kim!
paulasweetpea says
What a difference! Awesome transformation!! You must be so pleased with this project.
Karah says
It is such a huge change on such a small budget!
dewdropgardens says
I love this product!! I’ve seen it done before and we are going to be doing our kitchen this year, including using this to finish the counters! It’s unbelievable that they are the same counters…it’s an incredible product!
Debbie 🙂
Karah says
It really makes such a big difference. Have fun with it!!!
Kelly @ Eclectically Vintage says
I need that sink!
laura@Top This Top That says
wow! I always wondered how that stuff worked. Is that in your old house in the islands? how’s the house hunting going- will it in key west?
Karah says
It’s in one of our rental houses in MD … I used the cabinet transformation product too. Even with so much more work to do just those two upgrades made such a difference.
karen@somewhatquirky says
Nice job Karah! Yes, that is the best sink ever. I’m looking for one just like that.
Karah says
I just went to the Habitat Restore in the Keys today and they had some neat old sinks.
Holly @ Lifeasathrifter.com says
This is awesome! Definitely pinning for future reference!
Shannon @Fox Hollow Cottage says
yes. i love that sink. I swear I would rip my counters out for a sink like that. what a great transformation! I bet you just LOVE it :)))
Karah says
We just buy a house with the sink and then rip everything else out. LOL
Jenn/Rook No. 17 says
Wow! Amazing! Beautifully done. What a fantastic product and demonstration to boot.
Karah says
Thank you so much Jenn!
Natasha says
i so need this
would love it if you could share this on my link party
Natasha @ http://www.serenityyou.com
RAE DAMBROSIO says
HI KARAH,
IT LOOKS TERRIFIC. YOU ARE SOoooooo TALENTED. I AM AN OLDER DO IT YOURSELFER AND JUST LOVE THE NEW PRODUCTS EVEN MORE WHEN ONE SO TALENTED AS YOU HAS TRIED IT ALREADY, CAN’T WAIT TO TRY YOUR IDEAS !
I AM MAKING A KITCHEN ISLAND AND HOPE TO PUT IT ON FOR YOU TO SEE,I HAVE TO GET THE BEFORE PICS LIKE YOU DO. WISH ME LUCK.
HEY ! BY THE WAY HAVE YOU EVER WORKED WITH SPACKLE AND STENCILS ? I DID MY KITCHEN 12 YRS AGO. IT STILL HOLDS UP BUT I AM OPEN TO NEW IDEAS. JUST LOVE YOURS.
RAE ON BRIGANTINE ISLAND NJ
Karah says
Thank you so much for the words of encouragement!! I am working with spackle right now and have some posts coming soon with some of my tips!! I have not really ever used stencils, though, sorry!!
LorieAnn says
OH, you give me hope – I just received my kit and plan to tackle my countertops next week. My counter looked like your “old” one! My question – Did you take the metal trim off of the counter? That trim is the one thing that bothers me the most. To find a replacement would cost too much….
Karah says
Hi LorieAnn! You can do it! I just left the metal trim and used a very liberal amount of the base coat and decorative chips around there. There are no seams or gaps and it ended up looking great! My one major tip is to be sure to cover every little spot of the base coat with the decorative chips, they will be everywhere, and it will be messy but you don’t want the base coat showing through. Have fun!!
LorieAnn says
Thank you! Now I’m excited!
Lorie says
I love my “new” counter! Turned out beautiful. Thanks for your help and encouragement.
Karah says
YAY!!! I’m so glad to hear it, that is still one of my favorite makeovers!!
Belinda says
I think I will try this on my bathroom sink/vanity. Huge improvement. BTW, love the spelling of your name our daughters is the same and you don’t see that often.
Belinda says
Do you know if topcoat is waterproof? My sink is one whole piece on top of the bathroom cabinet
Karah says
I’m not sure I would use this product in the sink, Belinda. I know it is water resistant, but you might want to check with Rustoleum to see if they recommend using on the all-in-one sink and counter styles.
Karah says
No, you don’t run into many with the same spelling. That’s awesome!!