This post may contain affiliate links which won’t change your price but will share some commission.
Ok, so it would be an understatement to say that I’m not totally thrilled that there isn’t just some bright, big, right-in-my face ‘reverse text’ tab on the home screen in Word. Phew!
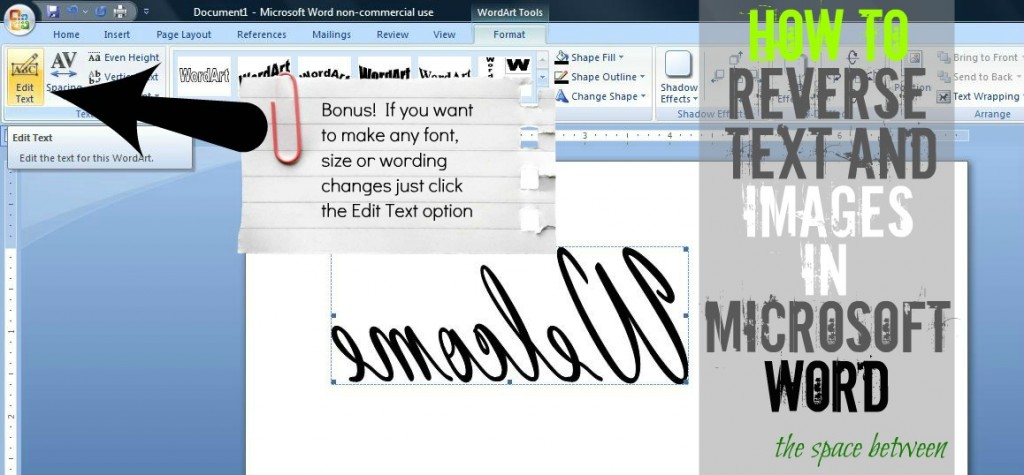
I would have felt like a total loser. But, lucky for me, I only feel like kind of loser. 🙂 Truth be told, there is a pretty simple, however not 100% intuitive (at least that’s what I’m choosing to tell myself) option that my blog buddy Linda pointed out to me. And she just so happened to have posted a great tutorial for the version of Word she was using.
And, since I had to figure out a couple of the steps in our Microsoft Word 2007 ’cause we’ve totally got the latest and greatest technology, here is the step-by-step tutorial to make a reverse image for my your future reference. 😉
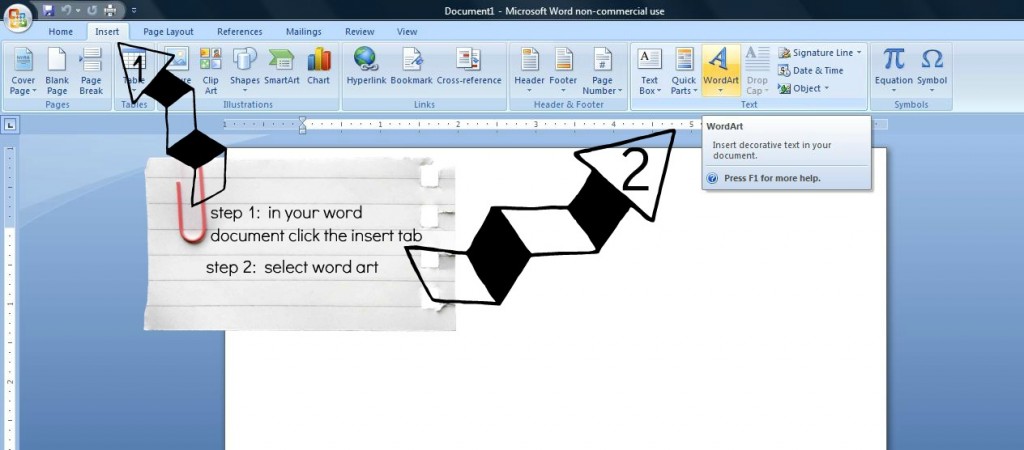
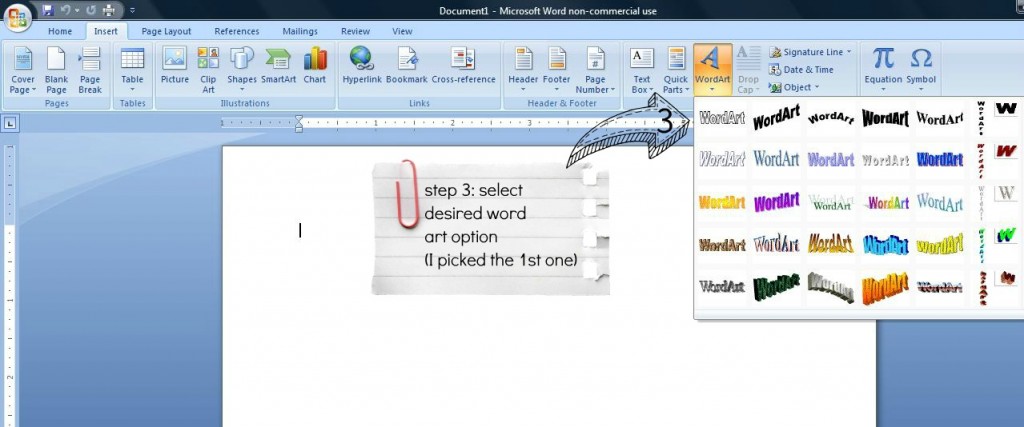
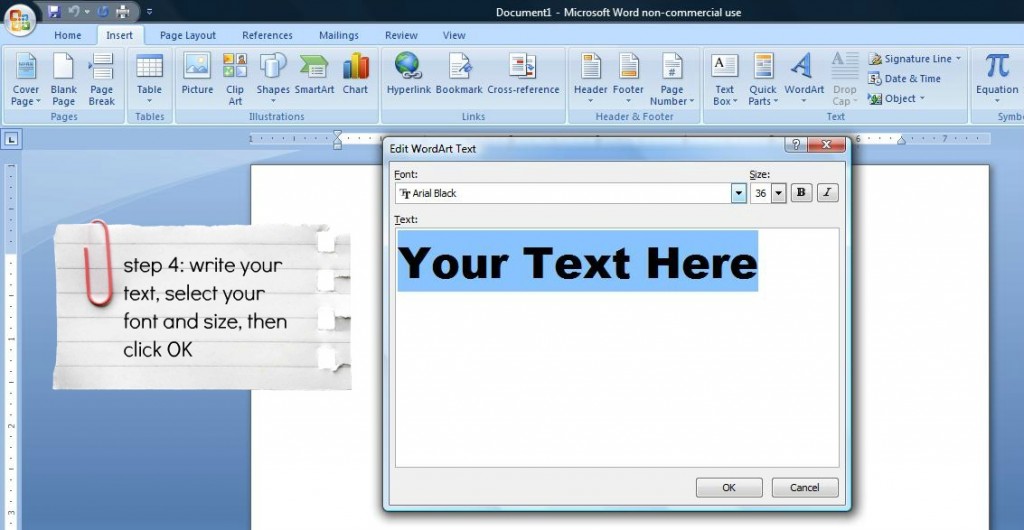
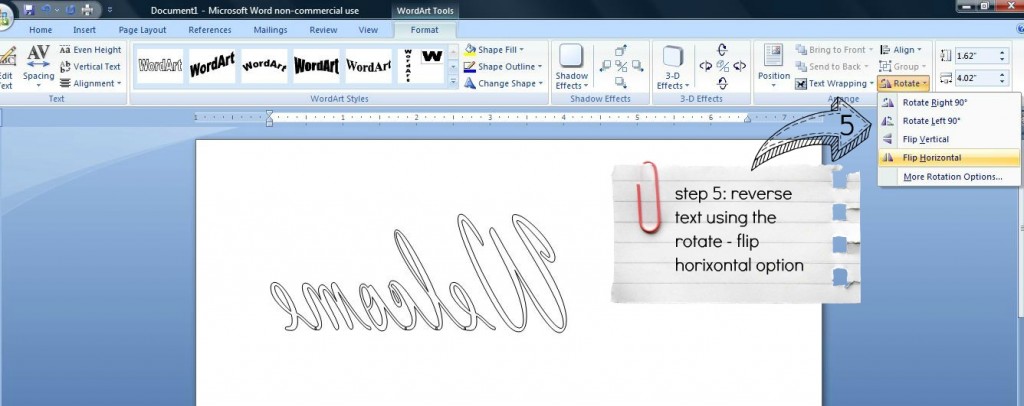 And, yes, I totally did type ‘horixontal’ in that step description. And, a little insider secret, if you hover over the picture for step 4 … I saved it on my computer as ‘right your text’ instead of ‘write your text’. Awesome, I am. Sigh. 😉
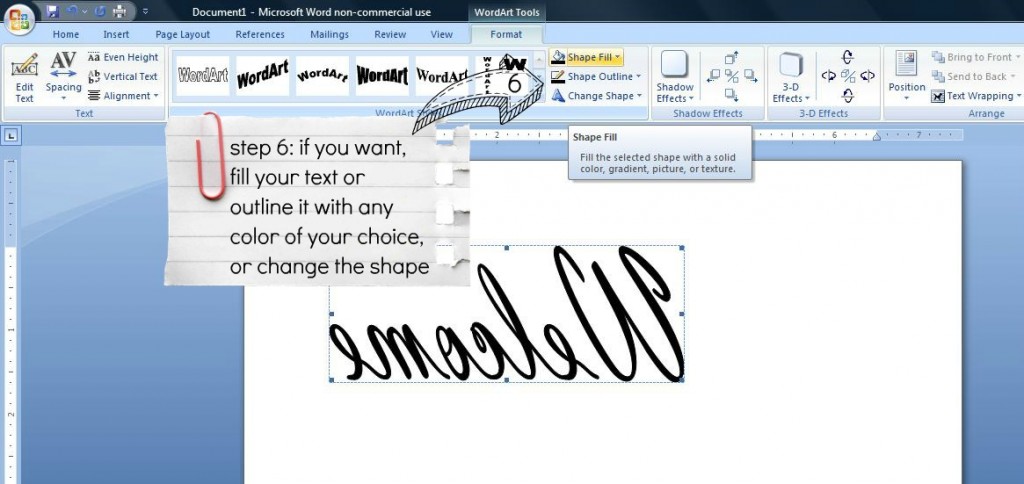
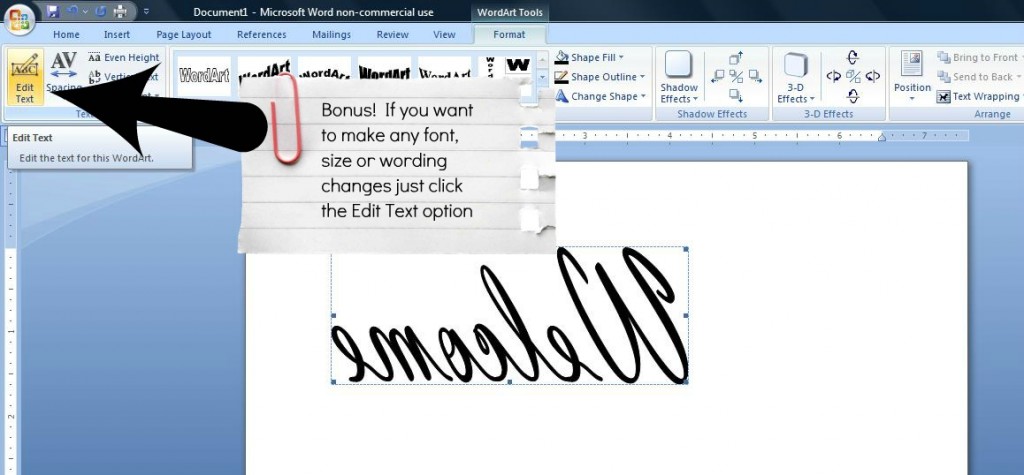
Now, print and then just follow the steps for the image transfer using your newly mirrored image here.
And, an awesome reader of this here blog, Patty, gave another great set of instructions using the text box option in Word. I have to admit, I got hung up on the ‘paste as a picture’ step. I’m used to a ‘paste special’ option and it just wasn’t working that way for me. But, it might just be because I am kind of a loser am not that bright have the attention span of a wasp didn’t take the time to make it work. I’m sharing it here fully expecting that many of you will be able to make it work. 🙂
1. Insert a text box. (Click on Insert, then Text Box, then select the type)
2. Type text inside box and format font, color, etc.
3. Select the text box by clicking on it. The outline of the box will appear with handles.
4. Copy the text box and paste as a Picture.
5. Select the picture. The outline of the box will appear with handles.
6. Click on “Page Layout” on the top menu. On the right side, you will see selections for Align, Group, and Rotate. Click on rotate.
7. In the drop down menu, select “Reverse”
Note that once you copy the text as picture, it cannot be further modified. The original text will need to be modified again and copied as a picture for further changes.
Happy mirror imaging and image transferring and sign making. And, be honest, am I the last person to know this?!?! 🙂
I am sharing this project here and at: BNOTP, DIY Show Off, Home Stories A to Z, Savvy Southern Style, Remodelaholic, Today’s Creative and Sugar Bee Crafts.


Debbie says
now I just need word 🙂
Tisha @ Delectable Home says
My kids know how to do this, but I’m not always aware of the obvious. Thanks for the tips!
Karen says
I can’t wait until my son is old enough to help me as left alone I’m helpless about most things technological. He’s 2 now so I may have to wait a couple of years.
In the meantime, posts like Karah’s help tremendously!
Vicky says
Wow…..who knew it was that easy to flip! Thanks so much I will for sure give this a try 🙂
Inspire Me Heather says
Thanks! I use Word a lot but didn’t know this little trick!!
Maury @ Life on Mars says
This is awesome! I’m pinning to so that I can remember it for later!
Kelly @ View Along the Way says
Ahhh wordart! Does that bring back any school-aged memories of tackying-out school reports with gaudy rainbow wordart for you?
…me neither.
Jessica @ Stay at Home-ista says
I didn’t know that at all, although I don’t make any claims to being tech-savvy:)
Jessica
stayathomeista.com
Whitney @ Drab to Fab Design says
Thanks for this! I had no clue in word either 🙂
Kelly @ Eclectically Vintage says
No, I was the last to know! Until now – thanks for the great tutorial! I’m seriously wanting a tattoo now!
Kelly
Laura at Top This Top That says
well it’s about darn time that you figured this out!! 🙂
Charlene@APinchofJoy says
Thanks! I’m pretty proficient in Word — but guess I never had a reason to use this before because I didn’t know. I’ll think of a reason now!
Kristy Rohm says
Very cool…I have learned something new today. Oh…BTW…hubby tried to throw away a pallet today….bad hubby 🙁