This post may contain affiliate links which won’t change your price but will share some commission.
Or, what I like to call my Free Pantry Upgrade. 😉
I can’t even say that with a straight face.
We have established that we live in a breadbox, so I’ve been getting creative with some storage.
I’ve had our pantry type items in the hutch since we moved here. But once the hutch became the tv stand, that’s been kind of weird.
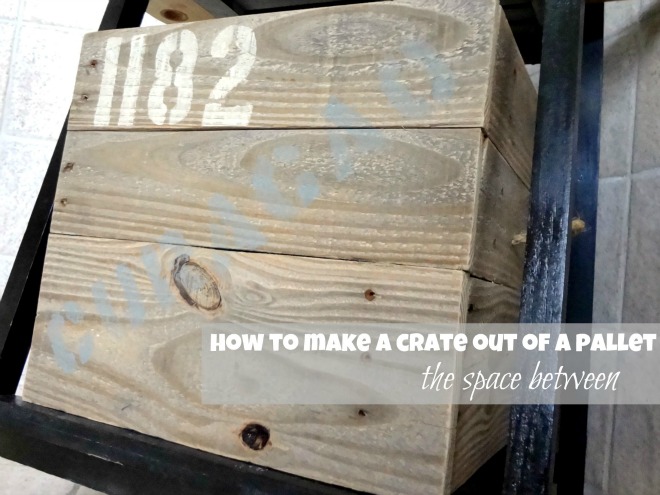
So, I decided to make a box crate out of a pallet. And it didn’t cost me a penny. Not many things make me smile more than the word FREE. 🙂
 Well, dragon berry mojitos make me smile pretty big…but that’s not really relevant here now is it.
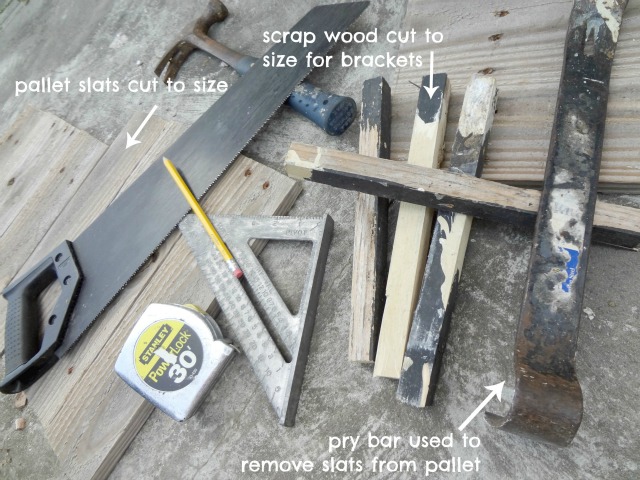
So, I didn’t actually take a before picture … but … it was a pallet. 😉 Similar to this one. And I used the same technique to remove the slats, a hammer and pry bar along with some cursing and a blister on my forefinger.
Those last two are totally optional. 🙂
I knew where I wanted my crate to go in my kitchen, so I measured my space and cut my slats to size (14 inches long). Based on the height I wanted, I needed 3 slats per side (one wide one and two narrow ones), so I cut 12 pieces the same length.
I took a little piece of scrap wood (maybe a 1 x 1) I had and cut it so I could use it as the brace to attach each of the sides of my crate together. The height was measuring about 12 inches so I cut my little brackets, if you will, about 10 inches long. Just long enough so I could get one screw into each of the three pallet slats on each side of the soon-to-be-crate.
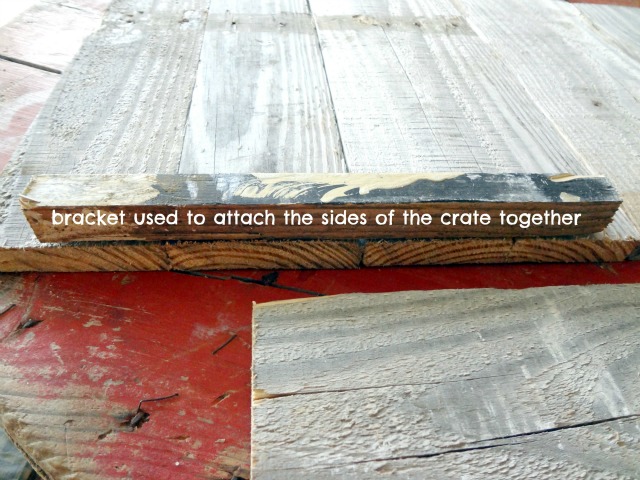 Ok, here’s the thought process … I wanted the front to be only a view of the slats, meaning the front and back slats would overlap the slats on the sides. So, in the picture above, you see how I lined my brackets up flush with the edge of the slats for the sides of the crate. I attached the 4 brackets to both ends of the slats for both of the sides. Then, by lining up the slats for the front (and then back) of the crate, I was able to attach the brackets to the slats creating a bottomless and topless box. Confused yet?
This pic is of the 2 sides with the brackets attached … ready to be attached to the front and the back sides of the crate.
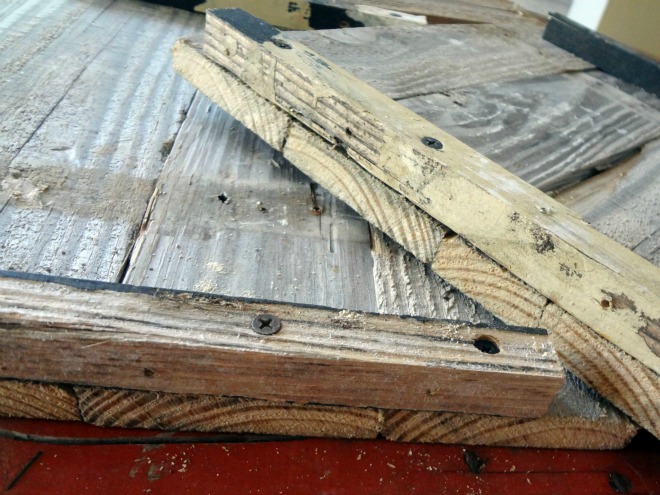 Why yes, I do work construction on the coffee table. 🙂
Which makes now seem like a good time for a few tips:
1. Don’t do construction on the coffee table unless you’re ok with a sawdusty mess. 🙂
2. Drilling pilot holes for your screws (like I did here) is always a time saver … for those interested in saving time and sanity and maybe a little bit of finger flesh.
3. One might want to wash their pallet with some sort of disinfectant cleaner.
4. Sanding the slats before working with them, or wearing gloves while handling the slats would probably be a good idea.
But, I’m not one to judge so if you happen to forego any of these tips your crate is still cool with me. 🙂
Ok, once I had all of the sides connected, I added a bottom. This is probably backwards carpentry, but that’s how I roll.
AND, so I didn’t have to rip down the width of any of the pallet slats, I spaced them so they aren’t wide enough apart for any canned goods to fall through, but not exactly a solid wood bottom. Like so.
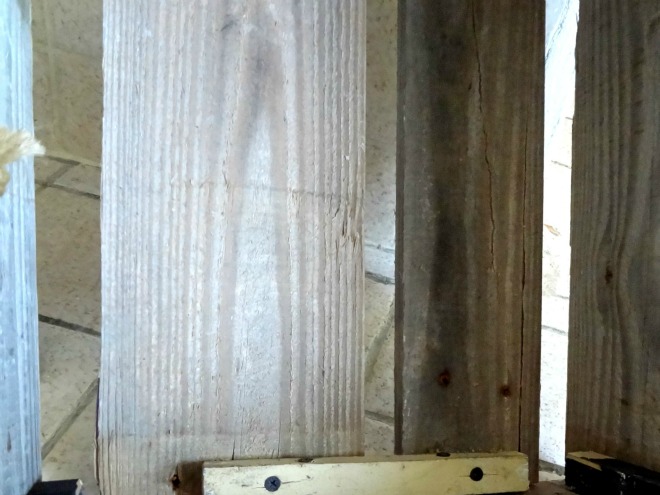
Then I drilled holes on either side of my crate to run some rope through for handles.
And because I didn’t want people peaking at my canned goods (that’s what she said), I added a top by just cutting more pallet slats the length I needed and adding a few pallet slats to the underside to attach them all together. Like so.
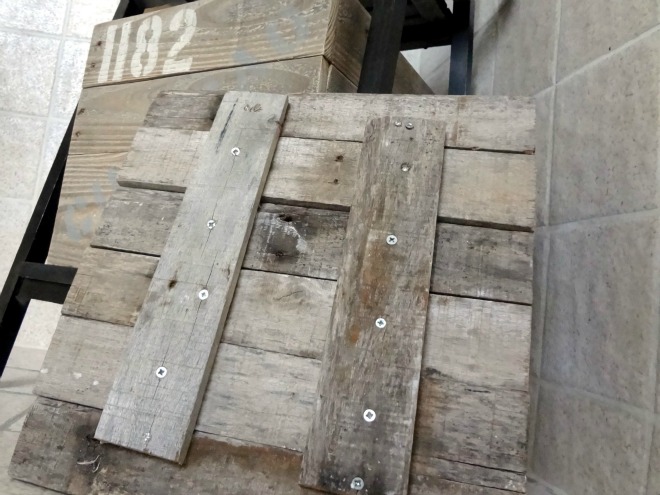
And because I love me some driftwood, I just screwed on a piece that I thought would work as a handle.
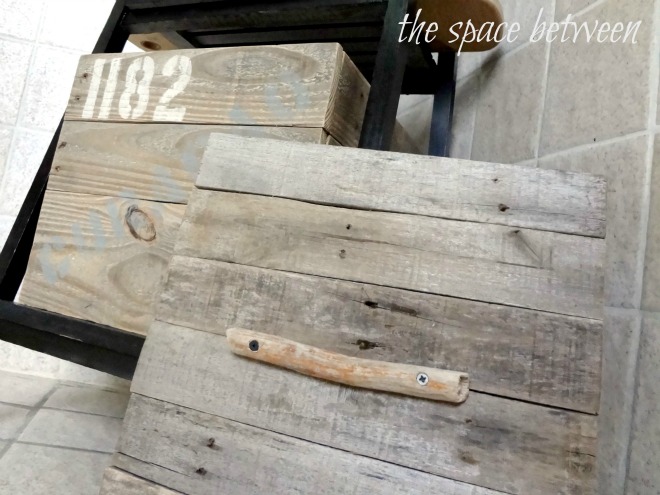
After I admired her for a few hours I decided to add some random stenciling. My new favorite hobby. 🙂
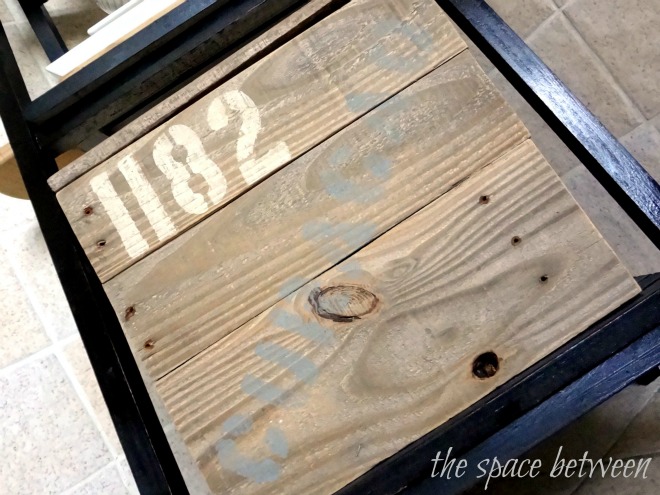
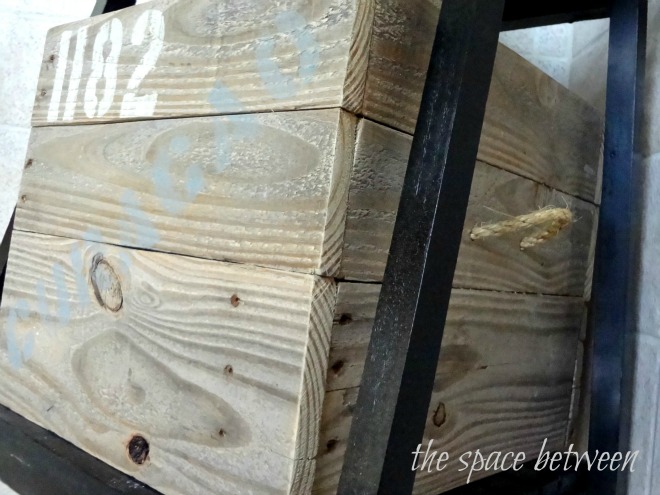
I picked a not so random number and then stenciled the word CURACAO along the front. Kind of like it’s a crate of canned goods on its way to Curacao. Appropriate I’d say.
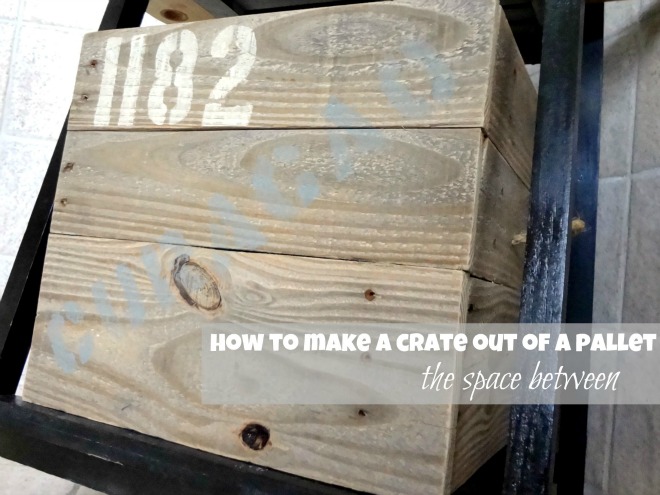 Thank goodness, because we all know who doesn’t like random stenciling around here. 😉
I finished her off by hand sanding the whole crate to distress the stenciling and smooth out the finish a bit. Oh, and just to clarify, all of the nail holes you see on the outside of the crate of from it’s previous life as a pallet. Building the crate with the brackets on the inside eliminates any new visual nail or screws. And I really like the rustic look of the open holes from it’s life as a pallet. Score!
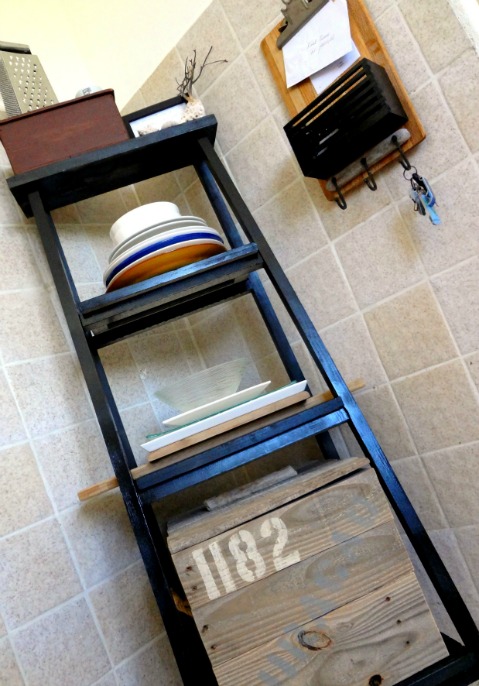
While I was at it, I was inspired to add another driftwood shelf below our jute wrapped rusty pipe pot rack.
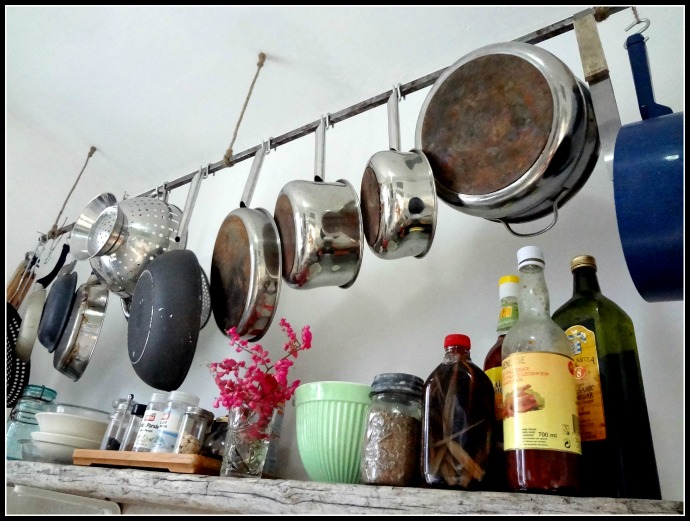
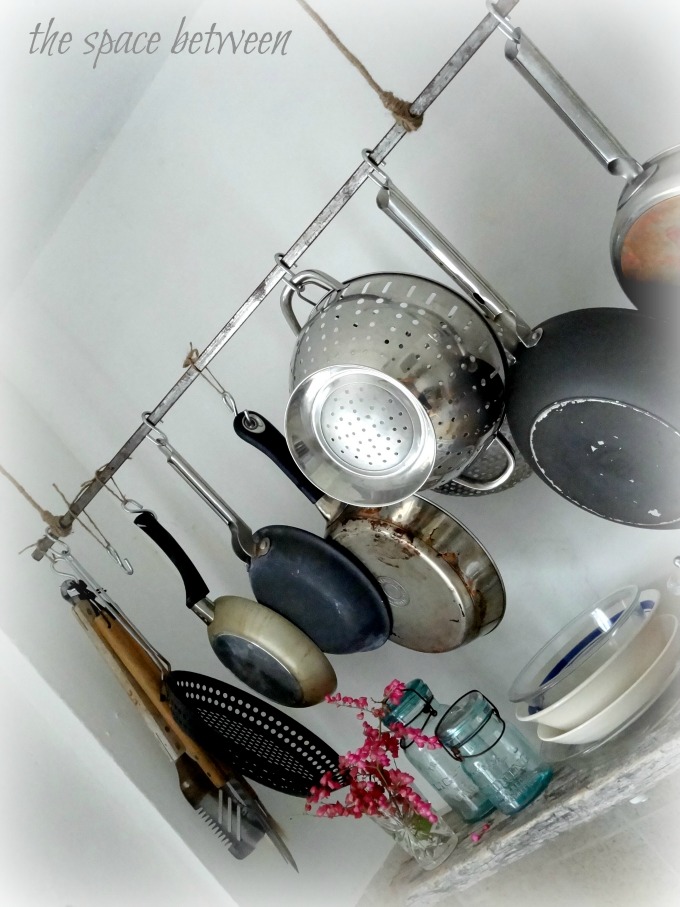
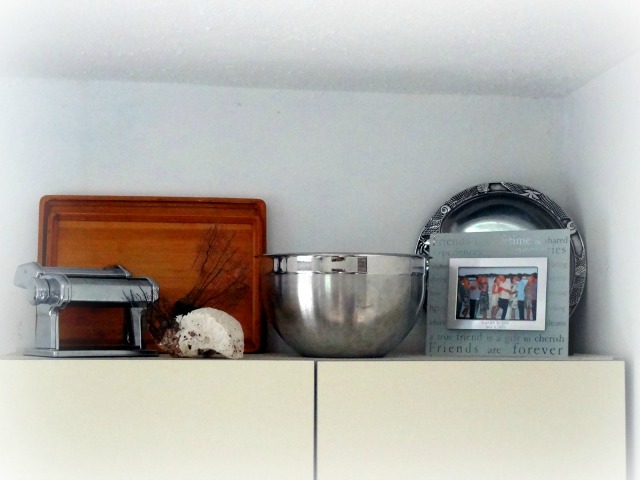
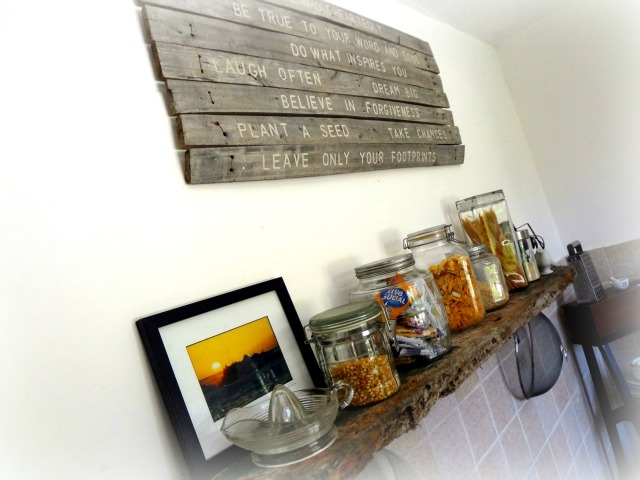 And, because this has turned into a mini kitchen tour … here’s my attempt at storing some of our less ugly kitchen things in plain sight.
Seriously, if you want to make your very own pallet crate, it really is easy, feel free to email me for more detail. I know you can do it … and who doesn’t love FREE, stylish storage?
And another little side note, the only electric tool I used is my drill/screwdriver … no fancy equipment required. Bonus!
If you like this project I’d would love for you to pin it!
And if you want to see how I made that little clipboard landing zone you can check it out here. And I made a super simple one pallet slat trough here.


Melissa @ Loving this {crazy} life! says
Great idea! I am also very fond of the word, FREE! I have seen so many things made out of pallets on Pinterest and have yet to make anything. I may have to go scouring for some to use for storage. Oh, BTW, I also LOVE your driftwood shelves! You should link up to my It’s a Piece O’ Cake Linky Party {http://lovingthiscrazylife-melissa.blogspot.com/2012/03/hrefhttplovingthiscrazylife-melissa_5380.html}. It’s open until tomorrow and Thursday will be the next one. Thanks for sharing!
artandsoulinsantaclaus says
How creative! Very nice! Looks great! It is amazing what a person can come up with if they have a little imagination a few supplies, and some time. Reminds me of what my 22 year old Marine son that recently came home for a visit. He said “I think poor kids have more fun when they are little”! I thought that was so funny because my kids always felt deprived while they were growing up because I would not buy then all then latest gadgets as they came out.
Dana @ Cooking at Cafe D says
First, I love free, too!
Second, dragon berry mojitos sound like fun!
Third, you can see my very inexpensive – get much needed – pantry upgrade below.
(The pantry shelves had been falling down since 1959 when the place was built – not that I was around back then to see it!) http://www.cookingatcafed.com/2011/02/stormbound-show-us-your-pantry-or-snow.html
I really like your new pantry.
And, that driftwood shelf is *swoon* worthy.
~ Sana
Megan says
What a great pallet box you have made! It’s awesome and looks great in your space.
Laura at Top This Top That says
I am so lovin that, and your shelf. Where did you get the driftwood? Beach?
laura
cassie says
super cute! and i was thinking maybe you couldn’t keep a straight face because if you take the r out you have panty… but that would be just silly. but panty reveal would be a funny post title!
Andrea says
Great idea! I have two pallets sitting in my garage. I may have to give this a shot!
Bliss says
Looks mavvvelous my dear. I did a pantry re-do, but no one will ever see it because it went from terribly unorganized and messy to a bit less unorganized and messy.
~Bliss~
thistlewoodfarm says
Karah,
I love this and I am totally pinning it! What a great idea! I love the handle too! You always come up with the best ideas. It must be all of that Caribbean sun!
blessings,
karianne
Amy@BuffaloRoam says
I think I say the same thing every time I comment, which is :You are SO creative! And this is no different. Just love it!
shelby@honeysuckle says
Love it! You have super cute stuff in your kitchen! We recently did this pallet to crate thing and made shoe storage out of them for our mudroom: http://www.honeysuckleblog.blogspot.com/2012/02/mudroom-breakdown.html
You’re right – nothing beats free! 🙂
mountainmae says
The crate box was an inspired idea and free just makes it better. Looks great.
Lisa@budgetdesigngirl.blogspot.com says
Karah,
What a fun project! Free is fantastic, and I LOVE how this came out! It looks amazing with your driftwood and other wood projects in your kitchen!
So cool! It’s pinworthy for sure!!!
Have a great week!
xo-Lisa
joy2journey says
Yay you! So creative!!! 🙂
Hugs,
Bj
RHome410 @ Friday is Pizza, Monday is Soup says
Cute and functional… Win, win! Oh, wait… and FREE. Triple win!
Ashley@AttemptsAtDomestication says
That looks awesome! You always come up with the most creative ideas! 🙂
Jessica @ Stay at Home-ista says
It looks amazing, like something you’d pay $300 for from a very trendy catalogue. A cool catalogue:) I also do some work on our coffee table, I even have a picture of a circular saw, jigsaw and power driver on it!
Jessica
stayathomeista.com
kellyatvatw says
LOVE. Love love. It’s actually refreshing compared to all those pantry upgrades with matching labeled jars, IMO. 🙂 And it looks expensive!
shirley@housepitalitydesigns says
Where do you come up with these ideas?…I love it…Now, if I made it…it would take me 5 minutes to know that I need a couple of band-aids and then one of your dragon berry mojitos to get me the rest of the way…Great project….you are too over the top creative!
Sue Reincke says
Nice addition to the kitchen! And I also smile about dragon berry mojitos. 🙂
tkwblog says
I’m thinking the Pallet up cycle is the IT thing also! Super idea! I keep thinking of all the uses I would have for some pallet boxes, err I mean crates. Pinning this now!
Cindy says
Your new box is gorgeous! And I love the shelves and treasure on them. Your kitchen is looking wonderful!
Hugs, Cindy
Rebekah says
Loving this! There are so many great ideas and D.I.Y. projects for pallets! I want to do one!
debbiewestbrooks says
It looks great! I want a pallet 🙂
Debbie
Kelly Rowe (@LiveLaughRowe) says
LOVE THIS 🙂
Kelly
livelaughrowe
Melissa @ Loving this {crazy} life! says
Hi! Just wanted to let you know I featured your projects as part of my Linky Party today!
Jill says
That crate is so cute!! I can’t believe you made that from a pallet! Good job!
I currently have a link party going and would love for you to share this and anything else you would like!
http://twoyellowbirdsdecor.blogspot.com/2012/04/thursdays-temptation-link-party-13.html
Jill
Rebecca says
This is so great. I love pallets! I’m pinning it and I’m a new follower! 🙂
Stacey says
Pallet love lives on! I would love if you stopped by my Creative Inspirations party to link up – I would love to have you there!
Stacey of Embracing Change
http://staceyembracingchange.blogspot.com
Stephanie @ House Candy says
Love your pallet crate! Cute, practicle and free makes for the perfect project 🙂
Emily Morgenstern says
Love it!! I want one for MY house!! Do you ship?? 😉
Jennifer says
I love your crate! I have a couple of pallets in the garage and I want to try this!
You are one of the Fabulous Five on Laughter and Grace this week!! http://www.laughterandgrace.com/
Lauryn says
so amazing! i would LOVE for you to link this post or any other posts you want to my weekend link party http://lovenotesbylauryn.blogspot.com/2012/04/spread-love-link-party-6.html it opens at midnight tonight, hope to see you there!
{love} lauryn @ lovenotesbylauryn.blogspot.com
Ruth says
I love this idea. It’s gorgeous. I love free, too.
Ruth
Amy says
You did a great job on your box..I mean crate. I love it with the stenciling and the little driftwood handle is just the right extra touch.
Jamie @ Scattered Thoughts of a Crafty Mom says
Love this! Awesome job!
Jaime from crafty scrappy happy says
Just perfect! I Love this, and it is such a simple idea! Thank you So much for sharing and for the inspiration!
Jaime
kim@toomuchtime says
First of all…I love you:) You SOOOO made me smile and laugh out loud over my coffee this morning! Seriously LOVING this project and I am totally stealing all our stealth tactics in building it! Pinning and sharing on my FB page:)
laurie says
Adorable, Karah! Love the look – and the stenciling! It adds so much character! 🙂
xoxo laurie
Roeshel says
Great job, Karah! It’s so pretty! I love all of the rustic charm of your kitchen. Thank you so much for sharing your creativity in the DIY Project Parade. 😉
Becky says
You had me at crate…and pallet..and wow–great results! Thanks for sharing.
Lauren says
I think I live in the other ‘breadbox’ in blog land so I LOVE all of your ideas for a small space! Your ‘pantry’ is adorable!
Kelly @ Eclectically Vintage says
I leave for a few days and you do this!? I can never vacation again … look what I am missing!
Love this – pinning this – FB sharing this …
Kelly
Onna says
Very cool! It’s awesome how just a little thing can add so much detail to a room! I love that other pallet project as well! :]
Kate says
That looks great!!
Taylor-Ann says
This is to stinking cute. What a great job. I would love it if you showed it off at my new linky party @ Kampenlane.com.
I can’t wait to see what else you create.
~Taylor
Tara@Tales of a Trophy WIfe says
Gorgeous!
Tisha @ Delectable Home says
I don’t know which I love more: the crate, or reading about how the crate came to be. I’ve never made anything out of a pallet and because I only have about 6 canned goods total in my pantry right now, canned goods storage is not what I need. I do have an entire piece of furniture filled with potato chips and cereal bars though (http://delectablehome.blogspot.com/2011/11/attractive-food-storage.html). Still, building one sounds like a fun diversion, so thanks for the tutorial and for linking up!
Sarah says
I love this crate it’s so cute! I love the vintage look. Can you share this at my link party?
http://thewinthropchronicles.blogspot.com/2012/04/share-it-link-party-7.html
Linda says
I am definitely loving this! And I’m definitely putting it on my to-do list. I’ve made the pallet shelves, and I have two more pallets to play with! (You can see the shelves here: http://www.thosecraftysisters.com/2012/03/recycled-pallet-into-book-shelves.html; basically what you see all over Pinterest, lol.)
Claiming Our Space says
I love this. Now I need to make 2 so I can stack them and make a nightstand for my stepson. I would love it if you would link up to my party at http://www.claimingourspace.com/2012/04/tout-it-tuesday-2.html
Shannon says
This is awesome–and your tutorial is great!! (and super amusing!)
Shannon@SewSweetCottage
Jen says
Wow it all looks just beautiful plz come to my home and make it look so nice!!!
Seaweed & Raine says
Your crate looks fab – and I love the stand that it is on (is it a ladder with flat shelves?)
Trish - Mom On Timeout says
Now I need to get my hands on a pallet! Your box (I mean crate!) turned out so cute! Your tutorial was very clear and easy to follow – love it! Thanks so much for sharing at Mom On Timeout!
Becca says
What a great project! I too am always looking for those creative storage options! I need to remember this one! Thanks for posting!
xo Becca
Dana @ CraftedNiche says
Karah – you’re wicked talented! …and you better not look shocked when someday I DO show up in Curacao! That house of yours is way too cute. 🙂
Alida says
I love pallet projects! Your crates turned out great!
Please consider sharing this project on Thingamajig Thursday going on now…
http://radcrafter.com/2012/04/thingamajig-thursday-21/
Lisa says
Be careful; many pallets are treated with pesticides
Amy Fountain says
very creative! perfect addition to the room.
Marilyn says
Karah, this is great! Isn’t it just fun to find a free cast off (pallet, discarded furniture, etc) and then turn it into something useful and wonderful?
You are one talented lady! 🙂
Trish - Mom On Timeout says
You just inspired me to start a new Pinterest board about pallet projects – I love this! Thanks so much for sharing at Mom On Timeout – pinned of course!
Liz says
Oh my gosh, what a great tutorial. I am saving this. I have been putting off my pallet collecting because I need a way to get some home. I see them everywhere. I need them. I want them. I have so many things I want to make out of them. You have inspired me to keep the dream alive. I found this project through French Country Cottage’s link party. I hope you’ll stop and visit me again at Quirky Vistas.
Liz
Aimee - ItsOverflowing says
Featuring you tomorrow!!! Awesome Crate!
XO, Aimee
aimee says
wow this is so great. i love the look of all the rustic wood. it would be amazing it you could link up at http://www.twiggstudios.com/2012/05/sunday-show-off-linky-party-and.html
thankyou so much xxxx
Cathie says
Just be careful and make sure that the wood used wasn’t treated as it is toxic!
Karah says
good point, Cathie!