This post may contain affiliate links which won’t change your price but will share some commission.
Back in December, when I was on my little DIY trip to get some work done on rental properties we have in MD, it was freezing! Well, it actually wasn’t freezing outside but it was down right frigid in the house. (You can see more of my lovely cold weather DIY outfit here.) That’s where I’ll start to explain that I really did think I had taken some better pictures. I guess the foggy mess I saw on the camera wasn’t just my breath … but a not-totally-focused or properly exposed picture as well. Sorry about that!
But that doesn’t put a damper on my excitement of the transformation I was able to make in this worn little kitchen in about a week. We started with the counter transformation, then we updated the cabinets … and left most of the cabinet doors off, and then updated the hardware on the cabinets we kept AND then we backed the newly open cabinets to give it a wood slat look on a $32 budget.
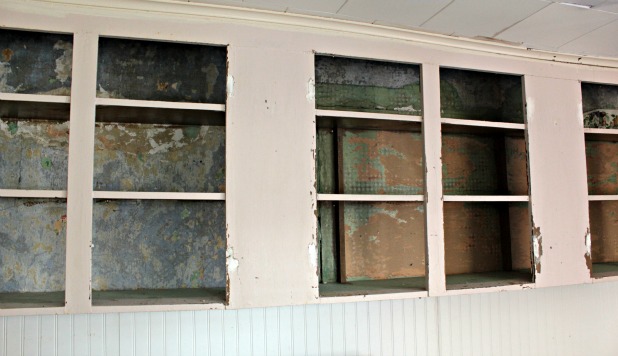
Let’s remember what the cabinets looked like before …
Ay yay yay!
What you see there is a combination of multiple layers of wallpaper, an abundance of cracks and a very old plaster covering up the back wall.
I knew we weren’t looking to spend a whole lot of time (making removing all of the wallpaper, fixing all of the cracks and skim coating the entire area out of the question) or money. So I decided to buy a few sheets of an inexpensive 1/4 inch plywood and give it a wood slat look for only $32.
The entire project took less than a day and here are the supplies you’ll need:
- 1/4 inch plywood sheets, I used about 1 1/2 4×8 foot sheets
- project grade adhesive, I used this
- 5/8 inch brad nails like these (just over $1)
- stain or finish of your choice, I used this (I had this on hand)
- hammer
- tape measure
- table saw or have them cut your pieces at the hardware store (Lowe’s made most of my cuts … the first 4 were free and then it was $0.25 after that.)
- miter saw, we have this one.
Measure
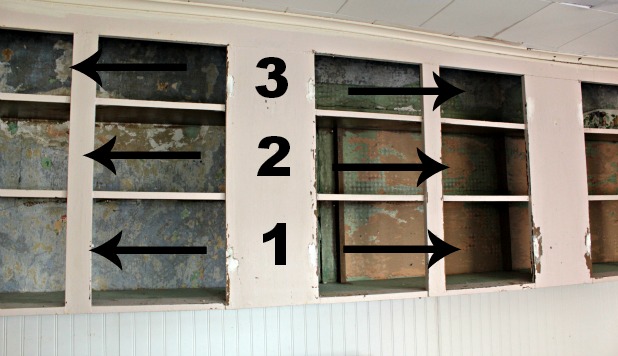
Ok, so you can see that we had three separate wall areas we needed to cover.
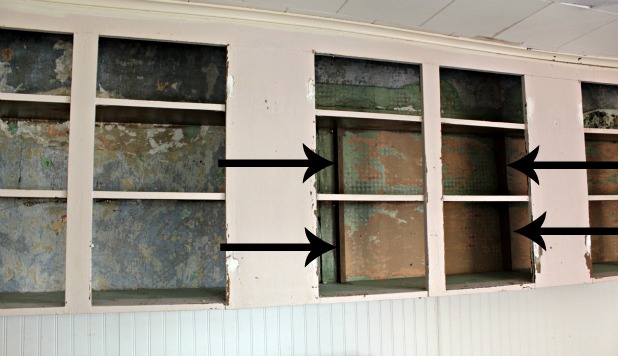
 We also has these two support pieces we needed to work around on the bottom two shelves.
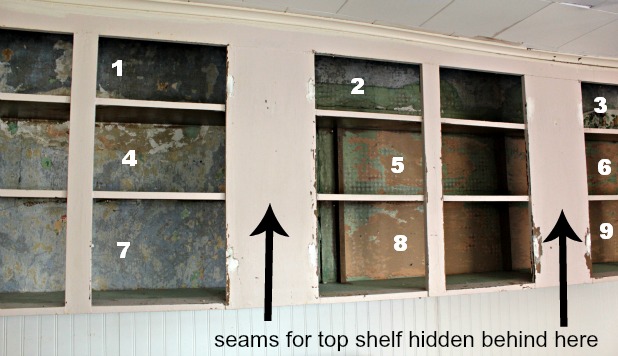
 Since I knew all of the cutting was going to get done at Lowe’s I decided to just divide the height of each shelf in half and use two ‘slats’ of plywood in each section.
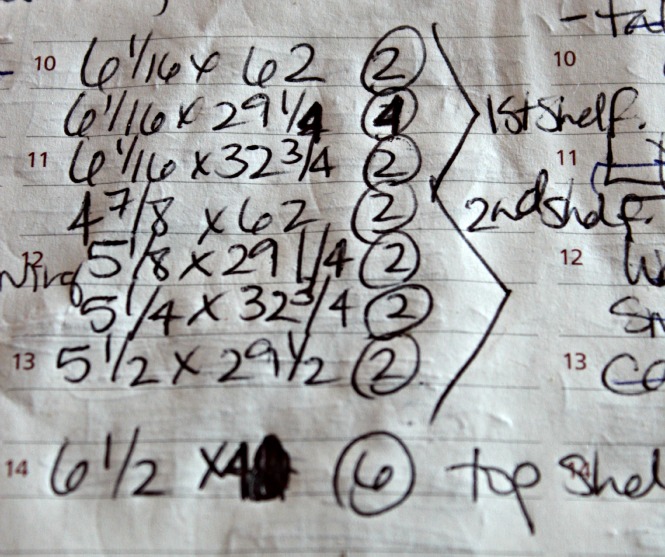
Ok, so that means that I had 9 different sets of measurements. Even though there weren’t any support brackets in the top section, for ease of installation it worked out great to measure 3 sections for that shelf and I just hid each seam behind the wider sections of cabinet wood.
If your cabinets are as old and in as rough shape as these, you’re going to run into some wonky measurements. Some parts of these shelves were saggier than Dolly Parton would be if those babies were real.
Since this is a rental property, I didn’t worry too, too much about it. I just made sure my measurement was small enough that the slats would definitely fit. If I had the electricity turned on at the house there would be more room for error, and I could have used a circular saw to shave off parts and had more perfect fits. But I didn’t, so we just went with it.
And our measurements ended up looking like this, the circled number is how many of that size we needed, turns out one section of the top shelf was exactly the same size as one section on the bottom shelf, hence the four 6 1/16 x 62 inch pieces.
Cut
Armed with my measurements I was off to Lowe’s to buy my supplies and have them make my cuts.
Funny Story! When I got to Lowe’s and had my sheets of luaun loaded on a cart and asked a guy in the lumber section if he could make a few cuts for me. He led me back and loaded the first sheet on the saw and asked for my first measurement. I said 6 and a 16th … he looked at me … said he be right back … and went to find someone else to help me. Sorry man … not exactly sure which hash mark is the 16th? Hahaha
Tip!!! Mark each piece as they are cut with its measurement, after awhile they all start looking alike.
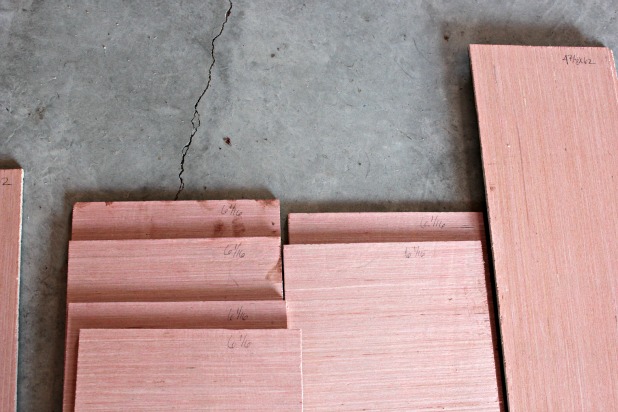 Also, it’s worth noting here that if I was doing this in my own house, I would make sure that each cut was horizontal along the grain of the wood to emulate the wood slat affect we’re going for. The way the measurements worked out for this project I could get all of my cuts out of two sheets if I went against the grain on some so to save some moolah we chose to go against the grain. Not that there’s anything wrong with that.
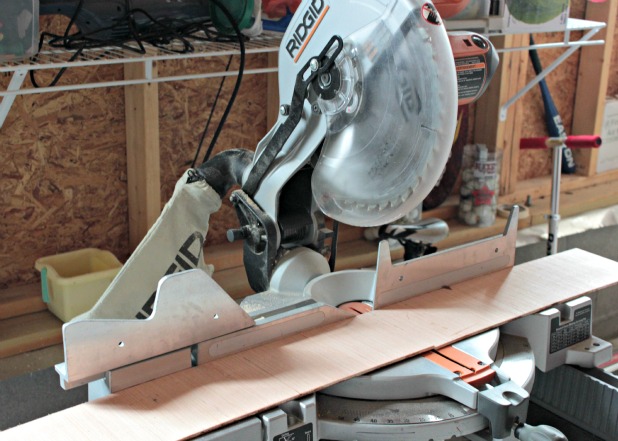
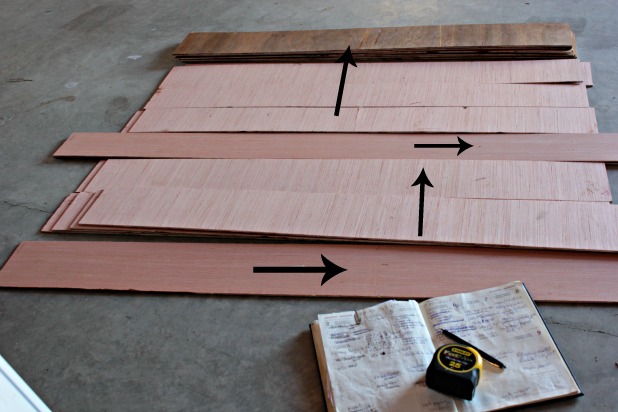 Now, once I was informed that it was going to be $0.25 a cut after 4 cuts at Lowe’s, I decided to only have them cut the strips to the width I needed and then I used our compound miter saw (we have this one) to cut them down to size.
Stain
I just used a color I had on hand, Minwax Early American and applied it with a rag. I didn’t even wipe it off because I wanted a darker look. Let them dry during lunch or overnight and then you’re ready to see it all come together.
Install
All of the slats were cut to size and stained and now it was the moment of truth. I new there were going to be some areas that wouldn’t be perfect, but I was more hopeful that everything just fit!
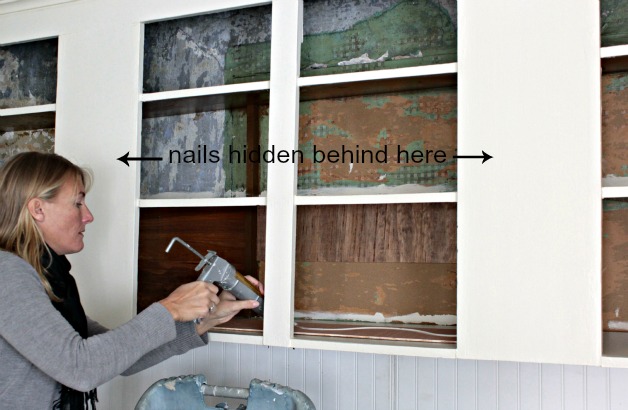
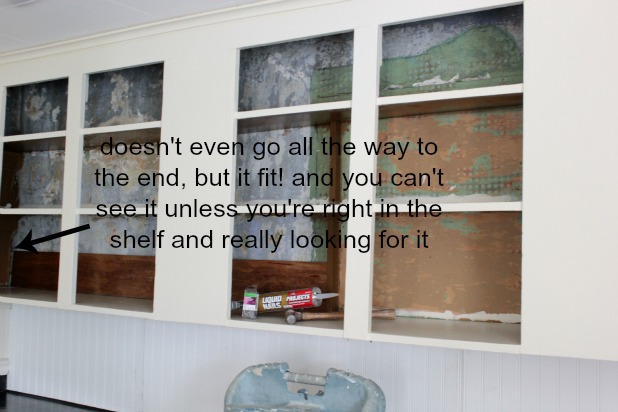 I just applied a liberal amount of the liquid nails to the back of each slat and then nailed each slat up with the brad nails just for extra support until the liquid nails dried. I had a lot of the wood in the front of the cabinets to work with to strategically place my nails so I didn’t have to bother going back to take them out.
If you wanted a clean, wood look you could always remove the nails and putty the holes to match your stain, the liquid nails really does provide all of the stability and hold after it has had a chance to dry.
And, totally off topic, but can we take a poll of people who actually like their profile shot? #notafanofmyownprofile
Admire
Seriously! For $32 you’ve just totally transformed the look of drab, dated cabinets.
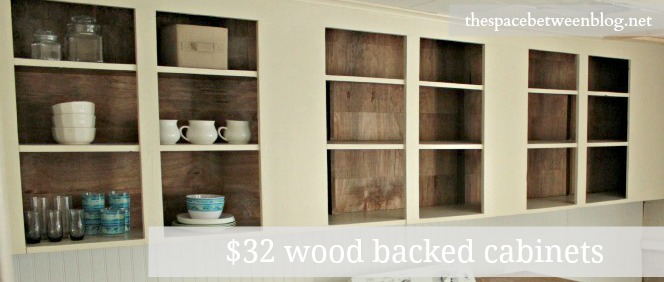 Sure, there are a few spots that aren’t exactly perfect. Thank you sagging shelves. (Another option would have been to add more shelf brackets to push up the sags … if you’re looking to add another step to your project and be a little bit more of a perfectionist.)
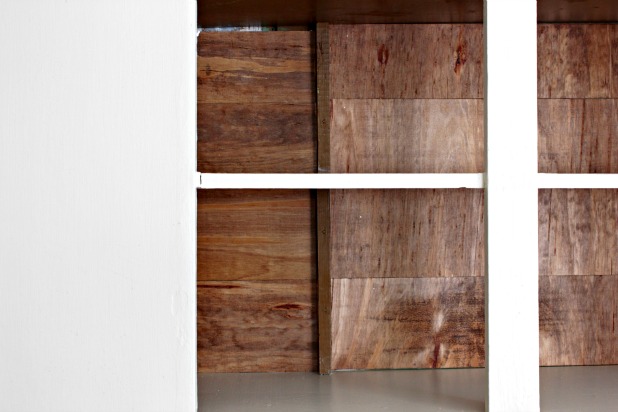 But when you take a second to remember where we started and keep in mind we’re done in less than an day and for less than $32 you’ll be tempted to high five those imperfections as you’re moving on to the next project.
 Ouch!
Ouch!
And just because we don’t want to end on that note, how about a little #househunt2013 update. Ummmm …. yeah …. we’re still looking. 
 How’s that for a $32 upgrade? Have you spent $32 on anything recently that’s made a huge difference in your house?
To follow along the kitchen transformation so far click here.


Linda @ it all started with paint says
An amazing before and after, Karah! Looks awesome!
Karah says
test
Dana @ Cooking at Cafe D says
Hi Karah,
I’m just going to out on a limb and guess this isn’t the first time you’ve gone against the grain
I spoke with hubby and he said his HD stare doesn’t charge for cuts – and said that folks often come in with lists like yours. He just called the cutting “good customer service.”
$32 – great! And, can I say that in the pic where you are showing the gap from the sagging shelf…the stained lauan looks really nice
~ Dana
Karah says
Woo Hoo!!! Thank you so much for coming back and commenting, sorry for all of the trouble!! And I think ‘going against the grain’ is my middle name.
Karah says
I see where your avatar didn’t come up … weird!?!
Dana @ Cooking at Cafe D says
Test
breida @ breidawithab.com says
Hi Karah –
Love the way these cabinets came out! See you in a few months!
-b.
Karah says
Thanks Breida! Haven reunion!
Jessica @ Stay at Home-ista says
Adore the backs of these cabinets! I feel like I’ve seen a million chalkboard paint cabinets, and these are brilliant!~
Ashley@AttemptsAtDomestication says
This looks so so so so much better Karah! I absolutely LOVE the wood on the back of the cabinets!
Kelly @ Corner of Main says
Awesome! When you posted about the cabinets I was wondering how the insides looked so great! Well done =)
Karah says
Thanks! I love how much that wood changed the whole look!
cassie says
just keep commenting, just keep commenting…. testing testing 123
Karah says
LOL, THANK YOU!!!
Brooke says
Ha! LOL on the profile. Not yours, but I hate mine too. I guess it’s something we really never see of ourselves, kind of like hearing your voice on a recording!
Karah says
Ahhhhhh, so glad you agree … and you’re right, we don’t ever see it so when I do it always startles me, EXACTLY like the voice. LOL
emmabriggs619 says
You really pick the right color for your cabinets…but the only problem with these colors that dirt is visible and you need to clean it right away when your cabinets got dirt.
Karah says
Sometimes cleaning is the worst!! One of the great parts of the rustoleum cabinet transformation kit is the protective top coat, it create an easy wipe off surface. Phew!
Sheila @sZinteriors says
Seriously, Karah – I am so impressed! You are truly an inspiration
Tamsyn says
Amazing make-over!! I love that contrast of the wood panels at the back of the cabinets.
Karah says
That’s my favorite part too, Tamsyn!!!
karen@somewhatquirky says
Good idea Karah. It looks great and is seems easier and quicker than other methods I can think of.
I’ll join you in the questionable opinion of my profile club. Sorry your house hunt is delayed. Hope things work out soon. Are you missing Curaco?
Karah says
I’m really not … I’m just not the kind of person to long for things I don’t have, try to make the most of where we are. Do I miss some of my girlfriends and having a house, heck yeah!
Angela says
Love this and pinning it. I have been looking for a tutorial like this to guide me in some sort of direction for a hutch project I’m working on. Thanks so much for sharing!
Have a great week!
Angela
Karah says
Yay, I’m so glad. And that 1/4 inch plywood is so easy to work with! Good luck with your hutch!!
Tia & Jeff says
Oooh! Cool. This looks really great & so affordable. A++
Karah says
Soooo affordable … my favorite part for sure!!
Ruth says
What a wonderful transformation. This was a great idea!!
Ruth
Karah says
Thank you so much, Ruth. So easy, too!!
Crunchy Diva says
That is such a cool transformation! I have upper cabinets that need help (painted the backs- um, let’s see – 12 years ago! argh!) – and this is a great option for me. Thanks for sharing, Karah!! I’m happy to find your blog – I’m going to troll around for a while now.
Karah says
Hi Crunchy Diva!! I love that name. I’d love to see it if you do something similar, it really is an easy, inexpensive update that makes such an impact!!
Courtney says
Wonderful transformation!! Sharing at the party tonight~ thanks for linking up at Feathered Nest Friday!!
Karah says
WOW! Thank you so much, Courtney! And thanks for all of your photo styling tips on the webinar … I really want to get better at styling this year. Your advice has really stuck with me.
Karah says
That is so exciting! Thank you so much!!