This post may contain affiliate links which won’t change your price but will share some commission.
Note: First of all, seriously, we WON! The whole BHG Outdoor Decor thing. You and I. We won. I am verklempt, for everyone who voted, I love you for ever and ever, amen. 🙂
Now, I have to admit it, sometimes it is the most selfish of reasons that inspires a project around here. But whatever it is that lights the fire you just have to run with it. I guess. 🙂
We’ve moved into the guest bedroom in preparation for the full renovation of the master bedroom, bathroom and closet in one fell swoop. If the term “one fell swoop” means to tear out everything existing in each of those three spaces to then, over the course of time, one little project at a time, build it back up that is. So this is happening.
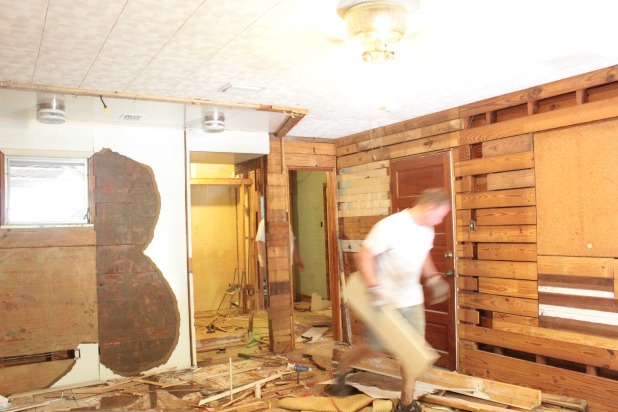
Much more to come on that hot mess very soon. But it only took me about .3 seconds to find myself completely dissatisfied with the curtain situation in the guest bedroom … which looked a bit like this for about six months.
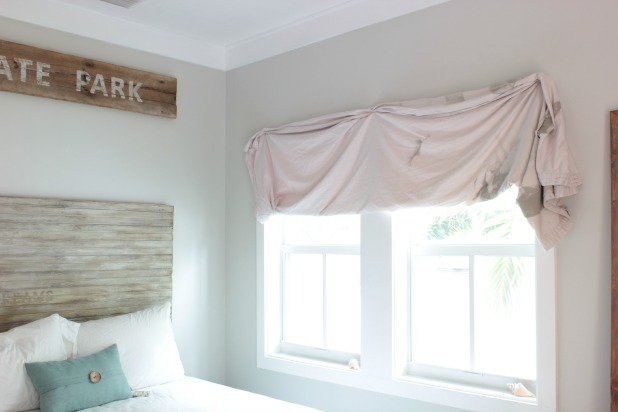
And this.
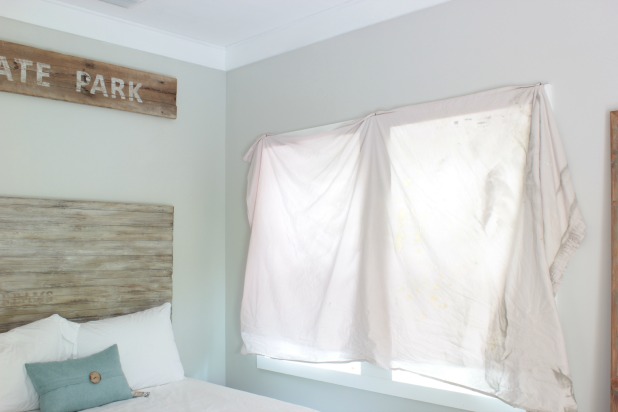
Sad, I know. My standing joke when we show everyone the house is to proclaim them “custom curtains”. I would venture to guess they are one of a kind, but if you have something similar send me a picture. It will make me feel better.
And one of the main differences in our guest bedroom and our master bedroom (other than the fact that one room has been renovated and one room needs to be renovated) is light.
As one of the people who takes up residence in this abode, normally in the master bedroom, I can admire all of the light in the guest bedroom from afar. I often think I forgot to shut the light off in there since the natural stream of light is so bright and beautiful.
What is not beautiful, however, is the neighbor’s light that he often leaves on all night. And the crack of dawn light that creeps in every single morning.

I kind of knew the light issue was there, but as the self-serving host I am, I never really cared too much, knowing that curtains would happen … eventually.
And then we started sleeping in there. And curtains become el project numero uno on the ol’ to-do list. Because no real progress is going to happen on the master if this girl can’t get a good night’s sleep.
So, I set about making curtains, and I was determined to have them end up beautiful, and not be long, drawn out process. Seriously, you can so do this.
I know there are a ton of different tutorials out there with proclamations of the what you’ll need to make professional looking lined curtains. And I can attest that you really don’t need any of the skills or knowledge even I thought were necessary.
Lie #1 – The ability to sew a straight line on command. My curtains are proof that is not 100% required.
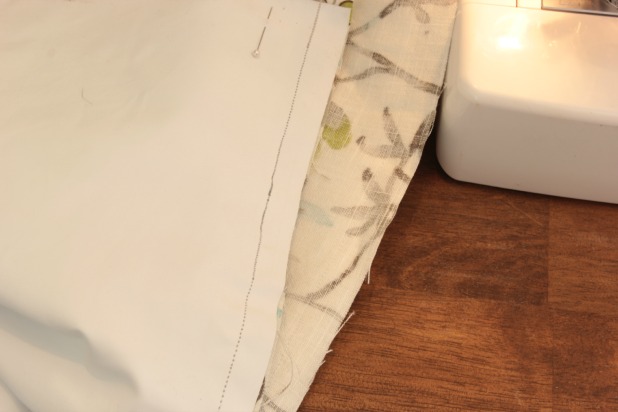
Lie #2 – You have to know exactly how tall you want your curtain panels to end up before you start. Nope. Not true.
Lie #3 – You have to know exactly what size needle to use and what tension and stitch size to set your sewing machine on. I have no doubt this would be helpful, but I have no idea, so I snapped this pic for anyone interested. Maybe these settings mean something to you?
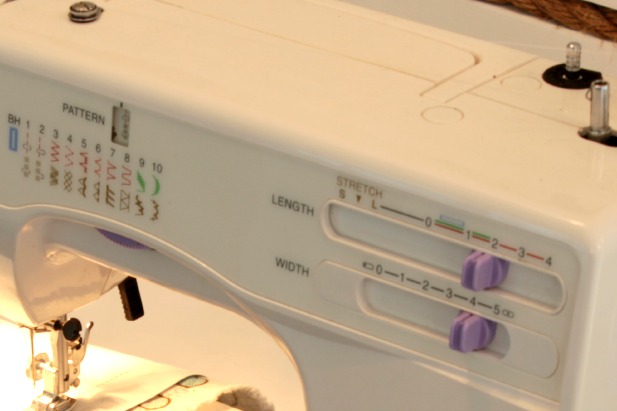
Lie #4 – You can’t just wing it as you go. Whatev! I did, so you totally can, too.
So let’s get started winging it. 🙂
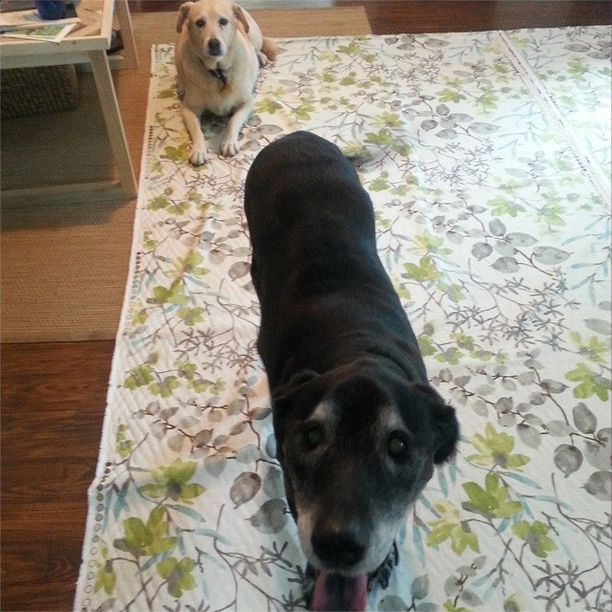
Step One – Clean your floor. Maybe you’re someone that does this on a regular basis without a prompt. Or maybe you’re me. 🙂 You’re going to need a lot of room to lay out your fabric so pick an area with a large, flat surface that you can maneuver around to reach your fabric from all angles. Dog supervision is entirely optional.
Step Two – Measure about how tall you want your finished curtains to be. Remember, if you want to fake larger windows plan to make your curtains so you can hang your curtain rod high on the wall and not right at your window trim.
Tip!!! Use the entire height of your wall as a guide. If you use this measurement you will always have enough fabric, and have leeway for a curtain that puddles more at the floor if you want.
See, no need to know the exact measurement at this point.
I measured from the bottom of our crown molding to the floor and used that 104″ measurement as a guide. If you don’t have crown molding just measure from the ceiling to the floor.
Step Three – Depending on how much of a hem line you want, add some inches to the final curtain height. I knew I didn’t need a hem at the top so I just picked a number out of thin air and decided I wanted at least a 5″ hem at the bottom, nice and chunky. So add a bit more than that to the total height of the finished curtain, I added 8″. This will give you some wiggle room, unless you are perfect, then go with a more exact measurement. 🙂 Lay out your fabric and cut to size. I just doubled over the fabric right off the bolt and made my cuts. This beautiful fabric is the Braemore Gazebo Cloud from Online Fabric Store.
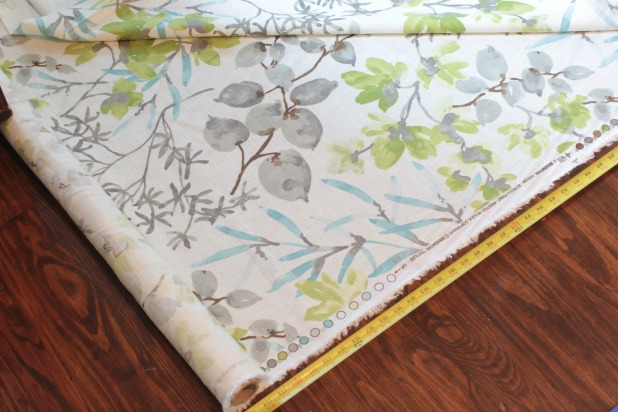
Good quality fabric sheers are key, I have these. And that first cut was the hardest for me. What if it’s not right? Too short? I render this beautiful fabric useless?
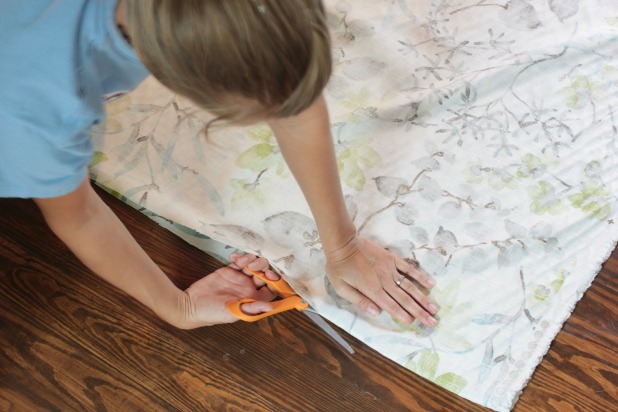
That’s how I decided to go with the measuring tip above. It took all of the questions out of it, no matter what, my fabric would be more than big enough for my room.
And I found comfort in making both panels at the same time, you know, just for the visual reassurance that they were basically the same size.
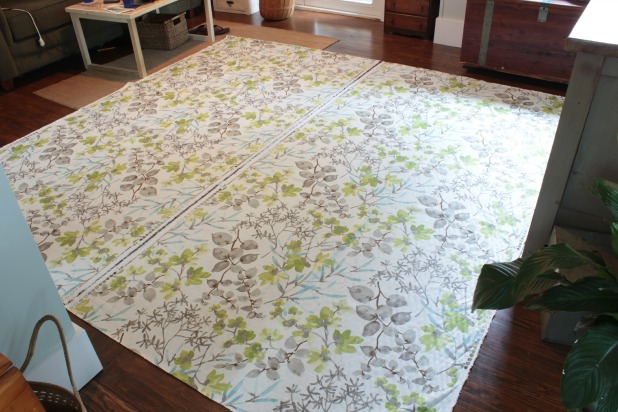
Tip!!! If you’re working with a patterned fabric make sure you have the pattern running in the same direction on both panels here before you start pinning anything!
Step Four – If you’re making lined curtains lay out your lining fabric, the side that will face toward your window facing down, right on top of my designer fabric and cut to size. I used this blackout lining fabric from Online Fabric Store.
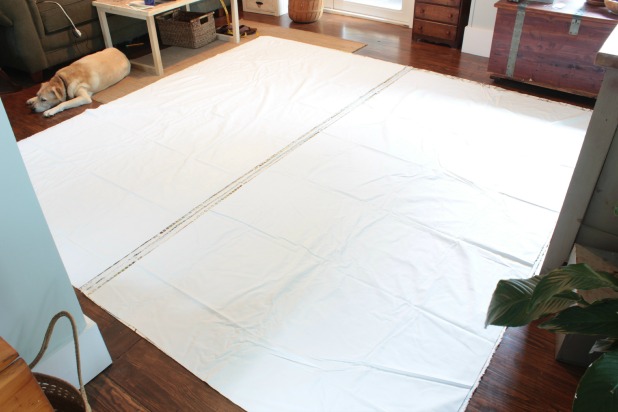
Truth be told, no measuring devices were used during this step. Basically your lining fabric doesn’t need to be quite as long as your designer fabric, so I just cut it an inch or so shorter than the curtain fabric. Easy peasy.
For fabric buying purposes I will tell you that 6 yards of both the curtain fabric and the liner would be perfect for this size panel.
Step Five – Pin around the top and both sides of the fabric. I lined the top of the lining fabric and curtain fabric together and pinned 1″ in from the edge and to make sure that the color index along each side of the fabric didn’t end up showing I pinned 1 1/2″ in from the edge of the designer fabric.
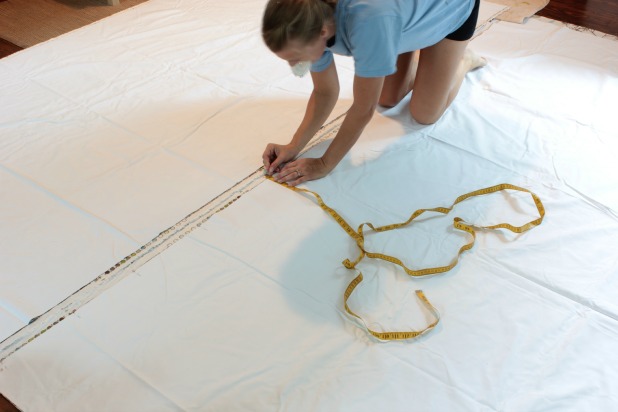
Step Six – Sew! I first sewed along the top and then along each side.
Here are a few sewing tips for near novice DIYers like myself:
- slow and steady works better than fast and out of control, trust me
- always start and end a line of sewing with a little forward, backward, forward action to prevent the thread from easily unraveling
- find a spot on your sewing machine to line up the fabric, or mark one right on there to help keep your lines straight, I used the edge of the metal plate on my machine as a guide
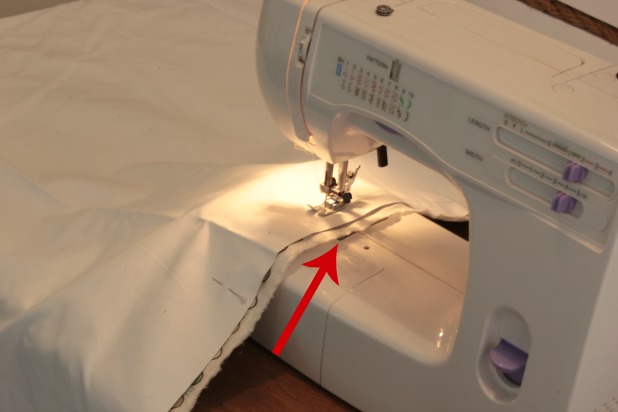
- whenever you need to stop in the middle of sewing a line make sure the needing is depressed into the fabric, this will prevent it from slipping out from under the foot
- have something close to toss the pins in as you take them out of the fabric, my great grandmother’s antique tea cup worked perfect
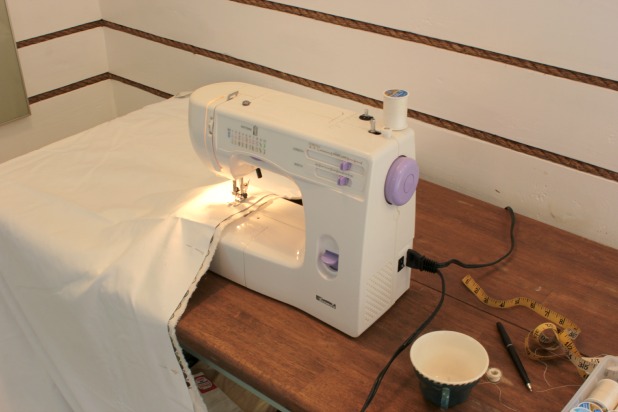
- definitely take the pins out before they go under the sewing machine needle, I have learned this the hard time … multiple times before it actually stuck #becauseIamverybright
- every once in a while make sure you’re actually sewing, sometimes the bobbin thread or even the thread in the needle just doesn’t cooperate and the needle holes make you feel like you’re sewing but you’re not #totalsewingbummer
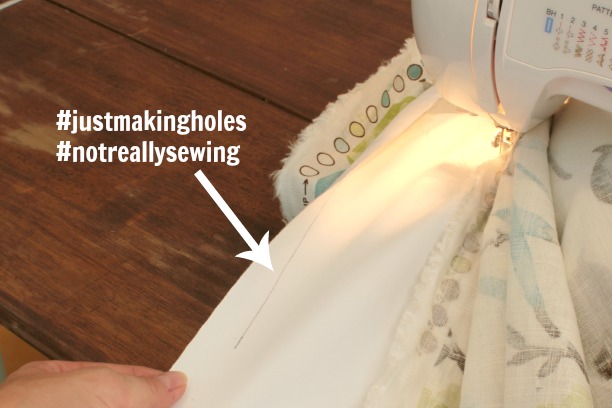
Step Seven – Turn your fabric right side out.
Tip!!! Cut the inside corners of fabric off before turning them inside out to make it easier to create a nice, sharp corner point. A pencil or other pointy object helps maneuver the fabric into place as well.
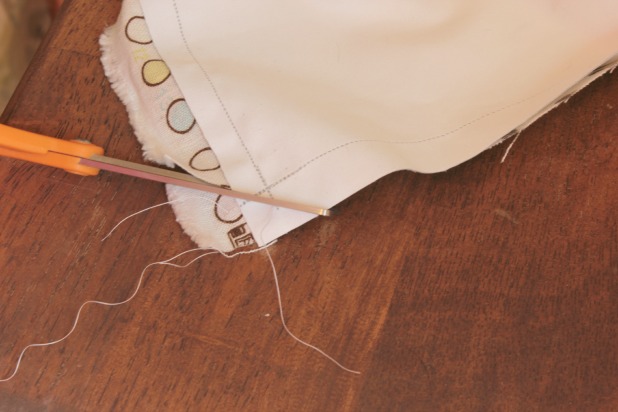
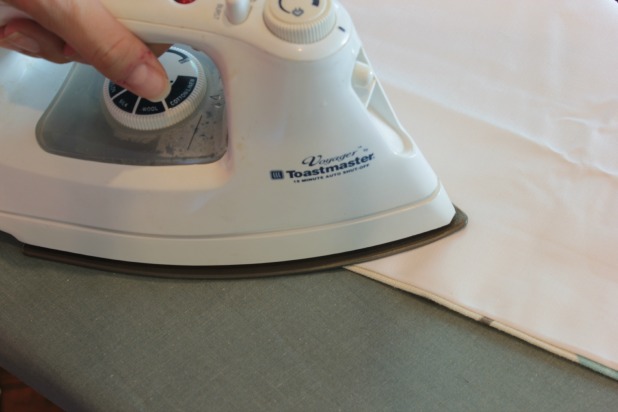
Step Eight – Iron. No exclamation point here, because I don’t find ironing one bit exclamation point worthy.
Tip!!! Iron from the lining side of the panel, this makes it easier to have the fabric side overlap the lining just a bit on each edge.
Step Nine – Hang! Yep, we only have 3 sides sewn, but this is my way of avoiding having to take exact measurements. With my rod hung and using clips for easy hanging, and a more casual feel (you could add back tabs or leave an opening to run the rod through your panels if you prefer that look) it’s easy to hang the curtains and see exactly where I want to hem the panels at the bottom. Just pin along the bottom of the curtain at the final length.
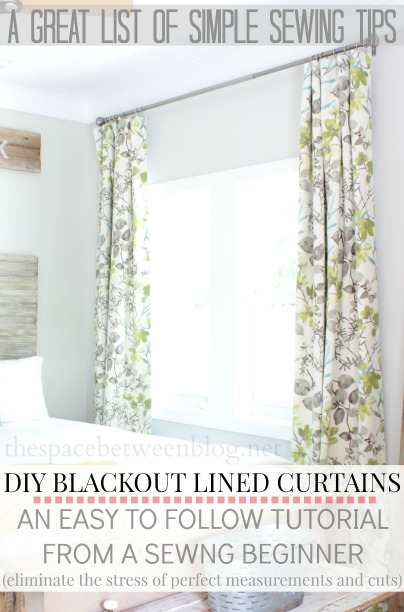
You don’t need to hang both panels here, but I’ll admit, I was tempted to call this project done-for-now since the bottom is hidden by the bed. And I couldn’t help but stop to admire the sheer beauty of the fabric. Again, it is the Braemore Gazebo Cloud from Online Fabric Store.
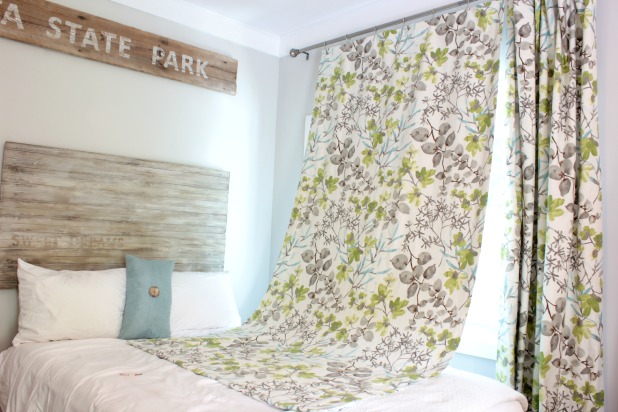
Step Ten – Hem the bottom to the final panel length. I just unclipped each panel and measured from the top of the panel to where I had pinned the bottom. Measure that same distance along the width of both panels and pin along the bottom.
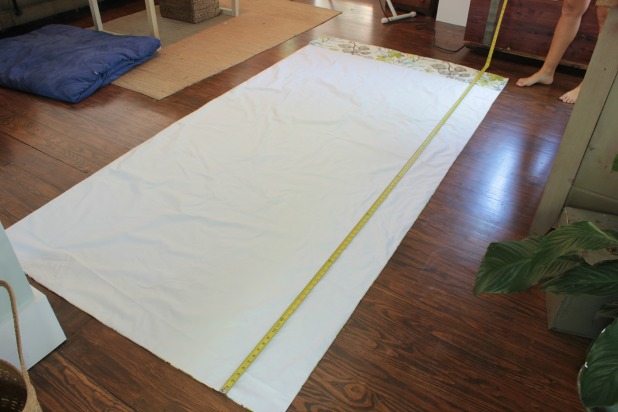
To create the bottom hem just measure your desired hem size, remember mine was 5″ (about) and iron the fabric over again with that much of a “cuff” of fabric showing.
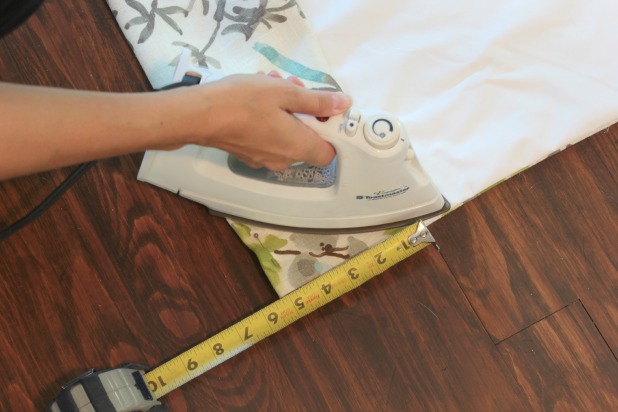
Then, just to hide any evidence of an unfinished edge, I folded the fabric over an additional inch or so and ironed again.
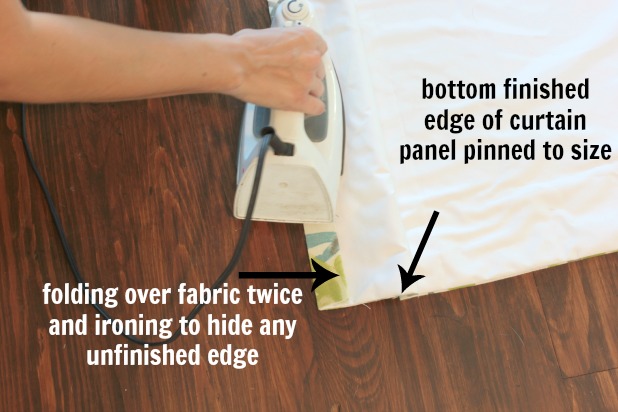
I first sewed that smaller hem to hide the unfinished edge, making sure it didn’t peek out either end. You can definitely call the curtains done here if you want more of the curtain fabric puddling on the floor.
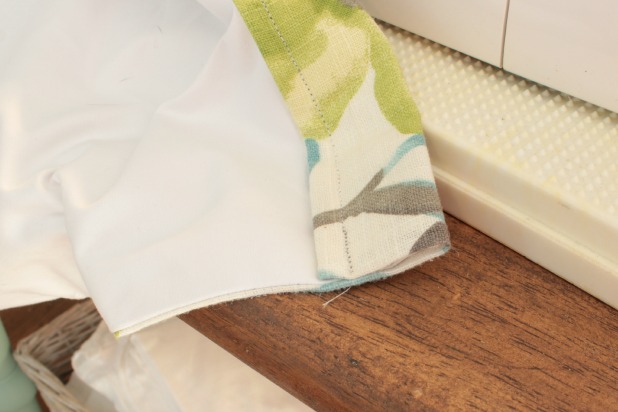
And then just one more line of sewing to bring the final panel size to your desired length.
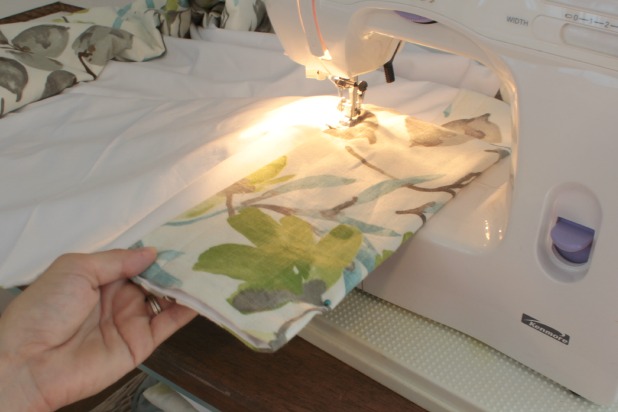
And for someone who went into this thinking “I’m not really sure what I’m doing” I could not be more thrilled with the result.
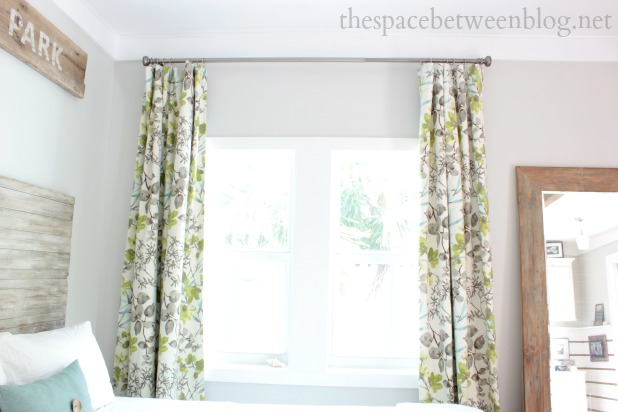
When Joel got home I proclaimed “you have to check out the curtains, and you have to touch them, they feel like real real curtains”. And they do. They are weighty and bring such a focal point to the room.
I am definitely in love.

Here’s a shot of what they look like on the floor behind the bed. aka, proof I did actually finish sewing the bottom. 🙂
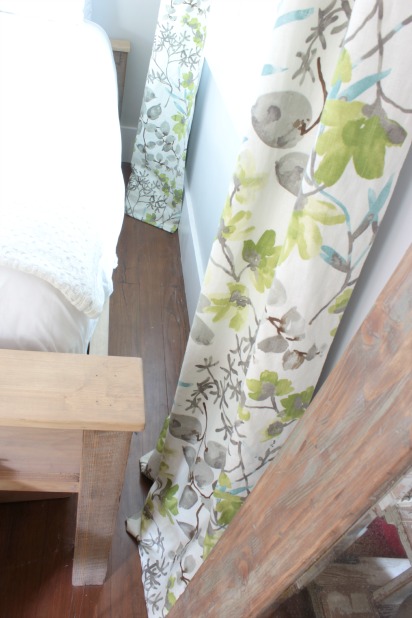
Needless to say the whole sleeping experience in the guest bedroom has just gotten a bit more luxurious!!
What about you … make any curtains this weekend? Do any demolition? Have you ever spent a night in your own guest bedroom? It’s … weird. 🙂
Update: A real life professional has added some invaluable tips in the comments. Definitely take a minute to check them out if you’re getting ready to make your own lined curtains.
Need a vacation? Don’t forget to enter the chance to win a 4 night stay in Anna Maria Island here.
And a larger than large thank you to Online Fabric Store for supplying me with this beautiful fabric and blackout lining, and even more for your incredible patience. I have had this fabric since October and then instead of proceeding with the curtain making process I decided to write a book. Your grace in this situation warmed my heart.


Megan @ Our Pinteresting Family says
The curtains are beautiful!! I love this room, Karah. You are so talented!
Karah says
Thank you so much, Megan!!
Sue says
Ah, yes, the neighbor’s porch light. I remember that. Ha! The curtains look great! And I can explain all that sewing machine stuff (patterns, zig-zags, etc. Most are just for decoration and you’ll never use them. Kinda like all those buttons on your tv remote.). And CONGRATS on winning the BHG contest! Whoop, whoop!
Karah says
I want to make something with those stitches sometime!
Jaye Leon says
Fabric glue, my friend! I made curtains for my front family and dining room and didn’t sew a stitch!
House is looking beautiful! Makes me want to go on vacation every time I see it!
Karah says
hahaha Jaye! I haven’t had luck with fabric glue sticking through washes, and I actually like sewing, it’s something I always say I want to do more of … but don’t ever do. :/ And thanks for the comments on the house, the feeling of vacation is always a good one. 🙂
Lynn says
G O R G E O U S !!! (quite like YOU!) LOVE, the fabric, LOVE the finished product. You’ve inspired me to rethink some current curtains (mu-wah-ha-ha). CONGRATS on the big win!
Karah says
Love the maniacal laughter, Lynn! Your current curtains better watch out!
PolishGalore says
The only thing I can sew is curtains – haha! They look great!
Karah says
I am determined to venture beyond curtains and pillows one of these days!!
chris aka monkey says
wow whoop whoop on the big win and the curtains…love the pattern and colors, i felt like i was right beside you as you made them… another job well done xx
Karah says
Thank you so much!!
Erin says
Congratulations on the win Karah!!!!! Love the curtains! I don’t, can’t and now refuse to sew. i cannot cut or draw a straight line, even with a t-square. lol!!!
Karah says
LOL Erin, I guess you know when to call it quits. haha
thekimsixfix says
Those came out beautifully. I love the fabric you chose, and the post is hysterical. It is true, there is a lot of wiggle room in curtain making.. “close enough” looks pretty darn good!
thekimsixfix says
Oh! And CONGRATS on BHG! That is so fantastic!
Karah says
Thank you so much!!
Karah says
Close enough is my goal for many projects. 🙂
Ashley@AttemptsAtDomestication says
The curtains look great Karah! I despise sewing curtains, but it’s always a great feeling when they are finally done and hanging up looking good!
karen@somewhatquirky says
That fabric is gorgeous! You did a pretty dang good job – and I know what I am talking about! The only thing I would say is that when you have pets it is a good idea to have your curtains just skim the floor – no puddling. I did not make any curtains this weekend, but I’ve made my share… I have slept in my guest room and it is weird. Actually it makes me think we should use it for the master bed.
Karah says
Thanks, Karen! It is weird, isn’t it?!?! The first two nights Mico kept getting up and going to lay on the floor in the master … like she was thinking “if I’m here they’re going to realize they are in the wrong room”. lol
txvoodoo says
CONGRATS! Our clicking paid off 😀
“Cut the inside corners of fabric off before turning them inside out to make it easier to create a nice, sharp corner point. A pencil or other pointy object helps maneuver the fabric into place as well.”
Not a pencil! Lest you imitate me, and the pencil draws lines all over your curtain, and bad words start coming out of your mouth. 😀
Butter knife worked better for me, until I got a little plastic bodkin at an estate sale for 5 cents. (I love estate sales).
Karah says
What does it say about me that I have no idea what a “plastic bodkin” is? But it sounds like it would be perfect, especially for 5 cents!
Mommer says
If your drapes start to look bunchy or wrinkled- maybe as summer and HUMIDITY progresses – it’s because you hemmed the bottoms to the lining. Lining is meant to hang separately from the drapery fabric – much like a slip underneath a dress. That all-cotton Braemore fabric (I’ve used this exact fabric!) may respond differently than the heavy (rubbery) lining . Next time – hem the curtain panel and the lining panels separately before doing the side seams. If you do not have “puddling” and want them to hang perfectly – try sewing large washers from the hardware store – into the hem corners – as weights!
You did a great job – I hate sewing with that rubbery blackout lining, but it sure does the trick! : )
(BTW – I’m a pro. decor seamstress)
Karah says
Thank you so much for taking the time to comment! I wasn’t sure about the liner, and I’m not much for research. 😉 But now I’m happy to know and will definitely remember for next time!
Mommer says
OK – I have some more inside tips for NEXT time. Please feel free to delete my posts if I’m being too much of a “know-it-all” ! : )
Your observation that 6 yards of fabric is a good rule of thumb for a pair of drapes (unless you have super high windows / ceilings) – EXCEPT – you have to keep in mind the REPEAT of a fabric. For small patterns and solids, no big deal. But when you buy your fabric – especially online, it will tell you the VERTICAL repeat of the pattern – so let’s say there is a big honking flower smack dab in the middle, you want to be sure you have enough fabric so that big flower is in the SAME PLACE on each side of the drapes. This is really important if you are doing more than one window’s worth of drapes in a room – it can made you get nauseated with vertigo. It messes with your brain – seriously. It’s funky, and wrong. Even for people who are not OCD, which I most certainly am! And I know, calculating the extra yardage involves math that makes my brain hurt, and also my wallet – better to have enough that you buy at one time! (there is such a thing as “dye lots” – which also hurts my brains!!!)
Your observation to make sure both panels are running the right way – up / down is also important, but again, let’s say your fabric is a plaid, large pattern or something that has a horizontal element – you need to make sure they are all lined up – for the above reason. Even if you have a solid fabric, you should run it the same way – use a safety pin, or a small mark to make sure. Many fabrics have a “nap” that may not be obvious, until you are all done and the light hits your drapes that you have worked so hard to create! The nap is the way the fabric is woven, and most flat cottons – like the Gazebo fabric – also have a finishing “glaze”, even though you can’t see it. I learned this at an early age when I made a pair of corduroy pants as a teenager, and one leg went up, one went down … the result being a “harlequin” effect! LOL! I rocked it anyways, telling myself that was what I was aiming for.
Lastly – in the comments section, you mentioned that “fabric glue doesn’t stick through WASHINGS” …. please tell me you would NEVER, ever try to wash these – like in a washer and dryer? You will thrash on the floor with despair! The cotton Gazebo fabric WILL shrink, and will never be the same. All home decor fabric is “dry clean recommended” – most certainly it is printed up and down the edge of your fabric. Natural fibers WILL shrink, even in cold water, colors may run or change, and that “finish” glaze will be gone. You must take them to the cleaners. I would only ever wash a solid color of sheers or unlined drapes that I have A – prewashed, and B – made sure I had enough hem to adjust if they shrank a lot.
Just some things to keep in mind for next time! : )
I love your “optional dog assistance” : )
Karah says
No problem, I always take any tips I can get. I love the added information and am laughing out loud at your corduroy story, I can totally picture it. But “rock it like you meant it” should be my motto. 🙂
april says
I love the finished outcome of both the curtains and the room!
As a sewer and a fabric/curtain/decor sales person I agree with most of Mommer’s recommendations (especially the pattern repeat). With the slight exception of the washing of natural fibers. You can wash the fabric first in cold water and on gentle. If you add a little vinegar to the wash it will help set the colours. It’s best to hang dry and then pass an iron before proceeding with the project. Always do the wash before any other step. Yes, the manufacturers do put on the selvage that dry cleaning is recommended…that covers their butt if the fabric does shrink. The dry cleaner will very possibly shrink the curtain/fabric as well. I can’t tell you how often I have had that complaint from customers. I personally, when doing curtains or clothing or bedding, prewash and have rarely had shrinkage afterwards. Certain fabrics shrink more than others ie. twill and denim have minimal shrinkage maybe 2-4%, regular cotton fabrics 3-7%, linens and rayon 5-10%. I usually buy a little extra with this in mind and whatever I don’t use I save for quilts, purses, bibs, etc. Most liners even blackout can be washed on gentle and hung to dry. Totally agree with her final two points when washing.
Another tip, to add to Mommer’s, is to always line red or black fabrics, natural fabrics (cotton, linen and especially silk). Red and black dyes will be the first of spectrum to fade especially in windows that get direct sunlight. Silk should be lined with dimout lining at the very least but blackout lining is the best. The sun wreaks so much damage to silk that if it is unlined it will look like a cat used it for a scratching post within a year or two (customers have brought in curtains that weren’t lined in complete dismay). Lining curtains is optional but I recommend it. It protects your face fabric from fading and sun damage. It also gives structure to lighter weight fabrics which makes the curtain fall much nicer. There are few different weights/names of liners (for curtains)…cotton, poly/cotton, dimout, and blackout. These are listed from the lightest/thinnest to the heaviest/thickest or least protection to best protection.
I use the fattest knitting needle for turning corners…it reaches further and not likely to pierce the fabric unless you’re a little too aggressive. ;o)
I too have the assistance of the four legged kinds…gotta love them!
Karah says
Thank you so much for all of the great information, April! I love the tip about using the fattest needle to turn corners, those corners were a struggle to get right. So many great points that I’ll definitely refer to for my next sewing project … whenever that may be. We’ve just moved to Aruba and our things will be shipped here at some point, my sewing machine will definitely make the journey!
Sarah says
I definitely second the knitting needle idea to get your corners turned out and sharp. I usually use about a size 8 or 10, but you can use larger so you don’t poke through the fabric. Beautiful curtains and thanks for the tutorial!
mia says
Hi Karah! What color paint is your guestroom? I searched your blog and the only thing i could find is Silvermist? Is that right? (Still drooling over Ryan Gossling, btw.) I’m about to buy 28 yards of Gazebo Cloud, but i first need to find the perfect paint color — and you have it!
Karah says
Hi Mia! I am so sorry the color was hard to find. It is Sherwin Williams Gray Owl mixed 50% ligther. Have fun with your project, I do love the color with the curtains!!
Cari says
I am no expert, but I keep a smooth bamboo chopstick in my sewing kit for turning corners.
Thanks for this post. I will be sewing curtains for the first time very soon. For my new babiy’s room! ♡
Karah says
I love the bamboo chopstick idea!!! I’ll have to adopt that one!
RukminiM says
Love the curtains and the website you provided had beautiful prints. I have windows that are 99×89. I was wondering how much fabric to order, could you please advice
Karah says
Sounds like you have a big project ahead of you RukminiM. I would suggest consulting a professional, I think they even have a chart at onlinefabricstore.com that can tell you. Have fun!
terrie steffensen says
love your post and your CAN DO attitude. Will be trying this project on granddaughters room. she will be here in about 30 days. never sewed curtains and wanted to line them. your tutorial very helpful. FYI 4 legged friends can be utilized to hold down the fabric at the corners. a tip I use when sewing wide seams is if there is nothing on the machine to guide you just measure from the needle, to the width you want and place a piece of blue painters tape on the machine to us as your guide
Karah says
Hi terrie! Have fun with your curtains, love your tip about the painters tape, thank you so much for sharing it!
Angie Winkler says
My very first sewing machine is being delivered tomorrow (amazon.com) and having no experience, I’m a bit nervous about what projects are looming in the future, waiting eagerly to mock my daftness! Your tutorial is so helpful, and your wit is undeniable! I literally LOL’d reading it.
Karah says
Thank you so much, Angie! And best of luck with all of your sewing projects. They may not be perfect, but sewing can be pretty fun. Enjoy!
txvoodoo says
I’m subscribed to comments here and I’m so glad, because I get to see another person learning to sew! I’m happy with the DIY revolution these days, but even more so that folks are coming back to sewing. You will be SO happy! Lots of video tutorials out there, and two great resources for beginners:
– check into your local Joann’s (or other fabric store). Most of them have regular classes to get you over beginner’s jitters!
– Look at Craftsy.com – they have many sewing tutorials, from how to use a machine on up. They’re not free, but they have some great ones to get you over the hum with a project.
And enjoy the new adventure! I made all the linens for my bedroom, including curtains and lampshades, for a fraction of the price! That’s a great feeling, and also knowing that no one else has the same thing I do. 🙂