This post may contain affiliate links which won’t change your price but will share some commission.
Hey hey! Happy Monday! It’s that Monday again … the one where we share those super simple, easy peasy, ‘it’s a cinch’ type projects.
You’ve seen my leaf wreath in a couple of vignettes recently on the blog.
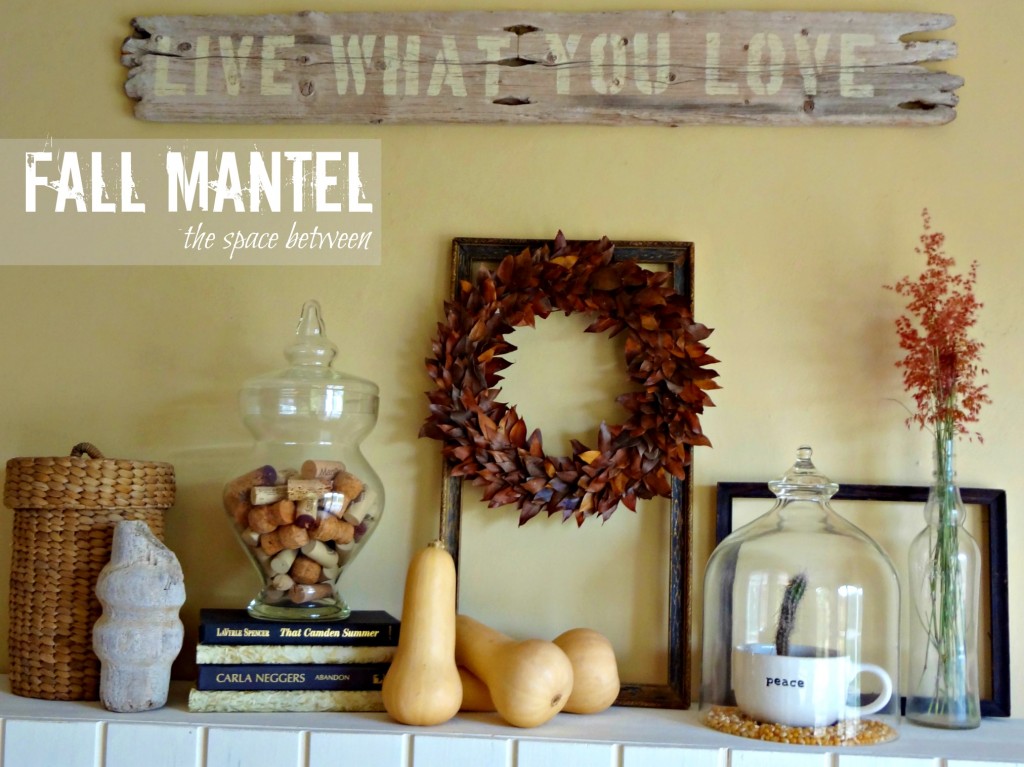
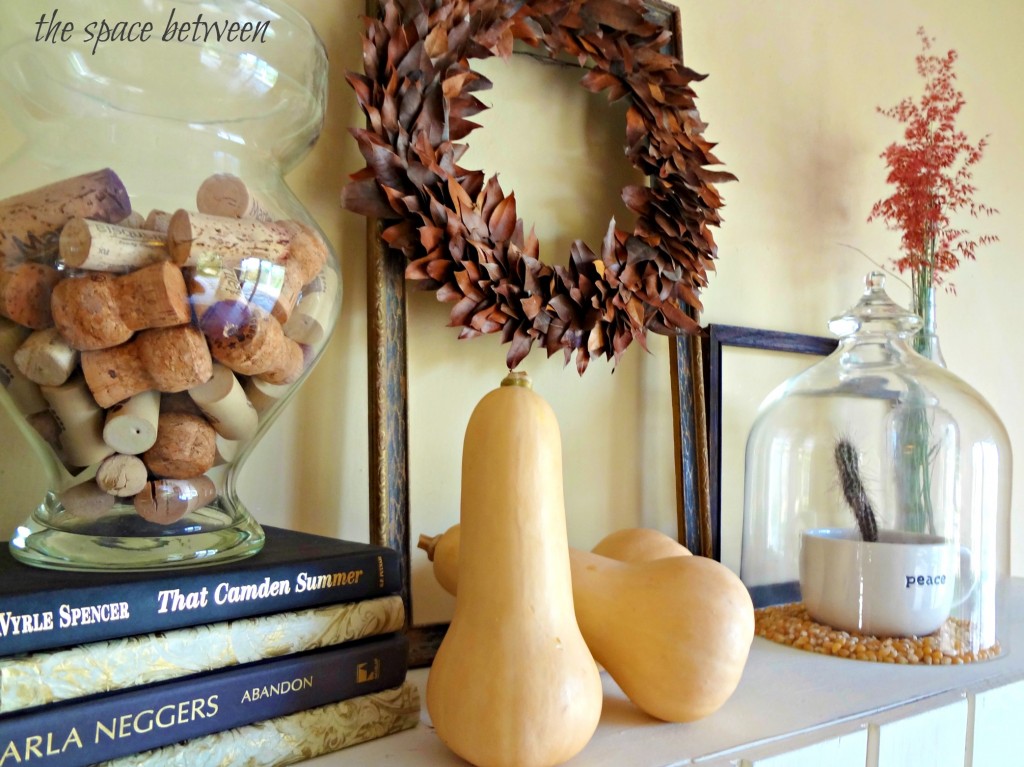
First we did our fall mantel, because we like to be way ahead of the curve. 🙂
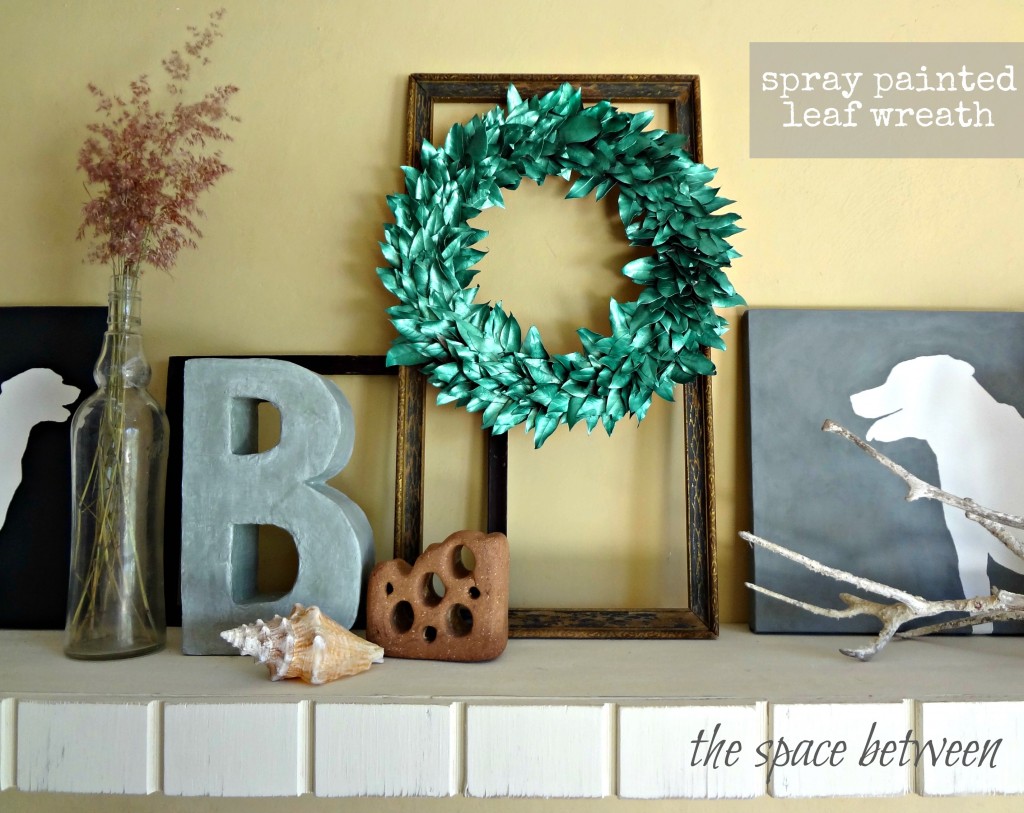
And then we spiced it up a bit with a little green metallic spray paint.
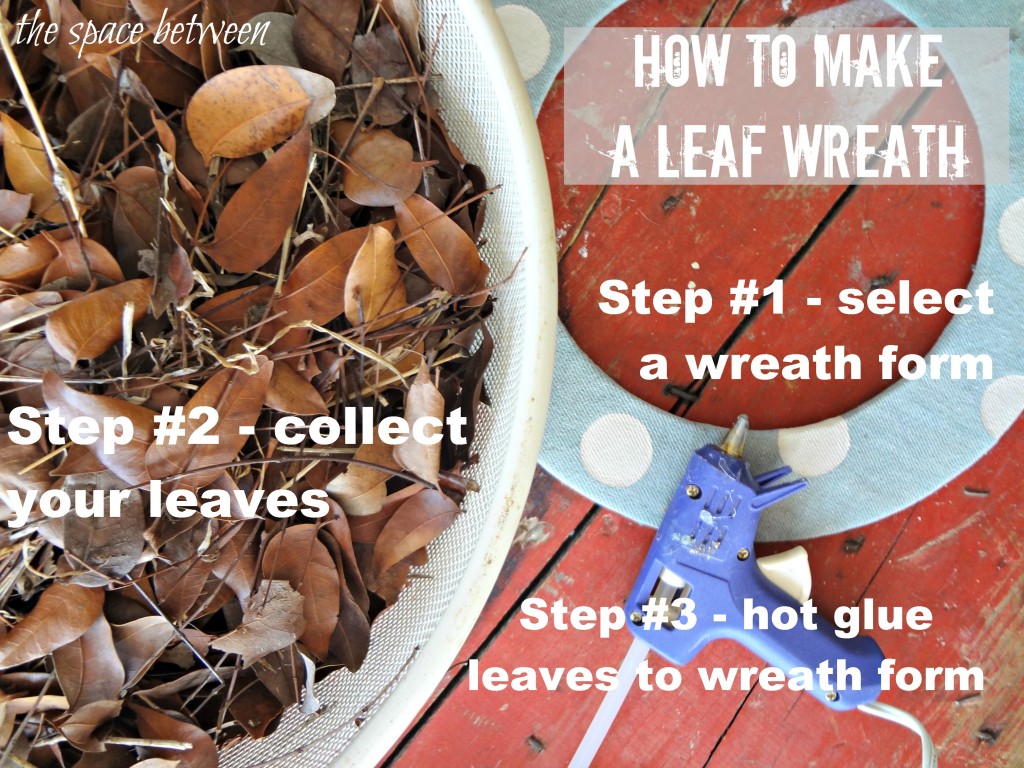
Just to be sure you all realize you can totally make one of these beauties for yourself, here is the step-by-step of how to make a leaf wreath. 🙂
Total time, about 15 minutes! Seriously, this was one of those projects that I was looking forward to an afternoon of a Project Runway marathon (in my dreams I am a fabulous seamstress) and a little crafting. And, 10 minutes later, when I was almost done I was a little bummed, I have to admit. #NeedAnotherExcuseToNotDoTheDishes
Step #1 – Pick your wreath form – mine was an after Christmas decoration I bought on sale for about $1. I had used it in another wreath attempt … hence the polka dot fabric.
Step #2 – Collect your leaves – We have them in abundance and the idea for this wreath came to me on a walk around the hood with the girls … in, like, March. I feel like I deserve an Olympic medal for waiting until July to make the fall wreath. 😉 NOTE: I only used about one-fiftieth of the amount of leaves I collected. It had me thinking I could totally pull a ‘Hildi straw wall’ and cover one of our wall in leaves! Ummmm, no.
Step #3 – Hot glue your leaves to your wreath form – I didn’t worry about front or back of the leaf. I just used full leaves and went to town, making sure to overlap enough so the wreath form wasn’t visible anywhere.
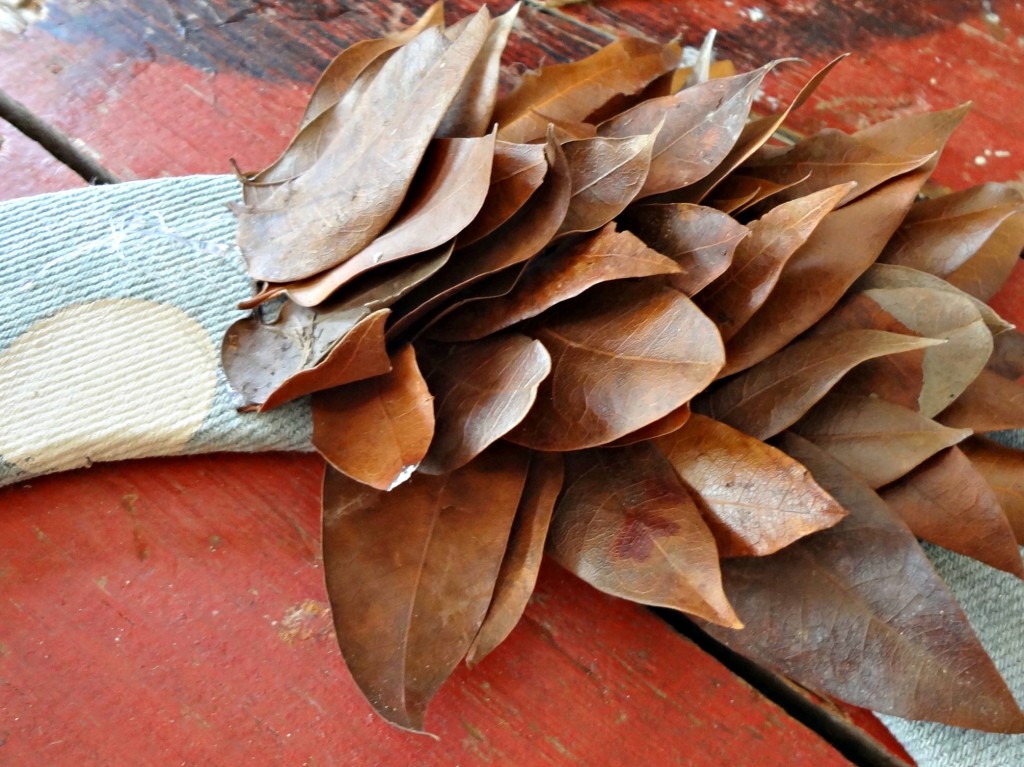
TIP!!! Keep a trash can near by to toss the damaged leaves and those you don’t want to use to get them out of your way.
And that’s it! Easy peasy, right!?!? And so versatile with the spray paint … one red, one white and one blue for Labor Day maybe? Or spray painted gold or silver for the holidays? What would you do with your leaf wreath?
And, if you’d like to see my previous ‘it’s a cinch’ projects you can go here, here, here and here.
And, to see what our walk around the ‘hood is like you can check it out here.
AND, don’t forget to check in on my ‘It’s a Cinch’ gal pals … here’s a sneak peek at what they’ve been up to … just click on the picture to get a closer look at their projects. 🙂




Kelly @ Eclectically Vintage says
I’d wear that leaf wreath around my head so I could be the female Julius Ceasar and would rock that thing like nobody’s business. Of course, I’d probably spray paint it hot pink, or maybe metallic gold!
Can’t wait for fall so I can scour the yard for leaves so I can make my very own fabulous wreath leaf!
Kelly
Maury @ Life on Mars says
Love this wreath! So great for fall and lord knows I have plenty of leaves sitting in my yard in the fall!
Anne says
Cute wreath! Love the easy peasy projects!!!
Linda @ it all started with paint says
You can still go all Project Runway and glue those extra leaves onto a skirt or a top …
Love the easy peasy leaf wreath and our it’s a cinch first Mondays!
🙂
Linda
thistle says
I love your wreath brown, gold or rainbow colored! Great project!
Have a great day!
karianne
andrea cammarata says
Oh my island girl — how fabulous and back to nature is this project! I LOVE IT!!!! Actually it is really genius!!! Thanks for sharing your creative passions with us all!!! Always great to be celebrating It’s a Cinch with you! Sending tons of hugs to all especially the furry M&M team!!!
Ashley@AttemptsAtDomestication says
So cute! I really want to put one of these together for the fall!
Jaye @ Just Trying to Make Cents of it All says
I didn’t realize you made the wreath, too! I just thought you spray painted it. It looks great and easy enough. Now just need to find me some leaves!!!! They’ll be falling soon enough here in the mountains so I’ll grab some them! Thanks for sharing. The possibilities are endless!!!
shirley@housepitalitydesigns says
Love the wreath brown, love the wreath green…now this may be one of the few projects you have presented that I can actually do…no power tools required..!!…Beautiful Karah! Now is that Mico looking and smiling at it with such approval?
Jessica @ Stay at Home-ista says
Yes! Pull a Hildi! I knew you were my type of girl, but that reference seals the deal:)
cassie says
it looks awesome and i love the 3 easy to understand steps! even i can do it. heck…. so could my dog, jake.
Donna @ My Sweet Things says
Gosh, I have tons of Magnolia leaves on the ground. What a super use for them! Thanks for sharing!
Sheila @sZinteriors says
My first thought was to keep the leaves in their natural leaf colour, spray them with a quick clear coat, and then a light dusting of snow spray for the holidays. I think that’s what I would do, but then I like the idea of giving them a weathered gray coat instead. In the end, not sure, but I’d like to give this project a try! So glad you shared the DIY steps – thank you 🙂
emily says
your wreath is amazing! I would love one of these for fall! hard to even think that fall is coming so quick! What lovely inspiration! Just wanted to invite you to join my Tasteful Tuesday Party. I have been hosting a recipe party (pretty successfully!!!) for over a year now, and this week we are opening up for crafts, DIY and home decor. Hope you can come by and check it out! http://www.nap-timecreations.com/2012/08/fresh-pesto-pasta-salad-and-tasteful.html
Suzanne says
Your wreath is just perfect for Fall. Simple and lovely – can’t ask for much more! Thanks for sharing.
angie@diyitnow says
LOVE, the wreath! I really like that you can paint it any colour you want. Great job!
Thanks for sharing.
Kristy Rohm says
Loving the wreath instructs…my kind of project …easy peasy!!! I have a nature preserve in behind my property so leaves are easy to come by. I think I may try it with oak leaves too!
Love to the babies!
Kristy Rohm says
Loving the wreath instructions…my kind of project …easy peasy!!! I have a nature preserve in behind my property so leaves are easy to come by. I think I may try it with oak leaves too!
Love to the babies!
Heidi @ Decor & More says
I love this for fall, Karah! But you’re right — it’s really very versatile! 🙂 Love. xo Heidi
anne says
Karah,
LOVE this idea!!! Looks so pretty.But I am not ready for fall LOL! I h ate the heat.But I am still enjoying the colors of summer.This will be a fun project to try.This could stay up until Thanksgiving too!
xx
Anne
Megan says
Just beautiful! I love your entire mantle. Megan
Kelly @ View Along the Way says
The metallic spray paint is beautiful! Pinned. 🙂
Karen says
I love it!! I have to wait a while for leaves to be falling around here, unless you count the kind that are brown and dried up from extreme heat and no rain……
Karen says
I love this. I have leaves just like from a tree in my front yard! This is on my list for fall! Thanks! I am visiting form Not Just a Housewife’s Show Me what Ya got party!
Heather Kaluf says
I am in love with your wreath! It is so Gorgeous! 🙂
I am going to have to find some leaves and make one.
xoxo
Heather
karen@somewhatquirky says
so i’m really behind on my commenting if you couldn’t tell. i love this wreath. both ways. you should make a new one for fall. of just make a new one and ship it to me. you have my address. i’m shipping your headboard tomorrow….
emily says
so beautiful!!! Thanks for linking to the first every craft link at Tasteful Tuesdays! Hope you come back again this week and show off your stuff! Party Opens tonight at 8:30. http://www.nap-timecreations.com
Tauni says
What a fun fall display. The wreath is great too. Wonderful project!
Thanks for sharing on Show & Tell at SNAP! I enjoy seeing your links every week.
xoxo, Tauni
Dottie says
Wow! This must have taken a long time! Looks great! Would love if you’d join our Countdown to Fall link party! Hope to see you there! Have a great week!
http://dixie-n-dottie.blogspot.com/2012_08_13_archive.html
Courtney says
Love this- sharing at the party tonight~ thanks for linking up at Feathered Nest Friday!
Emily says
So easy and the green spray paint looks awesome! What size wreath foam did you end up using?
Karah says
I’m so glad you like it, Emily! I actually used a flat, round Christmas decoration I got last year on sale after the holidays. It is about 12 inches in diameter, with about 2 inches of surface area all of the way around. I hope this helps, don’t hesitate to ask any other questions. I’m sure a round form would also work, it would just require more leaves. 🙂 I’d love to see it if you make one.
Jean Marshall says
good morning, I live in FL and have leaves all year long dur to our big oak on our front lawn. how ever I will wait till fall arrives so I can get nice fresh ones. Love this wreath, I hope to make my form from cardboard, double back it attach to hanger between the two pieces and paint a brown to match the leaves. No chance of any gaps showing.Thanks for a great inspiration…….jeanne
theboldabode says
Gorgeous wreath! I’ll be waiting for the leaves to fall, now!
Jenn/Rook No. 17 says
Incredible transformation from a pile of leaves to an artful wreath. Wow!
April @ illistyle says
I love the au natural wreath and the green wreath! How fun and versatile! Thanks for the tutorial. I so want to do this! xoxo
Miss Kitty says
I love it! When I first saw the thumbnail photo over at “Domestically Speaking” Fall blog party I thought “oh no…that’s a lot of leaves to press in a book and wait and wait and wait”…but NO…you have a much easier way. This really does look easy…thanks for sharing the “how to”s with us.
Karah says
LOL, I can only imagine THAT project. hahah This one is super easy, and great for all, thank you so much for visiting.
JoAnn @ SweetPepperRose says
Hi! I actually like it in both colors 🙂 visiting thru Cheri’s Fall party
JoAnn
Kim @ Sand & Sisal says
I love this wreath! I’m going to have to make one! The whole mantel is lovely.
Karah says
I’m so glad you like it, Kim. It is so seriously easy, would love to see a pic if you do make one. 🙂
Claire says
Love your wreath! I’m featuring it on my Saturday favs and would love for you to stop by-Have a great weekend! Claire
Karah says
Whoop Whoop, I will totally come by. Send me the link when it’s up!!
Roeshel S (@DIYShowOff) says
LOVE it! Featuring this one too, Karah…I’m doing a ‘natural’ fall decor round up and you’re the star with so many great projects! Thanks for linking – I love the reminder to get over here to see what you’ve been up to! 🙂
Karah says
Woo Hoo!! Thanks for all of the features. 🙂
Hello, I'm Leslie! says
Absolutely gorgeous! Your whole mantel is beautiful. I’m glad I found you at the Spray Paint party.
Leslie
Karah says
Thank you so much, Leslie!
findinghomeonline says
Wow – love that blue. Thanks so much for linking up at our party! Take care, Laura
Christine Leahy (@women_stand_up) says
THE STRAW WALL! LOL!! That was classic! I’m completely in love with the color of this wreath!!!!!!!!!!!!!!! I’m totally going to copy! 🙂
-Christine
http://www.letsgetcrafty.org
Karah says
Trading Spaces is one of my favorite shows of all time!! So glad you like the wreath. 🙂 I’d love to see a pic if you make one of your own.