This post may contain affiliate links which won’t change your price but will share some commission.
I am so stoked that Kilz is our primer sponsor for our Key West Conch house renovation. I’m happy to share how Kilz primer is an invaluable part of any renovation or remodel project. Check out our sponsorship details here and our full disclosure here.
Yep, it’s time for a little trim and molding around here. Finally!
We don’t really work on a daily schedule or itemized project plan. And if you asked me when we moved in how long it would take to get through the renovation of the living room / dining room combo (why did we start with the biggest room again?), I would have said that I had no idea. And I still don’t. 🙂
Right now we’re about 2 months in and we’re hanging trim. It feels like such a victory. (Hooray!) And at the same time it feels like it has taken forever to get here. (Boo!) hahaha
I knew from the get go I we wanted a craftsman or mission style look. Simple, clean lines … something that wouldn’t take away from the already existing character of the wood slat walls, but would add a fresh look to the old charm.
I looked into layered options, and options with little added details, some trim bling if you will. But it just all seemed a little busier than what we wanted.
Straight, chunky white boards won out. And when we got around to shopping for these boards we realized that solid wood boards six inches and wider could get expensive. So we went through a few decision factors that included:
- all of the trim was going to be painted white (natural wood trim over natural wood slat walls was just a bit much for us)
- we are so pleased with how the board and batten wall turned out
- we had already bought a table saw so ripping down sheets of MDF would be fairly easy for us
- the pre fabricated molding options we were considering are all made out of MDF so we felt good about using the same product to just create the look we wanted
- getting 48 FEET of molding for less than $35 sealed the deal
This really could be called “the easiest trim ever” or “the most economical trim ever”.
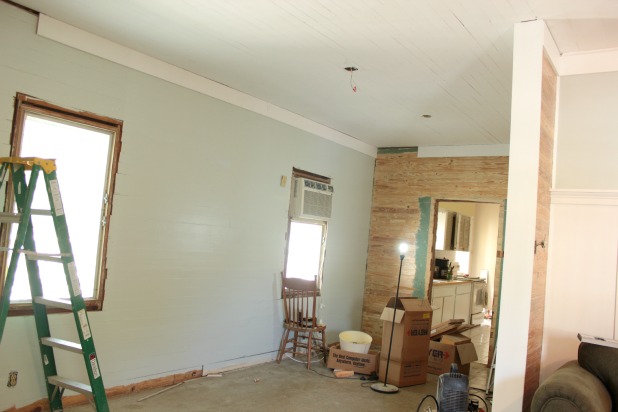
Here’s the super simple tutorial for making your own trim and molding.
Step #1 – Cut sheets of MDF to your desired width
We decided on 8 inch high baseboard and 6 inch crown molding, like I said, we wanted chunky. 🙂
Home Depot is our local home improvement store and they have a new policy that they won’t make any cuts less than 12 inches.
The manager actually said to me that he didn’t want to risk any of his employees cutting a finger off … I almost told him that it’s not as bad as one would think. 🙂
But instead, I just had them make cuts of either 12 or 16 inches. Then when we brought them home we cut them in half, down to 6 and 8 inches. We learned to do it this way after we brought our first 4 x 8 foot sheet of 3/4 inch MDF home and realized that even though we have a table saw there really was no need to struggle with the full sheets. Those suckers are heavy!
Update: After working with MDF for over a year now I’ve realized that one of the big tricks to getting MDF to really mimic the look of real wood is to sand the cut edges smooth. Even run a bead of caulk along the entire cut edge when you’re installing will help create a smooth edge, like real wood. I give a complete update on how I feel about the trim here.
Step #2 – Prime your strips
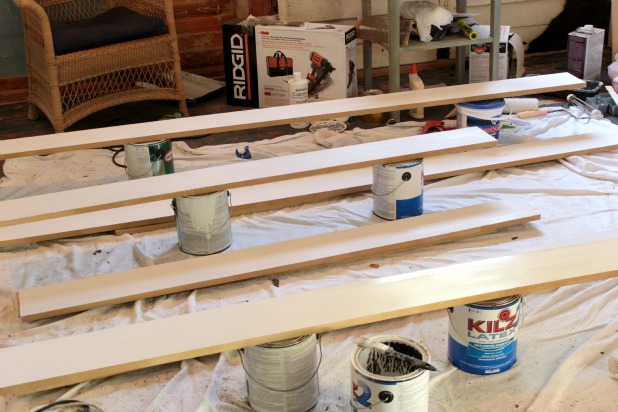
This step is super important, the MDF is going to soak up the primer like it hasn’t eaten in years. I’ve expressed my love for Kilz before, and they didn’t fail me here. I used Kilz 2 and it sealed the MDF and created the perfect surface for painting. If you didn’t prime here you would see a hint of the brown of the MDF show through the paint. Not only will the primer seal the surface but it’s stain blocking properties create the perfect white base for a bright white finish.
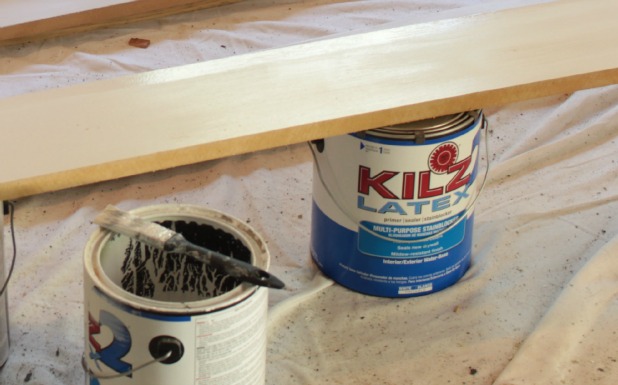
And the Kilz 2 is low VOC and extremely low odor making this step good for the environment and my nose. 🙂
Step #3 – Paint your strips
The reason getting the priming and painting done before you hang it saves you time is because then you don’t have to spend any time taping around it or trying to cut in if you do the priming and painting after. With our freshly stripped wood slat walls, we also knew we weren’t going to be caulking under the trim, so having all of the prep work done and only touch up work to do after it was hung proved to be a huge time saver.
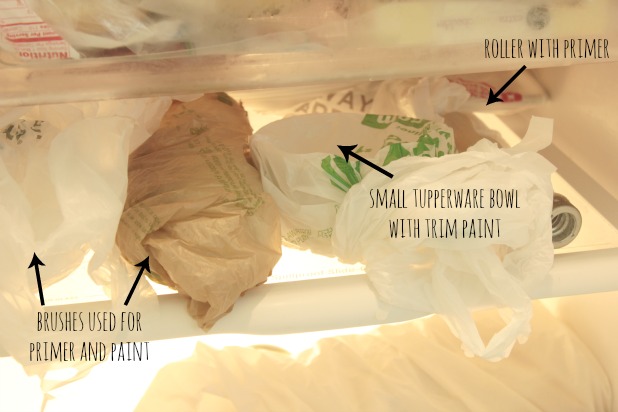
And, knowing we were going to be doing trim and molding throughout the entire house we bought one 5 gallon jug of white semi gloss paint. We also save time by not washing our primer and trim paint brushes and rollers. We actually have a dedicated shelf in our fridge that is the current home of our brushes and even a small bowl we are using for primer and paint. It’s just a quick grab when I need to do any touch up or put another coat on whatever project I’m working on.
Step #4 – Hang
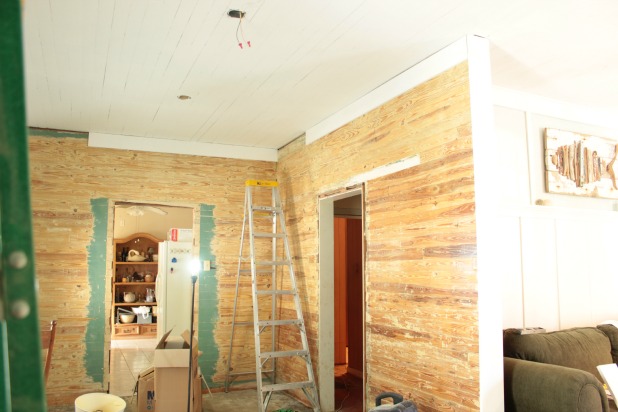
We’re only working on the crown molding at this stage because we want to get the floors refinished before we install the baseboard. But using our pneumatic nail gun and 2″ finish nails the process goes by pretty quickly.
 It’s a two person job to hang the 8 foot long sections, so Joel and I would do that after he got home from work in the evening. And then I would measure and cut the fill in pieces during the day on my own. Hence all of the pictures with only 8 foot sections hung. 🙂
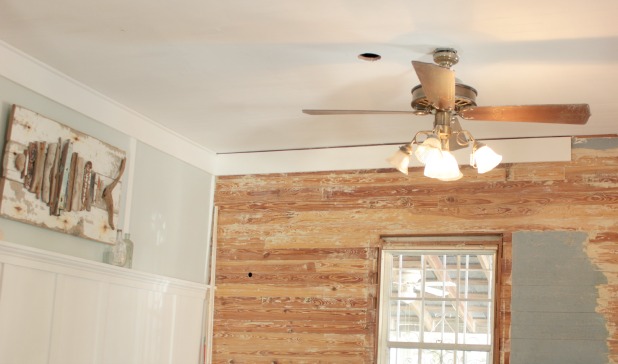
And now it’s up to me to make it look like fresh, clean seamless craftsman style perfection, or imperfection … we’ll just have to see how it ends up. I’m still finishing that part of it up so all the deets on that are coming soon.
But seriously, this is the easiest and most economical trim option ever, right?!?! Do you like the craftsman or mission style look? Are you a fan of all things trim and molding? I just think they really add that finishing touch to complete the look in a space.

Kelly @ Eclectically Vintage says
I’m missing one thing to get this look – you! You are such a DIY diva – it looks amazing!
Kelly
Karah says
Thanks Kelly!!
Ashley@AttemptsAtDomestication says
You guys are seriously awesome! I’m so glad you have a house and I get to see all this house DIY stuff from you! I love it!
Linda @ it all started with paint says
Easy AND economical? I’m in!
🙂
Jaye @ Just Trying to Make Cents of it All says
What a great idea! For that matter, you could also use a router and bevel the edge if you didn’t want the craftsman look! Great economic option for getting nice fat trim that is normally ridiculously priced!!!
BTW, you don’t sound like you look. Don’t ask me what I mean by that…not sure even what I mean but your voice isn’t what I thought it would be. I thought it would be higher for some reason and it’s good that it’s not because pipsqueak voices drive me nuts!!!
Conch House is coming along beautifully. I’m jealous!
Karah says
hahahahaha, I’m not sure if I’m more happy that I have a ‘better’ voice than you thought or more bummed that you pictured me with a pipsqueak voice all this time. 🙂 And I love the router idea.
Dana {Crafted Niche} says
Love this!!! I can’t wait to see how it turns out!
Kelly @ Corner of Main says
I love it! It’s going to look awesome. You guys are getting so much done!
Kelly @ View Along the Way says
SO SMART! I can’t believe how quickly you guys are getting things done!
Chris says
Any chance you have an updated picture of the results? I’m working on a similar project and would love to see how the wall crown looks, as well as a up close shot with the final trim pieces.
Karah says
Hi Chris! The trim is complete and I’ll snap some photos and post them next week. We love the simplicity of it. Good luck with your own project!
Alissa says
What size trim do you use for your door casing? Is it the same size you use for the baseboards? Thanks!
Karah says
Hi Alissa, The trim around the doors and windows is 3 1/2″, the baseboards are 5 1/2″ and the crown molding is 7 1/2″. I hope that helps!
Alissa says
In the post I think it says you used 6 inches for the crown and 8 inches for the baseboards. Am I commenting on the wrong post? Haha sorry I’m new to following blogs!
Karah says
Hahaha, no, my bad. Where we used MDF I did cut it 6″ and 8″ … of course that’s approximate as me and measuring don’t always see eye to eye. I chose those measurements to mimic the look of a 1 x 6 and a 1 x 8, which actually measure 5 1/2″ and 7 1/2″ respectively. I hope that makes sense, and doesn’t further confuse the issue. Definitely feel free to shoot me an email if you have more questions, I’m happy to help where I can.
Jen says
It looks like there’s a tiny space above one of the 8 foot sections on one side of the room, but not the other. What did you use to cover that up? Corner round? Or maybe a 1×2?
Karah says
I used quarter round, but you could use whatever you think looks nice 🙂