This post may contain affiliate links which won’t change your price but will share some commission.
Hello, hello! How are all of you fine folks today?
I am finally feeling like I’m getting caught up from the blog move. I still have a bit of a headache from all of the coding. But, I’m spending less time on what I call “back of the house” blog things and refocusing on what would then be “front of the house” blog things. Like projects and post ideas…so many fun things swirling around this little brain of mine to share with you. 🙂

So, let’s start with what I think is a REALLY fun one.
 I think chalkboards can be so fun (ummmm, yeah, just said fun for the third time in 3 sentences), and when you can literally paint anything and it is instantly a chalkboard … who doesn’t want to get involved, right?!?
But, the idea of all of those chalkboards being black made me a little slow on the uptake of this here trend. I just wasn’t into it. But, as with all things, I figured ‘how hard can it really be to just make some chalkboard paint?’. Right!?!?
As an aside, I don’t know if you know Kelly at View Along the Way. That chick is funny. Seriously, no holds barred (what does that even mean?), authentically funny. And in a recent post about wanting to be a sewer lady she exclaimed:
“I need to hire someone to follow me around and, whenever I think, “How hard can this be?,” their sole responsibility will be to kick me in the face.” – Kelly
It still makes me laugh. 1 – because I think ‘how hard can that be?’ All. The. Time. and 2 – how fun would that job be? 😉 Not specifically to kick Kelly in the face, but I’m always looking for free rein to be a bad a$$, and then to have it as a job. Fun, I say.
And, I happen to be guest posting over at View Along the Way today about what exactly it is that a gal does when she finds herself transplanted onto a Caribbean island. Head on over and say “hi” if you can. 🙂
Aaaanyway, back to the chalkboard paint. Lucky for me, it wasn’t hard at all. Phew!

There are a bunch of recipes out there, and honestly, as is with my strategy with everything, it doesn’t have to be perfect. 😉 Kinda takes the pressure off, right?!?
Martha Stewart says to use 1 tablespoon of unsanded grout to every 1 cup of paint.
Update: I read/heard/saw somewhere or other that if you add the unsanded grout to a little bit of hot water first it helps the mixing process and makes the chalkboard paint smoother. I will definitely try this next time.
I say take this much paint:
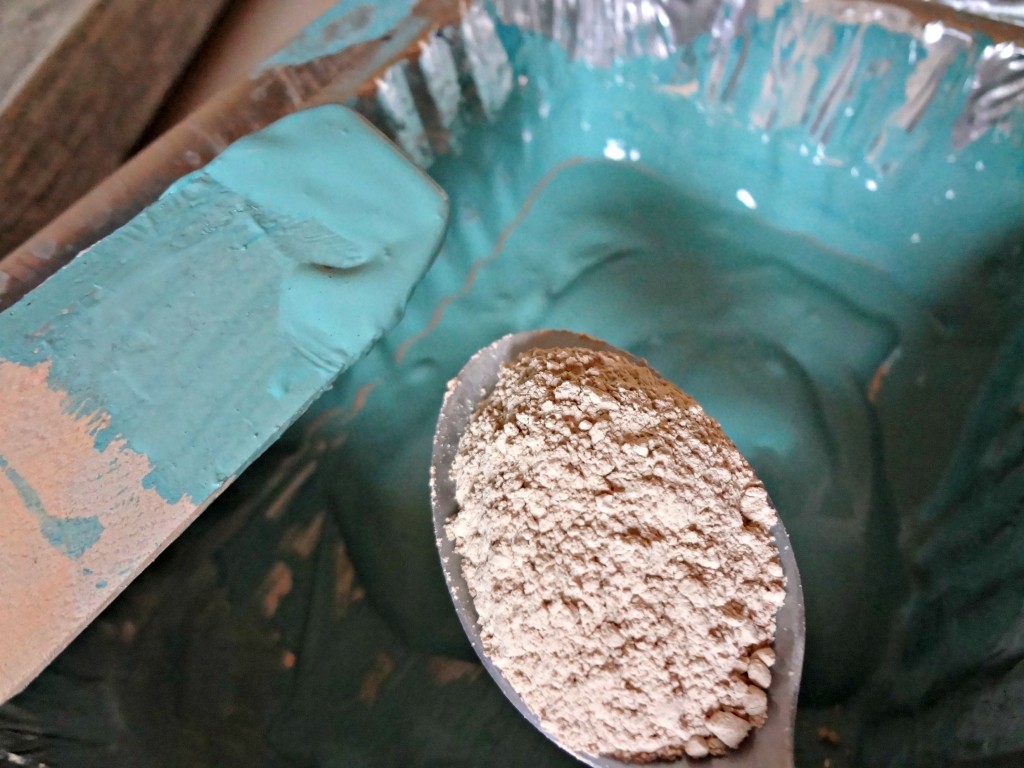
 And add this much unsanded grout:
 If I had to guess I’d say I had about a third of a cup of paint and I just used a regular plastic spoon, somewhat heaping, full of unsanded grout. Are those teaspoons or tablespoons? I really don’t know.
My ONE BIG TIP!!! Take your time with the mixing. Mix, and mix and mix some more.
It’s tedious, but unless you get up in there, you’re going to have tiny little blobs of paint covered unsanded group specs. Know what I mean? More mixing to begin with is conducive to less cursing at the end I would imagine. 🙂
And Tip #2!!! Don’t mix too much more than you’re going to want to use, the grout dries up the paint pretty quickly.
Now, after you paint your surface and it dries completely, the next step is to give it a light sanding. No pics here, but let’s picture it together. Chalkboard paint already painted and dried, sand paper in hand, raise hand to chalkboard paint, gently move hand back and forth with sand paper lightly smoothing out the surface of the chalkboard paint. Got it? 😉
Then condition your new chalkboard.
 I don’t have any idea why, but Martha said to do it, and what Martha says, we do. Unless, of course, it has something to do with buying or selling stocks of companies owned by friends of hers. I’m staying out of that. 🙂
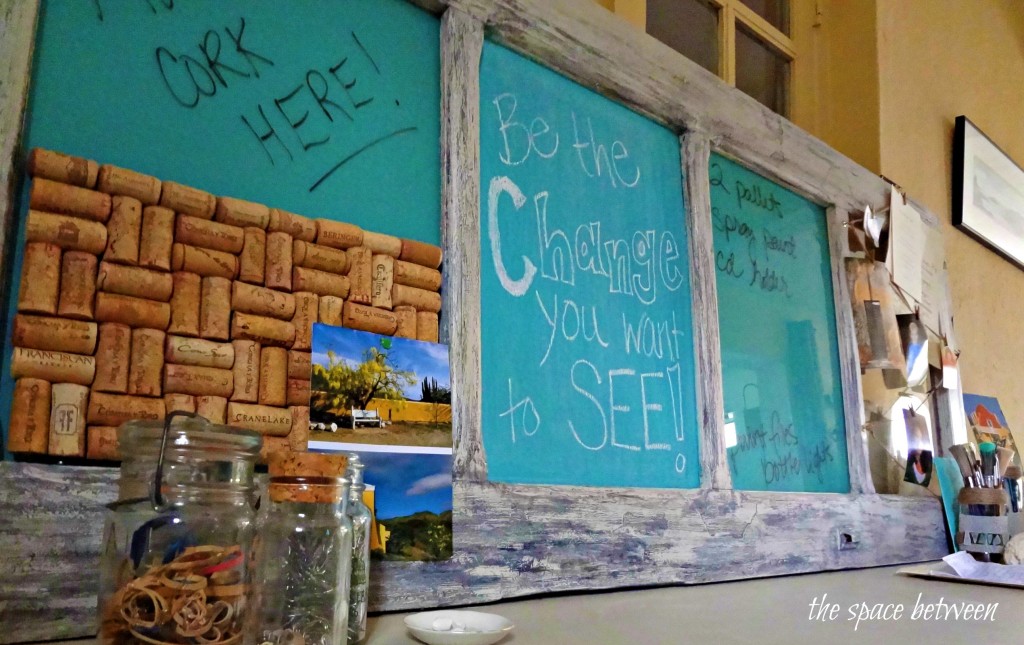
Essentially to condition your chalkboard you just take a piece of chalk and cover the entire surface. And then wipe it all of with a damp cloth. And Ta Da!
 Let the
 listing fun begin. 🙂

What do you think? Super simple right?!?! And the flexibility of being able to use any color paint … what will become a chalkboard next? 🙂


Shannah @ Just Us Four says
Love this! I am glad to hear that making your paint went well. It looks great too.
Karen says
I love the way you write, Karah. 🙂
Kelly @ Eclectically Vintage says
Oh how I would love someone following me around – not ready to kick me in the face for my crazy ideas – but at least willing to give me an Indian sunburn!
Love your no measuring chalkboard paint – you’re my kind of gal! That’s why I hate baking – too many measurements for me. Although Martha would disapprove of not following her directions to a T (and you don’t want to get on her bad side), I love it and the color is fantastic!
Kelly
cassie says
i just love this because you can have so many colors- SO fun!
Anne says
You are fabulous! Thank you for the recipe, I have all the ingredients – well not really, I have no grout… but I’ll bet the Plaster of Paris will work as well!
I love turquoise!!!!!!!!!!!!!!!
andrea cammarata says
this is absolutely AWESOME my friend!!!! KUDOS!!!! tons of hugs…you rock!
Zoe Feast says
I have not done anything with chalk board paint yet but maybe it is about time I did. I have loads of grout in the garage left behind by the previous owners ( ans boxes and boxes of tile come to that) Not sure if it is unsanded grout though…how do you tell?
Ashley@AttemptsAtDomestication says
That’s so easy! I really want to make a chalkboard for somewhere in our kitchen, I just haven’t decided where yet….
Kelly @ View Along the Way says
Hahaha, I never thought about what kind of person would apply for that job, but you might just be sick enough. 🙂 This project is awesome! Pinned!
christi baham willie says
Ok..FIRST…the way your write, PRICELESS! That is what I say makes people come back to blogs over and over and keep readers laughing!! GREAT writing!!!
Second..measuring….LMBO….I just love it!! That is how I like to do it…..
My question….Can you do this over an “already painted” surface?? Like if I were to pick a section in my kitchen to use as a chalkboard, can I just paint over what is already there and it will work fine?
Thank you for this post!!! Love your blog!!!!!
RHome410 at Friday is Pizza, Monday is Soup says
I never knew I could DIY chalkboard paint! I LOVE the idea of having it in all sorts of fun colors. I think you chose the best one, though.
Jessica @ Mom 4 Real says
I love this project…one of my faves so far! I use the same mixture for chalk paint…as in I paint furniture with it and wax it afterwards…no primer needed. I just painted a desk and a bench using the same mixture and they turned out amazing!
Jessica
Linda @ it all started with paint says
I guess when you can’t just run out to The Home Depot for a can of chalkboard paint it’s time to get creative. Poor, poor you on that Caribbean island with no Home Depot or Lowes …
… but I love that you created a beautiful Caribbean blue chalkboard color!
🙂
Linda
ARod says
love it thanks for sharing and i love that Gandi quote too 😉
Jessica @ Stay at Home-ista says
I love the color you chose! And that area on the left where the corks will keep filling in? I would have that part filled in, in a second. Just invite me down, and we can drink some wine together…
Jessica
stayathomeista.com
Karah says
It’s a deal! Just let me know what time to pick you up at the airport and we’ll get to “work”. 🙂
Liz says
Thanks for posting this. I’ve seen a couple of ways of doing this but this is simple enough to remember without writing it down or having to save the directions (I think, anyway. We’ll see about that.) I love that you can make the paint whatever color you want, because I do love a colored chalkboard rather than black, in some instances. Anyway, thanks. This was helpful.
Liz says
PS: I found you at Keeping it Simple’s Monday link party.
Taylor-Ann says
I always thought you had to use chalk board paint in a can. This is great. I would love if you shared them on my link party.
http://www.kampenlane.com/2012/04/hope-everyone-had-great-weekend.html
Can’t wait to see what you make next.
~Taylor
Lauren says
You’re the first person to actually SHOW the grout and now I know why mine didn’t work — mine must not be the right kind — it’s not powdery like yours! SO, thank you for the pics, ‘recipe’ and your projects turned out beautiful! Love the color!
Brittany says
I love this so much! I’m going to have to keep my eye open for a great window pane at the thrift store. Thanks for sharing!
JEnna says
This is awesome! Thanks for sharing! Found you from House of Hepworths! I’d love you to link this up at my party going on here:
http://itsjustcalledspicy.blogspot.com/search/label/Link%20Up
Jen 🙂
Sharon Hines says
I love that you went old school on the paint color. Love the way the project turned out. Thank you for sharing the tutorial at Show & Tell. I think it sounds fun to make your own chalkboard paint.
Sharon @ mrs. hines class
hani@craftionary says
wow.. I love the color, the quote and the corks, wonderful combination.. 🙂 Thanks for linking up at friday fun party..
Emily says
I was just.this.very.day going to google a homemade chalk-paint recipe! And, then, wa-la, I see yours at my link party! So fun! Thanks for sharing! And, yeah, I’m totally with you on the measuring and I totally visualized the sanding. 🙂
PS. Are you having feed issues since switching hosts? I stopped getting your feeds in my emails when you switched over and so I resigned up, but I’m still not getting them in my inbox. Any ideas on that??
denise aggson says
Does.it matter what kind of paint?
Karah says
not in my experience, I’ve used acrylic and latex paint.
Mary says
Thats pretty neat (plus blue is my favourite color)Did u use acrylic paint?
Karah says
I did!