Hey hey! Happy day to you!!
Just a quick note that I heard from a few of you that you aren’t receiving the posts in your email anymore. There is some new email spam rule so I had to change a few things so the emails wouldn’t be categorized as spam, but many of you may need to resubscribe to start receiving the emails again. You can do that here. Sorry for any inconvenience.
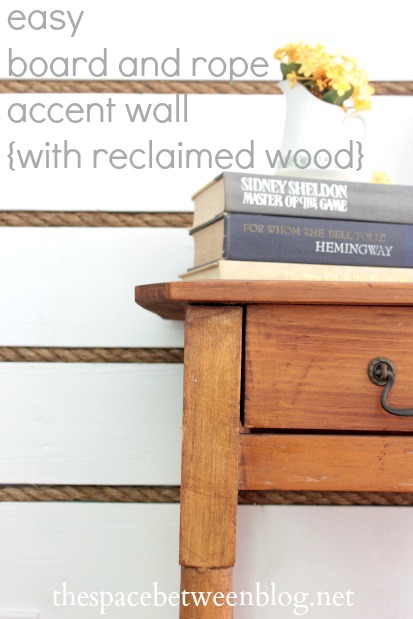
And here’s to finding another way to reuse old wood that we uncovered around this house during demolition.

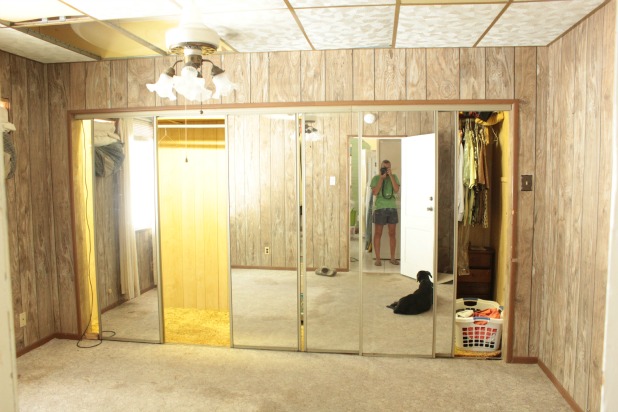
When we started in the guest bedroom she was looking like this.
And after a bit of paneling and drop ceiling removal and a closet relocation she starting looking like this.
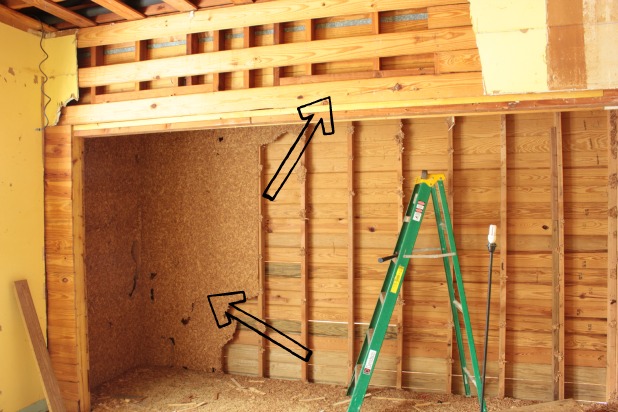
It is the boards that the top arrow in that picture is pointing to that we used to create the board and rope wall. They are just 1 x 6s that we found randomly strapped up on the walls under drywall and paneling, and we had just enough to line about 4 feet up the back 3 walls of the guest bedroom.
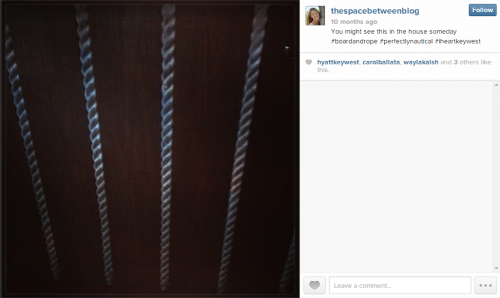
And this idea can be filed in the “top reasons why happy hour is always a good idea” because the look is actually inspired by the bar area of a local restaurant. I instagrammed a shot of it when Joel first pointed out that he liked the look 10 months ago.
We had been on the lookout for ways to reuse those boards we had removed but were holding onto and this was perfect.
This project really is a basic upgrade, but it has such a presence in the room it seems like a bigger project than it actually was. I would definitely recommend using a nail gun and stapler just because it makes the process go by so much quicker. And, because we had 4 sections of wall to cover for each row of wood and rope I made all of our cuts in advance, I didn’t even bother mitering the corner cuts … we didn’t think it made any difference in the finished look and straight cuts were easier to do in advance. I also primed and painted each individual board before installation.
To start the project, if you’re working from the wall studs, see if you have any outlets that need adjusting. Since the wood is 3/4″ thick we needed to pull out each outlet by a 1/4″ because it had been installed with the thought that we were going to hang drywall. After making sure the breaker was off I wedged our pointed prybar in there to remove the nails holding the outlets in place.
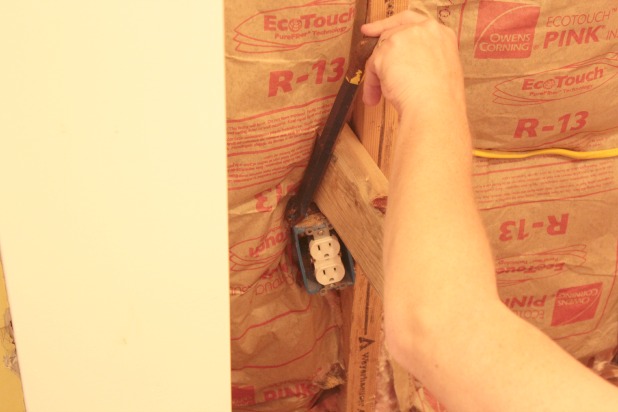
Then I used the side of the hammer to hammer it back into the correct place.

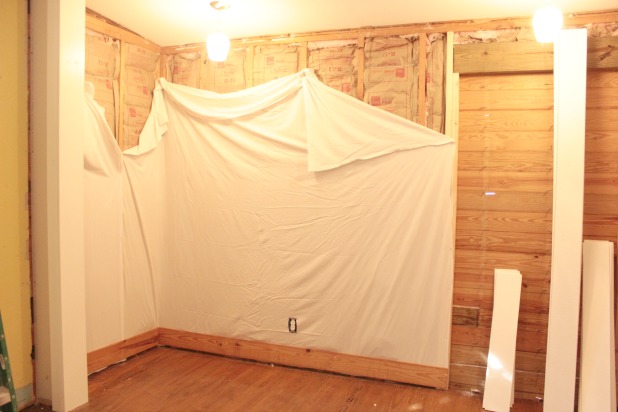
Then we decided to hang an old sheet up directly to the studs, just incase there were any areas between the wood and rope where someone could see right through to the insulation. We used a staple gun and then just left it random above where we knew we’d be stopping, it was easy to trim to size after the wood and rope were installed.
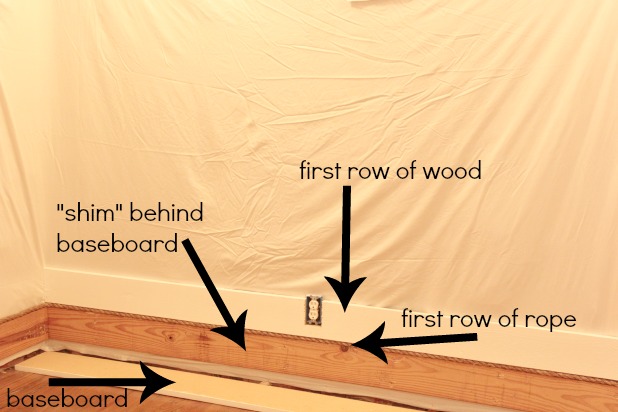
We also knew that A) we didn’t want to have to worry about ripping any boards to size so we wanted to start from the bottom and just work our way up the wall until we thought it was enough, and B) we would be installing an 8″ high baseboard so we didn’t need to have board and rope hidden behind the baseboard. So we first installed a row of boards where the top was 7 3/4″ from the floor, essentially this would “shim” out so we could attach the baseboard right to it.
After the “shim” board was installed we started with a row of rope (so it wasn’t wood heavy at the bottom with baseboard then a row of wood), then a row of wood, and it was this first row where we had to use the jig saw to trim the wood around each outlet.
But after that it was just a matter of layering row upon row alternating between rope and wood.
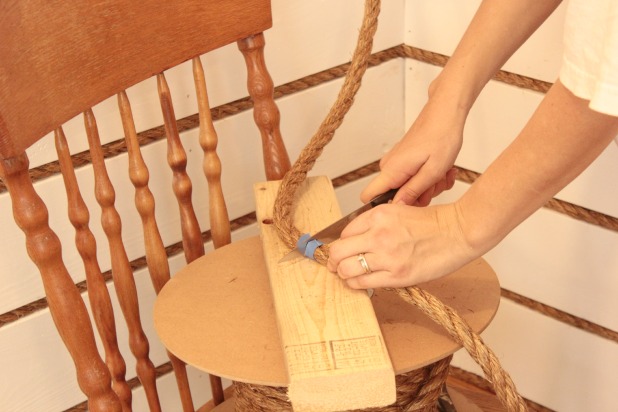
The rope we stapled into the board below it so none of the staples can be seen from the front.

And I just wrapped the rope with painter’s tape and used a serrated knife to cut each section. The painter’s tape is actually still there hidden behind the trim. If you didn’t want to leave the tape you could dip each end in white glue and let it dry to prevent fraying.
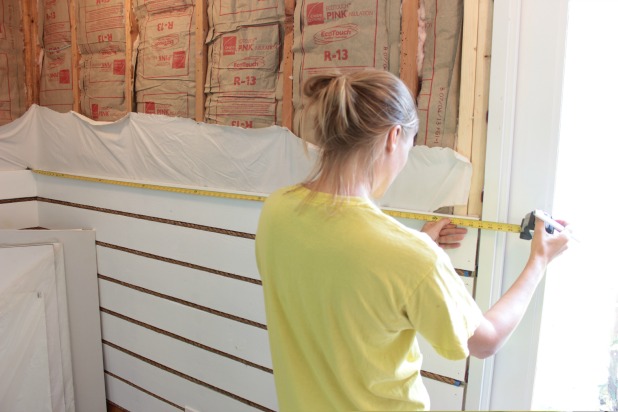
With all of the rows of wood and rope installed we had to wait for the new door to arrive and be installed so we could use exact measurements of where the door trim would be to add the last board. I chose a 1 x 4 and installed it more like a ledge. You can also see how I just took a pair of scissors and made a really rough cut through the sheet.
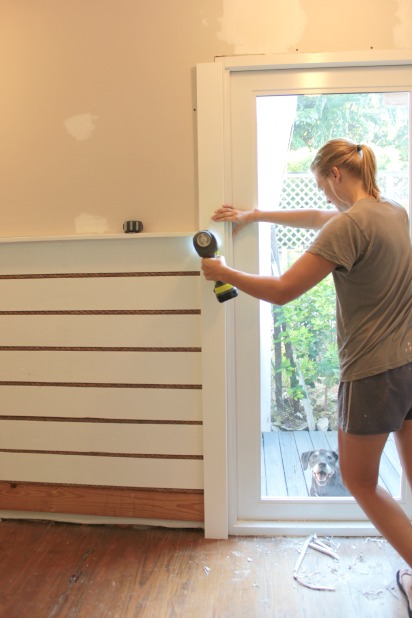
I ran a bead of wood glue on the top edge of the top board and attached the ledge board with a few 1 1/2″ nails. I did miter those corners because they were more noticeable.
Now, since the rope and wood part of the wall is 3/4″ thick I wanted to shim out the drywall above the ledge board so it would also be 3/4″ thick so the new trim we still needed to install around the new door would sit flat on the boards as well as the drywall.
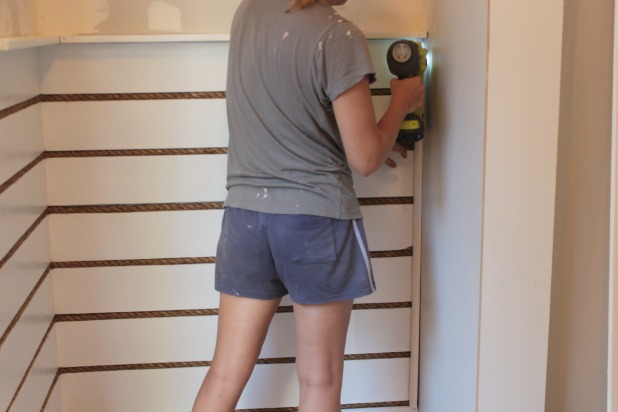
So I just cut about 4″ wide strips of 1/4″ thick plywood, called lauan, and attached them with small nails.

I installed the drywall right into those shims and the wall studs and then finally we could finish it all off with the door trim.
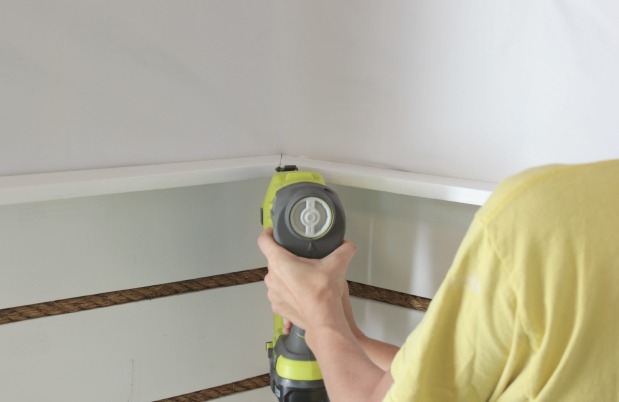
Then I installed the baseboard and a piece of quarter round in each corner where the board and rope ended and a plain drywalled wall began.
And we’re definitely happy that we thought to hang the sheet behind it all because there are a few spots where the wood wasn’t perfectly straight and there are gaps between the wood and the rope, but all you see is a nice white background. If you were going to install this type of wall right over existing drywall that would serve the same purpose.
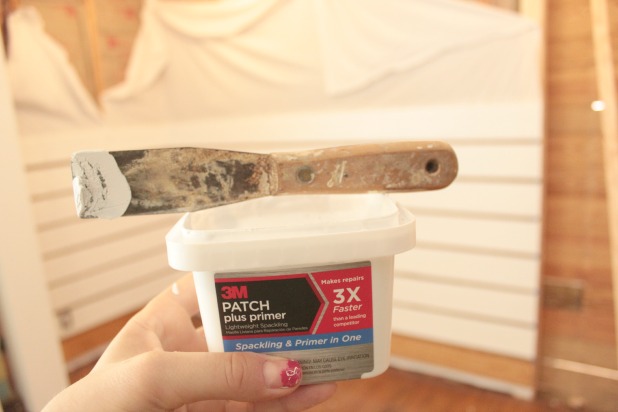
Along the way I used a spackle with primer in it to fill all the nail holes and cracks and then finish it off with one last coat of paint.
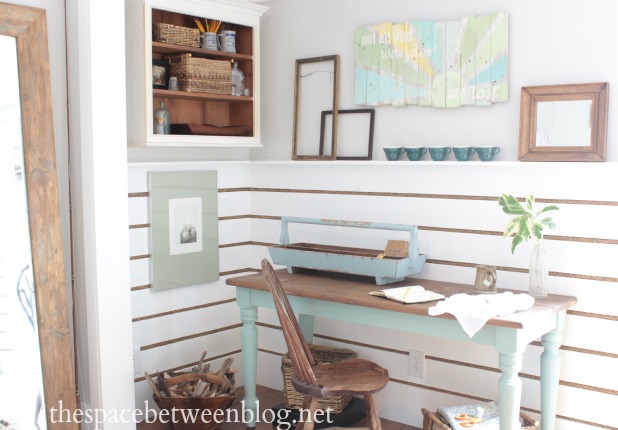
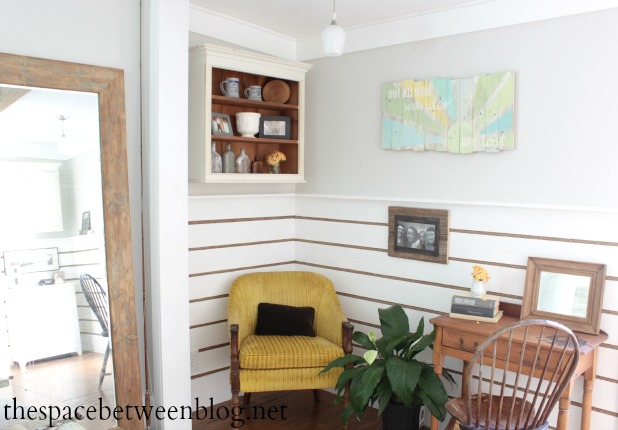
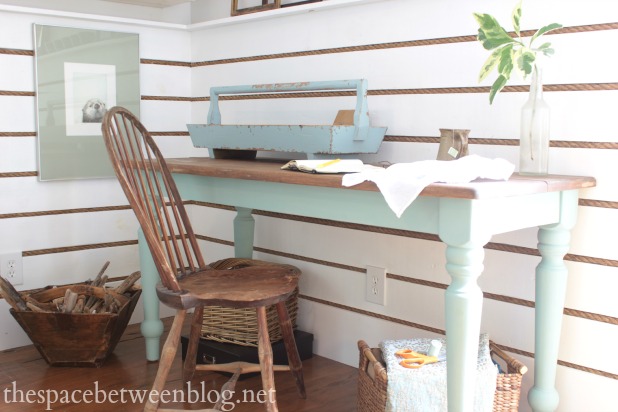
This is the corner you see most often, and right now the sewing machine is on the table, which officially puts me one step closer to actually making the much-needed curtains for this room. 🙂

And then tucked away on the other side are the two other white pieces of furniture that I’ve had since I was a kid, and they both have doors so all kinds of project supplies, stencils, scraps, etc are hidden away in there.
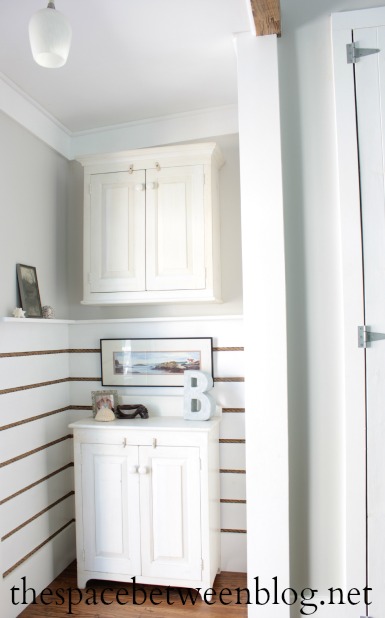
I love how the rope is actually the same color as our wood floors and the old beam we installed as an exposed header. I also love that it’s mildly nautical but not over the top. Since we had that weird little knock-out in the back of that room that used to be the closet, I think this type of accent wall really helps define the space as the craft/project nook and somehow make the weird knock-out not seem so awkward.
Before I fully committed to the idea of a work surface and permanent project corner we lived with a chair and small desk back there for a while. But we eventually decided that a full-time project nook was the way to go. And you know that means that “I” decided, right?!?! 😉
Now I feel like I need to get busy making projects to justify creating a whole space around the idea. 🙂
 Other than the blackout curtains and maybe something to cover the big window in the door … but only at night when we have company because I am in love with the amount of light that comes in through there on a daily basis … this room is pretty much complete.
Which is good because Joel and I are prepping to move into this room so we can completely demo our master bedroom, bathroom and closet for a “three spaces at one time” overhaul. I give you more details on that in this video.
And if you’re taking on this rope and wood accent wall project you can read about our drywall techniques, our spackling techniques and some simple wall repair techniques. And then tell me if you have any favorite accent walls in your house? Anything made with rope?