the space between

upcycle, repurpose and reinvent your space

  • about
  • aruba
  • key west
  • curacao
  • projects
  • house tours
  • privacy policy

pallet wood garland

December 1, 2014

Hey there! I hope you had a great holiday weekend. If you haven’t seen the great comments on the last post and you’re an animal lover, you really should take a second to read them. So cool that you guys shared your own stories, thank you for that! You can read them here.

Sometimes I carry around an idea for a project for a long time and it just never comes together. But something else entirely comes together and it all works out. Like what happened with my new pallet wood garland.

pallet wood garland

I had been keeping an eye out for fallen branches in hopes of making a wood slice garland for our board and batten wall. I have some simple, festive decor up there and think a swag of some kind would add a little whimsy. At 3 1/2″ wide I don’t really have a lot of “mantel” space to work with up there.

christmas mantel 2014

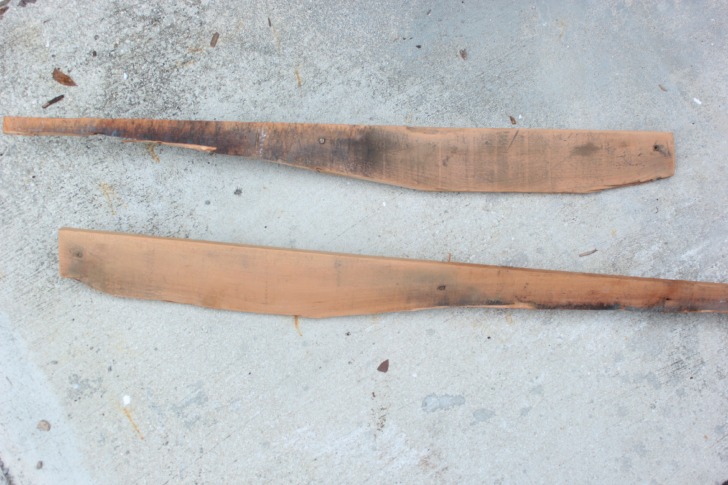
But, after weeks of not finding a good branch to cut into wood slices (I imagine it would be pretty easy with a miter saw) I thought little pallet wood slices could work just as well.

I needed less than two full pallet slats for this, so this is a great project for cracked and damaged slats, no perfection needed here.

pallet wood garland

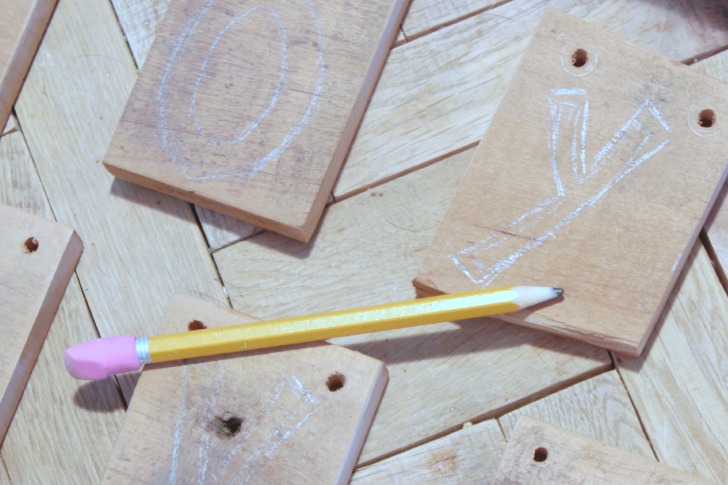
Each slice is about 2 1/2″ wide, but definitely not exact. I actually sanded the pallet slats before I cut them with my miter saw because I find it easier to sand larger pieces. Then after each piece was cut I sanded over the edges just to remove any splintering wood.

pallet wood garland

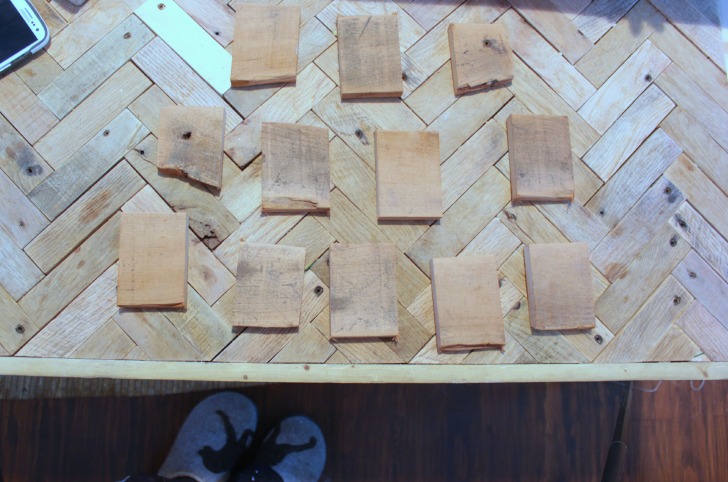
Sorry for the late-night-crafting photos. But aren’t my slippers cute? My mom got them for me last year for Christmas from LL Bean. ๐Ÿ™‚ #IHeartMaine

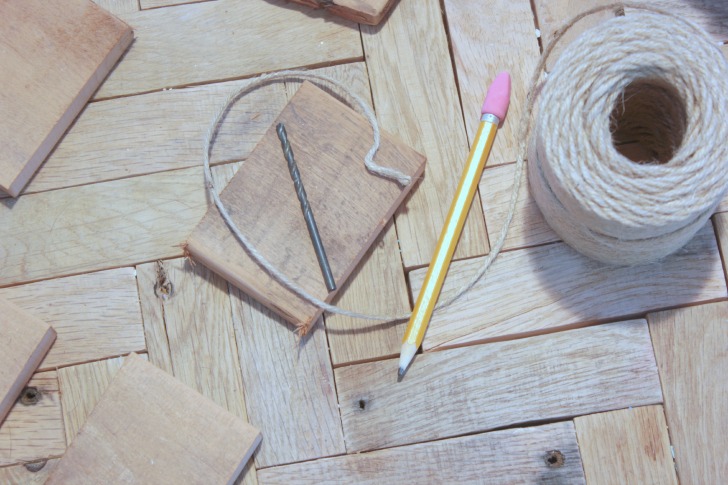
Now just drill two holes in the top of each slice for hanging with a drill bit just big enough to fit the twine through.

pallet wood garland

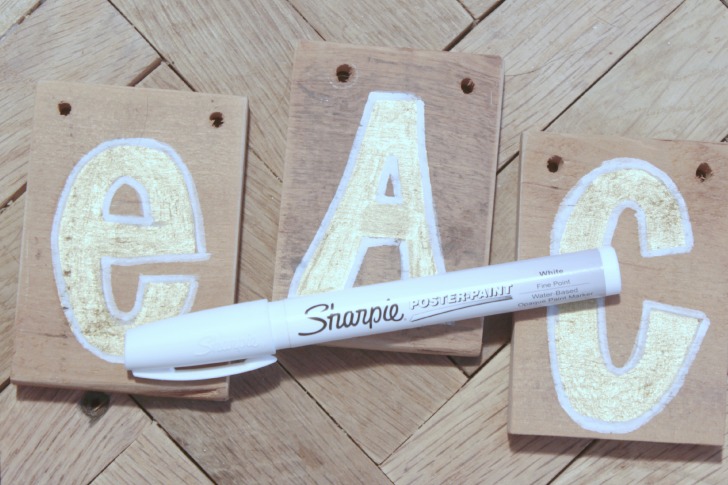
The lettering is just hand drawn, but you could use a stencil.

pallet wood garland

I used paint pens for the letters, gold metallic for the inside and then a quick outline in white, again … good and imperfect.

pallet wood garland

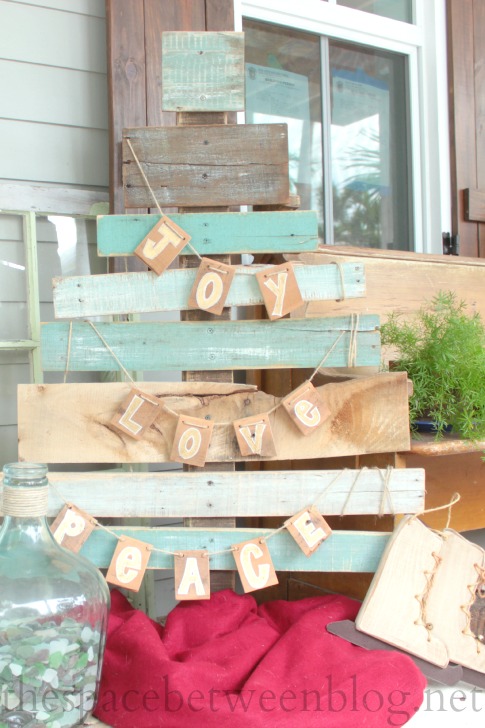
Since this turned into another little pallet project I tried it on our little pallet slat tree that welcomes our guests on our porch. Gah.

pallet wood garland

Seriously, is there a cuter dog? better decoration for a pallet slat tree than a pallet slice garland. I’m gonna go with no on that.

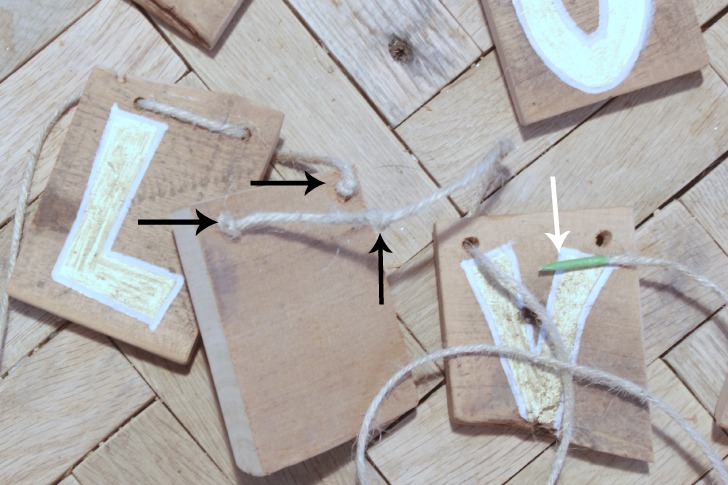
To add the jute twine, just run it through the holes tying knots (black arrows) every now and again. Wrapping a bit of painter’s tape (white arrow) around the end of the twine will prevent it from fraying along the way.

pallet wood garland

And, no joke, the very next day our neighbors had tree trimmers at their house cutting down dozens of limbs from their huge Mahogany tree. Maybe for next year. ๐Ÿ™‚

pallet wood garland

And just to prove I haven’t killed the poinsettia yet … and neither has the newspaper delivery person. ๐Ÿ™‚

pallet wood garland

You can check out our other Christmas craft ideas, 11 homemade ornament ideas and 10 DIY gift ideas.


inexpensive DIY wood slat walls

November 25, 2014

Happy Thanksgiving week everyone! I can say, that my holiday spirit is still fully intact. I’m not so sure about our newspaper delivery person, though, as my poor poinsettia on the porch is the perfect landing spot for the paper. :/

Joel says I’m going to kill it anyway so maybe they’re just doing me a favor. ๐Ÿ™‚ ย He thinks he’s funny.

But, before we move ahead to full on Christmas around here I wanted to give you the low down on the DIY wood slat walls we installed in the master bedroom.

wood slat walls

Some people might think we’re crazy, adding even more wood to this house. We have wood floors throughout, and wood slat walls that are original to the house on maybe 1/3 of the walls. But we just love the look and wanted to add a little architectural detail to our otherwise basic master bedroom.

We wanted the look to add a bit of a cottage feel, but we also wanted it to be subtle and not overpowering to the room.

wood slat walls

How’s that for a beauty shot? ๐Ÿ˜‰

This room is not very large and has a funny angled wall that encloses the master closet and bathroom. We put the wall there, so I’m definitely not complaining about it. But I think addingย the wood slat walls (and the lighted picture nooks, which we’ll talk about soon) might help draw attention away from the room itself and toward some of the more fun details.

Based on the new wall placement between the closet and the bedroom the windows on that wall weren’t centered so I just hung four white curtain panels along the whole wall to camouflage the off-center windows.

master bedroom bed

Knowing that wall would end up covered anyway, we went ahead and drywalled that wall and the other exterior wall facing the back of the house, so we were left with 3 walls to slat with wood.

So … I built a wall or two.

wood slat walls

I’ve talked a little bit about building here, and I kind of think it makes everyone’s eyes glaze over so no details here. But shout if you want to. I went ahead and added the extra studs in between the regular studs purely for the wood slat walls, we didn’t want the plywood to warp over time so we felt the studs closer together were a good idea. Actually, that was all Joel. Well … idea conception = Joel, idea implementation = Karah. And so it goes. ๐Ÿ™‚

For the wood slats I turned to a plywood product I know and love called Purebond. I used 3/4″ Purebond Plywood to make the closet in the guest bedroom and the guest bedroom bed frame. I used 1/4″ think plywood for the wood slat walls and since they are so light weight they were really easy to work with. I had the guys at The Home Depot rip each 4 x 8 foot sheet of Purebond down to 12″ strips (each 8 feet long) and then once home Joel and I ran them through our table saw and cut them just under 4″ wide.

What I really love about Purebond is that it is made in the USA and is 100% formaldehyde-free. It’s a hardwood plywood so it makes for a great economical choice when you want the look of wood, but need to watch the wallet.

PureBond_Pledge

With the wood slat walls, I knew I wanted to paint them white so “the look” of wood was really what I was going for. And I’ll say it again, I love how easy the 1/4″ thickness was to work with. After the cutting I literally did this entire project along.

I started with a light sanding of the edges of each strip of wood, just to remove any splinters.

wood slat walls

Then I just started at the floor and since the weird angled wall was going to be the trickiest part I just decided to start there by lining up the ends of the first two pieces.

wood slat walls

Turned out that it was easier to line up the corner with a thin shim behind one of the wall studs so I just used an extra piece of the 1/4″ plywood and nailed the slats right to the shim and into the stud at that corner.

wood slat walls

The second row is really the most important because it will be the first one seen above the baseboard so I leveled that row of slats before nailing them in … the Ryobi Airstrike worked great for this project, I bet their new stapler would work great, too. (affiliate links)

wood slat walls

That gap between the slats ends up hidden by our chunky baseboard, and from here it was really just a matter of cutting to size and layering the slats, nailing them directly into the studs. The two walls that enclose the closet are less than 8 feet long so each row is a full slat. And as for spacing, I started by using a penny to space the rows apart, and then I started forgetting about the penny and just eyeballing the tiniest of gaps between the slats. We like how it has a bit of an inconsistent feel to the spacing, not too perfect. Or perfect at all really. ๐Ÿ™‚

wood slat walls
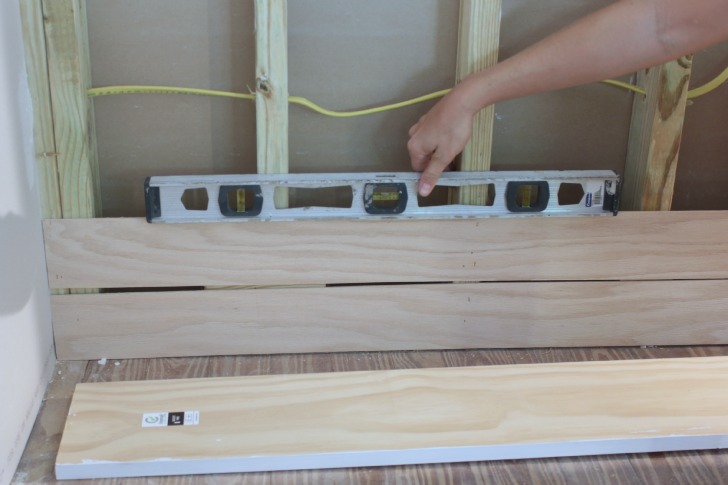
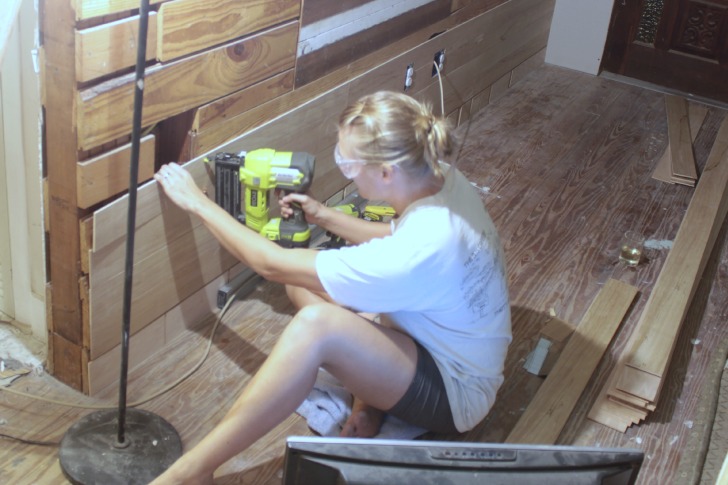
On the other, longer wall, I just staggered where the slats meet up in each row so it didn’t look too perfect. This turned out to be a great little late-night-let’s-get-caught-up-on-some-of-my-favorite-shows-project.

wood slat walls

I also just used scraps of the plywood for the first row, because you want to add the 1/4″ thickness to the wall so the baseboard has a flat surface to adhere to, but it doesn’t have to look nice since it’s just going to get covered up.

And using those scraps kept this project to 7 full sheets of the Purebond, so about $210 for the three walls of the room. That’s cheaper than wallpaper and so much easier than stenciling. And I didn’t cry about not having to tape, mud and sand those three walls, that is for sure. ๐Ÿ™‚

I did put three coats of primer on them just to try to get as crisp white a finish as possible. And by “I” I totally mean “my cousin and I”, because you know that room and board is not free around here. ๐Ÿ™‚ ย While she was visiting I used her for free labor had her go over the walls with a roller while I went along each seam with a brush.

wood slat walls

And like most projects, it really takes the finishing touches like the trim and some caulk to make the look really come together. I used a shoe molding called quarter round where the wood slat walls met at a corner with a drywalled wall used a piece of lattice along the weird corner where the two wood slat walls met. After after we refinished the wood floorsย we finished it all off by installing molding and baseboards like we’ve done throughout the house. (Details can be found here and here.)

wood slat walls

I like that it adds a bit of texture and dimension but is really subtle, it almost catches you by surprise once you notice it.


wood slat walls

There’s still a lot to do in here in terms of decorating, I’m toying with the idea of a gallery wall of mostly black and white pictures on the long wall. We’ll see how that turns out, but considering where we started in here I still let out a bit of a sigh of relief when I come around the corner to see how the room looks now … and not how it looked then.

master bedroom before

It’s like a Christmas, or Thanksgiving, ย miracle. ๐Ÿ™‚

  • « Previous Page
  • 1
  • …
  • 10
  • 11
  • 12
  • 13
  • 14
  • …
  • 169
  • Next Page »

Copyright © 2025 · custom theme design by this bold girl · Built on the Genesis Framework 

  • pinterest
  • facebook
  • instagram
  • rss