the space between

upcycle, repurpose and reinvent your space

  • about
  • aruba
  • key west
  • curacao
  • projects
  • house tours
  • privacy policy

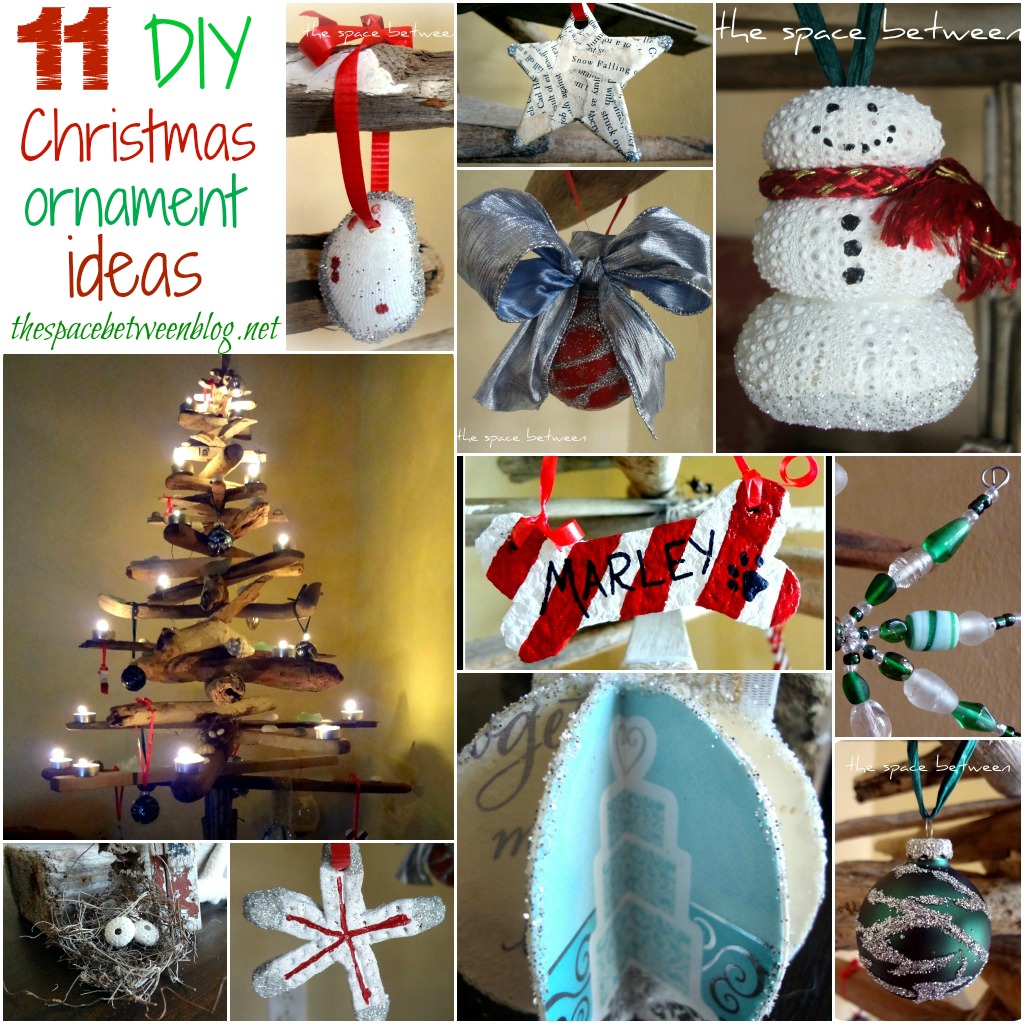
11 homemade Christmas ornament ideas

November 9, 2012

‘Tis the season. The season to get ready for the holiday season. The one where we start to think about how we decorated for the holidays last year … and how we’ll do it this year.

I actually started this blog on November 1st last year and pretty quickly joined a crafting competition at Mega Crafty. The challenge was to decorate a tree for under $20. I came up with some pretty fun homemade Christmas ornament ideas that hardly cost me anything.

Since there were about 3 of you reading last holiday season, I’ve rounded up what we made Β to show off our 11 DIY Christmas Ornament Ideas. Β 
homemade christmas ornaments

[Read more…]

pallet art {tutorial}

October 20, 2012

Here’s the story of my very first pallet project. Well, for the blog anyway … me and pallets go way back. πŸ˜‰

Here’s the perfect little pallet in her original glory.

I loved the aged grey color and I loved the width of the slats on the pallet, it’s almost like they were aged down to a narrower size. Perfectly irregular.

I don’t know if it was the long time I let the baby sit in the harsh sun and often pelting rain, or just the nature of the beast, but these slats came off like buttah. Just use a wonder bar and hammer to pry them off.


To back up just a minute, I had to use a small spackle knife to remove some stuck on spackle (oh, the irony) from the pallet. I had picked it up at a construction site. On a rainy day the blobs of spackle loosened right up a bit and then I just scraped away.

Then I diligently cleaned left the pallet out in the rain a few more days.

A few days after that I took it all apart and laid the slats out to see what I was working with.

I debated cutting the slats down, so they weren’t quite as long. But, I liked the weathered edges and the nail holes and I didn’t want to create clean cuts, so I just left it.

So, let the wording begin.

I used these stencils to trace all of the lettering.
I did a rough eyeball of how many letters would fit on each slat to help me decide on exactly what I was going to say. I determined that each line had to be less than 30 spaces, including all letters and spaces in between words. I also determined that I didn’t want them to be all the same length because I wanted more of a jagged edge look in terms of where all the lettering started and stopped.

I may or may not have decided I liked the jagged edge look because it made the project easier by eliminating the need to make sure the wording on each slat was lined up. I will never tell. πŸ˜‰

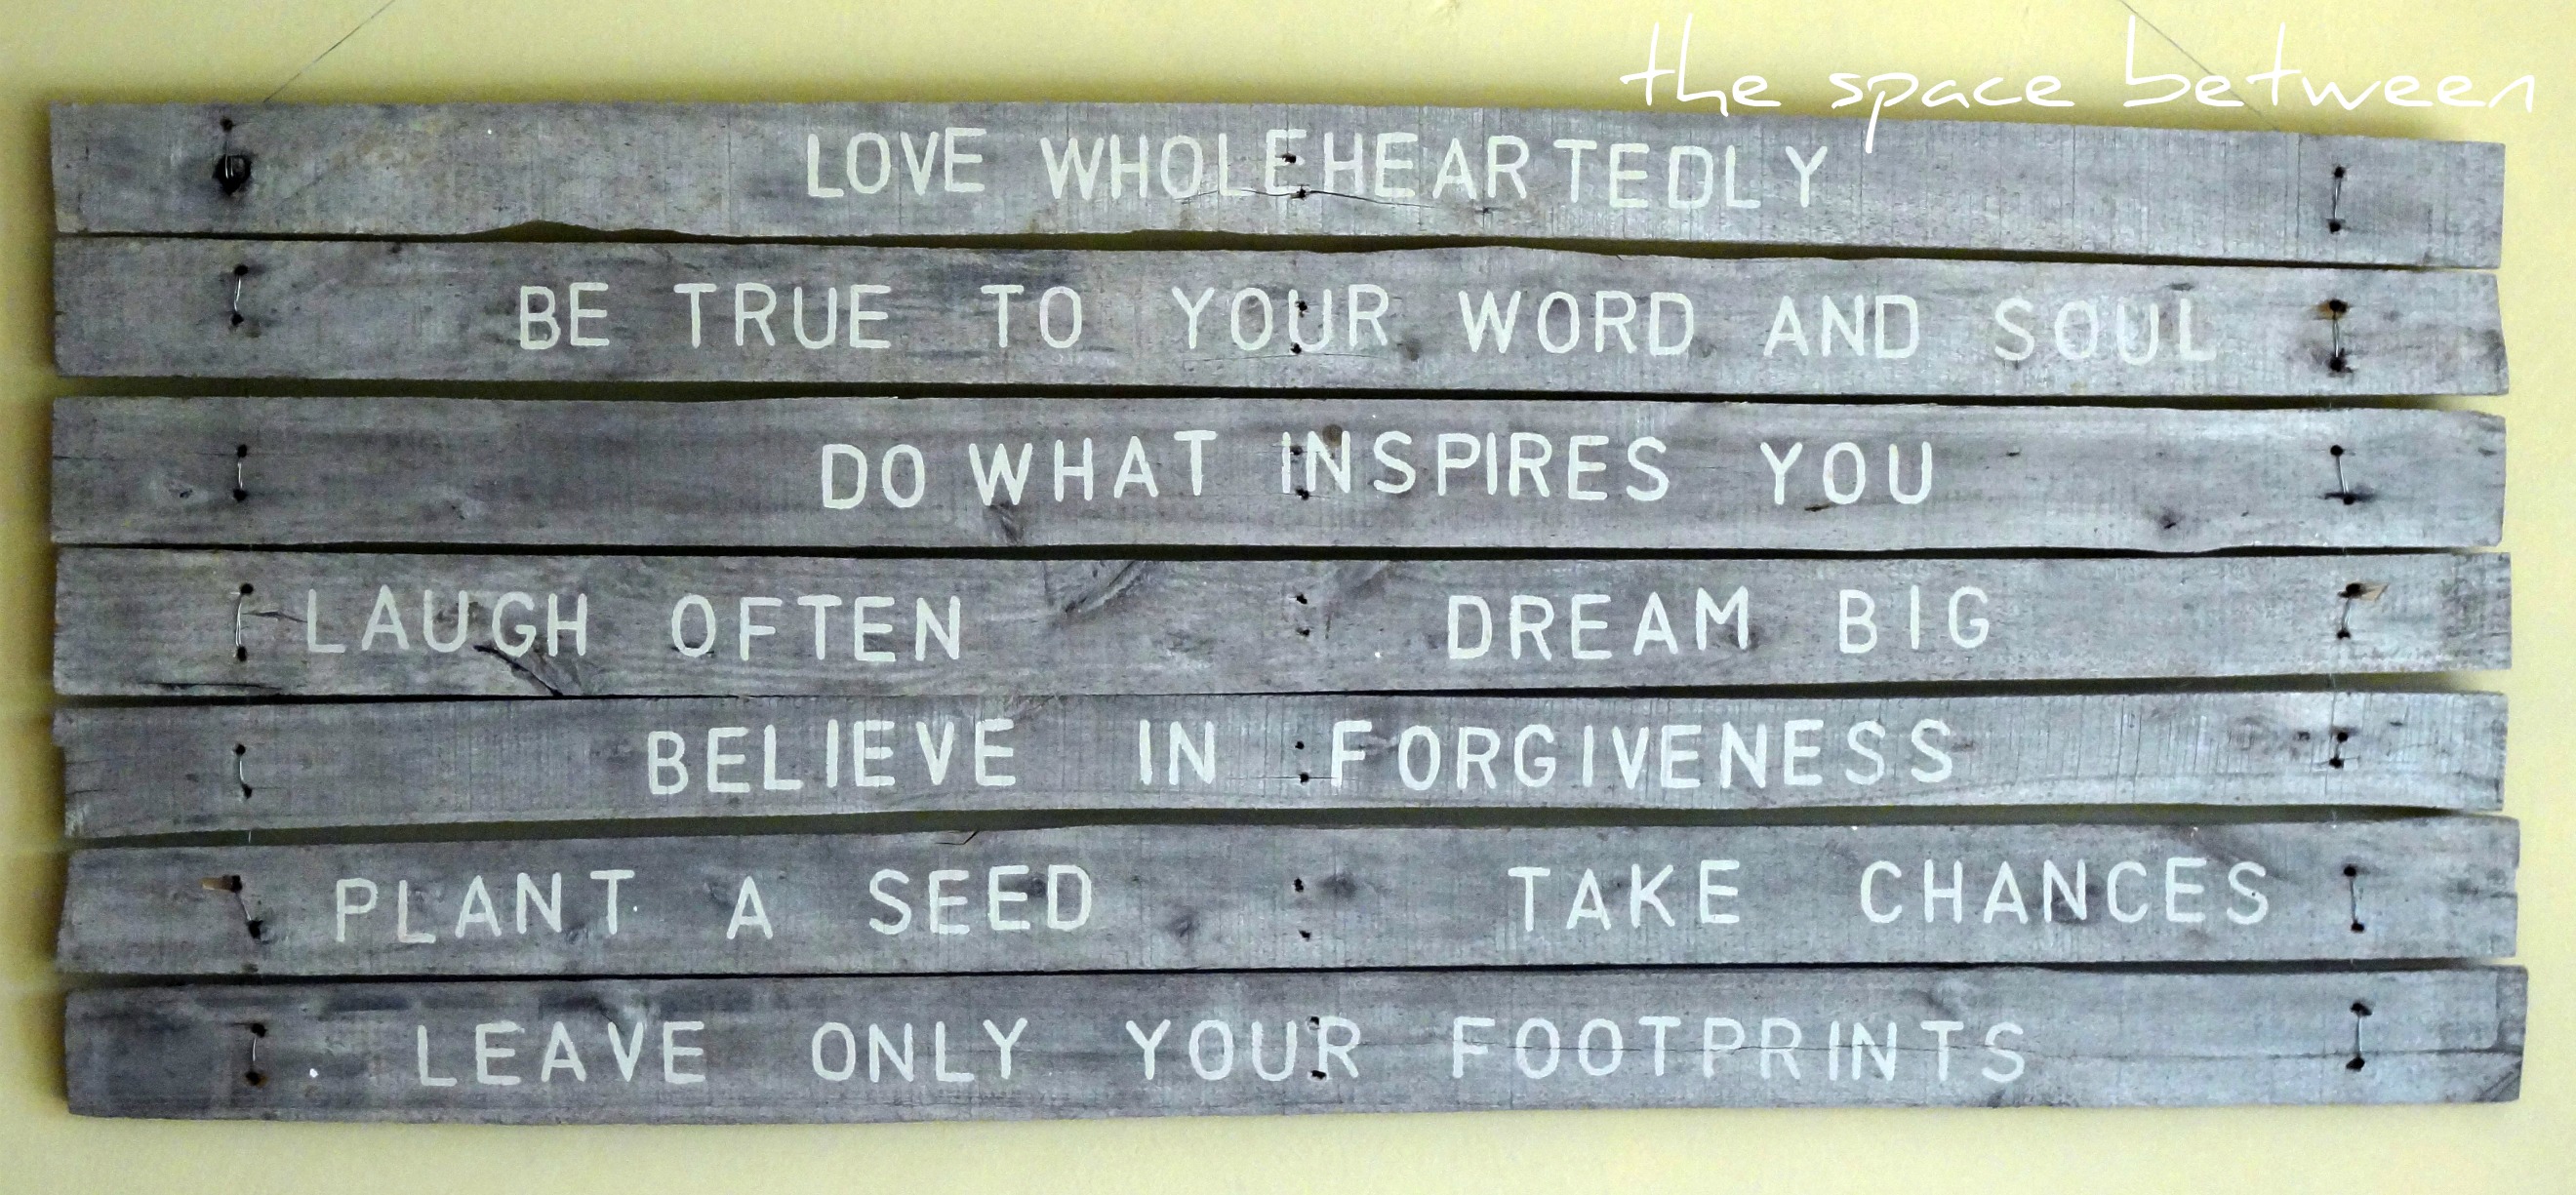
Sooooo, this is what I came up with:

slat 1 – love wholeheartedly
slat 2 – be true to your word and soul
slat 3 – do what inspires you
slat 4 – laugh often dream big
slat 5 – believe in forgiveness
slat 6 – plant a seed take chances
slat 7 – leave only your footprints

Now, just to make it happen. Easy peazy like.

I was able to do all of the stenciling and painting without any major screw ups. I came close to a slat that said “be true tour word and soul” and one with “leave only your footrints” but caught my almost errors in time.

TIP!!! Check, double check and check again after each letter!

Timing wise, it took me about 45 minutes to do all of the stenciling and then about 30 minutes PER SLAT to paint. Those of you who are super artsy can probably either skip the stenciling part all together, or just use your paint directly with your stencil.

Once all of the lettering was done, I just needed to get it all put together and hung. I had originally thought that I would use some of the other pallet wood from the same pallet and nail the slats back on just a little closer together than they had started. But, then I got the idea to weave some wire through the nail holes. I liked this option for two main reasons, 1) it added another element of rustic and 2) weaving wire seemed easier than lining up and nailing all the boards. πŸ™‚

The first step to this plan (that I would have had to do with both options) was to remove all old nail remnants to create an open hole for the wire. I used a nail punch and hammer. These little nail punch thingys are most often used to set nails into wood so you can putty over them before painting and be none the wiser where the nails are.

Then I just looped the wire through the nail holes.

And wrapped the ends, end over end, to secure it all together.


What do you think of the final product?


Beautifully rustic, I think. I like the grey of the wood and the cream color of the paint. I just mixed a few paint colors I had together. It’s very similar to the color I used to paint the words on my Mapped Dresser.

A pretty good sized art piece for about $2, the cost of the stencils, and if you already have stencils, or are crafty enough to freehand, this baby is totally FREE. Unless you need to buy wire. πŸ™‚

So far this year this pallet art has been found in our kitchen above one of our driftwood shelves and in my summer mantel. And I made a totally different kind of pallet word art here over the summer.

What do you think?

  • « Previous Page
  • 1
  • …
  • 110
  • 111
  • 112
  • 113
  • 114
  • …
  • 169
  • Next Page »

Copyright © 2025 · custom theme design by this bold girl · Built on the Genesis Framework 

  • pinterest
  • facebook
  • instagram
  • rss