This post may contain affiliate links which won’t change your price but will share some commission.
That’s right! I found the lazy easy way to do something new. Shocking, I know. 😉
![]()
Tuesday we talked all about front door paint color choices and empty pots, dead trees and lights without light bulbs.
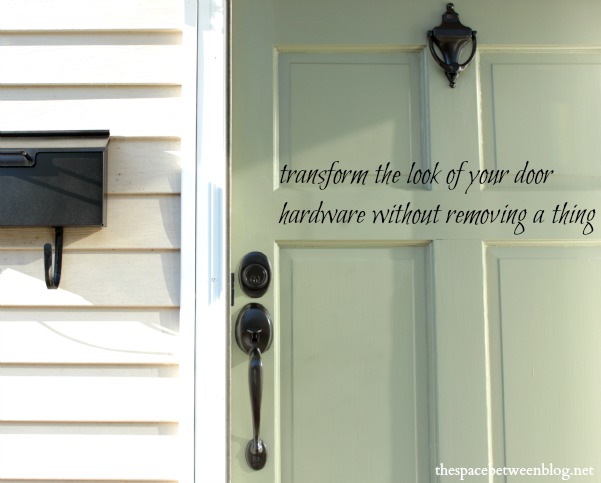
And today we’re talking about painting door knobs … without even removing them.
That’s right!
This was one of those projects that I knew I had to do … and just to refresh your memory on how I knew … unless I wanted to buy a whole new set. Which, ironically, I knew I didn’t want to do. 😉
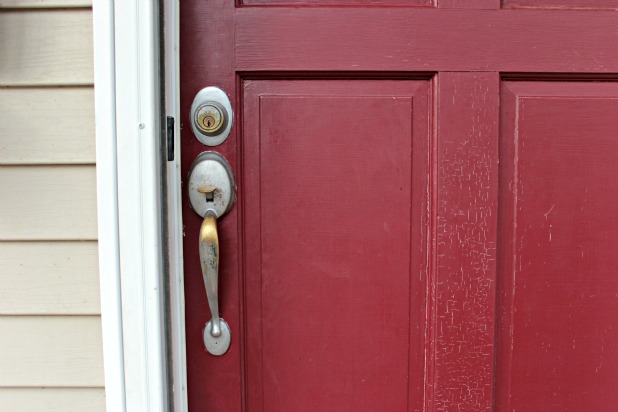 Hey good lookin’ …
Yeah, she’d seen better days. Actually, I first decided to paint the old brass hardware a brushed nickel finish more than 6 years ago, and it worked out really well for about 5 I guess. 🙂
At the time there weren’t any special products on the market and I didn’t really know of anyone else who had done it (oh to have been blogging before blogging became blogging) so I just grabbed a finish I liked and got to painting. We used the back door primarily so this wasn’t a heavy traffic door. The house has been rented for the last 4 years and the front door has seen a lot more action (ifyaknowwhatimean). I’m not sure I would recommend this option on a door that is used multiple times a day. But only time will tell with this new type of paint.
I used the Krylon Rust Protector paint in the Oil Rubbed Bronze finish and one of the best parts about this paint that it dries to the touch in 8 minutes!!
 That feature is seriously awesome. And the paint coverage was amazing. This paint is specifically designed for rust protection when used on metals. The key is to shake the can for at least two minutes … get all the active juices mixed up properly in there and then just go to town.
Once I got started, I decided to do the mailbox too … and then the mailbox at another house … and then the house numbers at that other house. Yeah, it just worked really well.
The picture taking notsomuch. I think I must have gotten wrapped up in what an instant transformation the paint made, and how seriously awesome the dry to the touch in 8 minutes feature was, that I didn’t bother to take any photo breaks.
But, for anyone looking to get to work painting door knobs without having to remove them, here is how I did it.
Supplies:
- spray paint, I used Krylon Rust Protector
- painter’s tape, I use Frog Tape
- plastic wrap, I used Saran Wrap
- light grit sandpaper, I used 150 grit
- optional – paper plate and craft paint brush for touch ups
Step One – Gently sand the area you’re going to be painting to scuff up the surface and, in my case, get rid of any loose paint from the previous paint job.
Step Two – And the most important step of all. Tape plastic wrap around enough surrounding area that you can spray paint in even strokes without having to stop your stroke over the hardware you’re trying to paint.
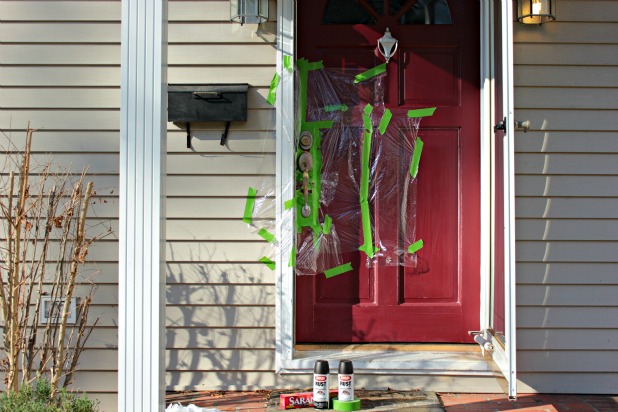 This is one of those check, check, double check steps. Make sure every possible surface is covered with the plastic wrap, make sure every little seam of tape is securely attached … and then check it all again. 🙂
Another part of this job that worked out really well for me was that I actually thought to do this before I painted the door. So I knew I didn’t need to be super precise with the tape around the actual door hardware because it was just going to get painted over anyway.
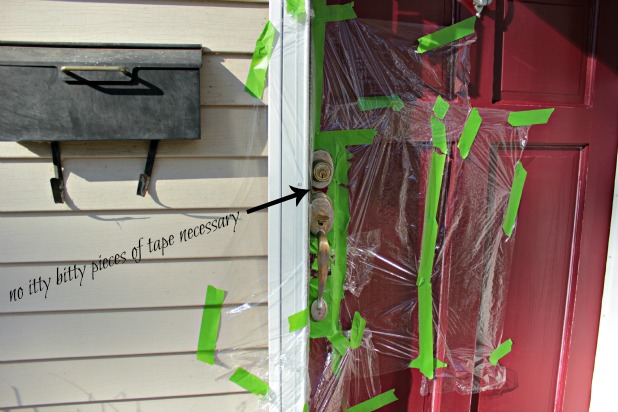
I love when I actually have forethought … that doesn’t happen all the time. 🙂
Just a note here, the mailbox is just hung by 2 screws so I took it down and painted it separately on an a piece of cardboard.
Step Three – Spray paint in smooth, even strokes across your surface. I did about 3 or 4 coats total. I would paint the hardware, the knocker, then paint the mailbox, then go back to the hardware. This is where the 8 minute drying time worked to my advantage.
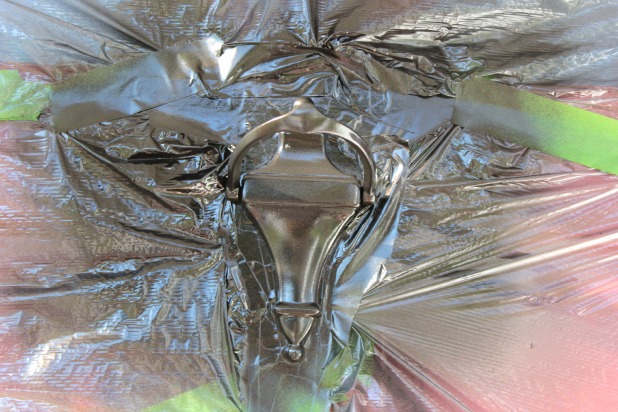 And this what she looked like when I removed the tape.
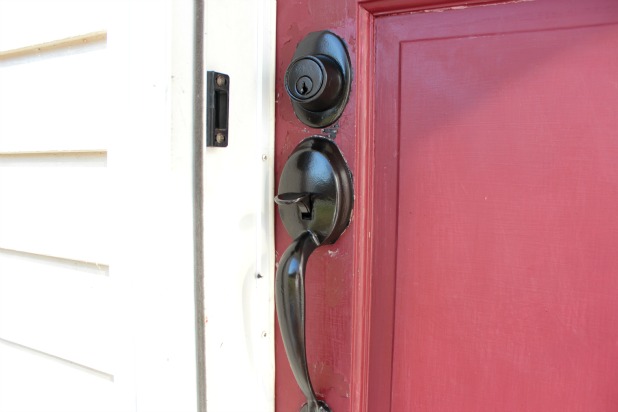 I somehow managed to get one little oops paint spot on the door frame … did you see it?
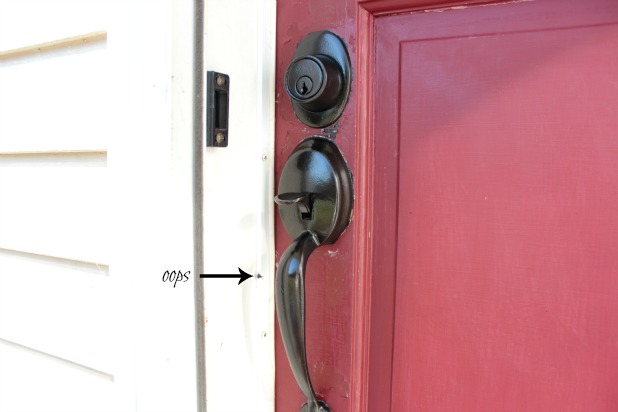 I actually just used the sandpaper to lightly scrape it off.
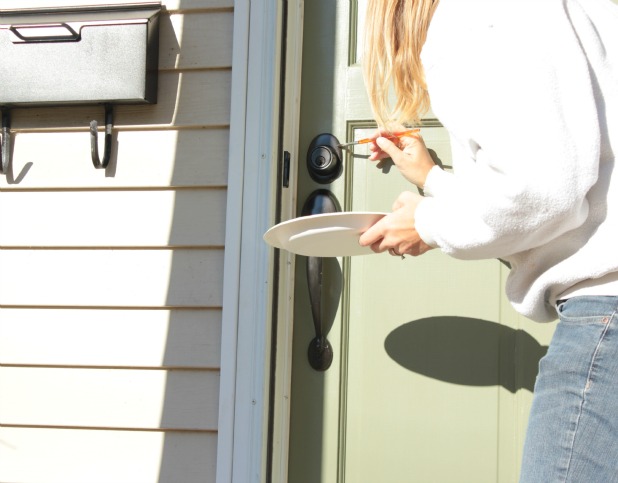
Step Four, if necessary – After I painted the door I sprayed some paint on a paper plate and used a craft paint brush to do a little touch up work.
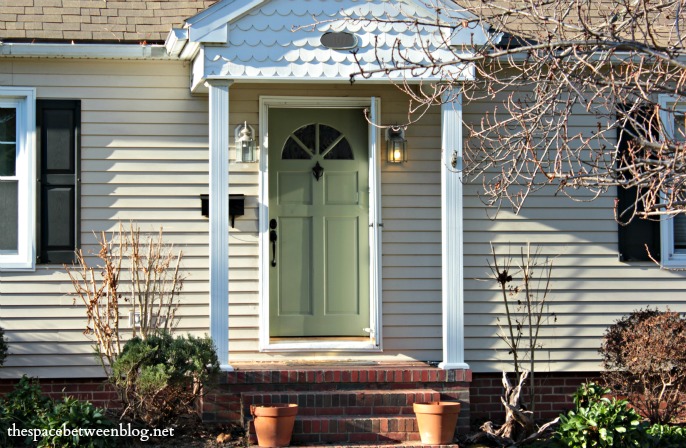
And the final product after the fresh coat of paint on the door.
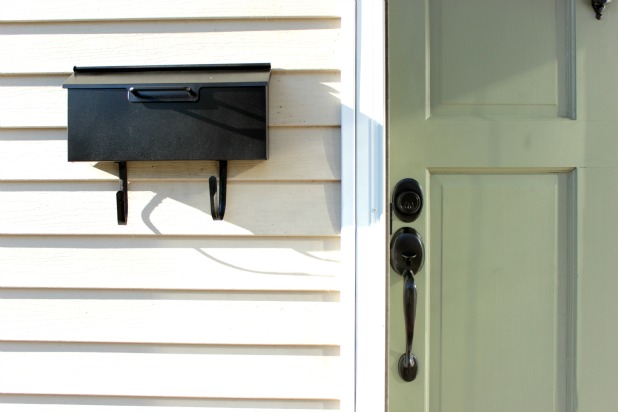 For the price of a can of spray paint and about an hour of time I’d say this little upgrade has completely transformed the look of that front door.
 If only spray paint could transform the look of landscaping, too. 😉
What do you think? Not a bad nearly free total transformation, right?
If you want to see how I scored the paint for the door for $2.50 you can see it here. And if you want to see how I learned that plastic wrap is so much easier to work with on these small projects, you can see a plastic wrapped faucet and kitchen sink here.
And if you want to tell me what you think I’d love to hear from you in the comments. Your thoughts on the color change, hardware change, climate change … really anything, they’re all welcome. 🙂
*there are affiliate links in this post for products I know and love
*I was given the Krylon paint to try, but the opinions are always 100% my own. Our full disclosure is here.

Marilyn says
This is awesome, Karah! I never would have thought to paint my door knobs! 😀
Karah says
Gotta love a budget upgrade!
Anne@DesignDreams (@ddreamsbyanne) says
Love it! I spray painted the handle on my screen door and went through the same process. I want to paint my door a new colour and I think the knob could use a paint job! How did you keep the paint from going into the lock through the keyhole??
Karah says
Thanks Anne!! I really didn’t do anything special. You could put an old key in there while you painted if you wanted. I just put my key in after every round of spray and wiggled it back and forth … very scientific. 🙂
lynn cockrell says
Karah, you did a beautiful job. Your door and its knobs look awesome! It was so smart of you to paint all the knob hardware before you painted the door itself. Thanks for the tutorial.
Karah says
Thank you so much Lynn!! I love it when I can tape of a project once to get the whole thing done … that thought process often helps me decide what to tackle first. 🙂
Kelly @ View Along the Way says
This is so deliciously lazy and perfect. What a huge difference!
Karah says
Deliciously lazy … I like the sound of that
Kim Sand&Sisal (@SandandSisal) says
Great tips! What a beautiful result. Loved the before & after shots. Pinned it!
Karah says
Thank you so much, Kim! Sometimes it takes a really bad before to appreciate the after. 🙂
Heidi @ Decor & More says
Ok, now I AM hitting on your front door! lol! I have the same issue with our front door hardware and was discouraged from spray painting it last summer. But when I think about how much use it actually gets, I think I’ll go for it. The whole world comes and goes through my garage. And that’s an even bigger problem. 🙂
xo Heidi
Karah says
Go for it!! If it doesn’t get a lot of use and you let the paint cure you should be good to go. 🙂
Christina @ Floridays Mom says
Great little transformation. I so need to do this to my front door, it looks just like your “before” I would have been so nervous to spray paint while it was on, you really make me feel like I can do it. Thanks for the tips, It looks terrific!
Karah says
It really is an easy way to do it and just the right price and time investment for my liking. 🙂
Joy2Journey says
Looks great for a little bit of effort! Love the look. Hugs
Karah says
Thank you so much BJ!!
Linda @ it all started with paint says
Oh, a DIY right out of my very own lazy DIY’ing heart! I did paint a ceiling fan while still firmly affixed to the ceiling!!
🙂 Linda
Karah says
Gotta love the lazy, errr, easy way!! 🙂
laurie says
Fabulous job, Karah! Love that you didn’t take them off the door! lol! But what a huge difference it made! I’ve used Rub N Buff on handles before – and that works great, too! 🙂
Karah says
I have yet to try rub n buff, will have to give it a go one of these days!!
Jessica @ Stay at Home-ista says
It looks amazing! Plus, I’ve recently decided that laziness is just the opposite side of the efficiency coin, so anything that saves time and lets me read US Weekly more, is good to go!
Karah says
lol, I’m totally using that in the future. 🙂
Dana @ Cooking at Cafe D says
I really like the transformation. And, it’s really hard for me to believe it’s a spray job on the hardware. I believe it, because you did it – but, I never would have guessed. )
Karah says
Thank you Dana!
debbiewestbrooks says
Easy.spraypaint.done in and hour… some of my favorite words! love and pinned 🙂
Karah says
hahaha, you got that right Debbie! Thank you!
Home Coming says
Great tips! Too bad I need to paint my entire door. 🙂 I host a DIY link party every Monday and would love for you to join! http://homecomingmn.blogspot.com/2013/02/the-diyers-link-party.html
Karah says
Hahaha, this tip only works if you need to paint your entire door. Lucky for you! 🙂
Kara @ The Joys of Boys says
This is such a great idea! My front door is looking a little sad these days. This looks like a project I could conquer without the hubby. Thanks for sharing!
Karah says
It really is super simple, the most important part is making sure you tape enough plastic wrap securely around so you can do a thorough spray paint job!
karen@somewhatquirky says
That’s exactly how I do my inside door knobs. Except I hang and lay a lot of sheets around since there is no wind indoors to take away the over spray. Your doorknob looks really great. Who wants to replace when you can paint? Those dang things are expensive! I really like that color – of the door.
Ashley@AttemptsAtDomestication says
This is awesome! I can’t imagine doing it any other way now!
We replaced all of ours when we moved in with fancy new ORB knobs. 😉
Melissa @ Keep Calm and Decorate says
I love the color of the door with the orb handles! I am a fan of Krylon spray paint.
Karah says
Thank you so much Melissa!
Cheryl | That's What Che Said... says
Thanks for linking up to Monday Funday Karah! I featured you today!! xoxo- Cheryl http://www.thatswhatchesaid.net/2013/diy-home-ideas/
thejennyevolution says
What a great project! Please share it on a terrific linky – Design Décor Tuesday. http://www.designdecortuesday.blogspot.com. See you there! ☺
Linda says
What paint/color did you use on the door?
Linda says
Never mind. I found the answer. I love this color and want to find something similar.
Karah says
Sorry about that, I wish I knew, it is a great shade, very similar to that Valspar tester in green.
Marcus Blagen says
How long after you spray your door knobs should you wait to tape it, so you can paint the door?
Karah says
Hi Marcus, I would wait at least as long as the cure time says on your spray paint. But you could also not tape and use a small craft brush to cut in around the knobs and paint it that way. Have fun with your project!
Andre' says
I was wondering how you spray painted underneath the handle, without getting to close it ran? Thanks yours looks great!
Karah says
Hi Andre, for the spots I felt like I couldn’t do I just spray painted some of the paint on a paper plate and used a small craft paint brush to finish it off. Any place I had to get really close I just painted in short, quick passes so the paint wouldn’t accumulate too much and drip. Sometimes it can take 4 or 5 of the quick passes to get full coverage. Have fun with your project!
Piper says
Trying it this weekend. Thanks!!!!
Cathy says
How do you keep the overspray from blowing on the rest of your house? When I paint I find dots of it in a large area where I am spraying.
Karah says
I used plastic wrap and avoided a windy day. 🙂